


Dresser Makeover With Paint & Color Washing

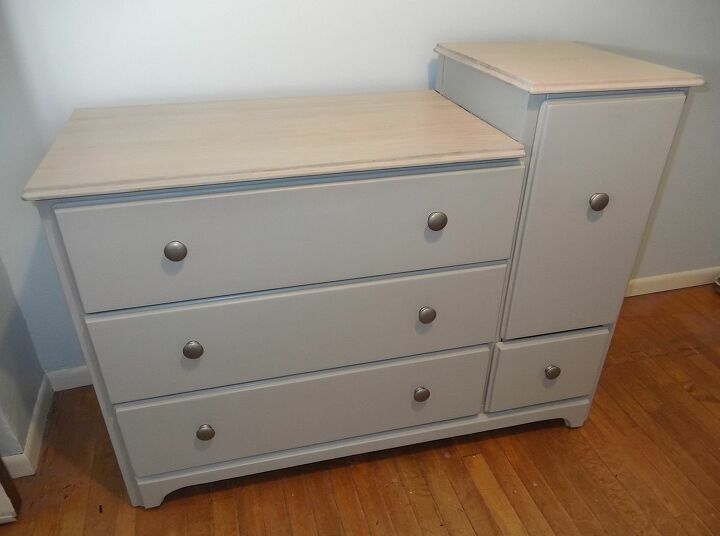
I found a dresser/changing table at a thrift store for $17 and it was in really good condition so I bought it. However, the color was very dark and uneven, with scratches and peeling, so it needed a makeover. This piece was going to be in a nursery with a lot of pastel colors and a light gray crib and I wanted to make sure it fit the light and airy style of the room.
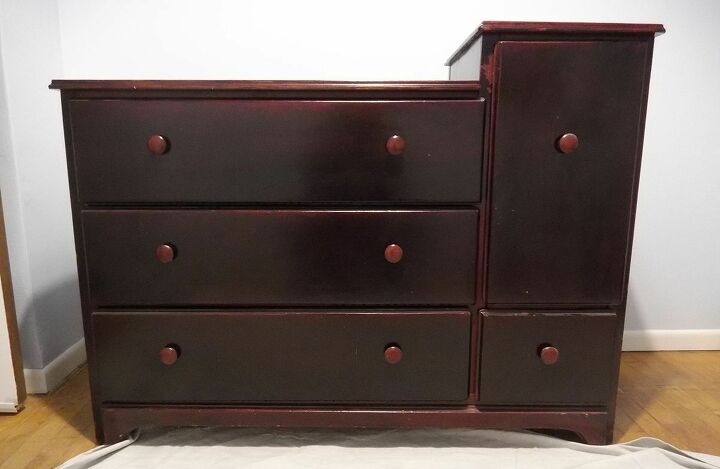
Here is the original dresser. As you can see, it is very dark and the color is uneven. There are also plenty of scratches and knicks throughout the piece. But the piece, as a whole, is very sturdy and solid.
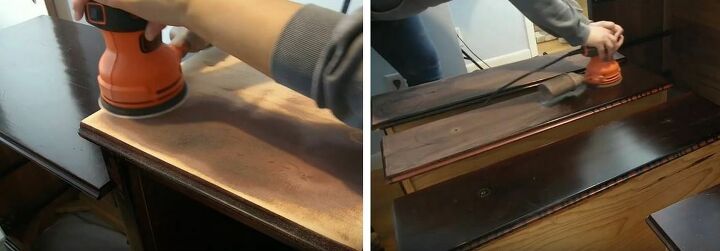
My plan was to do a color wash on the top so the wood grain shows, and the rest of the piece was going to get a full coverage paint job. So, the first step was to sand. I started out with 80 grit sandpaper on the top, to help get as much of the color off as possible. I used a 120 grit sandpaper on the rest of the piece and did a quick pass over everything. Since I was going to cover the main body with paint, I wasn't as concerned about getting all of the color off, but I wanted to give it a smooth surface.
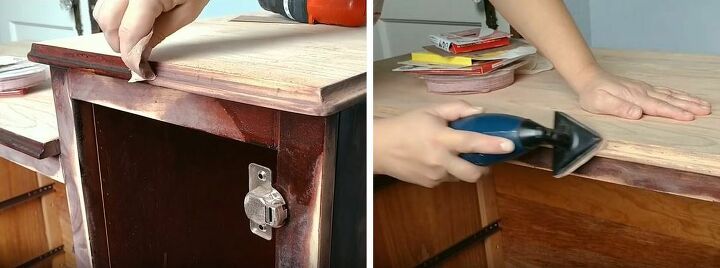
For the trim around the top, I started off using my fingers and an 80 grit sandpaper. After that, I went over it with a detail sander and 120 grit sandpaper.
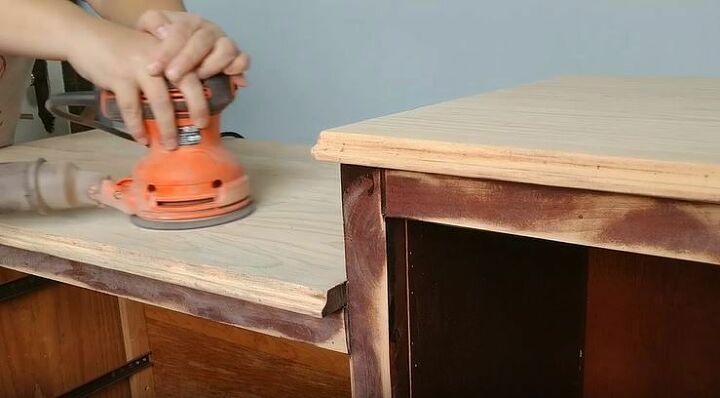
For the final sanding on the top, I used a 220 grit sandpaper to smooth it out.
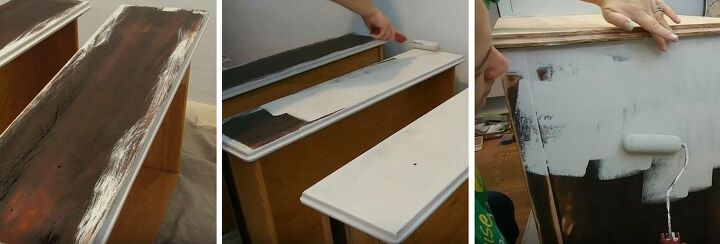
I started painting the edges with a small paint brush to make sure I filled in all of the curves. Then I went over the rest of the dresser with a small roller to make it go a little quicker.
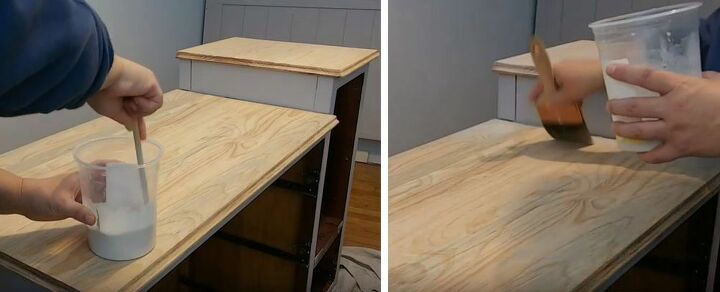
For the color wash, you simply mix water with paint to make the paint thinner. Depending on how opaque you want the color, you will have to adjust the amount of water you use. If you want a more opaque coloring, use more paint than water. I wanted a very light color, so I added more water than paint. Then make sure you mix it really well before you start applying the color. Once my color was ready, I would dip in a paint brush, but I before I removed the brush I would press it against the side of the container to let any excess fluid drain off of the brush. If you rush through the process and you have a thin color mixture, you risk splashing/splattering extra drops of color all over.
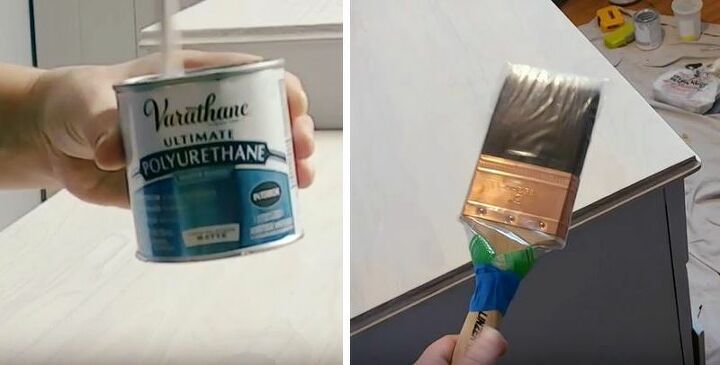
For the top coat, I used an interior polyurethane in a matte finish. The top got three coats and the main body of the dresser got two coats. Between each coat, while the polyurethane dried, I would seal the brush in a plastic bag to prevent it from drying out and becoming too hard to use.For the
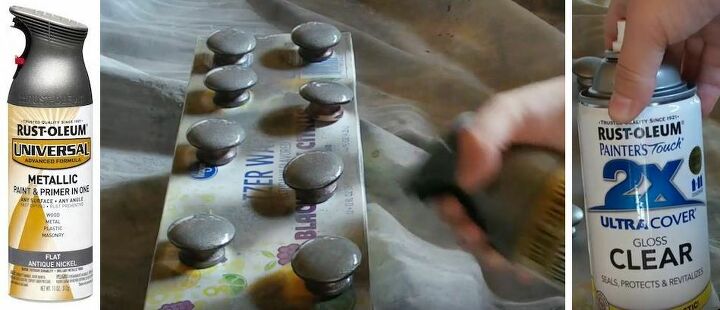
For the drawer handles, I used Rustoleum Metallic Spraypaint in Flat Antique Nickle. When the paint dried, I used a Rustoleum gloss clear coat to seal them.
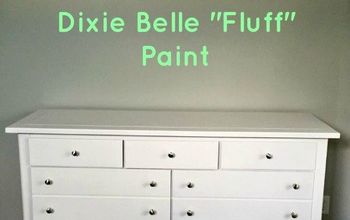
The final look is much brighter and is a perfect fit in the light and airy nursery where it belongs.

Before and After


Frequently asked questions
Have a question about this project?