


Tips for Using a Bathroom Wall Stencil | Dramatic Bathroom Upgrade
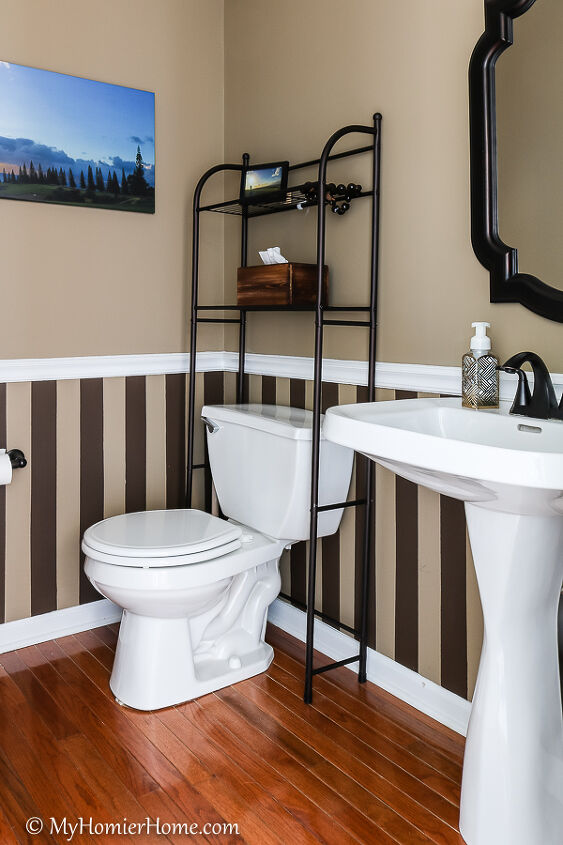
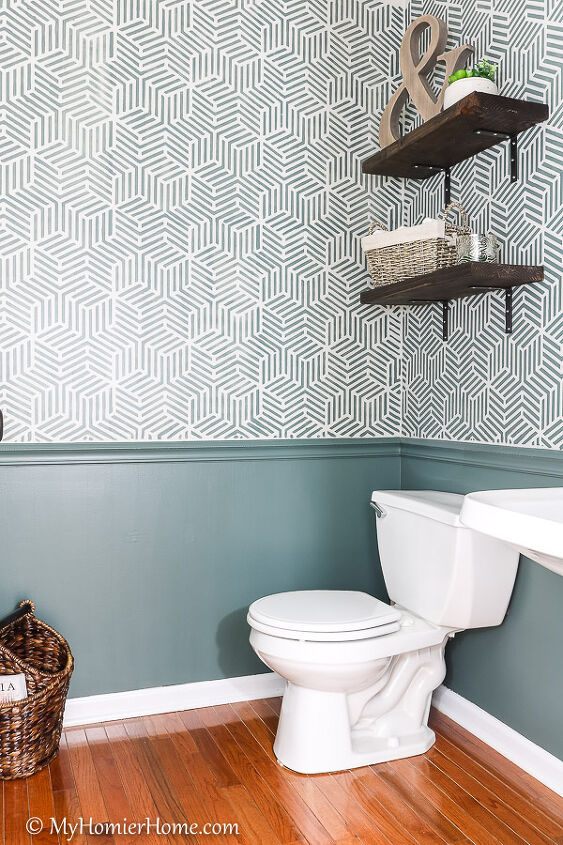
Living with an outdated or boring bathroom? All of our guests used the main floor bathroom when we had company over, but it was devastatingly ugly. I was in desperate need of a refresh to showcase my style and breath new life into this small bathroom on a budget... And for under $55, you can too!
Tip 1: Pick a Stencil You Will love for a Long Time
Etsy is a great place to search for fun stencils for any room. Check my materials listed below for the stencil I chose.

Tip 2: Consider Using Repositionable Spray Adhesive to Secure your Stencil to the Wall
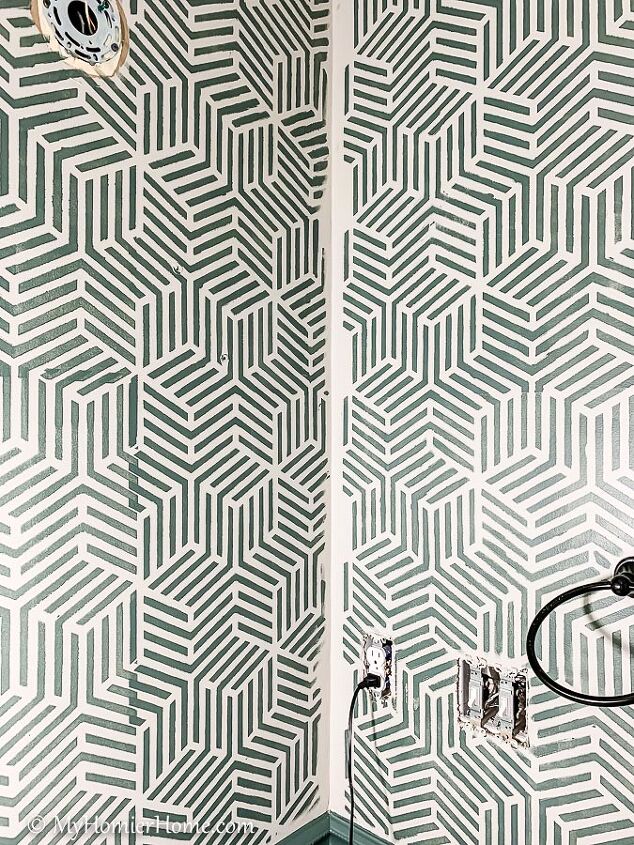
As you can see in the above picture, I used Frog Tape only to adhere my stencil to the wall. The only issue with this was that my stencil was a little flimsy and moved on me when I didn't have it flat to the wall, such as when it was resting up against a corner or didn't have room to go all the way down. Had I used the repositionable spray adhesive, I feel like I would have had less slips to fix.
Tip 3: Make Sure the Stencil is Level... Especially the First One for Each Wall
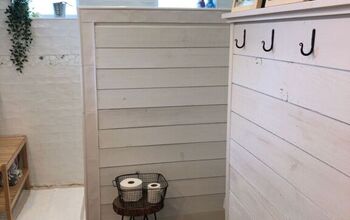
I used my laser level to make sure the pattern was straight for both the first one of each wall, my top left corner, as well as the one underneath that. It best to work from up to down and then left to right or right to left depending on your wall. If the first one is not level for either the top or bottom one, the rest will gradually start to show the slope.
Tip 4: Tape the Ceiling
Tip 5: Line Up the Stencil Perfectly with the One Before it
As you can see in the picture above on the left side, I did not align the stencil perfectly. This didn't cause me much issue as far the entire stencil rectangle, but obviously you can see the spots where it is thicker and darker.
Now, I didn't have to redo the whole stencil, but I did have to go in with the background paint color as well as the green color and fix these marks (see tip 7 for more detail).
Tip 6: Try to Use the Same Pressure on the Roller as you Move from Spot to Spot
Before moving your stencil to the next box, be sure to step back and make sure the paint coverage is even.
Tip 7: Extend the Stencil to the Edges Using a Cut Piece of the Stencil and a Small Brush
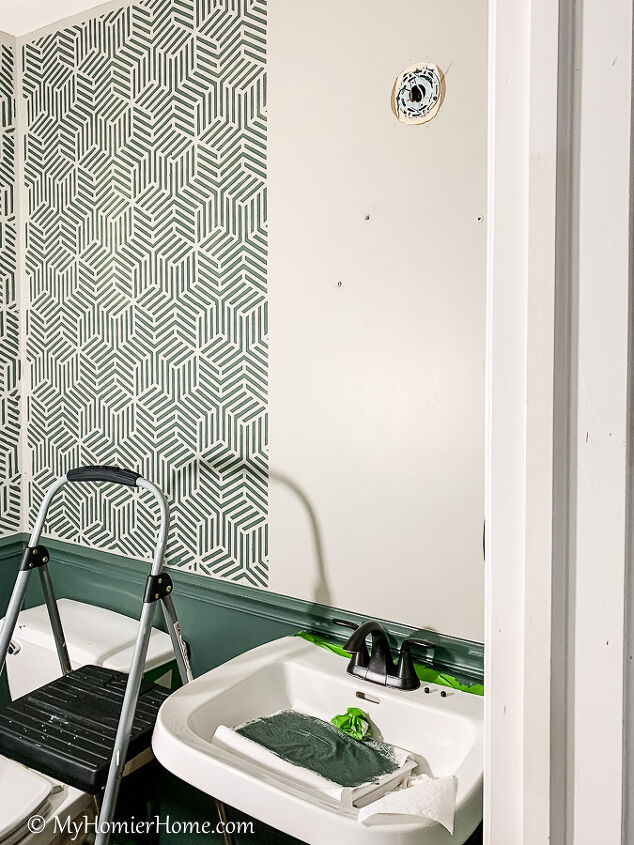
You'll notice in all the previous pictures that the stencil didn't meet the crease of the wall. After cutting the smaller version of the pattern out of your original stencil, align it near the corners and bend it a little to extend the pattern closer to the corner.
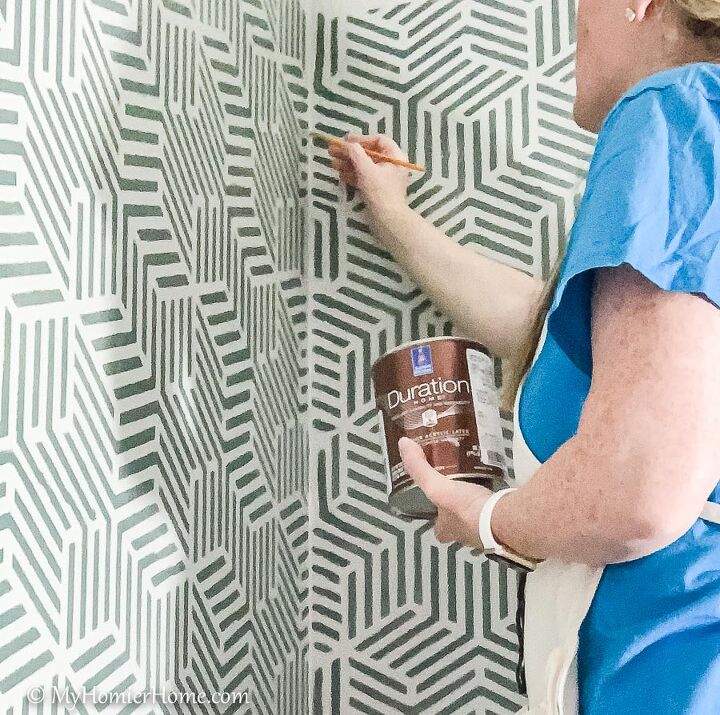
I didn't need it to be perfect, but I was aiming for a light map of the extended pattern to go back over with my smaller paint brush. I used my foam roller with very minimal paint on it to roller horizontally towards the corner of the wall.
This took about an hour, but it definitely got the job done in a way that you cannot really tell that it was hand painted.
Tip 8: Don't Connect the Stencil in the Crease of the Wall
Tip 9: Take Your Time - Don't Rush
What do you think?
Resources for this project:
See all materials


Comments
Join the conversation
-
Oh my word this is gorgeous!
-
I love it. All of it. The green is gorgeous & the pattern is timeless.


Frequently asked questions
Have a question about this project?
I like these both colors. What color was the original wall? I'm trying to find something similar for my guest bathroom and spare rooms
Thanks Christin. I thought that was green 🤦🏽♀️😊. What color was above the stripes? Or was that how it was painted when you moved in?
The result is simply awesome. Would love to recreate this bathroom in 3d, probably in planner5d or smth similar. Do you mind if I do that?