


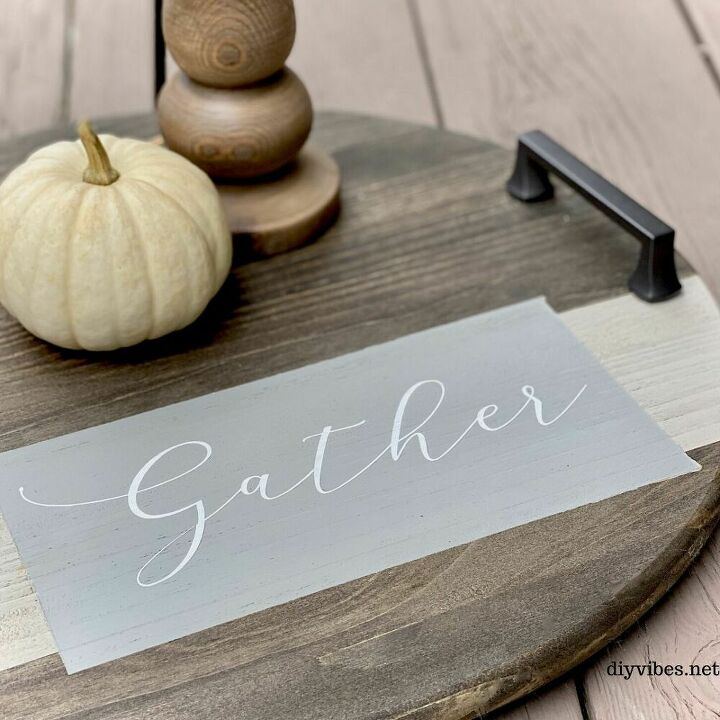
DIY Round Wooden Serving Tray
Compared to the amount of Halloween decorations I display in October, I find I really lack fall decor come November. Earlier this fall I made Twine Pumpkins and a Fall Wood Bead Garland , but I was looking for more DIY ideas. I came across a round wooden serving tray on Pinterest. I liked the idea, but wanted it to reflect more of an autumn theme so I decided to use neutral colors and the word “Gather”. I felt it would make it versatile enough to use in my dining room all year round.
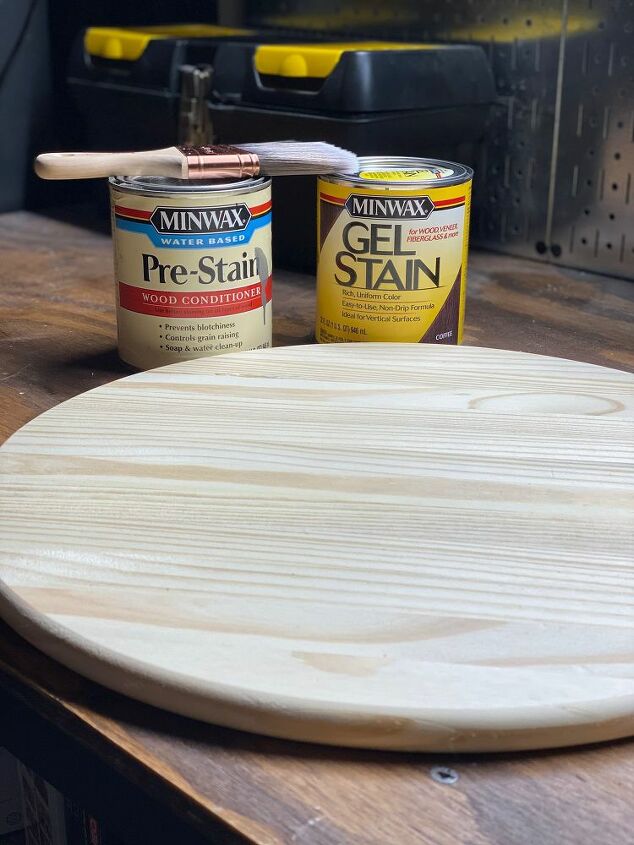
Here is what you'll need:
- 18″ Pine Wood Round (from local home improvement store)
- Pre-Stain
- Stain
- Brush/rags
- Frog tape
- Acrylic Paint/stencil
- Finishing wax
- Handles
- brown furniture pads
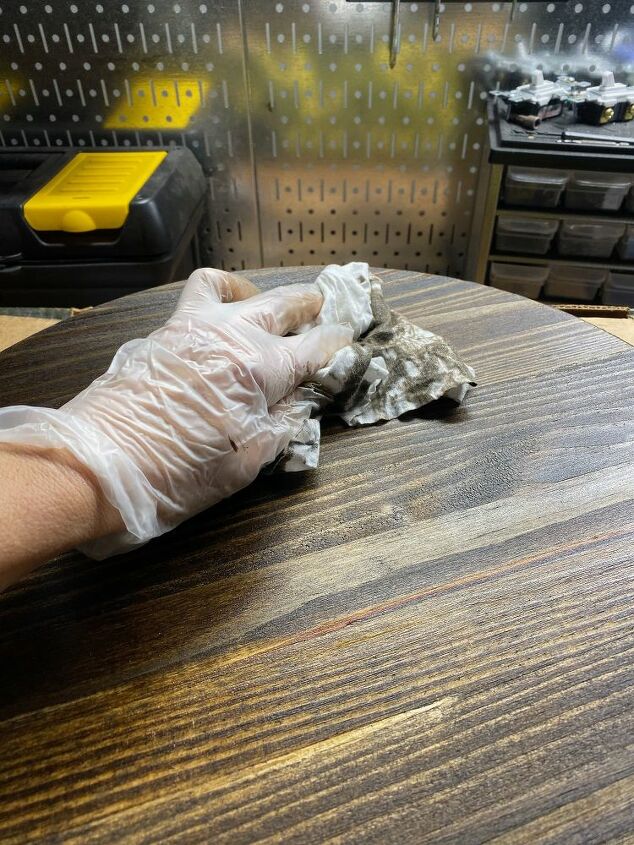
Since the round board is already smooth out of the package , I didn’t have to sand it but I still wiped it down with a dust free rag. Next I conditioned it with Minwax Pre-Stain. This makes the stain absorb evenly, preventing it from looking blotchy. I used a Minwax gel stain in the color, Coffee, which I wiped on with a lint free rag. I let it sit a few minutes and wiped it off with a clean rag. You can use a second coat depending on how dark you want it. I let it dry overnight.
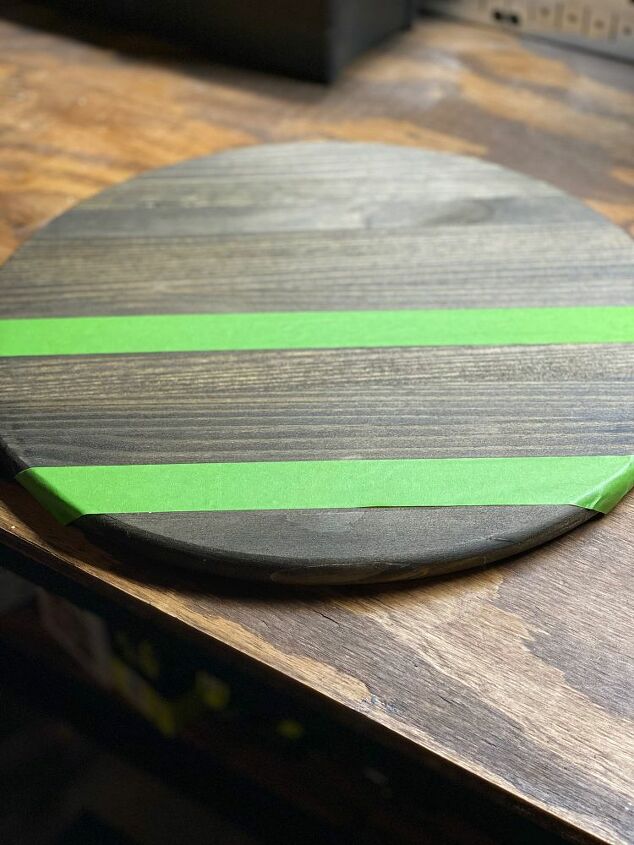
I used Frog tape to tape off a 4″ space and used two coats of Anita’s All Purpose Acrylic Paint in Taupe Gray. Since I was going to tape on top of that for my next color, I let it sit overnight to make sure it didn’t peel when I lifted it off.
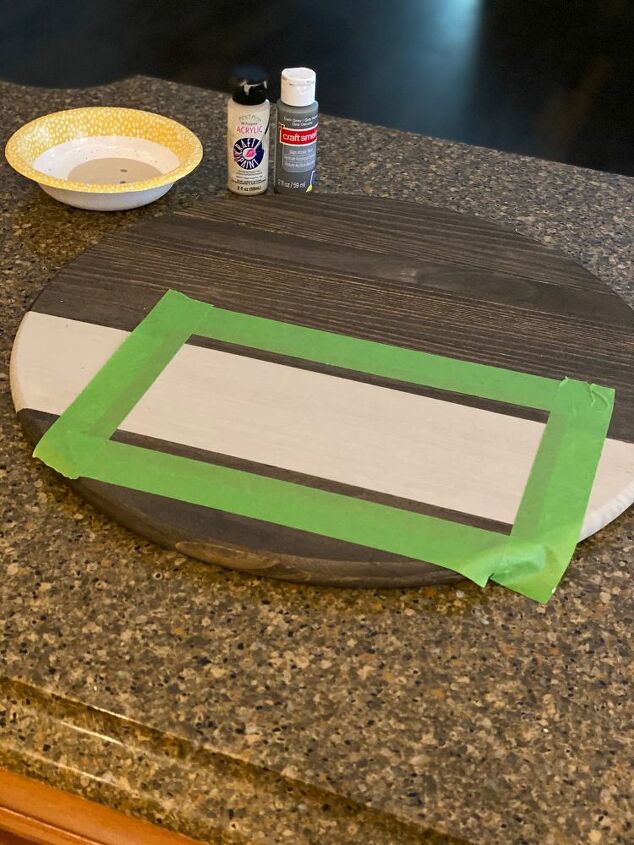
For the next layer I taped off a 5″ x 9-1/2″ rectangle. I mixed the taupe gray with a dark gray acrylic paint I had until I came up with a color that was more gray than taupe and painted it on.
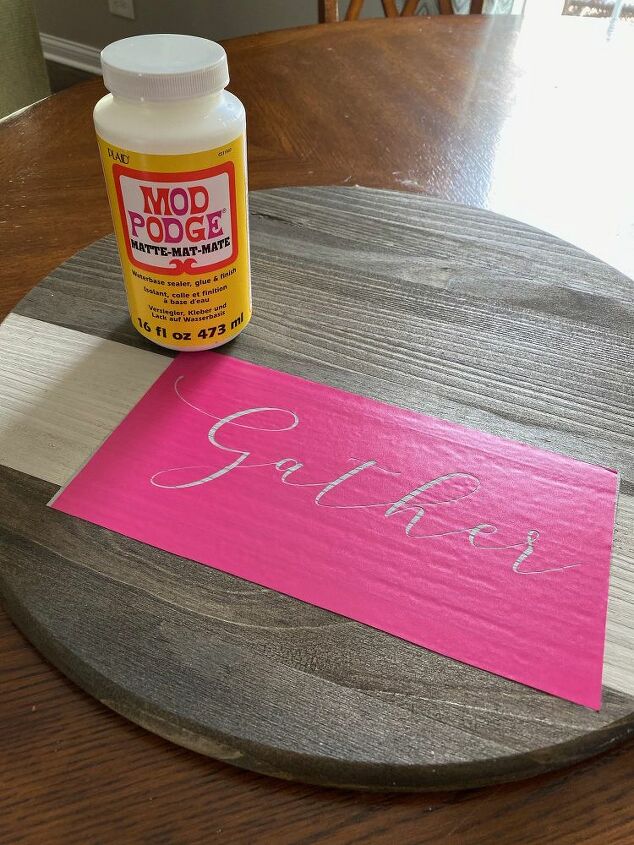
While it was drying I made a stencil with my Cricut (I used Melinda Script font) but if you don’t have a machine, you can purchase a variety of stencils at any craft store or print out a word from the internet and trace it on. Then you can paint over it.
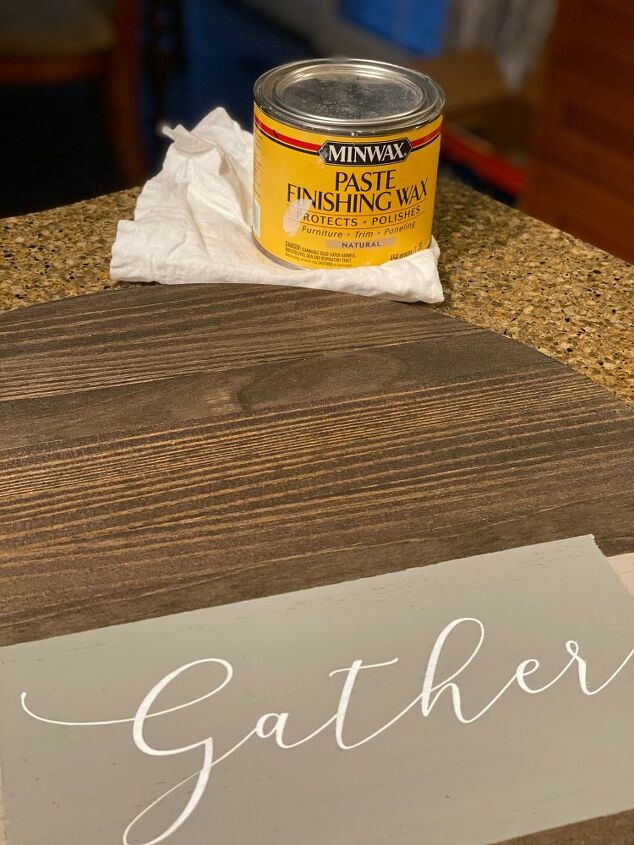
To protect my wood and give it a little satin sheen, I took a rag and wiped on finishing wax in Natural. I let it sit for 15 minutes and buffed it with a lint free rag.
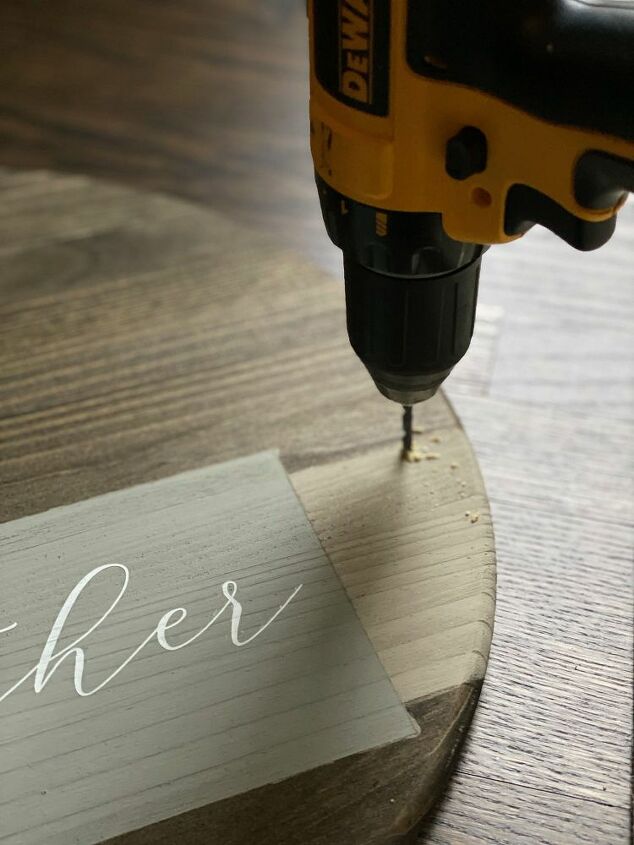
The final step on my round wooden serving tray was to screw on the handles. I measured where the middle of the board was and made sure the center of my handle was straddling that line. Then I measured the distance between the screw holes in the handle (mine measured 3/3/4″) so I could mark it once the first screw was in.
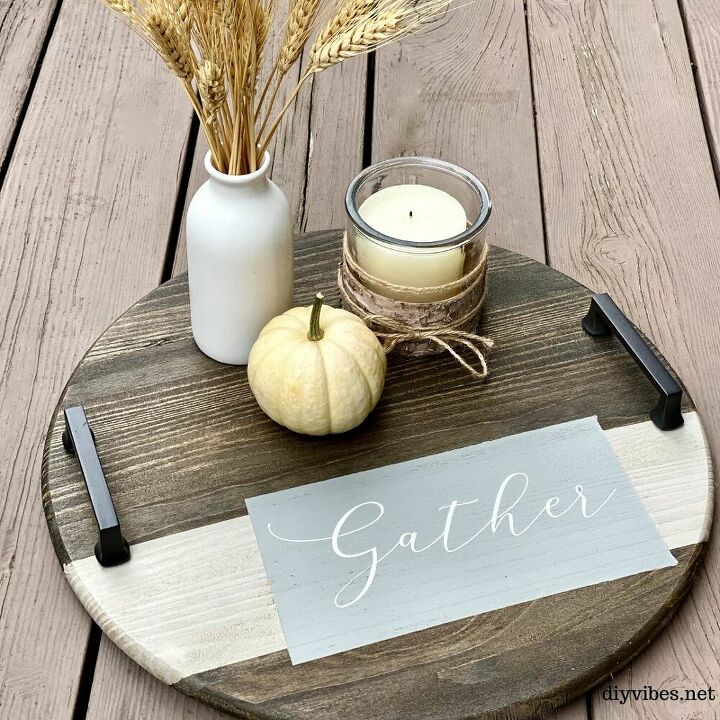
Once the handles were on, I attached four brown furniture pads to the bottom of the tray so that the screw heads wouldn’t scratch any of my furniture. Now it’s ready to use!!
You could even add lazy susan hardware if you wanted.
Resources for this project:
See all materials


Comments
Join the conversation
-
So cute! I love it!
-
It looks so elegant completed and expensive to yet simple & affordable fo most people to do thank you for sharing


Frequently asked questions
Have a question about this project?
This is a very nice project and posting.
I would like to emphasis the prudence of you using a pre-stain conditioner. That or a sealer is required to get an even stain on new wood, almost regardless of the species of wood. Sometimes if you have refinished a piece you can get away without it, but why risk it? If the pretreatment prevents you from getting some darker colors, a dye can be applied.
A well done project and please continue to educate.
Definitely going to try this! What’s the Mod podge for?