


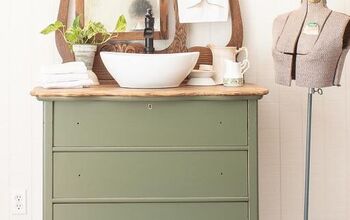
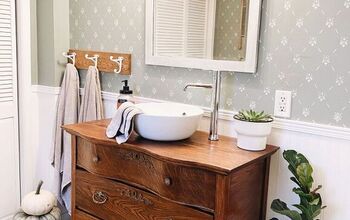
French Provencial Dresser Repurposed to Double Vanity

I wanted to show more photos of the French Provincial dresser I showed in my bathroom remodel, so I'm posting this separately. The dresser was purchased for $220 from someone who wanted to do this very thing but never got around to doing so. I had the sinks which I had purchased from Overstock.com years ago waiting installation in for my 'forever' home when I got around to creating the vanity. Loved the French Provincial look, and had to have a vanity that fit a 82 inch space; this fit the bill perfectly.
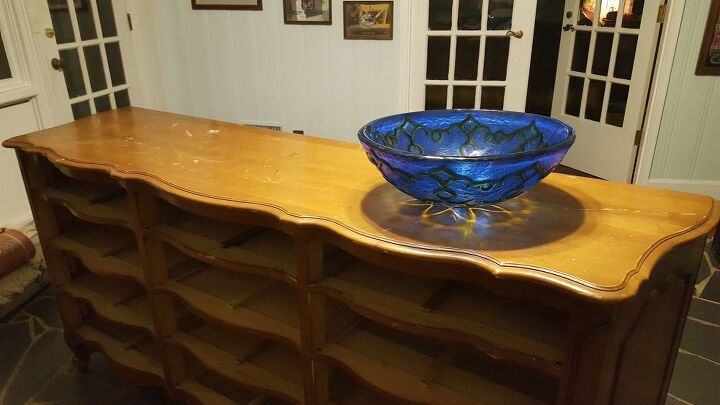
The original piece was gouged in a few places with worn finish everywhere. Took at least a week of sanding to get the finish off and the gouges smooth. Preparation counts! I don't have a photo, but the legs also had to be cut down to ensure the sinks were at an executive height (36") and the 41 inches it would have been!
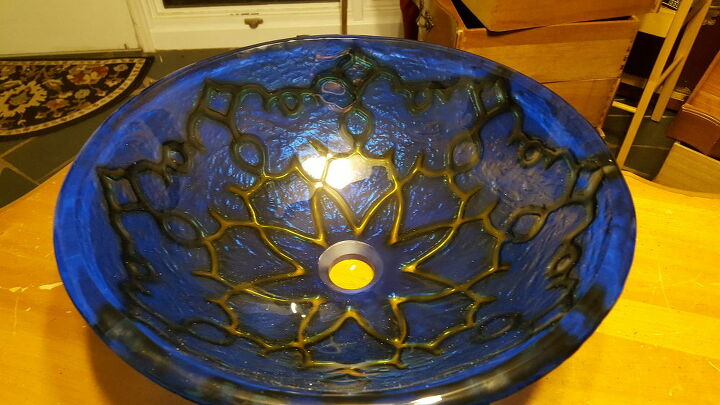
I bought these bowls about 15 years earlier and had been dragging them around the country during my military career waiting to retire and get my "forever" home!
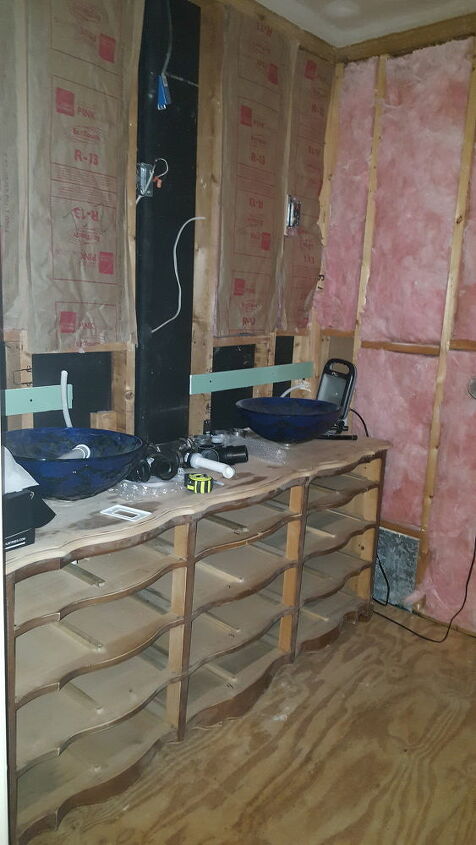
So prior to painting we had to decide where to place the sinks, mark where the plumbing would have to be installed, and run the lines. I used pex plumbing line, and had moved the lines from the floor into the wall. The cut off quarter turn handles were installed in the section of wall in the corner, behind the light. I put in an access panel on the other side of the wall (in front of the toilet) so it could be accessed without tearing into the wall. This paid off this fall when one of the faucets main piece failed inside the wall (one of the plugs for an incoming line we didn't use actually sheared off and if you turned on the faucet, would pour into the wall!)
The incoming lines to the right have the cut off valves below the vanity top, but you can see the hole where the access panel will be installed later. Had to drill slanted lines in the corner to accommodate the pex and moved the drain line to the middle center of the back of vanity, at the top drawer level. The vanity was well made, with solid wood shelves between each drawer level.
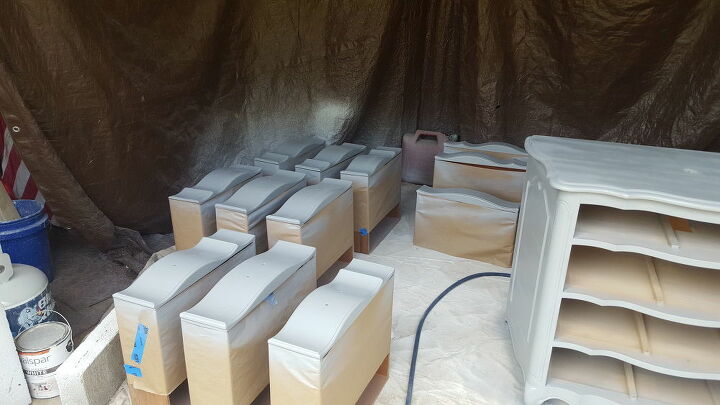
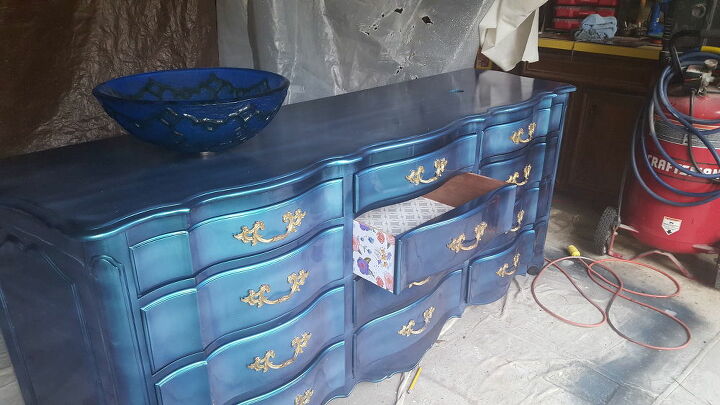
For those of you who hate it when someone paints wood, let me warn you the next few pictures are disturbing to purists, I'd leave now! I did tons of research on painting this with automotive paint after seeing the same dresser in yellow on Pinterest. Paint store employees tried to talk me out of it at Sherwin Williams! I finally had all I needed to start. I wanted a chameleon paint (changes color as you walk by) that was blue, purple, and green. Always wanted a car painted this color so I did the dresser instead. I bought the motorcycle paint kit on line, from The Coating Store, figured it was enough to do this, it wasn't quite enough. I could have used more color coat. I bought primer from Sherwin Williams, and borrowed an auto spray gun from a friend. I already have a compressor. One of the blogs I read to prepare said to put down a coat of lacquer before the color coat, so I bought canned spray lacquer from Lowes. This is the primer, 4 coats.
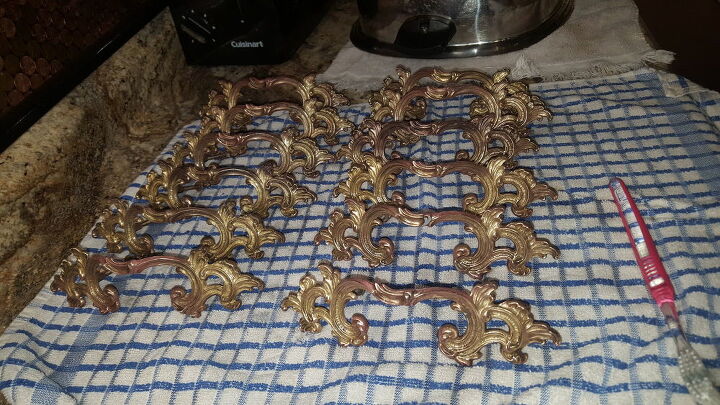
The handles were so tarnished you couldn't tell they were brass and copper. I tried about 4 or 5 different recommended 'sure fire' cleaning methods or cleaners. What worked best was an overnight soak in vinegar and baking soda, the a quick brush with vinegar and baking soda paste, then with brass cleaner. They turned out beautiful! I didn't use anything to keep them from tarnishing again, so I'm thinking I will need to pull them off this year and apply a clear coat of poly to them.
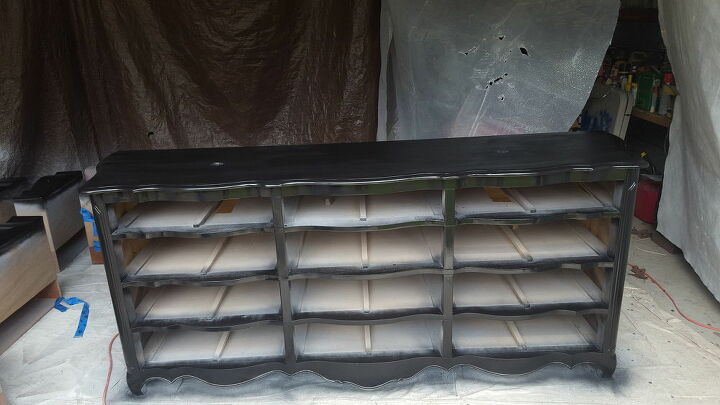
After the primer, I painted 3 coats of black lacquer.
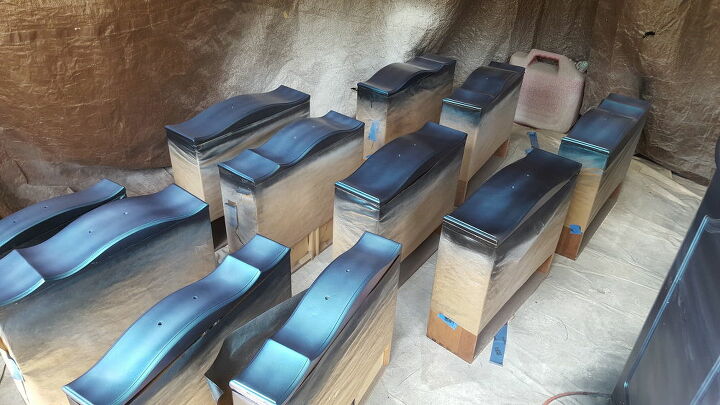
Next on was 3 coats of the base color coat.
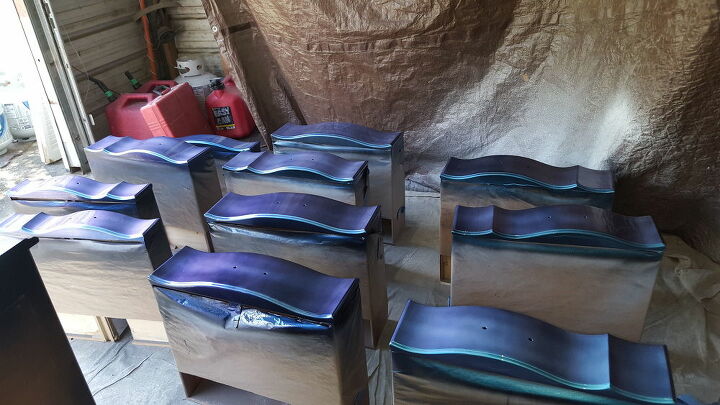
Then 3 coats of the color coat that causes the color to change based on lighting. Then 3 coats of clear coat. In hindsight, I would have put another 10 coats of clear on top of that, and put a bar top expoxy on the top of the dresser/vanity. I will be working on some more of these next year to sell and will put epoxy on the top.
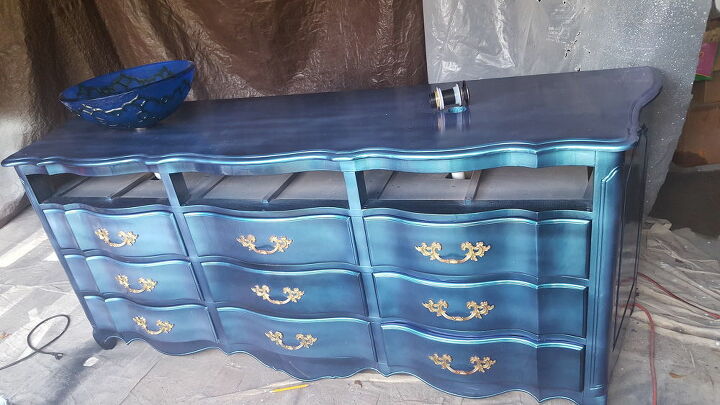
Time to put the hardware on!
I wanted a touch of color when you open the drawer, and wanted to line the drawers as well. Both were the tacky back paper. Again, in hindsight should have bought more of the flower paper and used it to line the drawers as well.
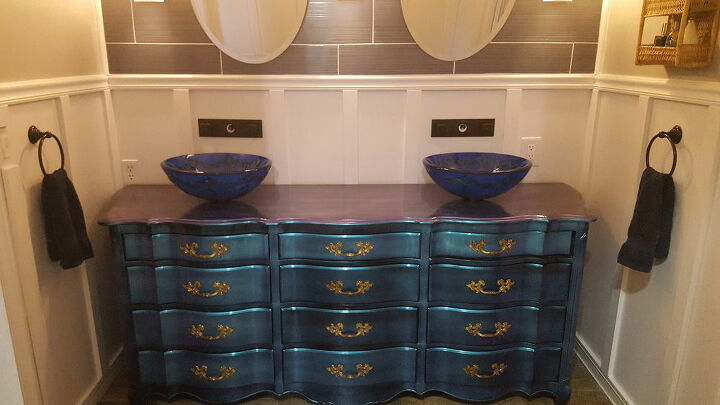
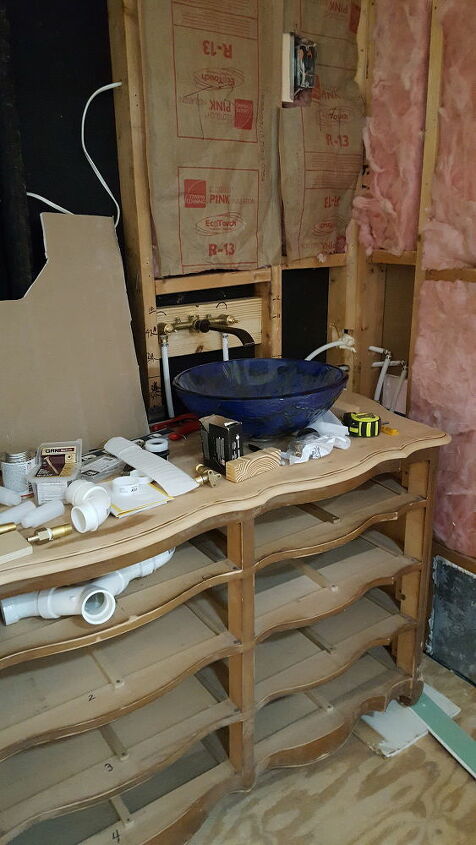
The top drawers were cut back by at least 1/2 to accommodate the plumbing installed from the sinks to the drain. We installed a sun tunnel sky light later in the year which enhanced the natural light hitting the paint and showed off the color changing aspects.
The final project in video.
Comments
Join the conversation
-
Woe.. that's really nice. You must be proud ..I sanded n spray painted two shadow boxes I found and used as planter boxes ..I told everyone ab it 🤦♀️🤪😂 this is just amazing..I'm in love with the bowls..I guess u knew that these were worth keeping. good for you!!!
-
So beautiful I want to do this soon❤️


Frequently asked questions
Have a question about this project?
Awsome piece would like to know the color used
What color paint did u use ?