


How to Add a Bold Statement to Your Walls With Silver Metallic Paint

It's no secret bold metallic walls are back in style. You see it in luxury hotels, high-end offices and now in residential homes.
Metallic wallpaper seems to be the biggest trend for contemporary and modern homes in 2019.
But, did you know that you can get the same cosmopolitan look for a quarter of the price of wallpaper?

Adding a bold metallic paint design looks best as a feature wall in a bedroom, dining room or living room.
Treat yourself to a beautiful metallic wall for a quart of the price of wallpaper.
Are you ready to give your home the glam it deserves? Well, I’m about to show you how.
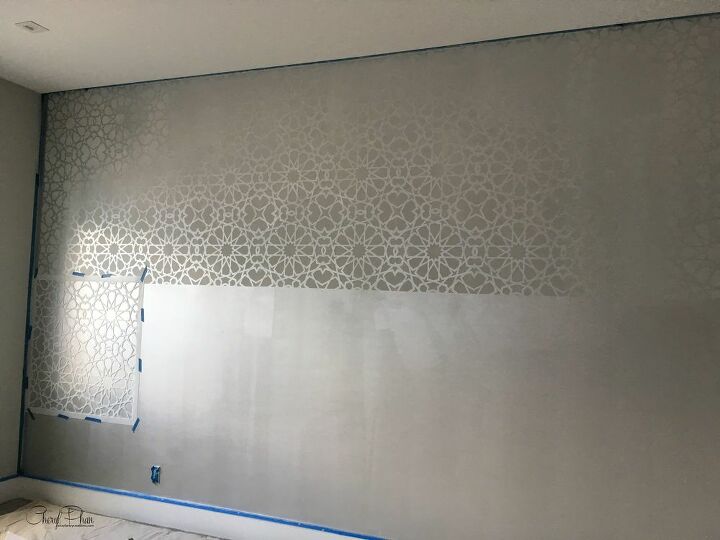
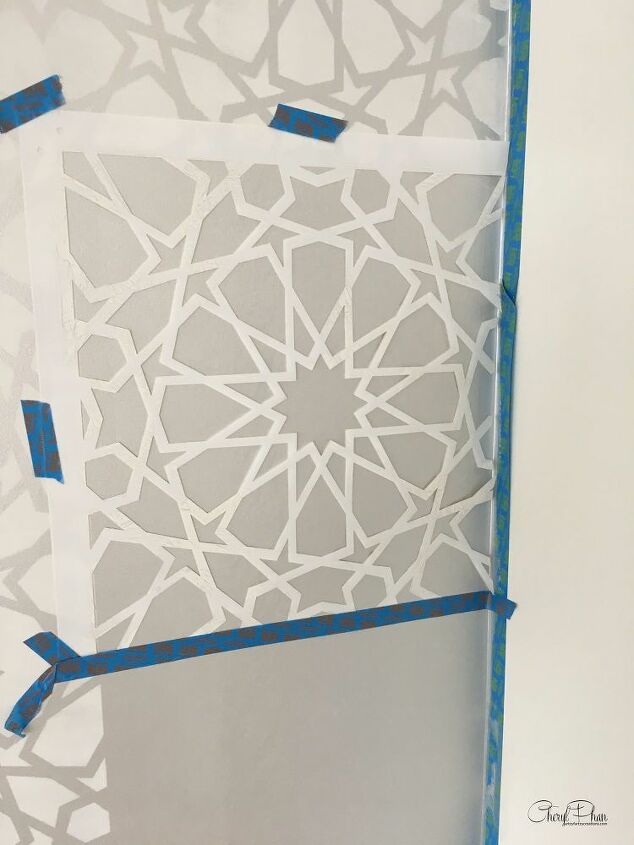
In most cases, I would say to start your stencil in the center of the wall but with this Moroccan stencil, I started on the left side because I didn’t want the stencil to end in the middle of the star on the design.
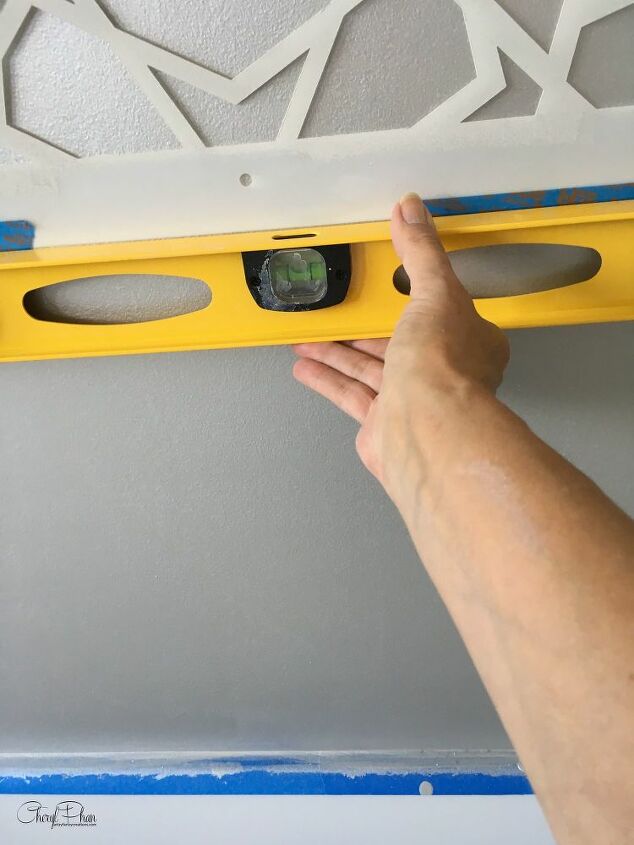
EVERY time you position the stencil, make sure you use a level to make sure it’s even. If just one is off just a little the entire wall will be off.
First Step
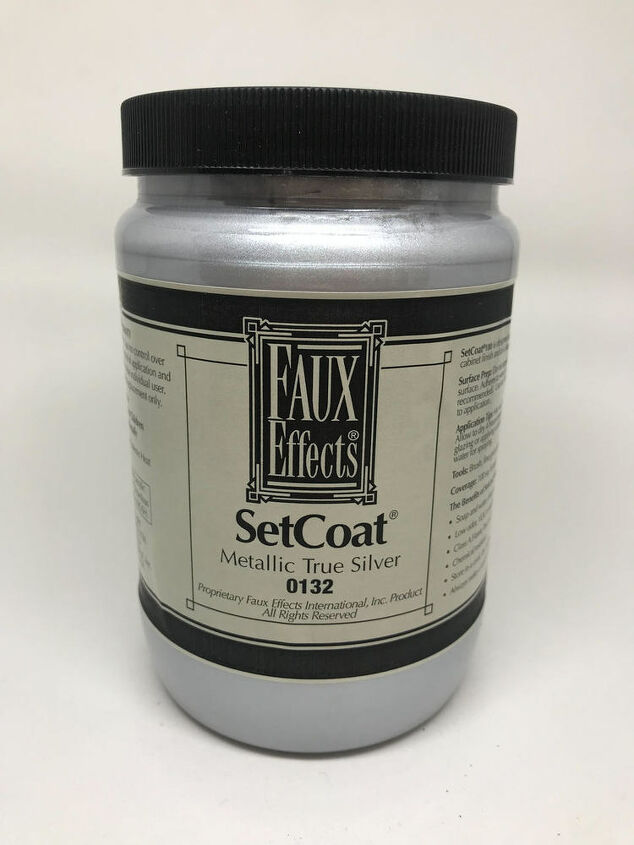
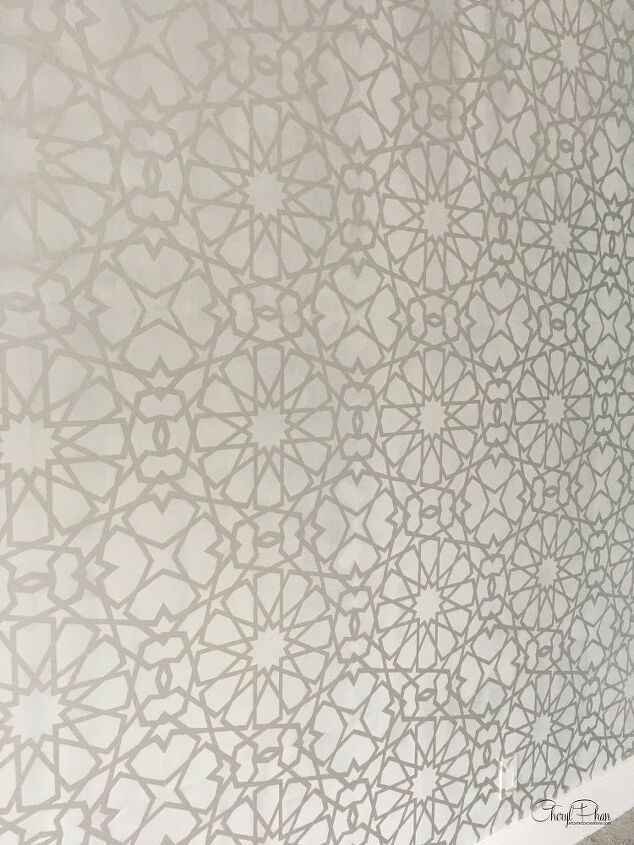
Paint the walls with two coats of metallic set coat paint.
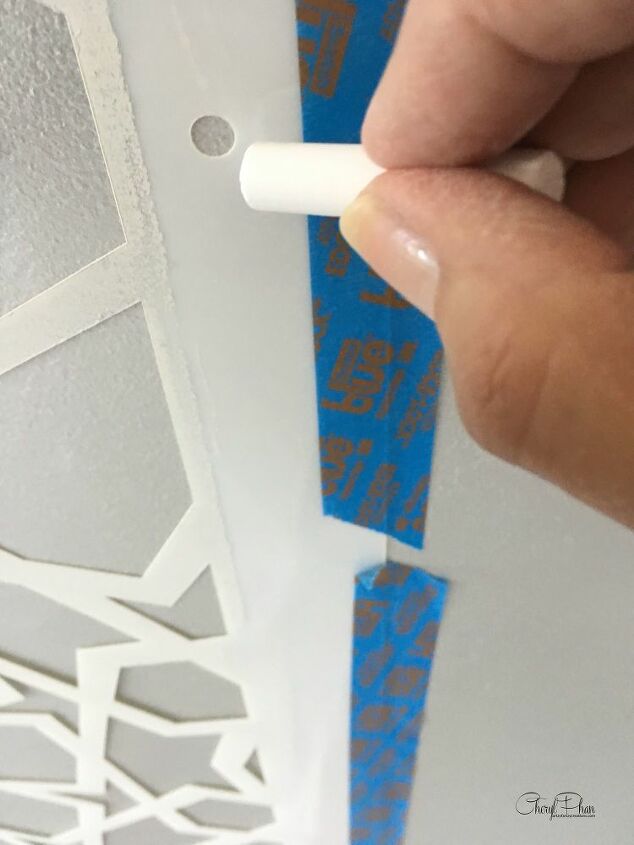
The stencil should have circles like this. These are called return markers. I use chalk to mark them. Chalk can easily be removed. DON’T use a pencil.
When you move the stencil to the next area it should line up with the chalk marks.
Don’t forget to use the level even if it lines up. You might have to tweak it a little.
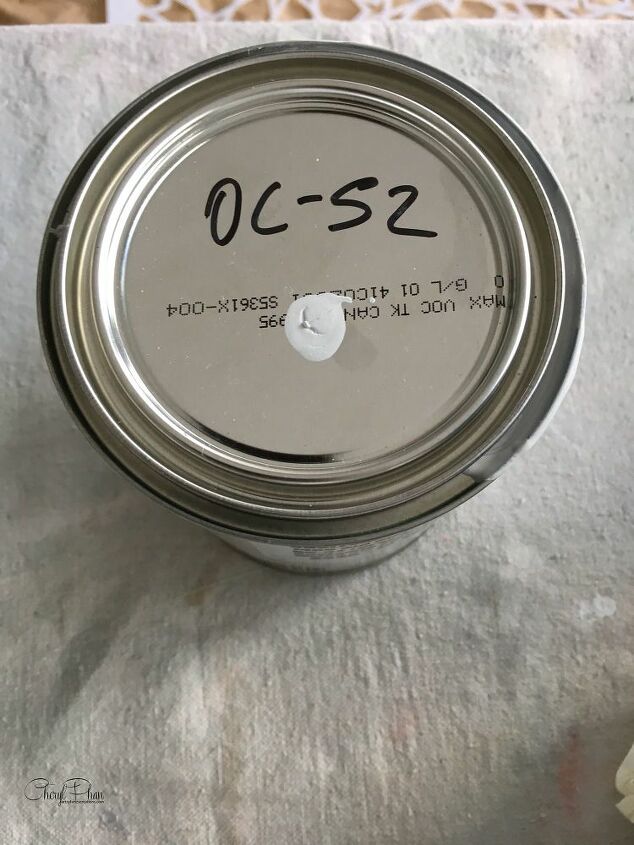
I use Benjamin Moore flat paint OC-52 for the stencil color. You can use any flat paint in any brand. I liked the depth of the metallic and flat paint.
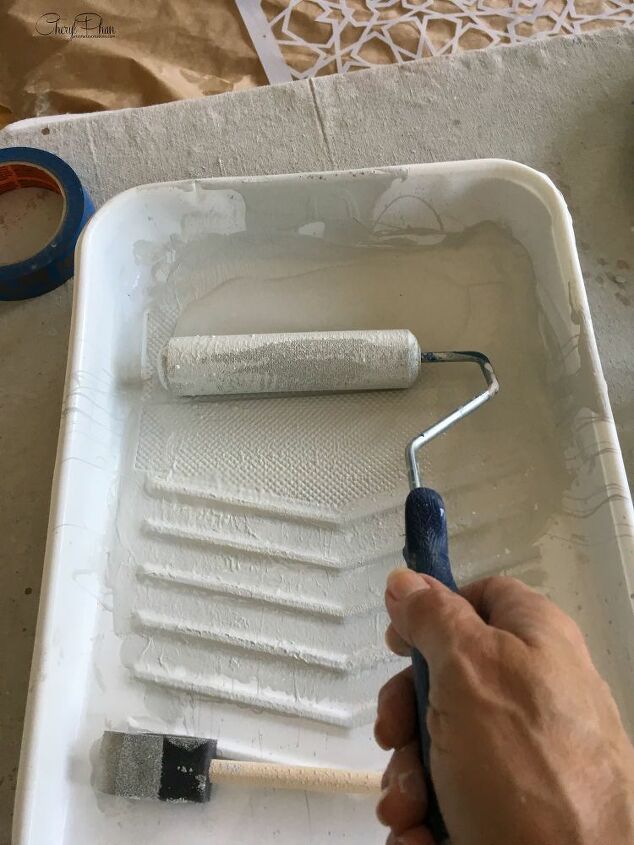
Using a sponge roller, roller on the paint for full coverage.
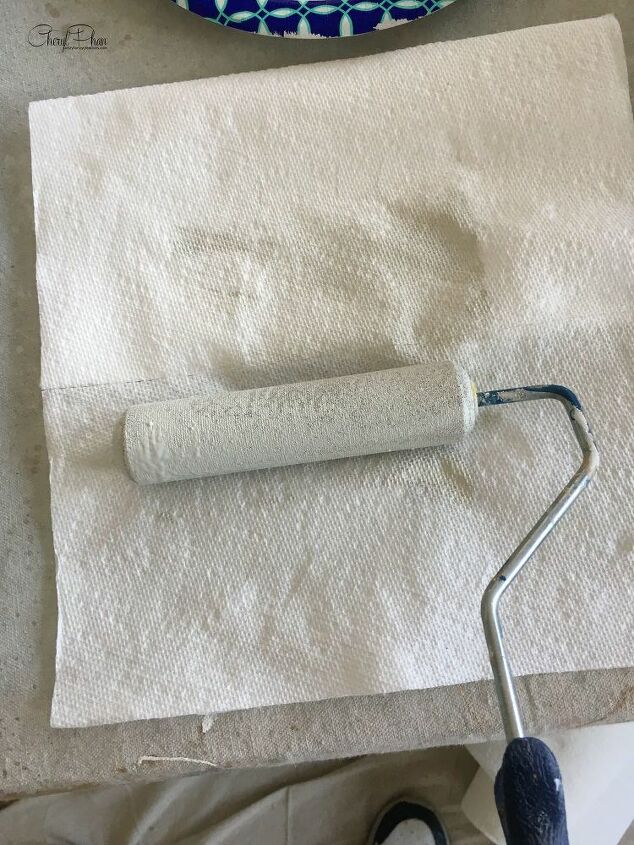
This is important. Use a paper towel and offload the paint so that it’s almost dry. You don’t want to use a loaded roller on your stencil. It will bleed through and you’ll have a mess.
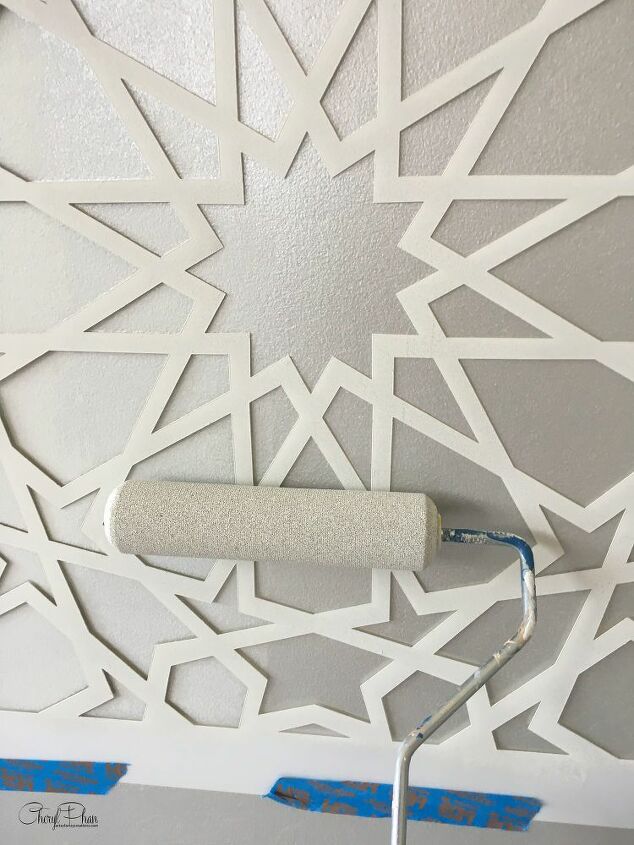
You want a crisp line. Roll on to the stencil with light pressure. You may have to go over it 2-3 times for full coverage.
Here’s a little trick I use to get nice tight corners. I buy 2 stencils because no wall is perfectly even and you’re going to have to cut the stencil to work your corners.
Trying to bend the stencil to work your corners is difficult.

When painting the corners, I use a sponge brush. It’s so much easier to do it this way and your corners will look neat and crisp.
I have one more trick up my sleeve. You will need to clean your stencil frequently. I usually clean it after two applications. If you don’t the paint will build up making it heavy and the paint will bleed through. This Krud Kutter is amazing for clean paint off just about anything.
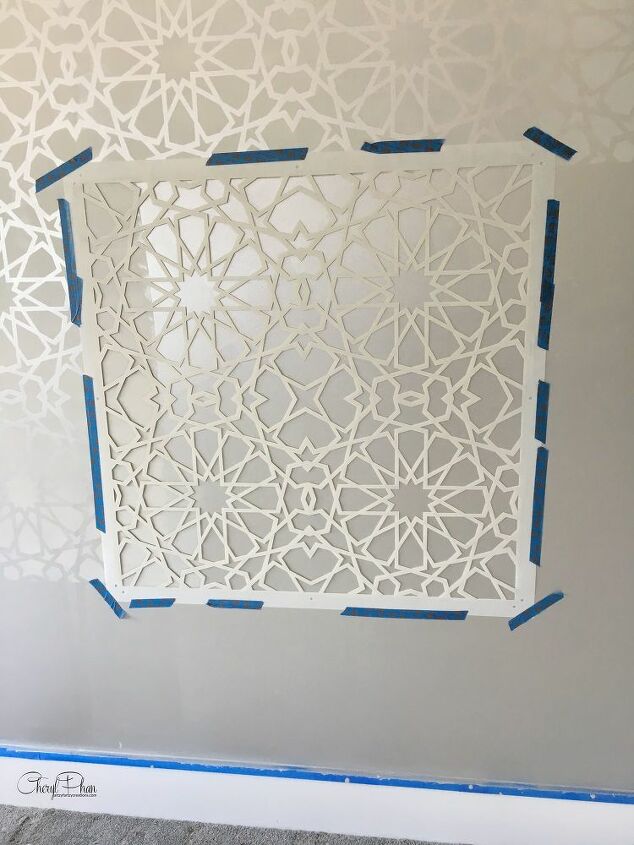
Once it's level, use a low tack tape so it’s secure and flat.
Hope you enjoyed this tutorial. If you have any questions, please join my Facebook group Ask Cheryl Phan and ask away.
You can also follow me on Pinterest and Instagram. Hope to see you there.
Hope this was helpful. I look forward to seeing you in the group.
Blessings,
Cheryl
Comments
Join the conversation
-
That is a huge wall to have done so meticulously!
-
Hi Thea: Thank you. It was a lot of work and a little tedious. But it came out beautiful. The love the metallic with the flat paint it really made it pop. I have other blogs you might be interested in. Here's the link https://www.subscribepage.com/diy-projects
Cheryl


Frequently asked questions
Have a question about this project?