


Farmhouse Style Christmas Calendar

With Christmas getting closer, the “how many days until Christmas” question gets asked almost daily by one of my children. Of course, the closer we get the more often I will hear it. It is nice to have a special Christmas calendar up so my kids can SEE how many days are left. Here is how I made a farmhouse/rustic style magnetic calendar.
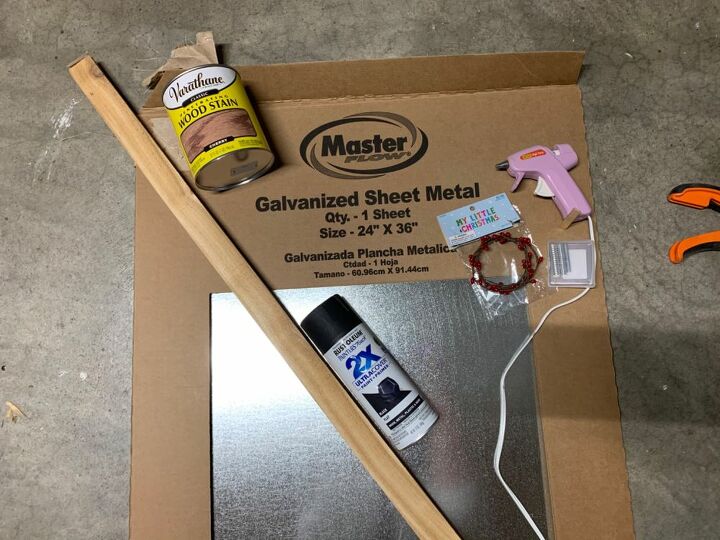
For this project you will need:
-galvanized sheet metal ($10 for a 24”x36” sheet, which is enough for 4 of these, unless you make them bigger than 12”x16”)
-wood for the frame ($4.50 for a 1”x2”x8’ cedar board. You don’t have to use cedar, but I really liked the rough sawn look)
-wood stain (I used Varathane Cherry, on hand)
-spray paint (I used a flat black, on hand)
-small wreath, or make your own using mini garland ($1.50)
-small magnet (I spent $5 for a big pack)
NOT PICTURED:
-finishing nails
-wood glue
-picture hanging hardware
-removable vinyl and cutting machine, or letter and number stickers
-tin snips
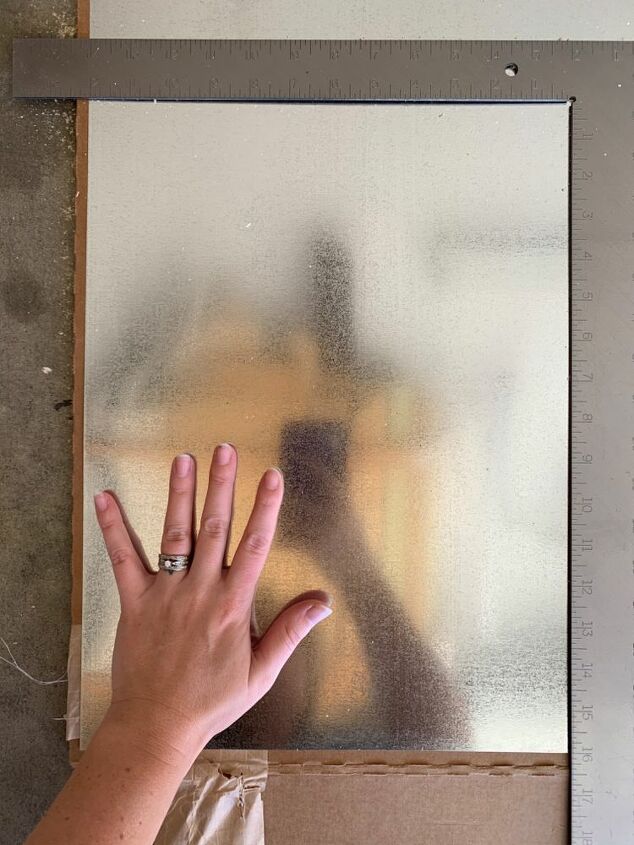
First step: decide what size you want your calendar to be. I cut the metal sheet to 12”x16” using the tin snips. I am making several, so this way I could get 4 out of one piece of sheet metal.
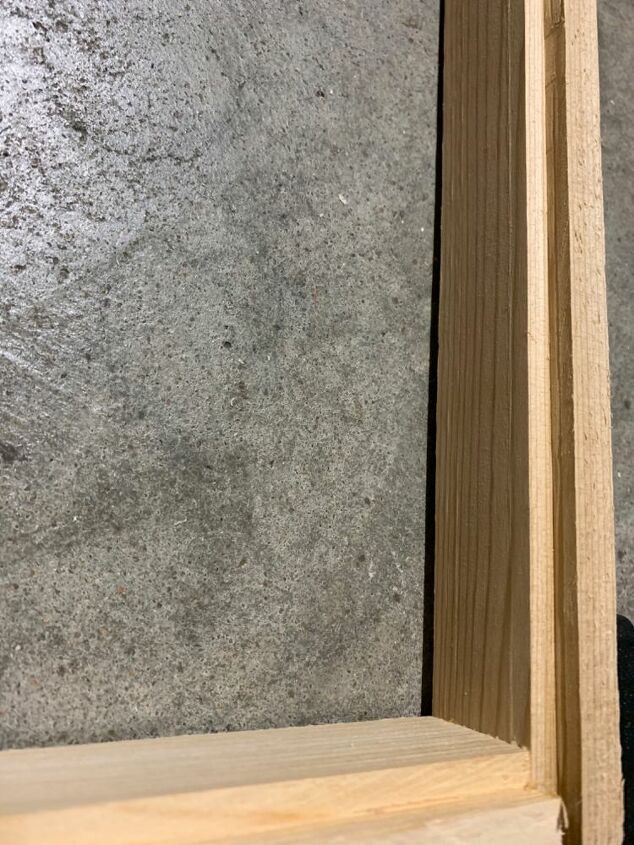
Cut your wood to fit around the metal. I made a simple box frame with 1/4” overlap groove for the metal to sit in.
to account for the metal overlap and width of the boards, I cut (2) 15.5” pieces, and (2) 12 7/8” (width of the metal, plus 2x the width of the boards, minus 1/2” for the overhang)
You don’t have to cut the groove if you want to attach the metal directly to the back, but because the metal edges can be sharp, I wanted them enclosed.
*If you do cut grooves, make sure you don’t go all the way to the edges of the top and bottom pieces like I did on this one. On a box frame, those grooves will be visible on the outside.
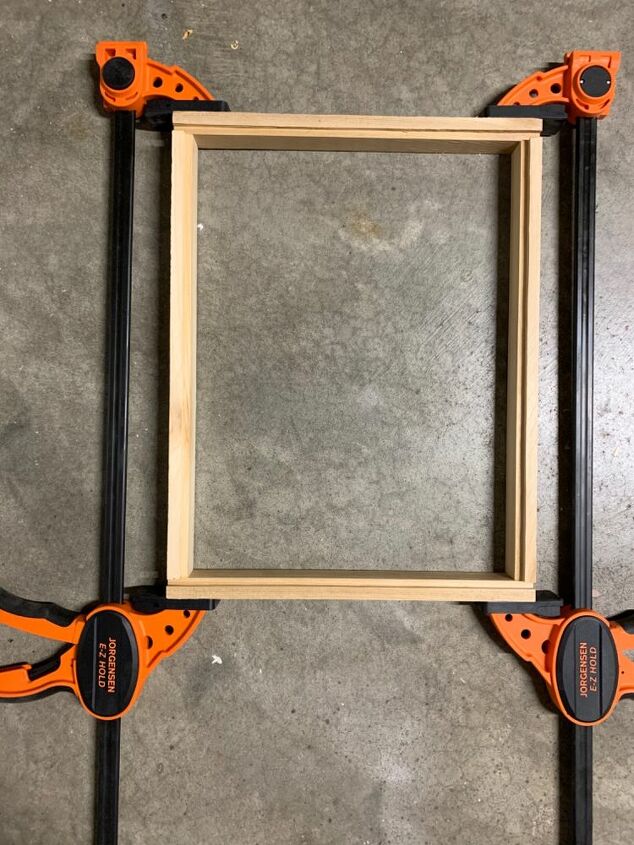
Glue the frame together, then use a couple finishing nails at each corner. Stain or paint as desired.
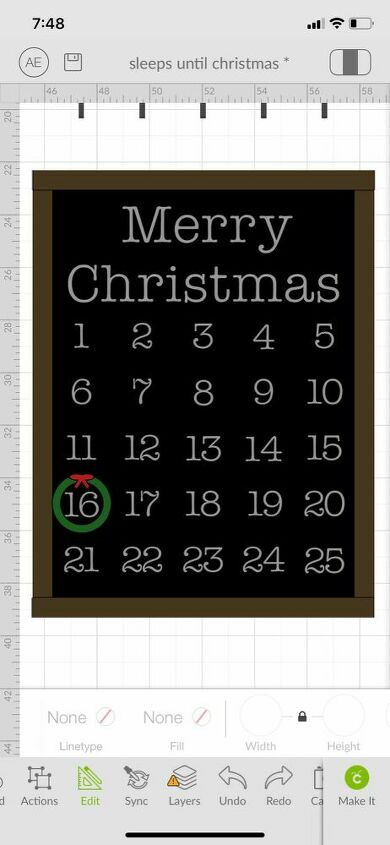
I drew up my design on Cricut Design Studio, then used my machine to cut out the letters and numbers on removable vinyl.
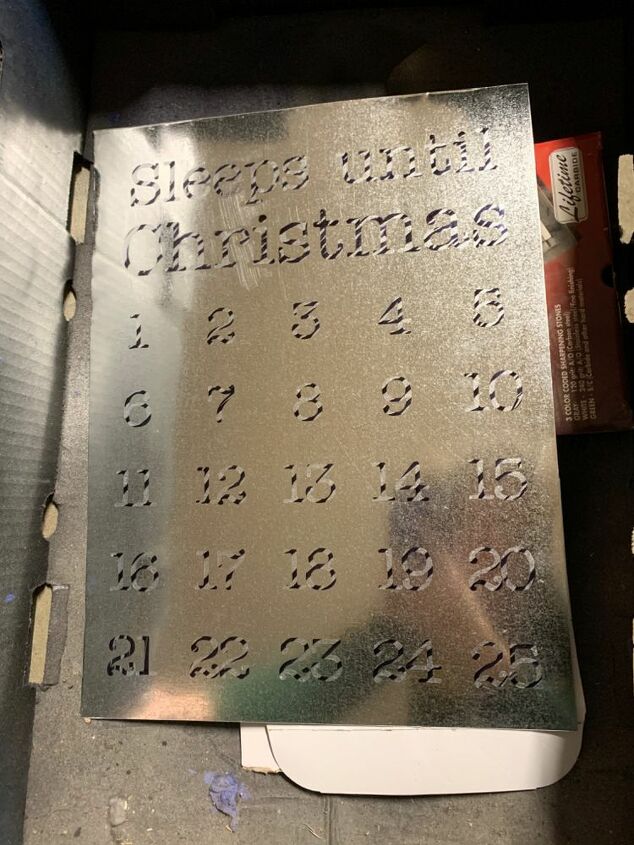
The vinyl I had was clear, so before removing the excess, I colored over the text with a marker to make it easier to see. Then I transferred everything over to my metal sheet. Make sure everything is stuck down really well so the paint won’t seep under.
*If you don’t have a vinyl cutting machine, you can still do this with letter and number stickers!
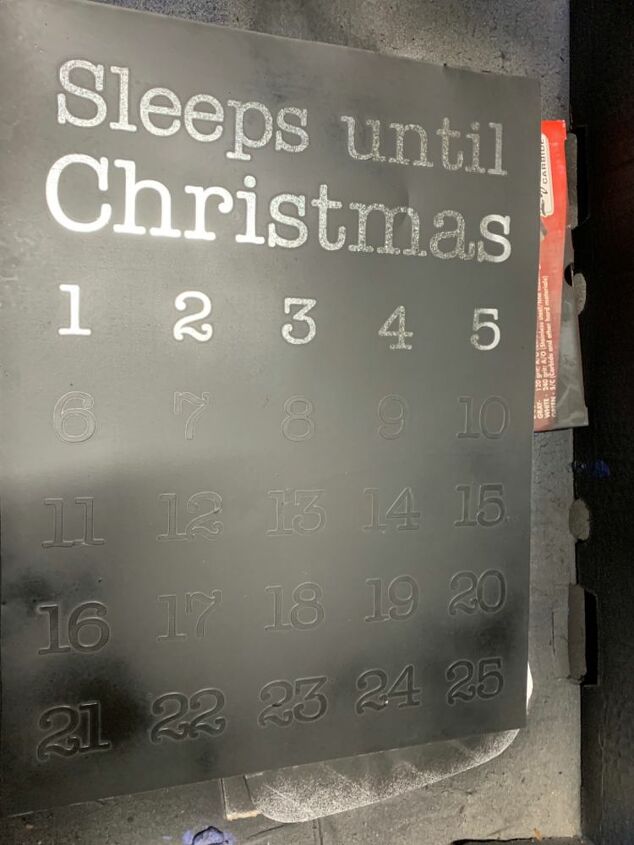
Spray a light but even coat of your spray paint over the metal. Wait a couple of minutes then carefully begin removing your vinyl/stickers with tweezers or a vinyl weeding tool. If you wait for it to dry completely, it is more likely to peel extra paint from around the text.
*If you do get some scratches or paint peels, you can touch it up by spraying some paint on plastic wrap and using it to touch up with a craft brush.
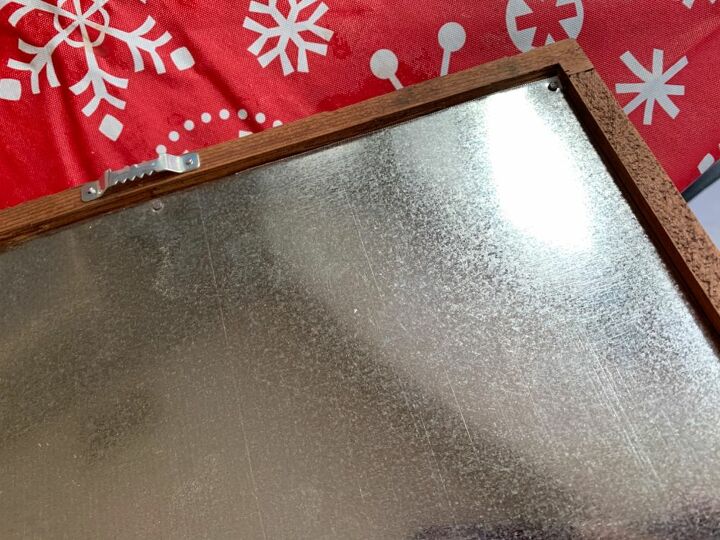
Once the spray paint is completely dry and set, set the metal sheet into the back of your frame and attach with a few finishing nails around each side. It helps to drill a tiny pilot hole in the metal and wood.
Attach picture hanging hardware if you wish to hang it up.
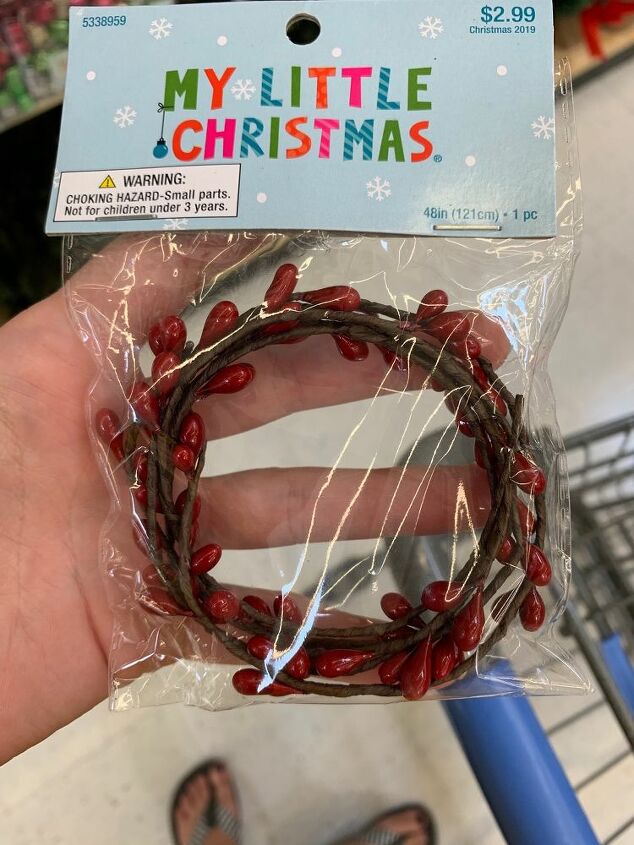
For the wreath, I bought this mini garland at Hobby Lobby while all Christmas supplies were 50% off. This is a wire garland, so it keeps it’s shape really well. I decided how big my wreath needed to be, and wrapped to layers of garland around each other and hot glued the ends at the back. Then I glued a tiny magnet to the back.
*I recommend pulling the wreath away from the calendar and replacing it at each number instead of dragging it so you don’t scratch up the paint. If it is something you are super concerned about though, you could spray the metal sheet with a clear protectant before attaching it to the frame.

Here is one of the finished calendars! So far I have made this one, a simple calendar; and another countdown calendar that says “Sleeps until Christmas” at the top.
So, for around $20 I have enough supplies to make several calendars, but if you only plan to make one, you can spend even less! It took me around an hour for each one, not including the drying times.
Resources for this project:
See all materials


Comments
Join the conversation
-
This is so super sweet! I love it! Enjoy using it!
-
Nice idea. I am going to make one using an old picture frame already made. But the idea is so cool.


Frequently asked questions
Have a question about this project?