


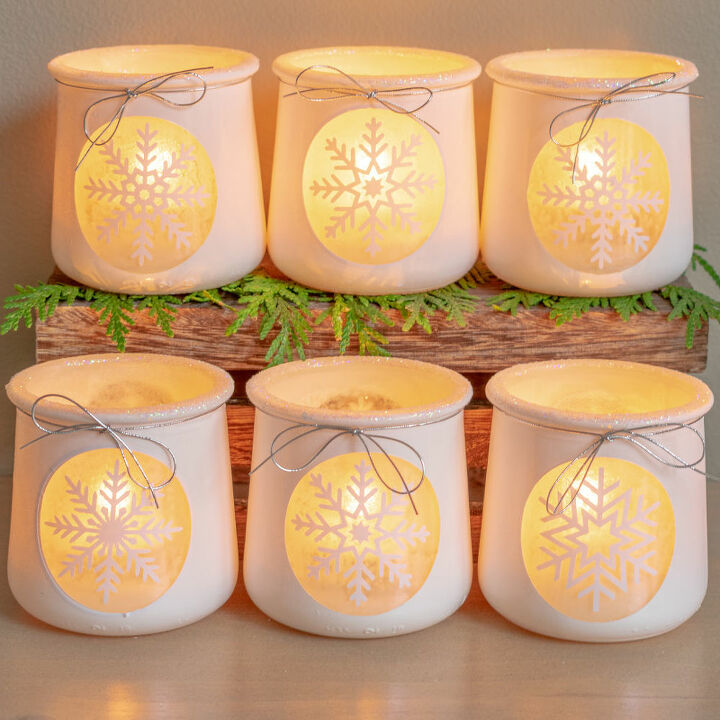
Winter Snowflake Craft: DIY Votive Holders From Up-cycled Oui Jars

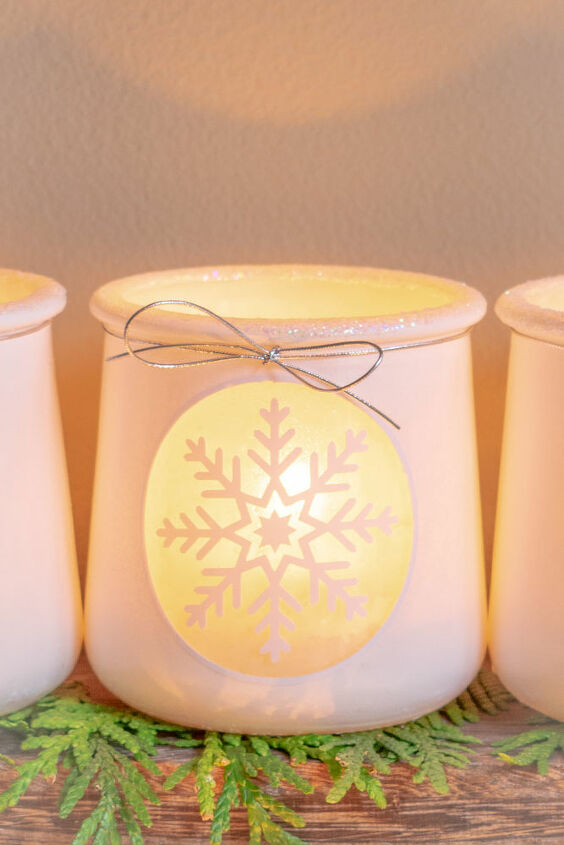
These DIY snowflake votives turned out better than I expected. Everyone loves a winter snowflake craft and this one will brighten up your home! They remind me of Milk Glass with little frosty windows. Like those winter scenes, where you’re strolling up a winding country road and stumble across a beautiful farmhouse covered in fresh snow and you can see the warm light glowing through the windows.
STEP 1: PREPARE THE JARS
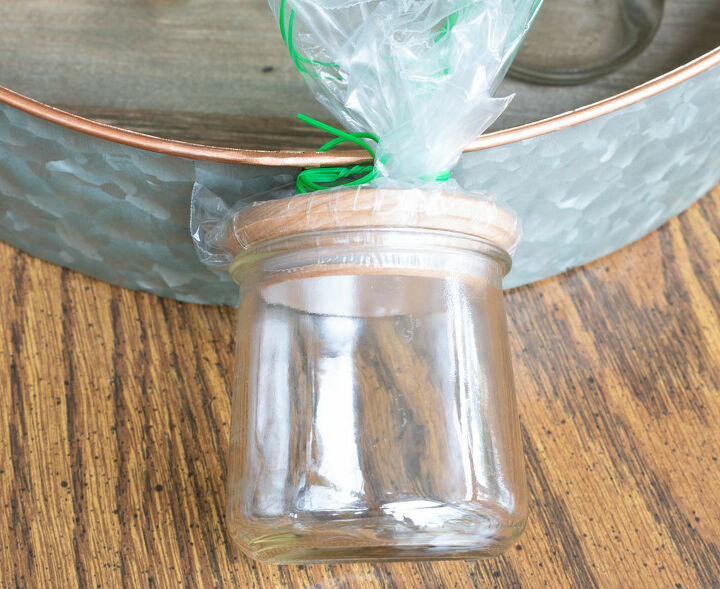
Remove the labels from your empty jars and any sticky residue left behind. I was able to peel most of the glue off by hand. But, if you have a difficult spot of glue, you can use Goo Gone. Then wash your jars with warm soap and water. I also quickly wiped the outside of the jars with rubbing alcohol, to be sure there was no grease or finger prints on them.
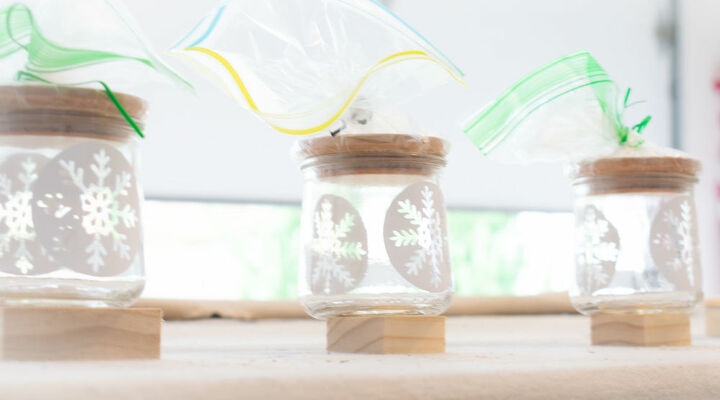
Place the Oui lids in sandwich bags and use a twist tie to hold them tight to the lid. Then insert the lid back into the jar. The goal is to not get the spray paint inside of the jars. You can also stuff them with newspaper or paper towels.
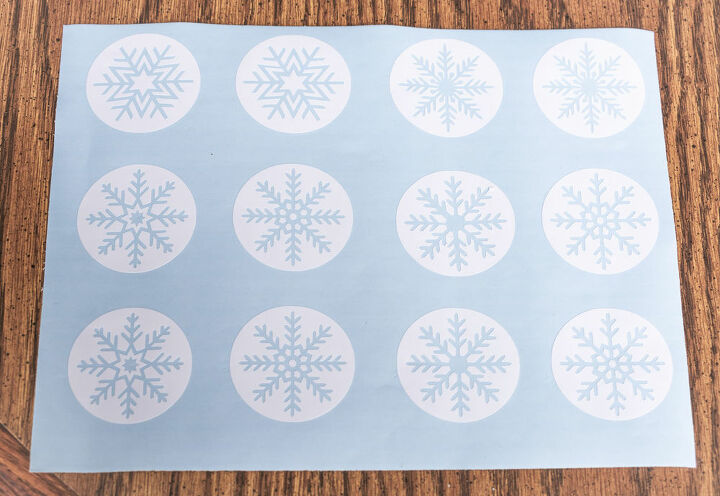
STEP 2: DOWNLOAD AND CUT YOUR SNOWFLAKES
Download the snowflakes and the circles file from my free Library. The instructions are over on the blog. I saved it as a JPEG, PDF and Silhouette file. I also made an 8.5 X 11 PDF printable for you.
Once you download the file, cut out your vinyl circles with your Silhouette machine. Then weed out the extra vinyl and set them aside for later. Now you’re ready to get started with your winter snowflake craft.
If your looking for a quick holiday gift, fill these jars with m&m's, nuts, or cocoa mix. Add the vinyl snowflake medallion (available at my website) and call it a day. The lids are available on Amazon.
STEP 3: PAINT THE JARS
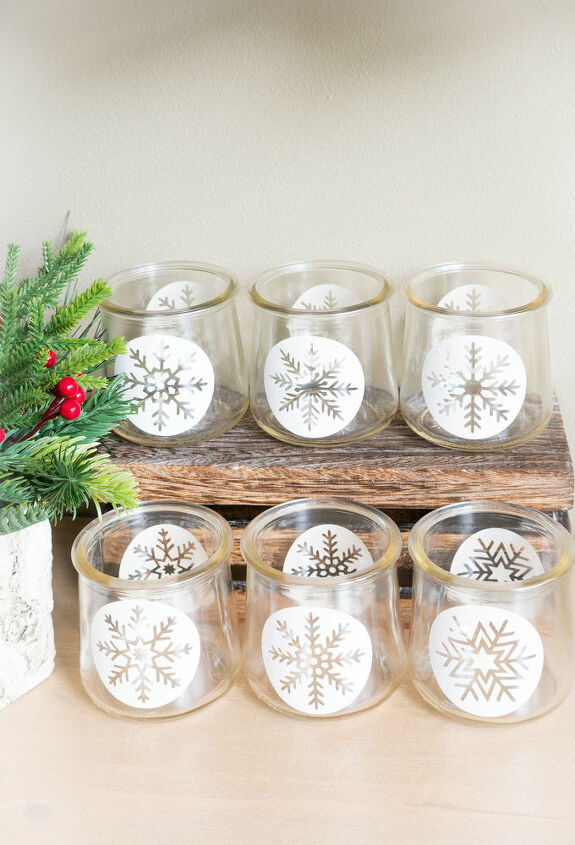
Next, paint the jars. You will need to do this part of the project in a well ventilated area. I painted my jars in my garage. Place the jars on blocks to keep them from sticking to the drop cloth. You’re vinyl will be a solid circle, without the snowflake. (Read more about this on the blog.)
Be sure to shake your can well before beginning. Then make very light even passes with your Krylon Colormaxx spray paint across the jars. I started on the left and worked my way right. It will take several coats to completely cover your jars. Don’t try to coat them all at once or you will create drips/runs. You’re first few coats will not fully cover the jars.
I made one light even pass with the paint, then turned the jars by the wood blocks and lightly coated the other side. Wait 15 minutes, if they are dry to the touch, then do the in between areas. Keep repeating until the jars are opaque white.
Let your jars dry over night before moving to the next step. This gives the paint a chance to cure a little, so it’s not soft.
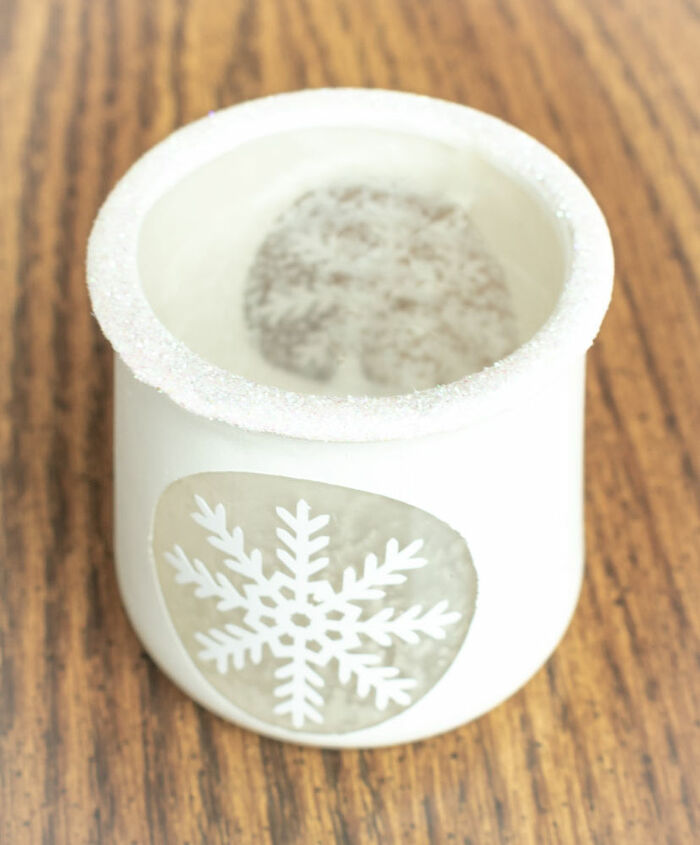
STEP 4: REMOVE THE VINYL CIRCLE AND ADD THE FROSTED PAINT
I found the best way to remove the vinyl is with an X-Acto Knife. Slip the knife up under the edge of the vinyl to get it started. Then you can just peel it off. The X-Acto Knife prevents the paint from marring while trying to grab the edge of the vinyl.
After you remove your lid or paper from the inside of the jar, use the Rustoleum Frosted Glass to paint the inside of the jars. You only need to coat the circle on the inside of the jar. Then let it dry.
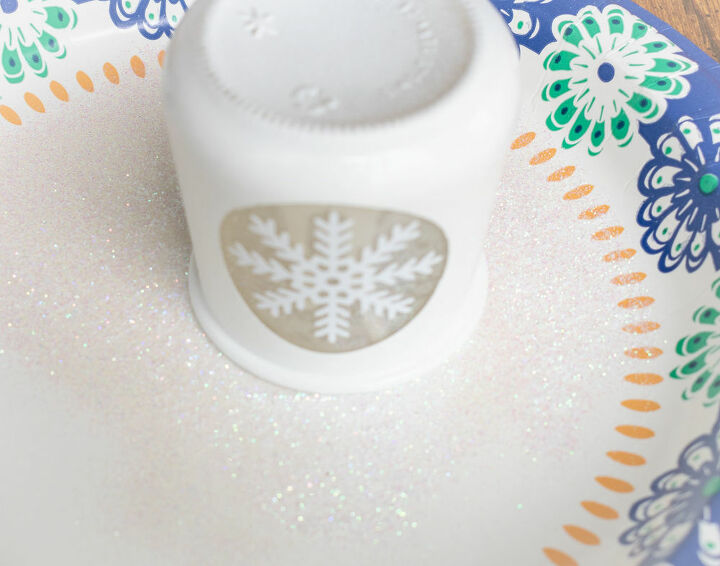
STEP 5: ADD SOME GLITTER TO THE TOP RIM
Put a little Modge Podge on a paper plate. Then add some glitter to another paper plate. Dip the rim of your jar into the Modge Podge. Then place it in a clean spot on the plate and turn it so the glue evenly covers the rim of the jar. Finally gently dip the rim of the jar into the glitter and set it aside to dry.
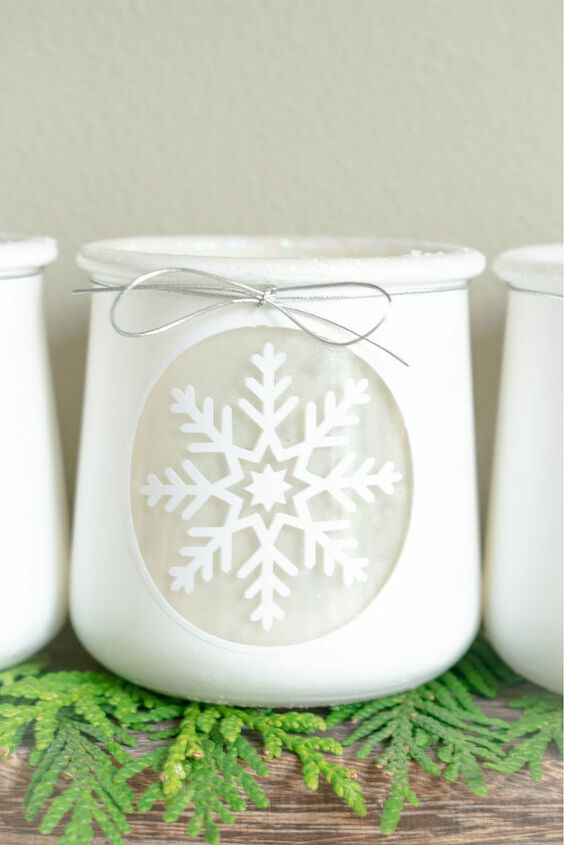
STEP 6: ADD YOUR VINYL SNOWFLAKE
Add some transfer tape to the top of one snowflake. Remove it from the paper backing, so the transfer tape has the image on it. Then line up the snowflake in the center of your circle on the outside of the jar and press it into place. The vinyl will stick really well to the glass jar, making it easy to remove the transfer tape. This is where your winter snowflake craft really begins to get cute.

STEP 7: COMPLETE THE VOTIVE HOLDER WITH RIBBON, EPSOM SALT & TEALIGHTS
Add the ribbon or the cording of your choice to the top of the jars. I also added a little bit of Epsom Salt in the bottom of the jar to stabilize the candle. Then I added some tealights.
To access the snowflake printables/cut files and many other freebies from my library, stop by my blog.
Do you like learning budget friendly ways to spruce up your home? Visit my home page for the latest crafts, DIY projects and printables.
I hope you're inspired by this winter craft project and get some fresh ideas for your own home.
Laura
Resources for this project:
See all materials


Frequently asked questions
Have a question about this project?
Love these! I don't understand why you would add the vinyl snowflake back on after painting the jars if the paint made snowflakes with the stencil. Make sense?
What in the world are oui jars?