DIY Wood Burned Christmas Tree Garland

I have another easy Christmas garland tutorial to share with you today! This DIY Wood Burned Christmas Tree Garland is not only beautiful, but it is another simple one to create.
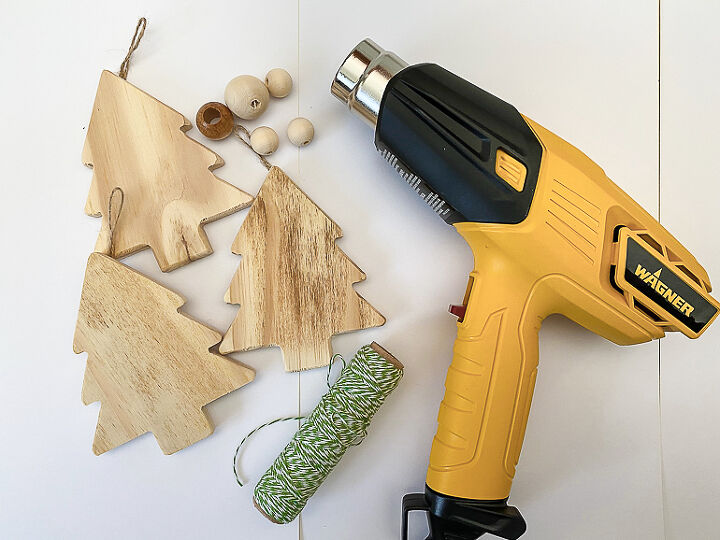
A couple of weeks ago, I shared my DIY Christmas Gnome Garland idea and today, I am sharing a new spin on the garland project. This time around, I am using the {aff} Wagner Heat Gun to make a rustic garland that is full of charm and personality.
Here is a video to show you how to make this garland.
- First, measure how long you wanted the garland to be. (The garland I made is about 3′ long.) Then, plan out how many Christmas trees and wood beads you will need to fit that size garland. I added five wood beads of different sizes between each Christmas tree. You can make this garland any size, with as many beads and trees you want.
- Once I knew how many trees and beads I needed, I painted seven natural wood beads “Palmetto” from Dixie Belle paint and seven beads in “Cotton”. I put the beads on wood skewers to make it easier to hold them while I painted.
- While the beads were drying, I put seven more {aff} natural wood beads on a different skewer and gave them a golden burnt look with the Wagner Heat Gun. The skewer helps hold the beads and makes sure your hands don’t get too close to the heat in the process. To burn the beads, wait until the heat gun starts changing the color of the bead and continually move the bead around until you get the burnt look you are after. The longer you hold the heat gun in one area, the more chard it will get. Don’t hold it too long in one place because you don’t want them to start on fire. 😳
- Once the burnt beads were done, I set them down and started working on the {aff} wood Christmas trees. I held the trees with a pair of scissors (shown in the video above). I did the same process as the beads. I put the heat gun on the tree until it started burning the wood and then moved the tree around until I got the look I wanted. The heat gun gets hot so make sure to wear heat gloves or use tongs or scissors like I did to hold onto the tree as you are burning it.
To see the rest of the tips I shared, head to my blog: https://mycreativedays.porch.com/diy-wood-burned-christmas-tree-garland/
This garland is so easy to make and can be made in so many different colors, shapes and sizes.
Crafting with a heat gun is fun and really gave this DIY Wood Burned Christmas Tree Garland a beautiful look that I wouldn’t have been able to replicate any other way.
Enjoyed the project?
Resources for this project:
See all materials
Comments
Join the conversation
-
 Melinda Record
on Dec 06, 2020
This is so CLEVER and I love the look. The burning treatment on the trees and beads give this tree garland a nice, rustic vibe. And the "garland" you added to each tree is so sweet. Too, your instructions are great and very helpful!
Thank you very much for sharing !


-
 Lindsay Eidahl
on Dec 07, 2020
Your welcome!
-
-











Frequently asked questions
Have a question about this project?
Fabulous! Did you cut the Christmas tree shapes yourself or buy them?