


How to Make a Star Wreath
This year I’ve gone rogue and made a star-shaped wreath for our front door. Its made with all the foliage I’d put in a traditional fresh Christmas wreath, but using a star wreath form made out of floral foam.
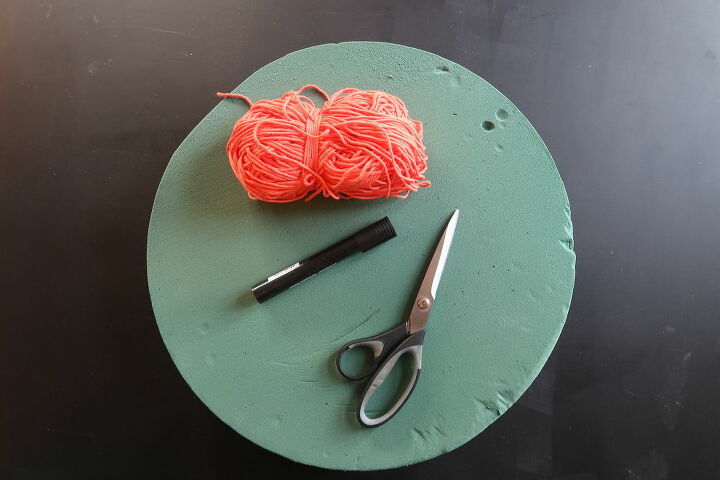
What you need to make a star wreath.
I used floral foam to make my star-shaped wreath and came up with a super simple way to mark out my star.
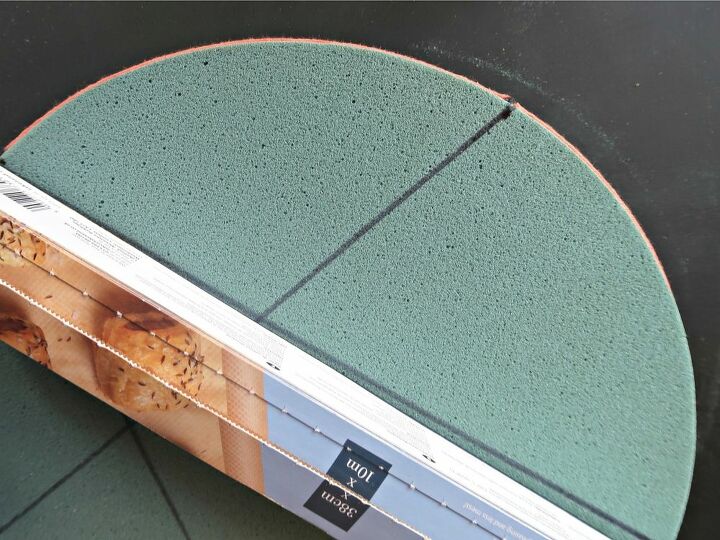
- 1 round floral foam pad (mine is 15 inches in diameter)
- A piece of string or yarn
- Marker Pen
- Knife
- Short length of wire to hang the wreath
My star wreath has five points, but you can use this method for six, seven and eight-point stars too. I will explain the slight differences in marking them out when we get to that stage.
How to mark out the star shape.
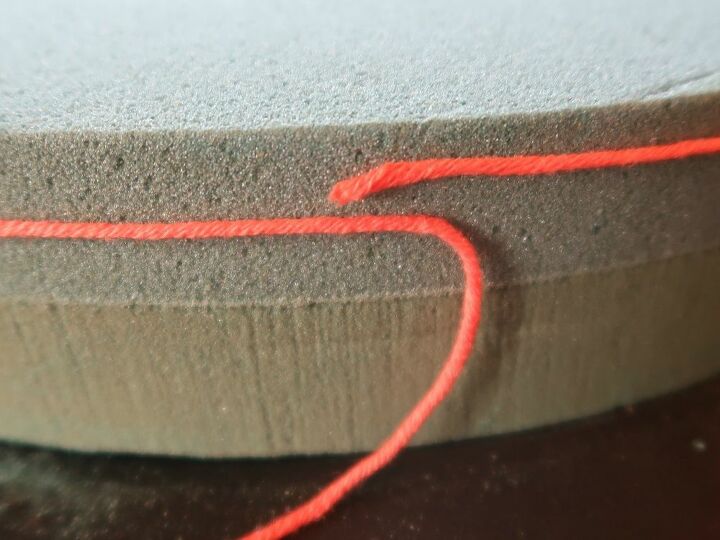
Take a piece of string and wrap it around the floral foam pad.
Cut it, so it fits around the pad exactly.
This string is now the same measurement as the circumference of the foam.
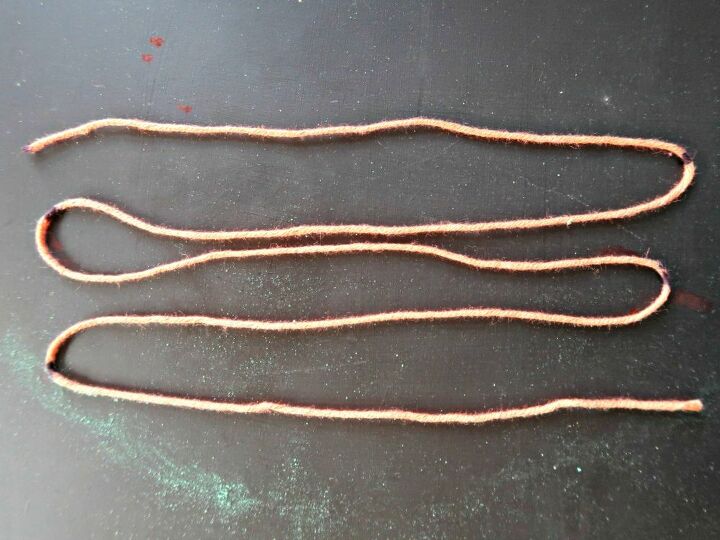
To make a 5 pointed star, fold your string into five equal pieces. If you want more points, you will need the corresponding number of folds.
Once you have folded the string into equal pieces, mark the loops with a marker pen as shown in the photo above. You can now use this measure to mark out the points for your star-shaped wreath.
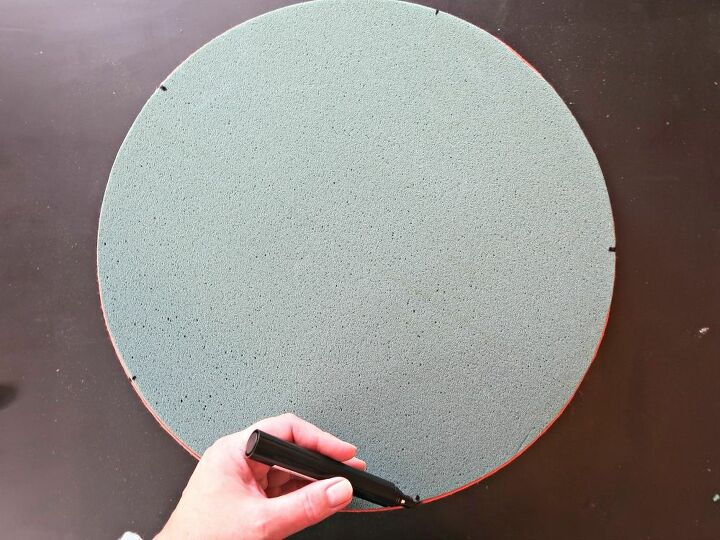
The floral foam that I’ve used here has two layers. The top layer is soft so you can push your arrangement into it while the base layer is stronger and holds everything together. I worked on the base layer as it is more robust for drawing on.
Wrap the string back around the floral foam, and mark each point onto it.
To draw a 5 (or 6) pointed star join up every other mark with a straight line.
For 7 or 8 pointed stars you skip two marks, joining up every third mark.
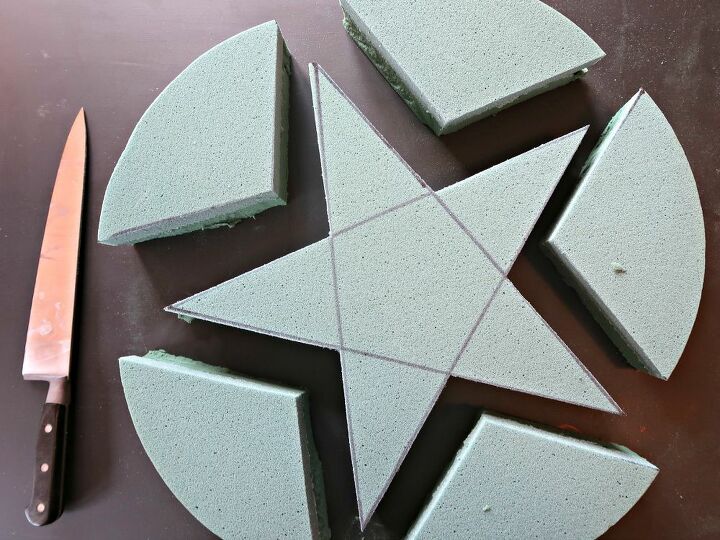
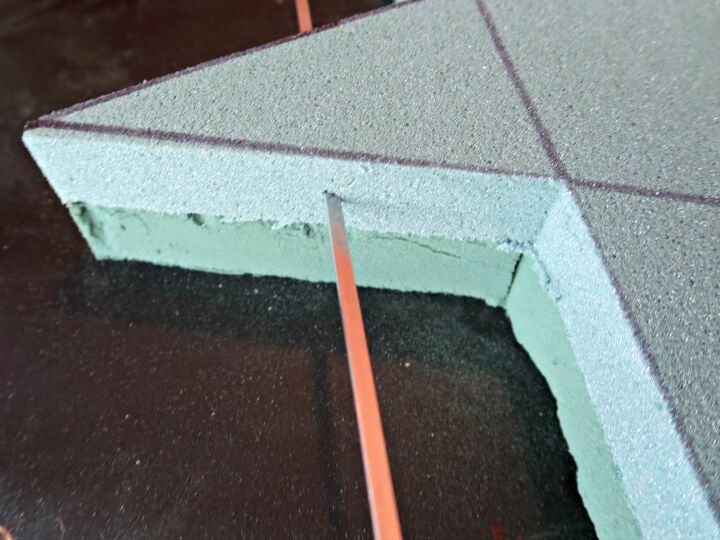
Cut away the unwanted pieces of floral foam to reveal the star-shaped form.
How to hang the star-shaped wreath.
It is much easier to add a loop to for hanging the star wreath before adding any foliage.
The base layer of the floral foam is most durable, so this is where you should attach the loop. (I’m still working upside down).
I used a skewer to make a hole and threaded some rustic wire through it to form my loop.
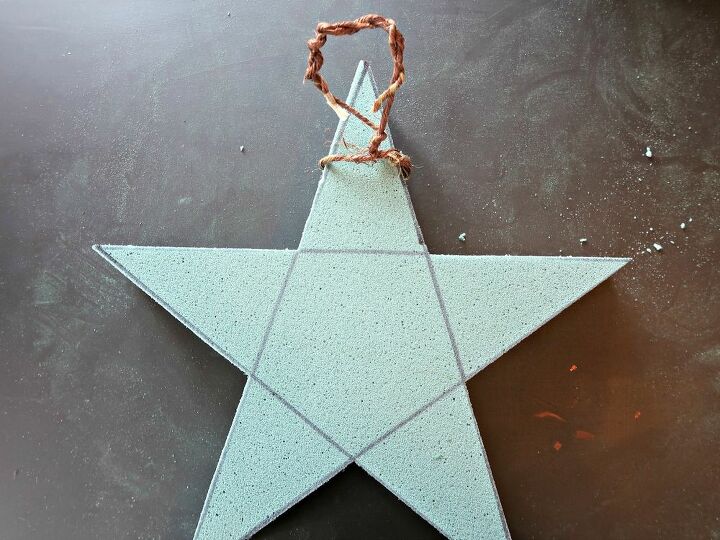
It is also worth checking that the star wreath form hangs properly now before you go any further.
Once you have finished preparing the star wreath form, soak it in water for a few minutes before decorating it.
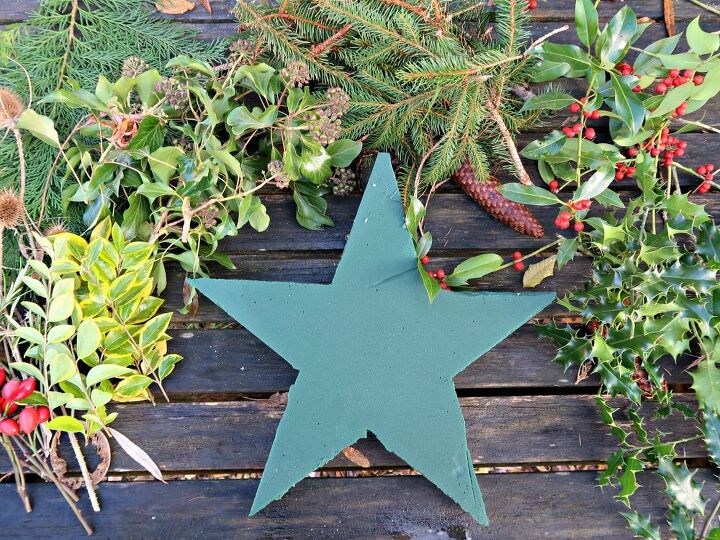
How to decorate a star wreath
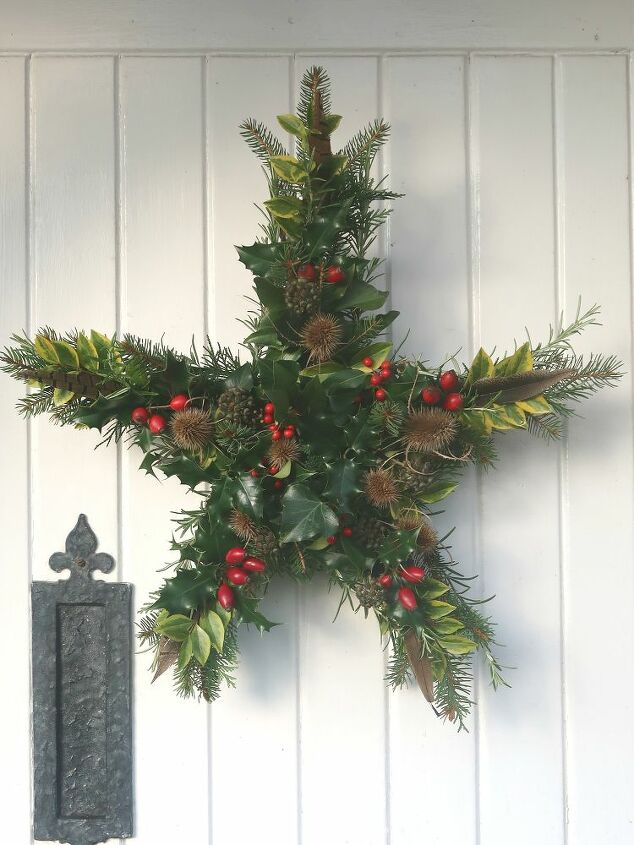
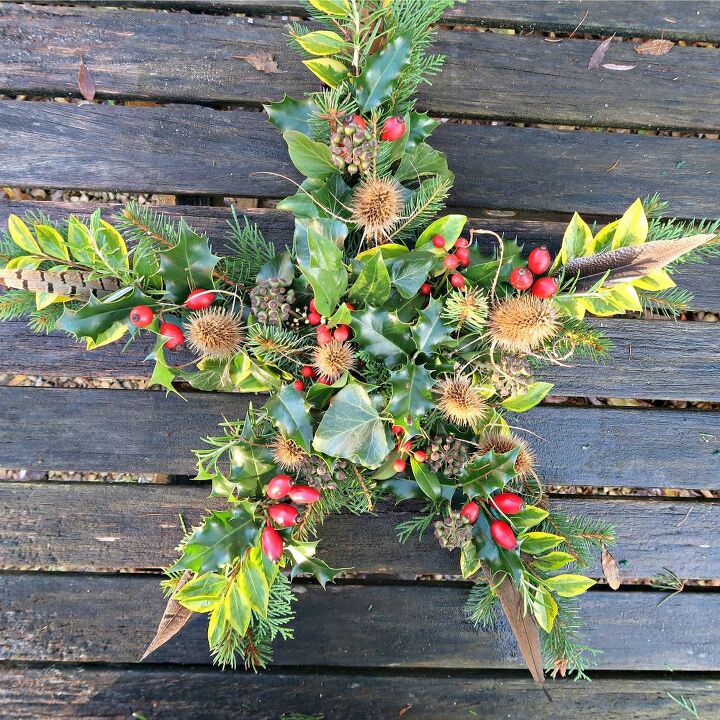
Collect a selection of evergreen foliage for decorating the star wreath. I used Holly, Ivy, Pine, Rosemary, Rose-hips, Teasels, Feathers and a couple of other bits.
Remove the leaves from the portion of the stem you will insert into the floral foam. Cutting the tip at an angle also makes it easier to push in.
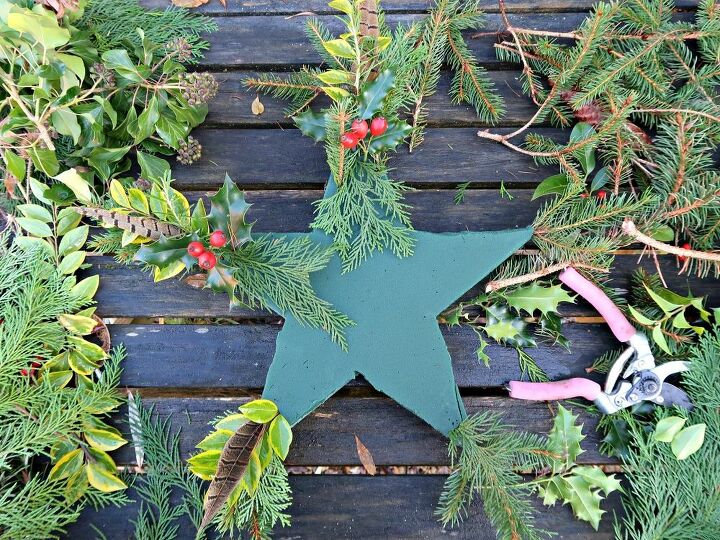
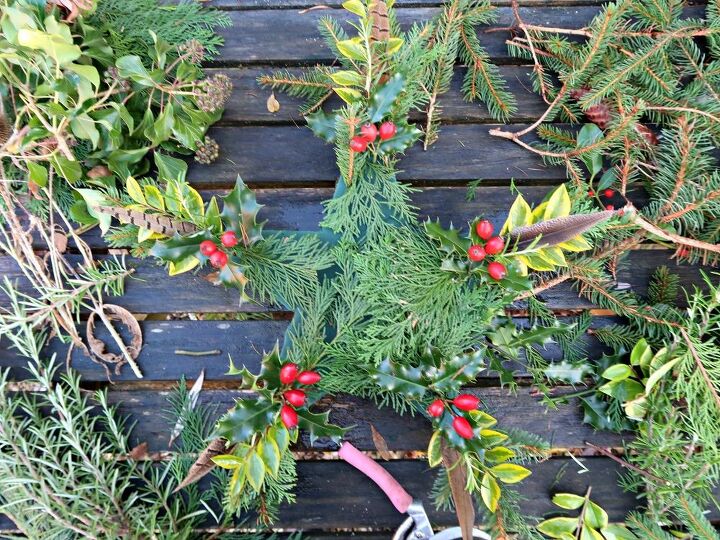
I started by filling in the points of my star wreath and made each one similar to keep the star balanced.
I managed to find Holly this year with berries on it, but if you don’t Rose-hips make a great substitute and are much more robust.
Once I had completed each of the points, I filled in the centre of the wreath.
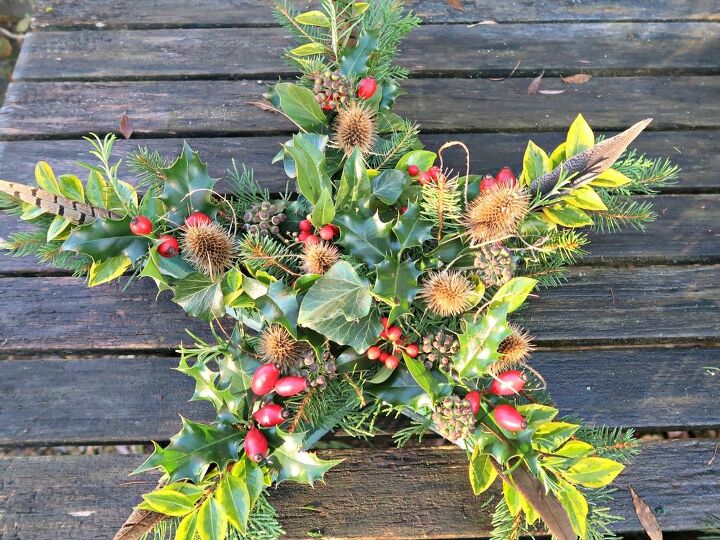
And here is my completed Christmas star wreath.
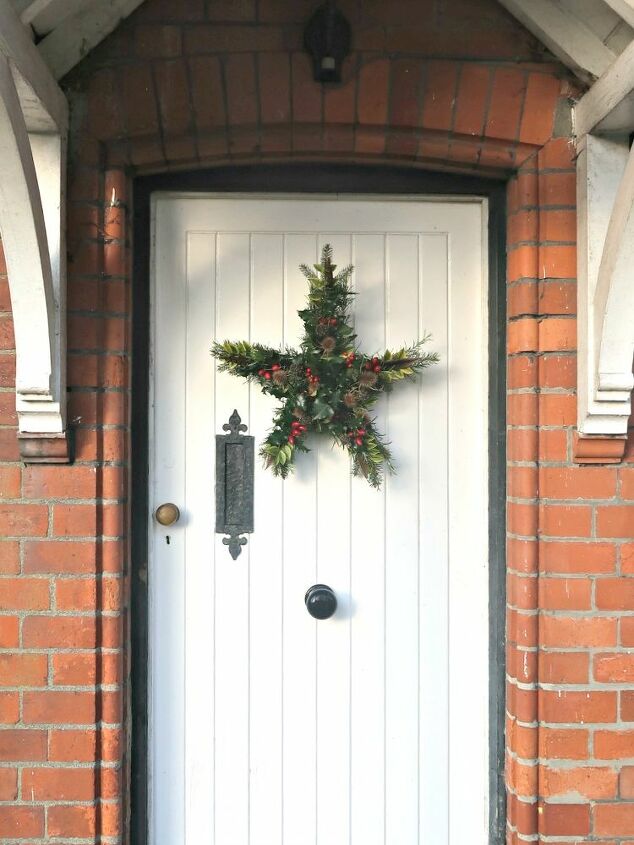
It now hangs proudly on our front door.
I’d love to hear what you think of our star wreath.
Would you hang one on your door?
Or do you think wreaths should always be the traditional ring-shaped?
If you have enjoyed this tutorial, why not check out some of my other quirky craft ideas over on my blog.
You can find a photo of the finished projects and click through links to a couple of my favourite Christmas makes below.
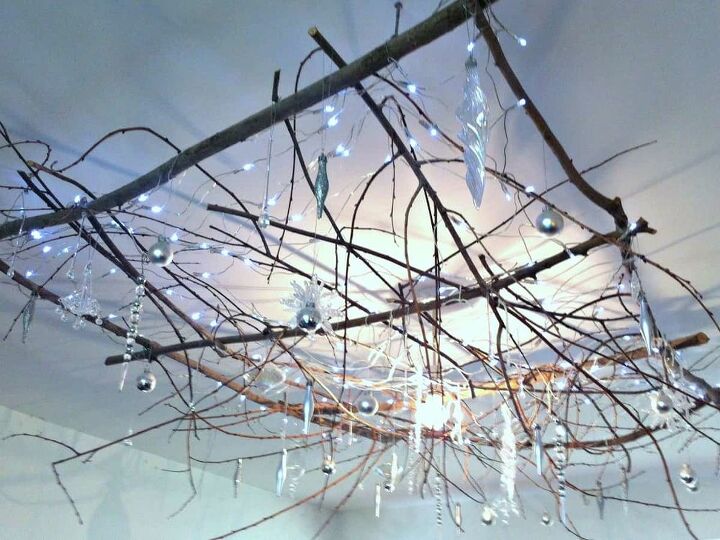
Our Twig Chandelier makes a beautiful ceiling Christmas Decoration. Check out our video tutorial to see exactly how we made it!

You will not believe how easy it is to make this Stunning Woodland Table Decoration. Made from an old barbecue grill, cardboard and glue and then decorated with candles, twinkly lights and lots of natural elements, we think it is the perfect centrepiece for Christmas or any other celebration.
How to Make a Stunning Woodland Table Decoration


Comments
Join the conversation
-
What a stunning idea! Love it! Your instructions are easy to follow! Thanks for sharing!
-
Love it, and the method for a perfect 5 (or other) point star. Thank you for sharing!


Frequently asked questions
Have a question about this project?