


How to Make Orange Slice Ornaments

If you’re looking for a snowy day activity, this DIY dried orange slice project is the perfect way to get your kids involved and create something cute to decorate your home with at the same time!
How to Dry Orange Slices
Materials:
- 4-5 Oranges
- Knife
- Cutting board
- Cookie Sheet
- Parchment Paper
- Cookie Cooling Rack
Step by Step Directions:
- Start by slicing the oranges. I sliced mine all about the same thickness. Not too thick, not too thin. You what them somewhere in the middle so they’ll dry out and so they won’t crumble when you create the ornaments or garland.
- Next, place the oranges on the cookie sheet. I used a cookie drying rack to raise them up off of the sheet. This allowed them to dry out faster. I also laid mine on a piece of parchment paper on top of the drying rack. I’ll be honest and say I read somewhere that I should do it that way but I’m not really sure why.
- Next, take a paper towel and dab the oranges to soak up some of the extra moisture. The entire idea is that you want to dry them out as much as possible. So by doing this, you take out the extra juice and speed up the drying process.
- Set your oven to 200 degrees fahrenheit. Place the oranges in the oven and let them roast for several hours. The longer you can leave them in, the better. Mine probably stayed in for three hours.
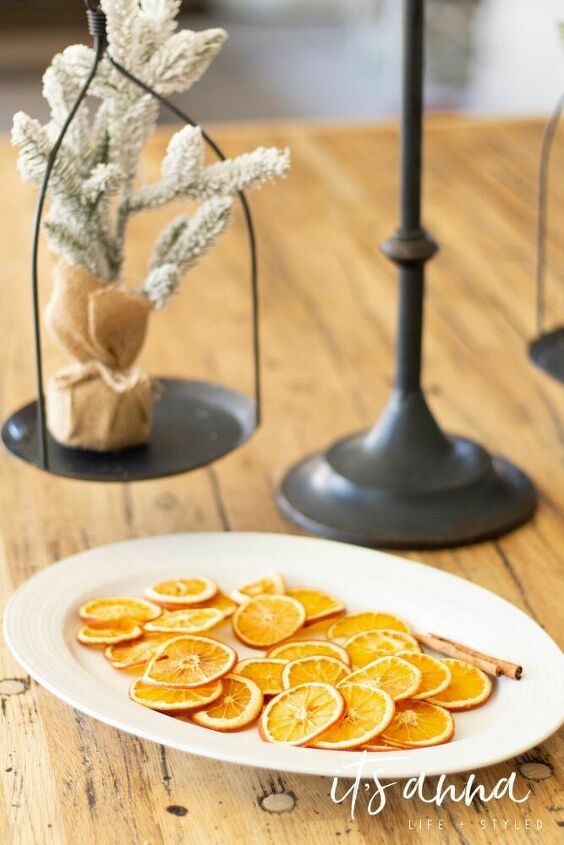
- You will know they are ready to be pulled out when the peel turns a deep golden orange/brown. They will also start to lift a bit and that will be another indication.
How to Make Dried Orange Slice Ornaments and Garland
Materials:
- Dried oranges
- Twine or some other type of string
- Scissors
Step by Step Directions:
- Some of the oranges you dried will likely have a hole in the center. This will make it easy to string the twine through. Some of them will not. I took a pair of scissors and gently cut a hole into the center of the oranges that did not.
- Next, you will take a 4” piece of twine and feed it through the hole in the center of the dried orange slice.
- Tie the ends of the twine into a knot and cut of any excess twine at the ends.
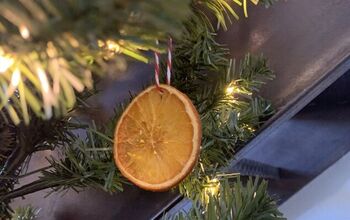
- Hang your ornaments on your Christmas tree!
- To make a garland instead of ornaments, you will just feed a longer piece of string or twine through the center of the orange and continue to feed the twine through as many oranges as you would like to add to your garland. The amount of twine and oranges will depend on the length of your garland. I recommend measuring where you plan on using the garland first and then going from there.
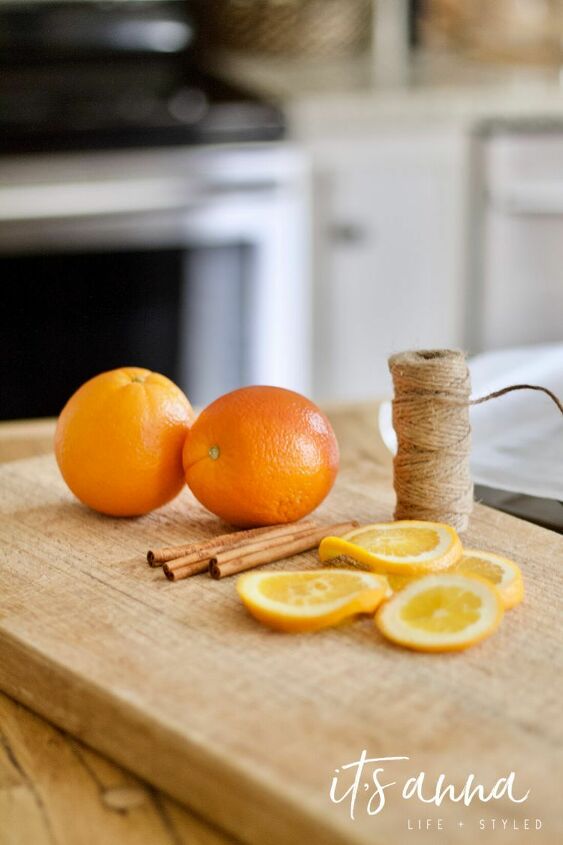
Start with 3-4 regular oranges. Cut medium thick slices.

Lay the slices out flat on the cookie sheet and dab dry with a paper towel.
Leave in the oven on 200 degrees for 3-4 hours.

String a piece of twine through the center of the orange and tie a knot.


Comments
Join the conversation
-
I would like to see a picture with more of the garland can't actually see how it looks on the tree. Please.
-
Hi Teresa, these kept for me all season long (so 4-6 weeks). I'd say the house smelled of citrus the day I made them but it didn't linger for that long. Hope this helps!


Frequently asked questions
Have a question about this project?