


A Unique and Updated Look for That Old Side Table

11 Materials
$50
2 Days
Medium
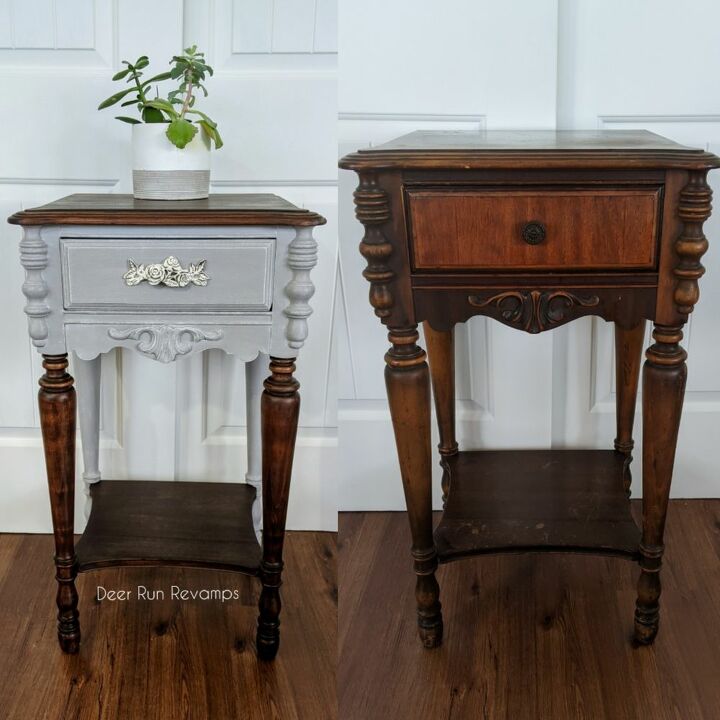
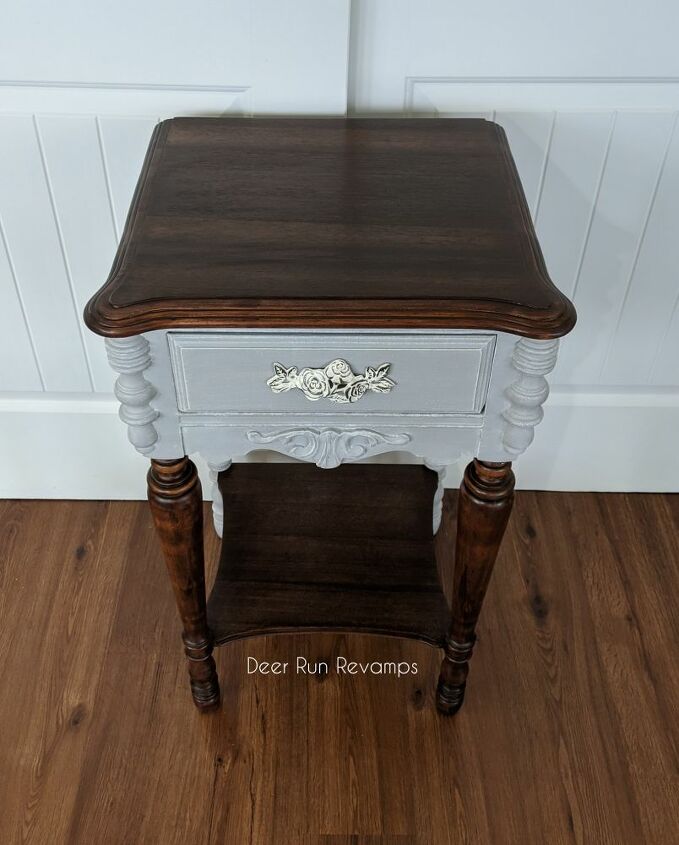
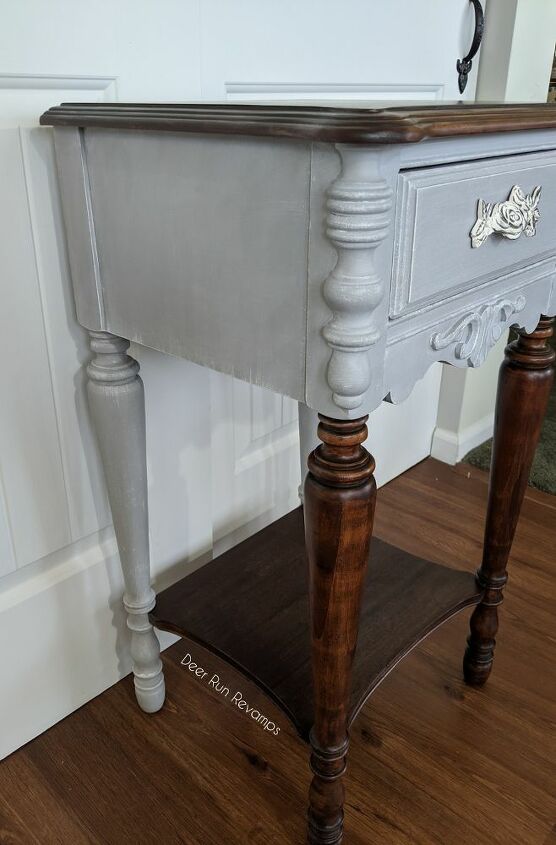
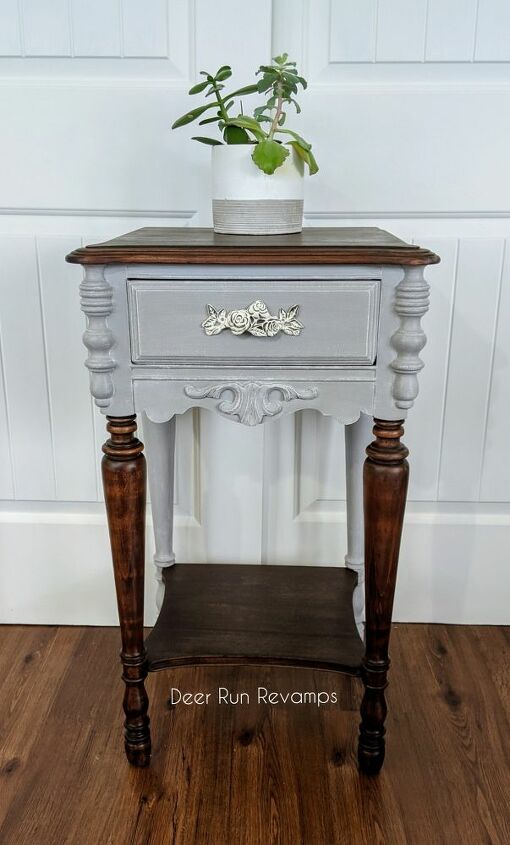
The hottest trend right now in the furniture market is a mix of wood and paint. The contrast is always stunning! This solid mahogany wood side table was in rough condition. The back leg had a large, deep gash that needed to be filled. The other leg had lots of Nick's that also needed to be filled in. I'm not a fan of staining over wood filler, it never looks right. And I didn't have a dark enough paint to blend it in, so I wanted to paint the back legs. But, the front legs were salvageable. So, I decided to do half paint, half stain 😉 Here's how I did it....
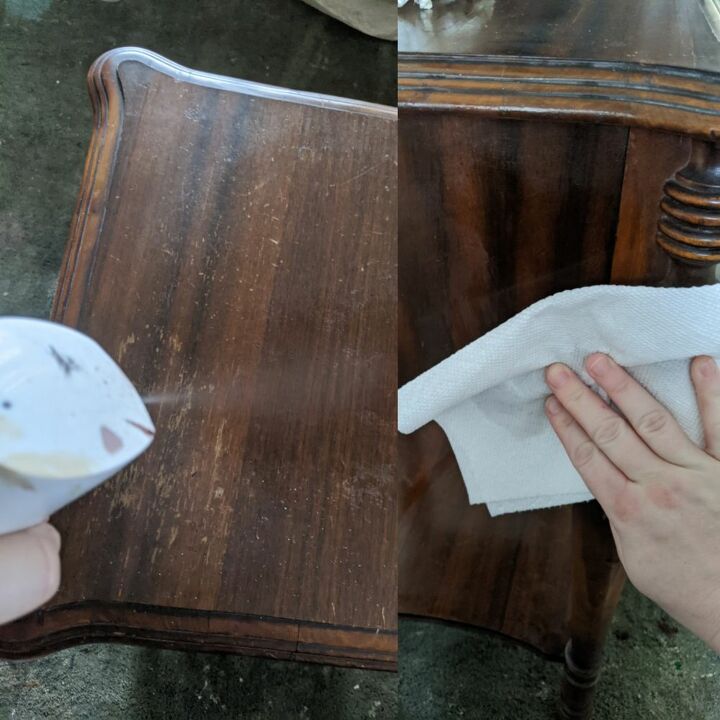
As always, clean the piece! You'd be surprised how much dirt and grime comes off of a piece that looks relatively clean. I prefer to use Frenchic's sugar soap. It's non toxic but gets all that dirt off easily. After washing it down with sugar soap, I wipe it down with plain water.
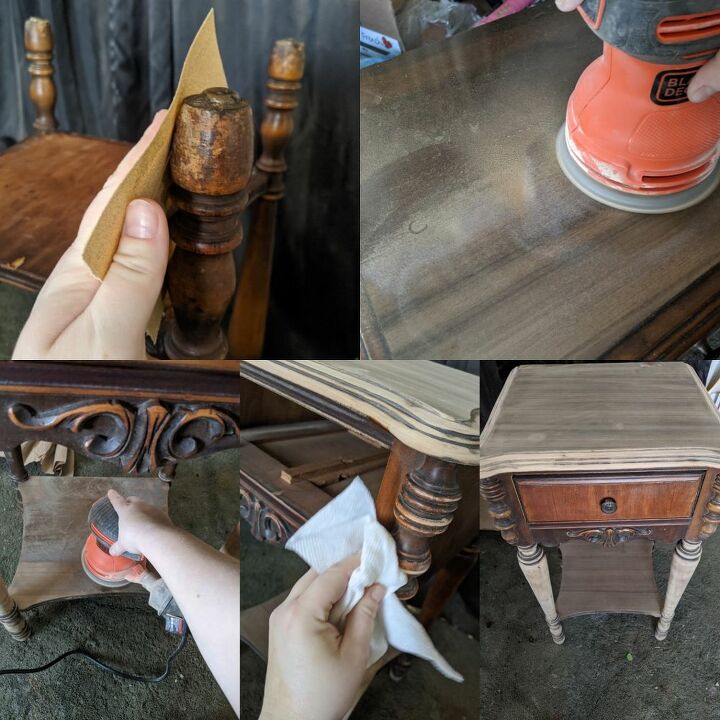
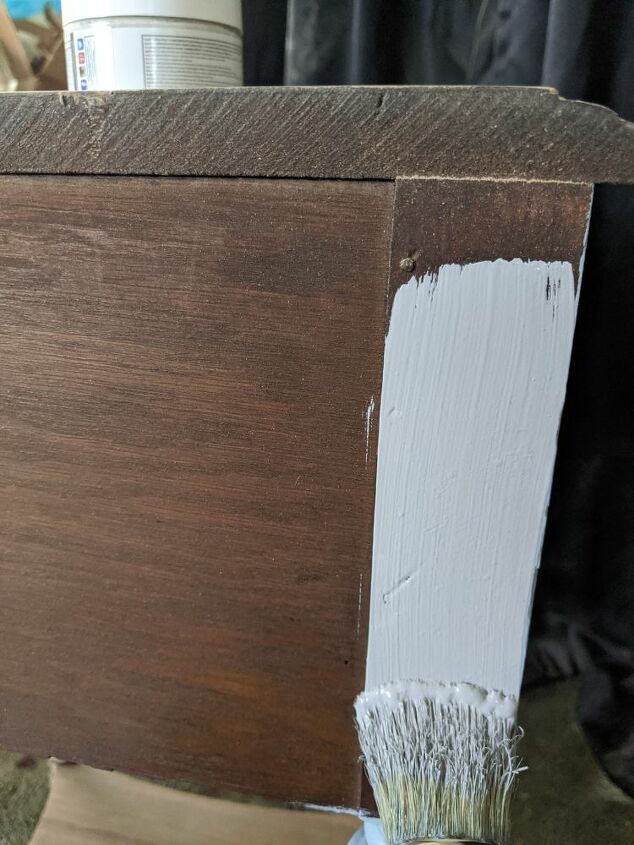
Now, it's time for the dreaded sanding. Where you're painting, do just a quick scuff sand with 220 grit sandpaper, this gives the paint some "tooth" to grab onto. Where you want to stain, you have to sand down to bare wood. If veneer, be carefully not sand through it. This piece was so old, the finish was basically worn off, so I didn't need to strip it. But if your piece has a thick finish, it'll be a time saver to strip it off. Start with 100/120 grit sandpaper. For the legs, I sanded by hand. For the flat parts, I used my orbital sander. Sand majority of the finish and color out. Now move to 150/180 and continue sanding until all bare wood. Finish off with a quick 220 grit sand. Then wipe down and remove all sanding dust. For my piece, I wanted some variation in color, so I left some of the old stain on the legs, especially in the details.
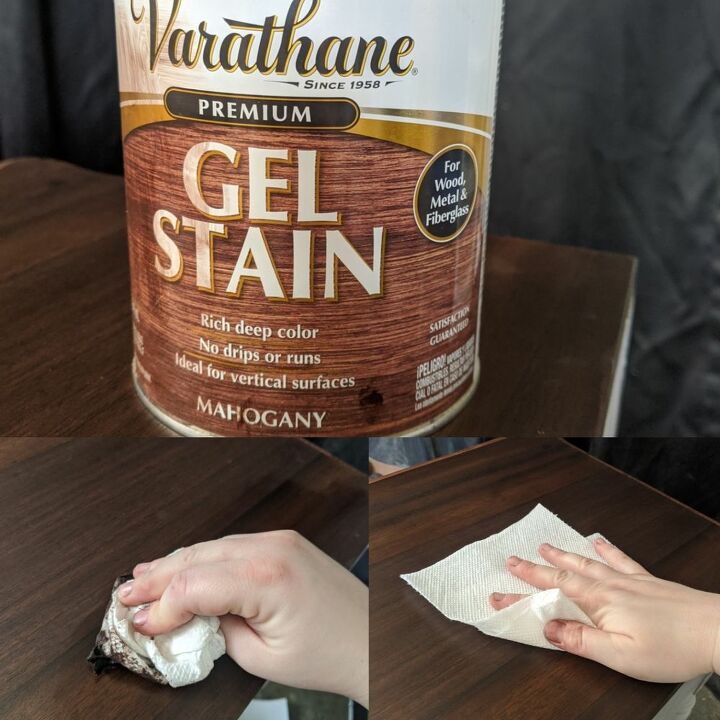
Grab your stain and a clean cloth. I like using either old t-shirts or paper towels. I used varathane gel stain in Mahogany. Gel stains can be used like a regular stain- apply and wipe off; or they can be left on for longer periods of time, which gives a darker/deeper color and hides more of the wood grain. I applied and immediately wiped off.
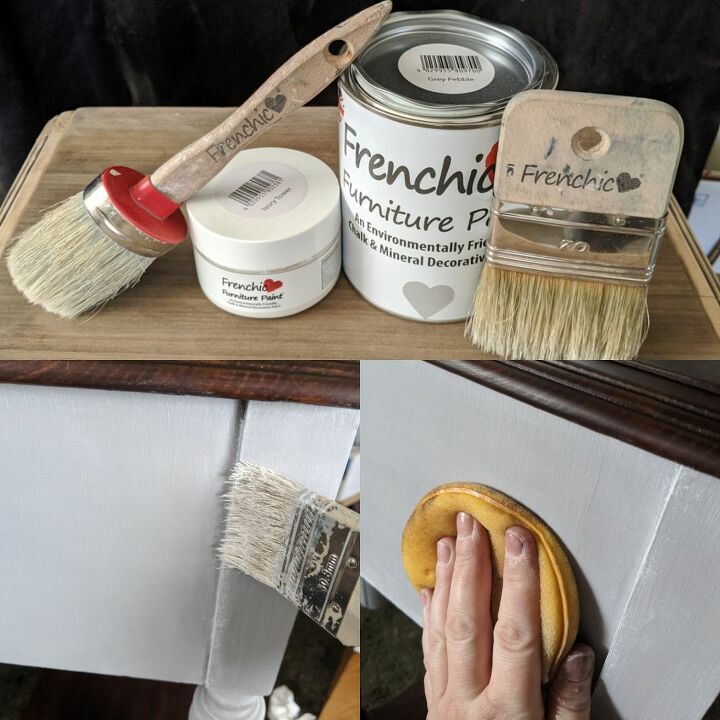
Now, we can paint. I used Frenchic Furniture Paint's "Grey Pebble". Frenchic is a creamy, non toxic mineral and chalk paint that is new to us over here in the US. I only needed one coat with a light second coat in spots.
Once the paint was dry to the touch (about 20-25 minutes), I dry brushed Frenchic's "Ivory Tower" over top to accentuate the details and edges. (Dry brushing is when you take a dry brush, add a very small amount of paint to it, dab most of it off, and lightly brush over areas that you would like to highlight) Finally, using a sponge, I finished off with Frenchic's white wax.
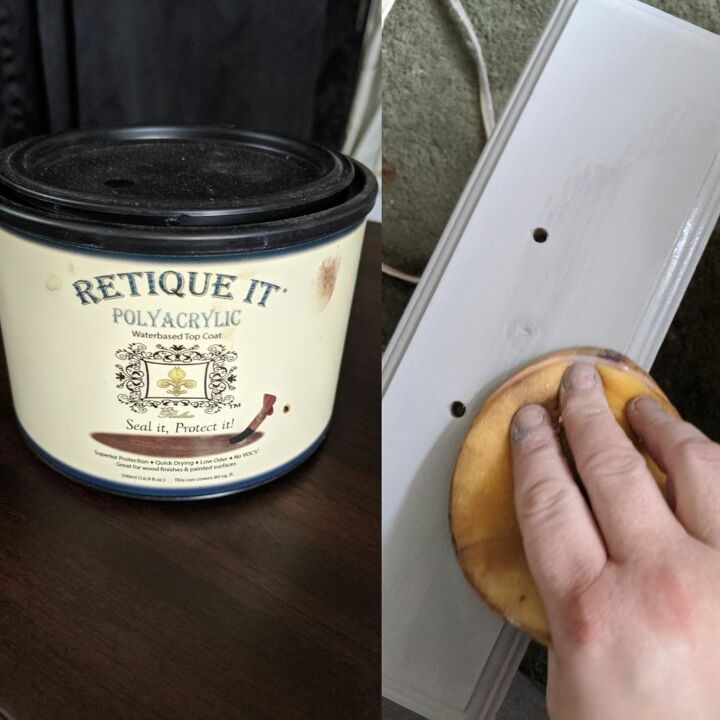
For the wood...After the stain has dried for at least 36 hours, apply Retique It's waterbased polyacrylic. I like to apply 3 coats to the top, 2 coats elsewhere, waiting 2 hours in between coats.
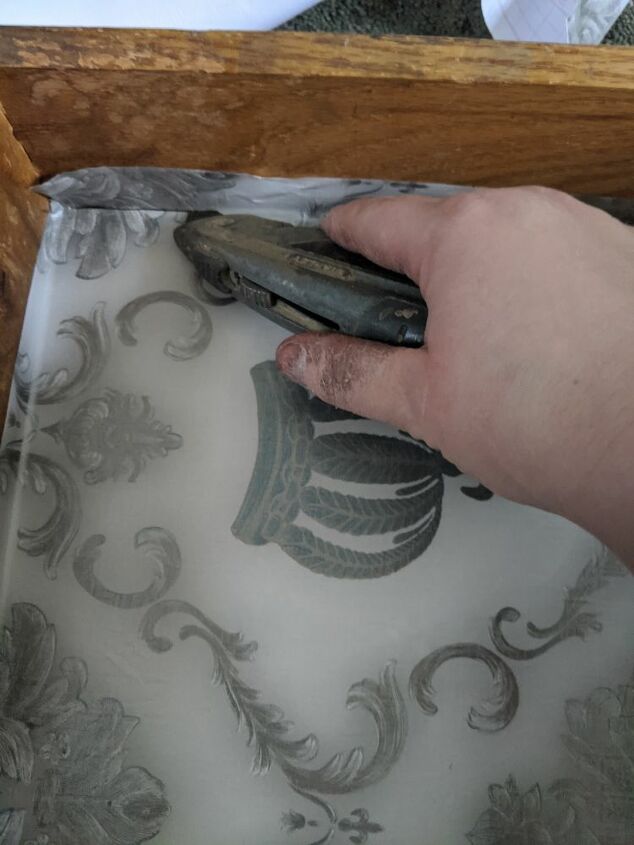
For the final touches, I added a new pull that I had in my stash and some pretty contact paper to the line the drawer.
This style was a huge success and sold within minutes of listing it
This piece required a very small amount of product. You'd be safe ordering the small containers of Frenchic Furniture Paint

You can grab everything I used here plus so much more in my Etsy shop. Products are linked below. You can follow me on Facebook and Instagram as well @Deer Run Revamps
Resources for this project:
See all materials


Any price and availability information displayed on [relevant Amazon Site(s), as applicable] at the time of purchase will apply to the purchase of this product.
Hometalk may collect a small share of sales from the links on this page.More info
Comments
Join the conversation
3 of 49 comments
-
No need to clean the parts you are going to sand, you are sanding the dirt off.
-
Wouldn't even begin to make anything as beautiful. Loved the transformation


Frequently asked questions
Have a question about this project?
Well it was a great piece before the paint. If the wood is in good shape or can be repaired why paint it☹️
What did you use the blending brush for? Thanks! Great job!
I'm not familiar with "sugar soap" . Is this a commercial product available nationwide? Or a home creation? Thanks!