


Dying Sola Wood Flowers

6 Materials
$50
4 Hours
Easy
My wedding is Officially less than 3 weeks away! Oh goodness how time has flow! I bought these beautiful Sola wood flowers back on Black Friday, I got a great deal! I thought wood flowers for my wedding would just be so perfect! I love all things wood, so why not wood flowers?! And I love the reaction I get when I tell people my wedding florals are wood?! Haha! So fun! If you’ve been following my crafty chaos, you already know I love a good deal. With that being said, the Sola Wood flower dye they sell on the website goes for $4/oz! And from my research I found that it’s nothing more than acrylic craft paint that you add to water. So that’s what I’ll be using in this tutoriall, $0.79 acrylic craft paint from Micheals. And that’s $0.79 for 2 oz of paint.
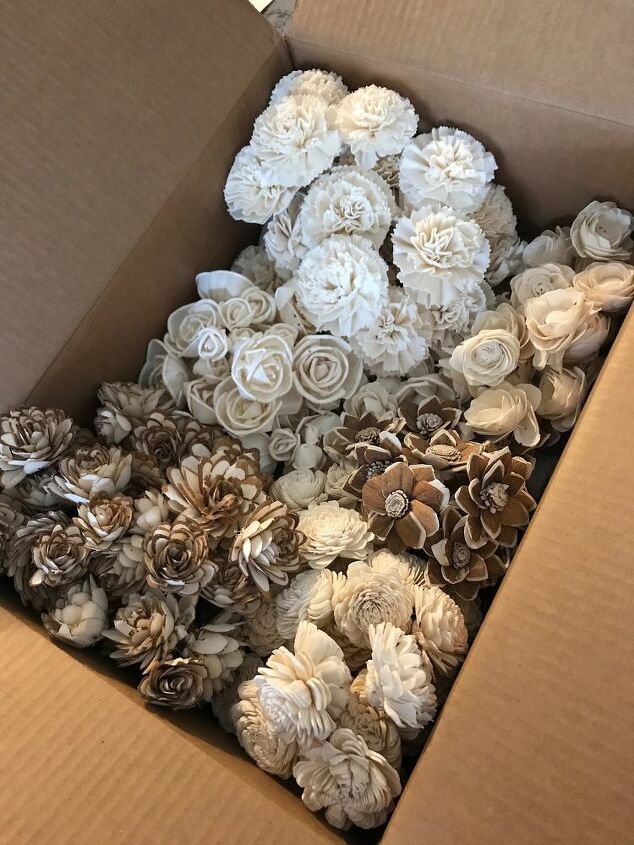
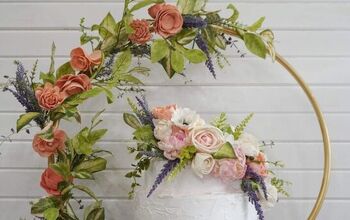
Aren’t they pretty! I’m so obsessed! I got 200 Flowers’s for $40 on Black Friday, and I’m so glad I did! I have been eyeing these for moths but was concerned that I would get them and they would all be damaged, if the 200 only 5 were damaged beyond use! Amazing! For this project you will need:
- Sola Wood flowers
- Acrylic paint
- bowls (1 per color)
- water
- plastic forks (1 per color)
- paper towels
- something to protect work surface, this is messy!
- gloves, not a must but I highly recommend
- somewhere to lay them out for at least 24 hours to dry (I used a wire shoe rack covered in paper towels)
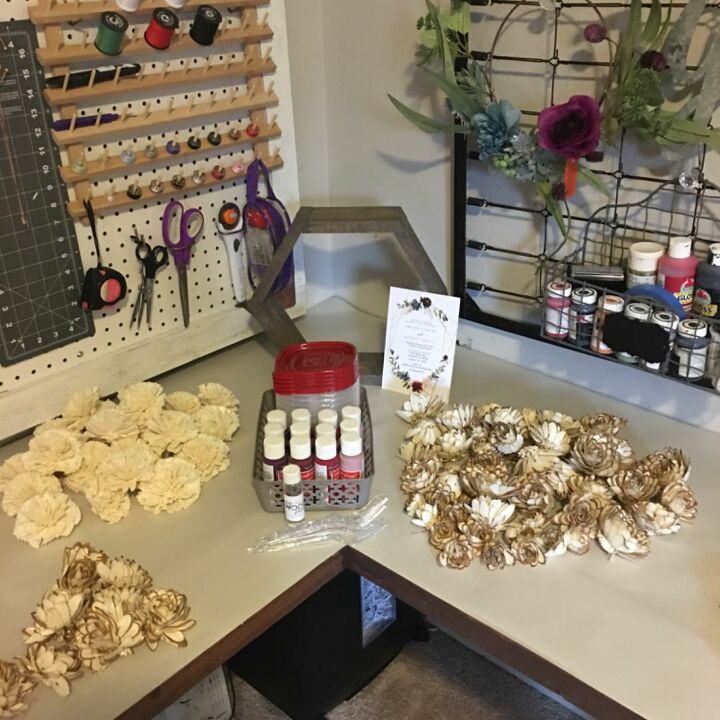
The setup! I laid out paper and separated the flowers by type and got my paints and containers ready, I was concerned I wouldn’t be able to finish them all in one sitting, so I did opt to use Rubbermaid containers with lids so I could save my “dye” for another day if needed.
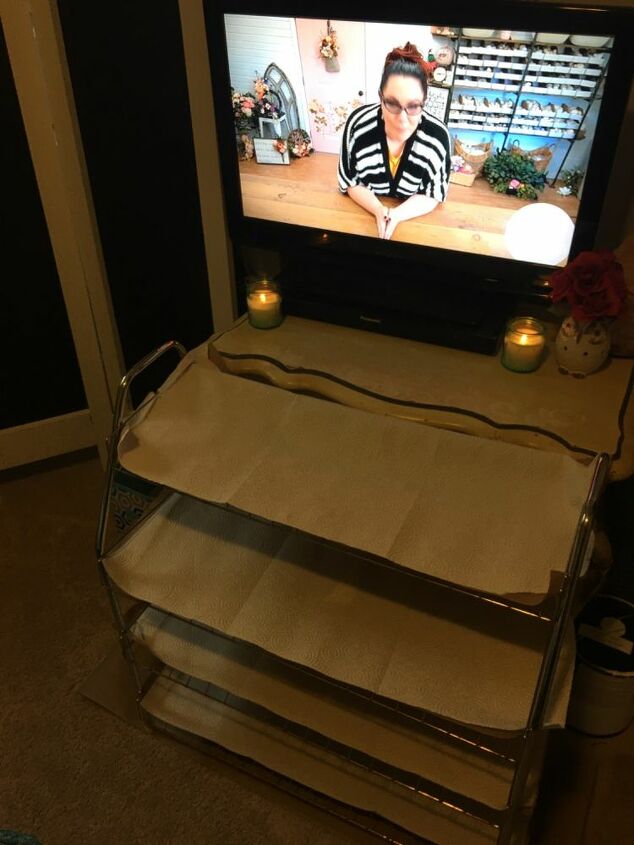
I set up a shoe rack with craft paper and paper towel to set them out to dry. I watched quite a few videos from “oh you’re lovely” on YouTube to get the process for this right, check her out she has so many good ideas! That’s what was playing on the tv in the background!
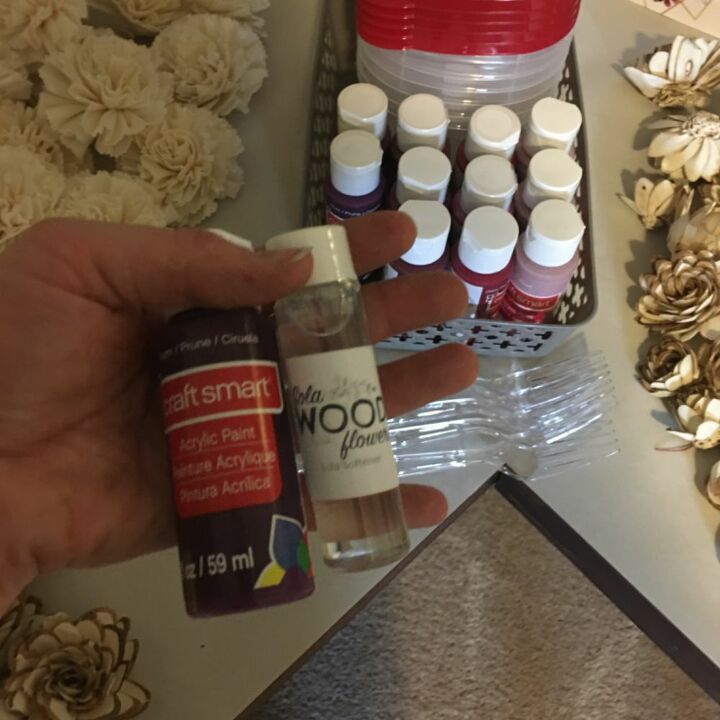
I also ordered the wood softener, the reviews said it helps soften the wood and makes it more durable, I will eventually be transporting all of these to the venue so opted to buy it to hopefully reduce damage in transport, I couldn’t find any really clear instructions on how much of the softener to use so we just added a capful to each color. Start mixing your paint and water, I added about 6 oz of water and a whole container of paint. I wanted multiple variations in color so I split the mixture in half, added More water to one half and used this mix on some other flowers, I love the gradient it gave! Same color but different richness I think is really going to add depth!
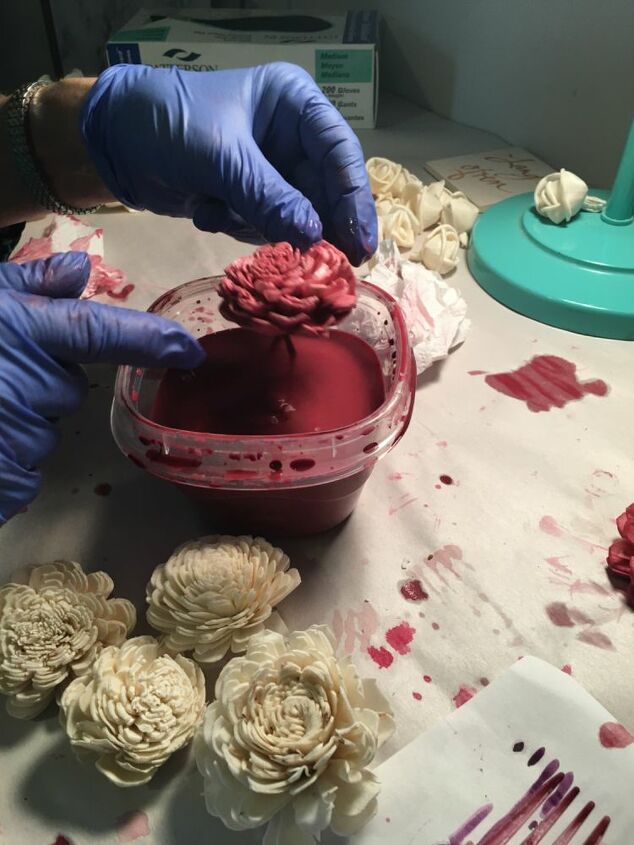
Dip the flower in the mixture and lightly fan out the petals, the water softens the wood and makes them more pliable, so you can shape and fluff the flowers while dying them, I had to dip some of them multiple times to get the dye down in all the creases, but overall it’s a pretty easy process!
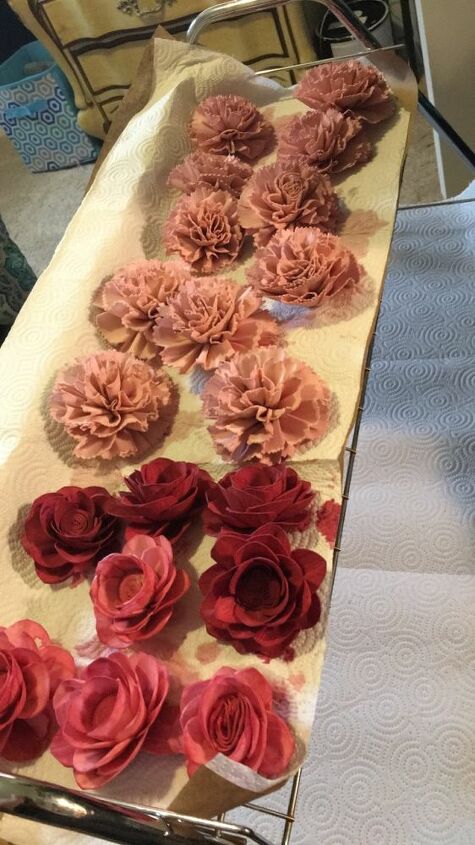
The burgundy flowers on the end were the ones I used the same mixture twice with different amounts of water, I love the subtle difference! I did the same with the pink, I’m obsessed! So with 2 paint colors I got 4 colors of flowers! I love it! I also left some “raw” since they are a nice cream color.

Aren’t they beautiful, and can you believe they are WOOD?! If you’ve seen these and we’re skeptical to buy them, DO IT! This was so fun to do! And easy! I expected to break at least a couple and that didn’t even happen! And the few that were damaged, ended up looking okay once I played with them in the dye! So! I’m even if you damage them, you can play with them to get them back to shape! So excited to start assembling my centerpieces using these!
Resources for this project:
See all materials


Any price and availability information displayed on [relevant Amazon Site(s), as applicable] at the time of purchase will apply to the purchase of this product.
Hometalk may collect a small share of sales from the links on this page.More info
Comments
Join the conversation
4 of 14 comments
-
Thank you for your tutorial! I bought some sola wood flowers too. But, just cause. THEN my daughter announced she's getting married this summer...so guess what?!
 Now I know how to paint them. Thank you very much! Yours look beautiful! And Congratulations!
-
These look amazing! I'm thinking about using wood flowers for my wedding as well. Where did you buy from? I've seen some pretty mixed reviews of different sites that sell them.


Frequently asked questions
Have a question about this project?
Wait wait... don't stop now... how did you attach them to Stems or to finish making your arrangements/bouquets?
I was wondering if the raw flowers you might have dipped in the softener as well?? Congratulations on the wedding!!
The video of the lady she used is from “oh you’re lovely”. Also as a florist sola wood flowers company is the worse to buy from. Oh you’re lovely or luv my flowers would be your best bet!