


Rockery Wall Redo
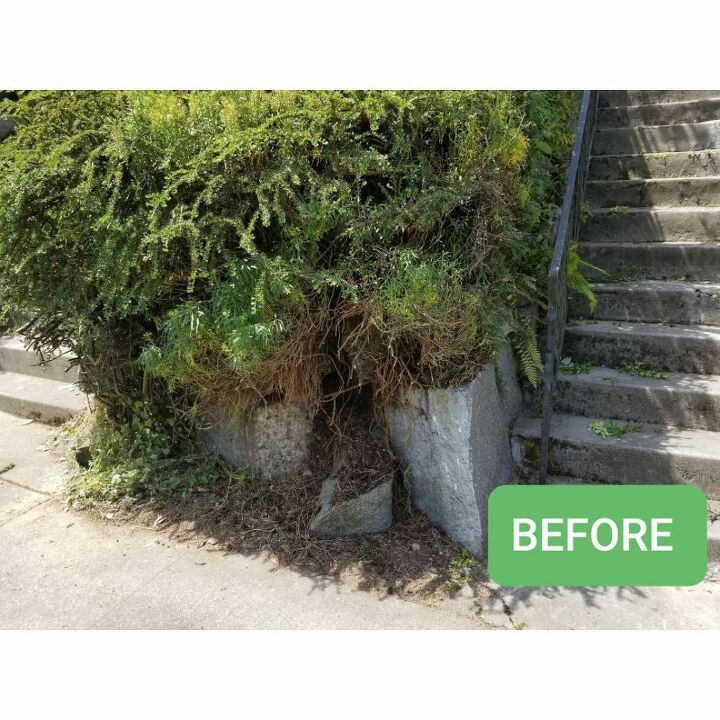
Before buying our house in Seattle, I had never heard of a rockery wall or Alpine garden. Our home has a two part rock wall that is separated by our staircase. The whole front yard is basically rock wall. Some of the existing plants, like ferns, were fine. But the majority were overgrown beyond pruning. With very little budget, I set out to tame the wild wall.
A neighbor told me the presence of rocks in the area is due to glaciation millions of years ago. How cool! As I was digging up plants, I found tons of rocks. In Southern California I would purchase bags of "river rocks" for my yard, while in Seattle I found them buried in my yard for free. I set aside the rocks I found and used them along the base of the rock wall and other areas of the yard.
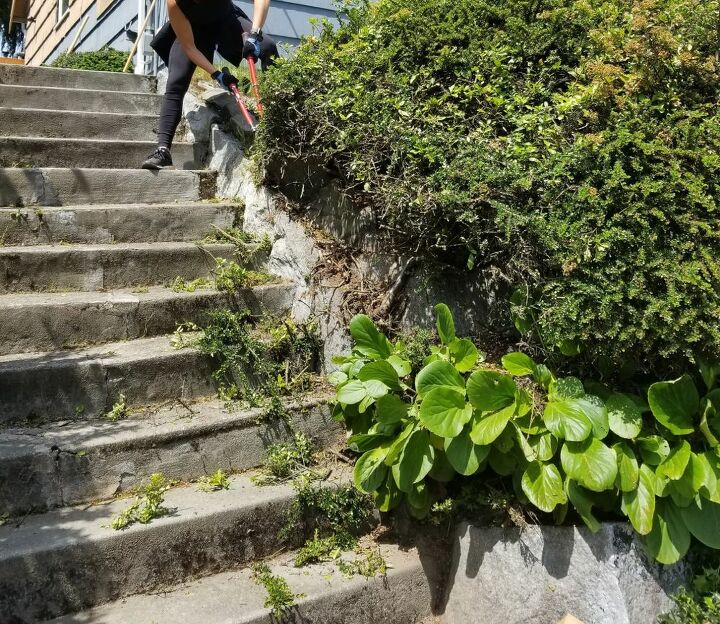
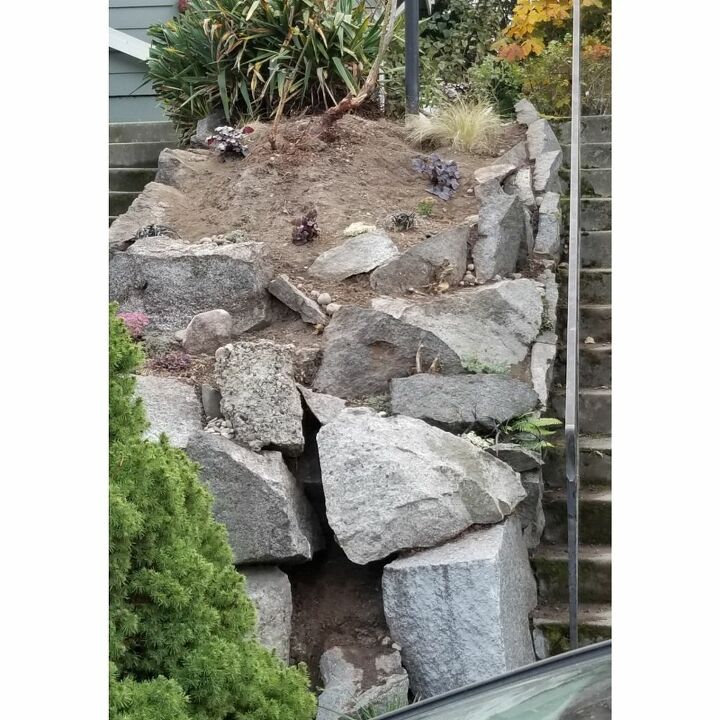
The photo above is actually the other side of my wall. I didn't take any photos while clearing the section of wall seen in my "after" photos. But the methods used were the same; cut back shrubs then dig out the roots, remove excess soil. Some of the rock spray plant roots are so hard to reach in the crevices of the rocks that I let them be. In small scale, they are fine, but in their over grown state they look like haunted house plants!
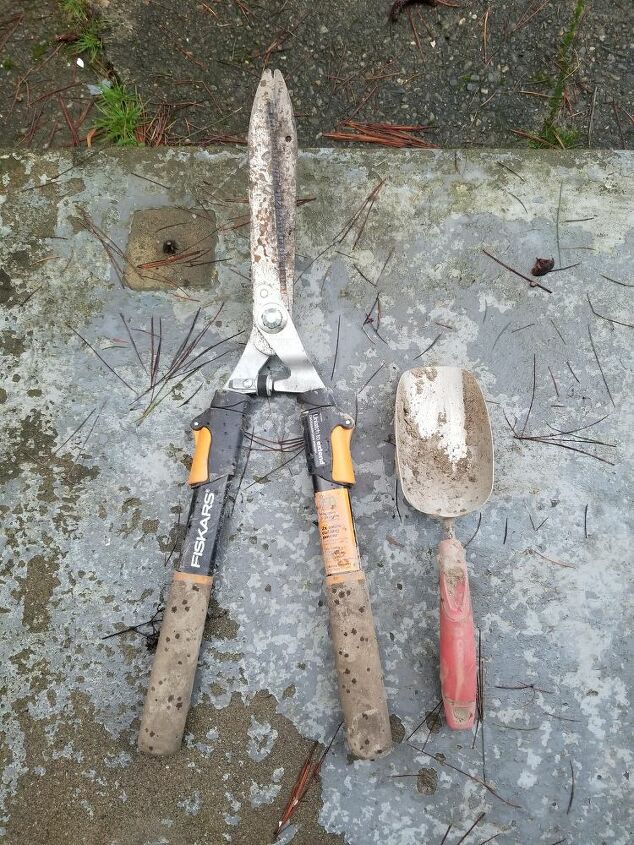
When I started this project I didn't have a lot of garden tools and my budget was very tight. I made do with my shrub shears for cutting through the thick plants. Luckily, there weren't too many woody plants to remove.
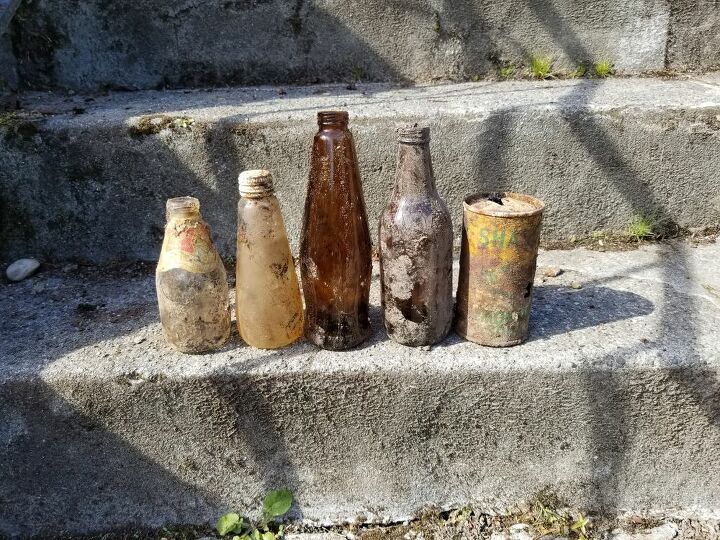
After pulling out the overgrown plants, I had to dig out some of the dirt to get to the rocks making up the rock wall. Buried there I found old bottles and cans, as seen above, bottle caps, toys, broken perfume bottles, and lots of candy wrappers. As I cleared out the dirt, I was able to see what the wall actually looked like. Luckily, it is stable and in pretty great condition.
My goals for the plants in the rockery were low maintenance, year-round interest, and small scale. Helpful folks at a local nursery helped me to pick out some great plants. My sister-in-law gave me some succulents from her own rock wall, and a cherry tree that I placed at the top. I left the existing ferns in place and I found some good plants in the sale sections of nurseries and big box stores. If I did buy a full price plant, I bought the smallest version of it.
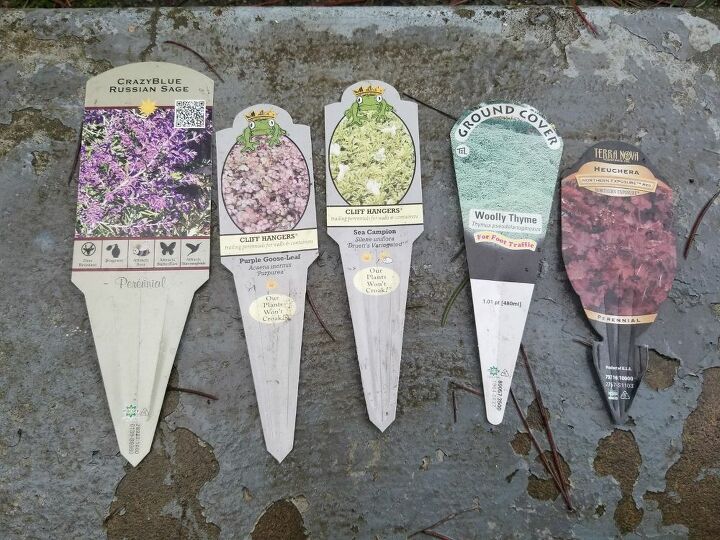
The plants seen in the above photo are:
Crazy Blue Russian Sage
Purple Goose Leaf
Sea Campion
Wooly Thyme
Heuchera (I used a few different varieties)
There are also some Hebes, Heathers & Black Mondo Grass and other grasses, but I can't recall their names.
This was my first time planting on a large scale from scratch. In the past I had container gardens or inherited yards where I planted some new things here and there. It was really exciting to watch the space fill in, to see what worked well together. I especially love how the Sea Campion, Purple Goose Leaf and Wooly Thyme cascade over the rocks, softening the angular edges of the rocks.
I feel like it took me most of one summer to clear the space, and then part of the early fall to add some plants. I probably worked on this part one or two days per week, for one or two hours. In the time estimate I stated 4 weeks.
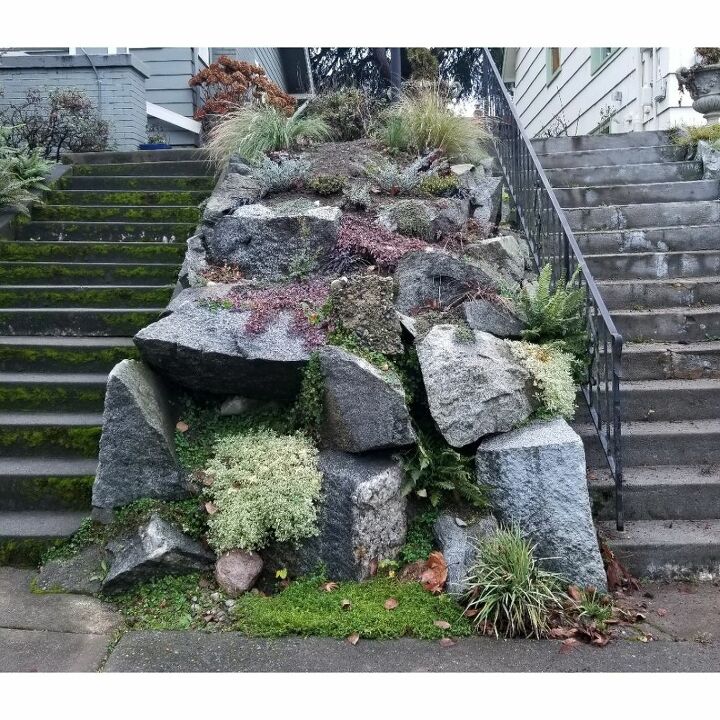
These plants are coming up on their second summer and I'm really pleased with the way they grew in. Last summer I moved a few plants around and added in some new ones, like the Hebes and Heathers, but mostly left it as-is. One thing I need to do is lay some weed barrier cloth. Weeds spring up like crazy.
I can't rattle of the scientific names of the plants yet, but my thumb is getting greener. Many neighbors have complimented how well this wall has turned out. One neighbor said he didn't think I'd be able to make anything so nice out of the mess that it was! I remember I would be outside usually during my son's naps, battling with the overgrowth, and this neighbor would walk his dog at the same time. Little did I know he thought my work was in vain! Many people would stop and encourage me, which was sweet. Between gardening and walks with my son, I got to know a lot of neighbors. Many of them probably think I'm mad; muttering to myself in the yard, cursing stubborn roots, dirt all over me, hair flopping around. Oh well, suits me fine to be the crazy plant lady.
To see another area of yard tamed, read creating a planter bed for a peek into my backyard.
If potted plants are more your speed, check out steps and tips to pot a succulent plant.


Comments
Join the conversation
-
This turned out beautifully. I'm doing one in the spring. Gives me ideas.
-
Very beautiful. You didn't give up and now even the neighbors can enjoy the fruits of your labor. One day at a time!!


Frequently asked questions
Have a question about this project?
Simply gorgeous - Happy you ignored naysayers!
I am thinking of adding rocks to a hard to mow bank in our yard. If I put down weed barrier cloth, should I put down soil between the rocks and put in plants or should I leave plants in the containers they come in and set them between the rocks?
Wow, beautiful!
Did you paint the stairs green or is that moss? Don't change that, it's so pretty!