


Make Your Oven Look New: Easy DIY Oven Door Cleaning for Under $5

Have you ever been frustrated by a stubborn stain underneath the glass or on the inside of the oven door, or noticed a mark on the finish of your appliance you can’t off no matter what you try?
Are you looking for an easy DIY oven door cleaning trick to help you get rid of those stains forever?
The patches of rust deep inside the trim of my oven door had been bothering me for a long time and I needed to find a way to remove it.
Instead of trying to work on a solution with the door in place, I decided to figure out how to remove the oven door before tackling the rust.
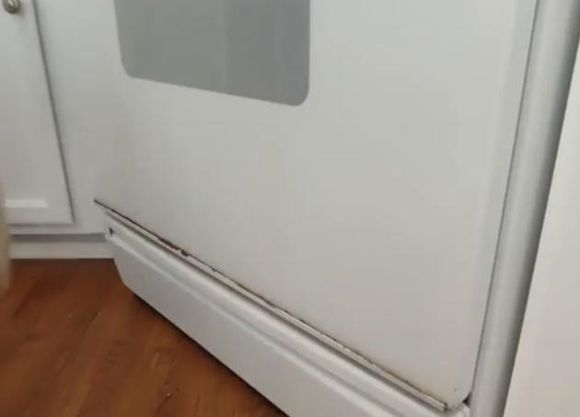
After learning how easy it is to remove the oven door, I was able to clean my oven door and get it looking new again for around $5, or the cost of a small bottle of appliance touch-up paint.
Instead of giving up on ever regaining the brand new look your oven once had, try this very simple tutorial to get those hard to reach areas looking spotless!
Tools and Materials:
- Dish Soap
- Sponge
- Wire brush
- Old toothbrush
- Appliance touch-up paint
- Wrench or Screwdriver (Depending on your oven model you might need tools to remove the door hardware and will need them if you want to clean any small trim pieces)
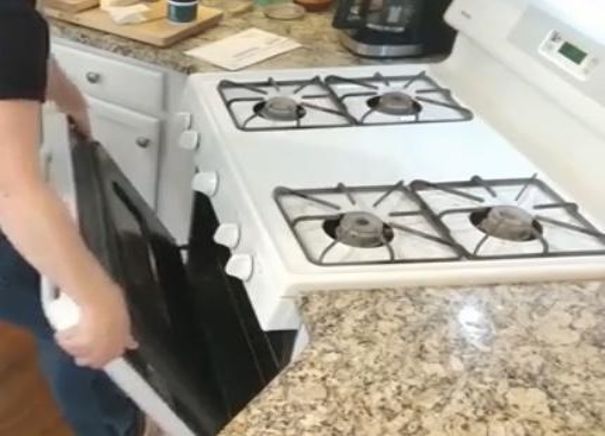
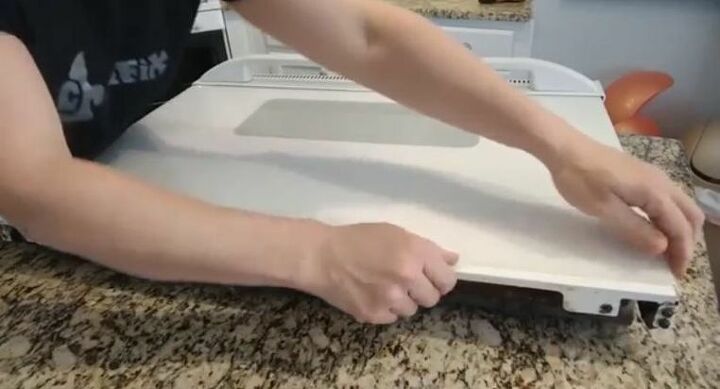
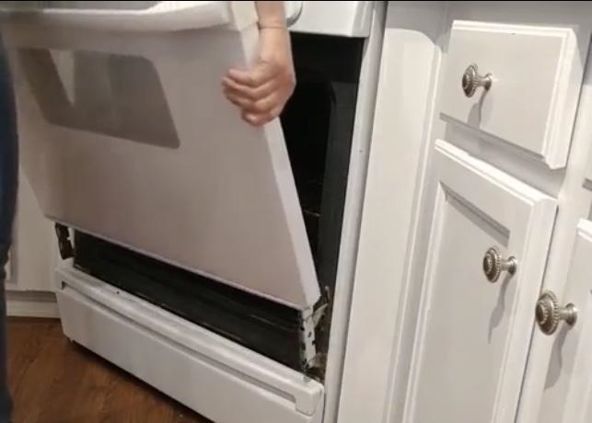
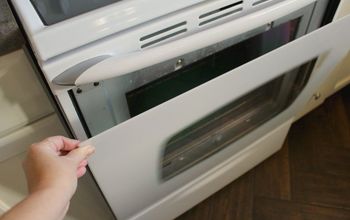
1. Remove Oven Door
Open the door and gently pull up on both sides of the door. Lift up and toward your body to remove the door. Mine lifted out so easily without having to remove any hardware.
Be sure to ask for help if the door is too heavy to lift and hold and always consult your user manual to determine if this removal method will work best on your oven.
2. Place Oven Door on a Flat Surface
I carefully placed my oven door, glass side up, on my counter where it would be easy and convenient to work with and clean it.
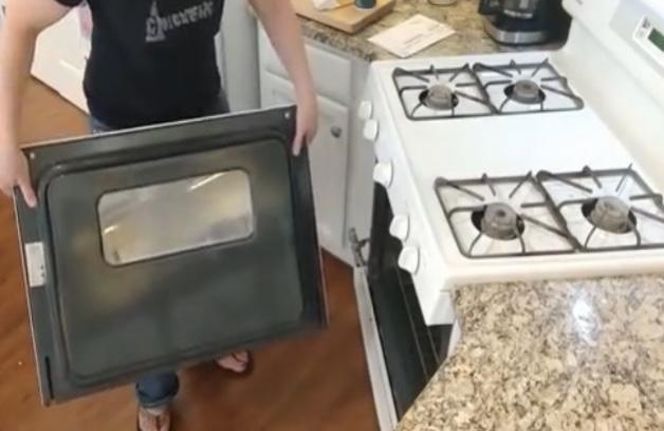
A table will also provide a safe surface with no risk of dropping or damaging the door.
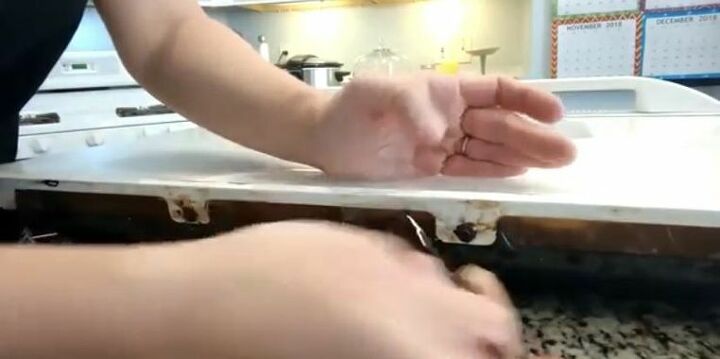
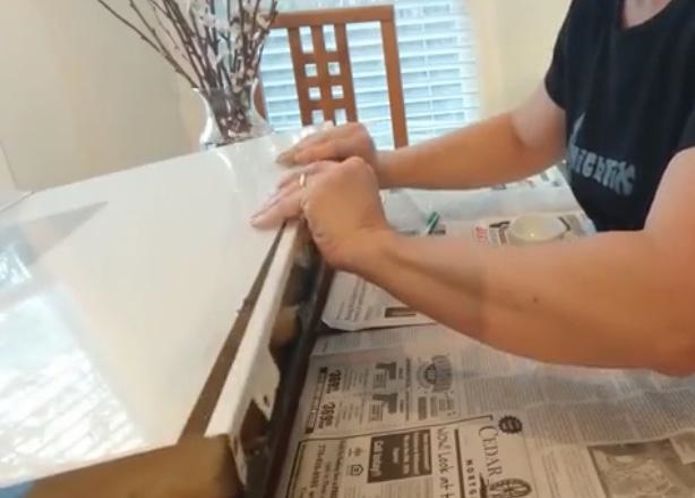
3. Remove Oven Door Screws
I unscrewed the hardware attaching my oven door front and carefully lifted it away from the oven door back. This enabled me to remove the rusted trim piece and tackle the cleaning and rust removal steps.
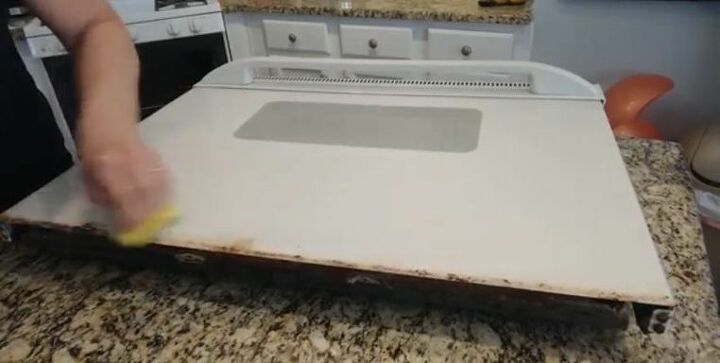
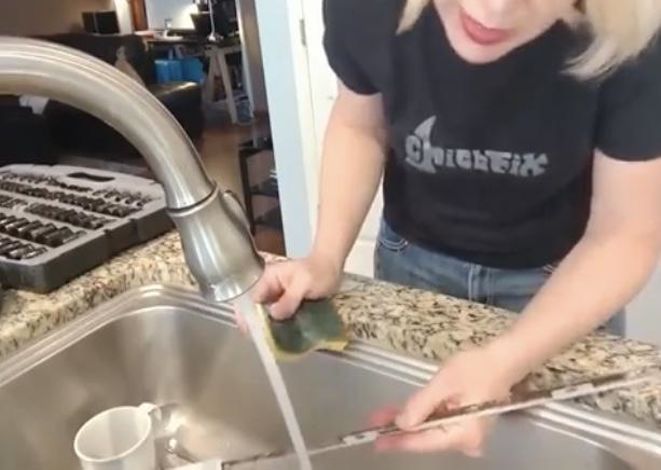
4. Clean Oven Door Glass and Trim
I used a wet sponge and blue dawn dishwashing liquid to clean the layers of grease, cooking spills, and kitchen stains. The trim piece was coated with stubborn rust that did not wipe off and I knew I would have to use a more abrasive removal method.
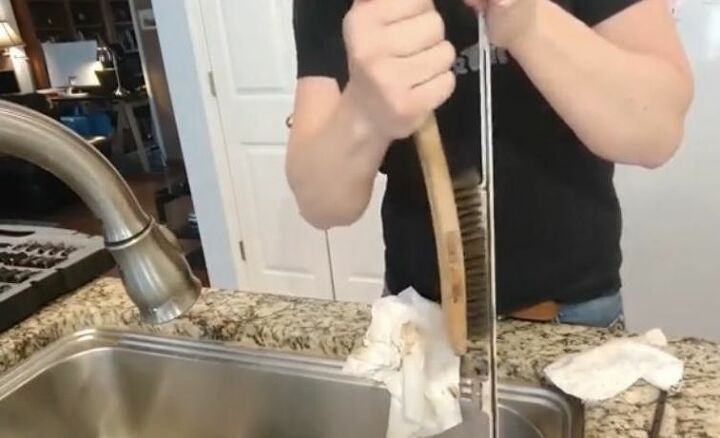
5. Remove Rust
I scrubbed and loosened the rust with a wire brush from the piece of thin metal trim that most likely caught years of drips and held moisture from spraying and wiping down the oven front. Complete this step outdoors to prevent making a dusty mess inside your home!

6. Rinse and Clean Rust Remnants
After breaking up the rust with a wire brush, I washed and scrubbed the dust and remains in the sink with a sponge and wire brush. There was quite a bit of dust and my abrasive scrubbing removed the paint in some small patches.
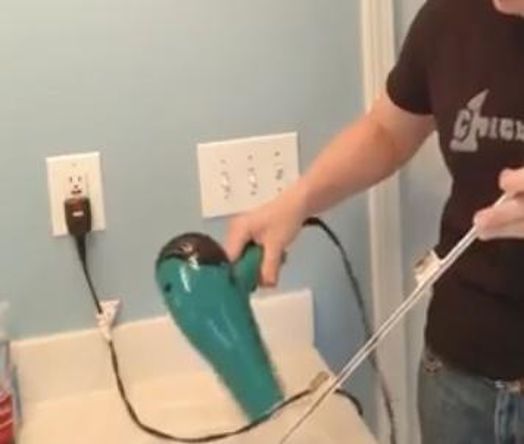
7. Dry Completely
After removing all of the dirt that I could and thoroughly rinsing the trim, I let it dry completely. I knew that I would be applying touch up paint and it was very important to apply it to a dry surface.
Even if you do not need to apply any touch-up paint, let it dry thoroughly to avoid trapping any moisture in your oven door.
I was impatiently waiting to apply my paint and resorted to using my hair dryer to speed up the drying time of my metal trim.
8. Apply Touch-Up Paint
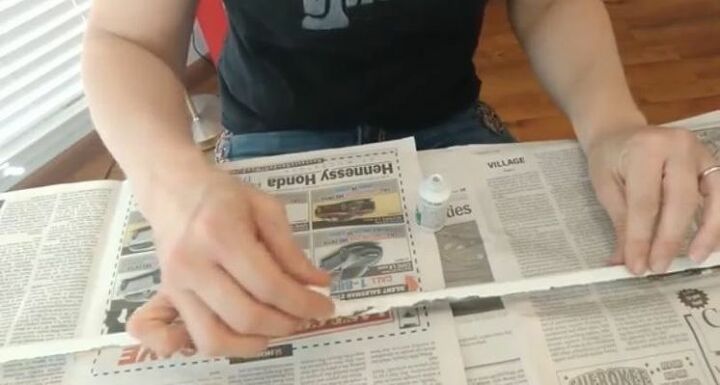
I purchased a small container of appliance touch up paint and used it to camouflage the areas paint was removed by vigorous scrubbing.
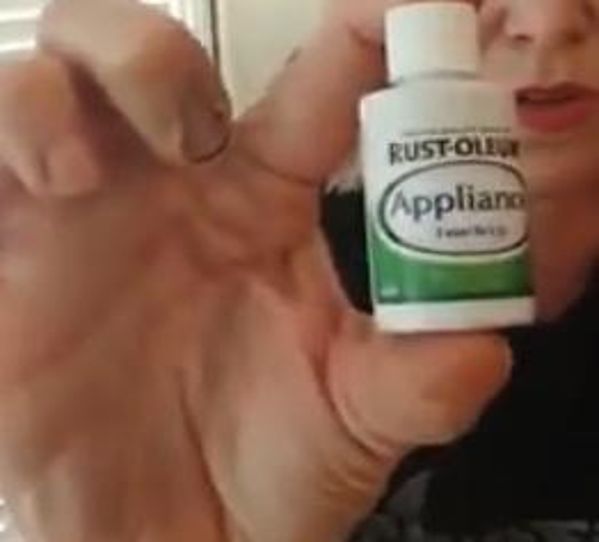
If any rust or discoloration remained, the touch-up paint would have concealed it as well. Allow the touch-up paint to dry completely.
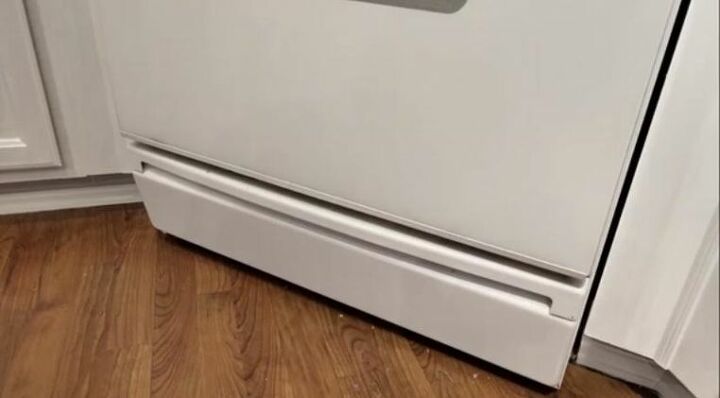
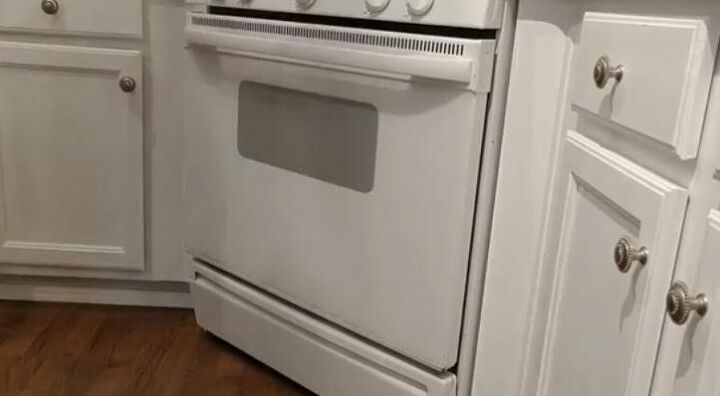
9. Reinstall Painted Trim
After the appliance touch-up paint dried, I reattached my painted trim to the base of the oven door before reinstalling it. The finish was smooth and bright white and no longer made my oven look ten years older than it is!
10. Reinstall Oven Door
I carefully lifted and then gently slid the oven door back down onto its base at the front of the oven. As always, if you encounter difficulty reinstalling the door, consult the manual for your model.
I was so glad that I took the time to try this easy trick to clean my oven door rather than live with one that looked old and worn out simply because of a patch of rust.
There were so many other stains trapped under the glass that I was able to easily wipe away with a bit of blue dawn and a sponge. I only had to spend $5 to buy the touch-up paint and had all of the other items necessary for the job.
Don’t live with an oven door that looks dirty or aged when it is so simple to give it a quick fix and make it look new again!
More Oven Cleaning Tips
Easy DIY Oven Door Cleaning
Have you ever cleaned your oven door or are you living with one that is in desperate need of a good cleaning?
Share your best oven cleaning tips and or find inspiration for other cleaning tips that give your appliances a facelift on Hometalk!
Resources for this project:
See all materials


Comments
Join the conversation
-
Thank you for the encouragement to try this. I plan to try it!
-
My oven door was rusting on the bottom also ( I had a black oven), I did take it apart and primed and painted with Rustoleum. Every so many years I would have to do it again. I think I finally found the problem. We hang a dishtowel on the oven door handle, water would slightly drip from your hands onto the oven door and continue down the face of the door. We finally clear caulked the seam where the door meets the metal part. Fingers crossed it's been a few month and looks fine.


Frequently asked questions
Have a question about this project?
I wonder if the seal around the inside of your door had to be replaced and did the heat stay in the oven as good as before ?
I’m not sure what will happen if I try this ? Maybe I would .