


Picture Ledge
2 Materials
$20
2 Hours
Easy
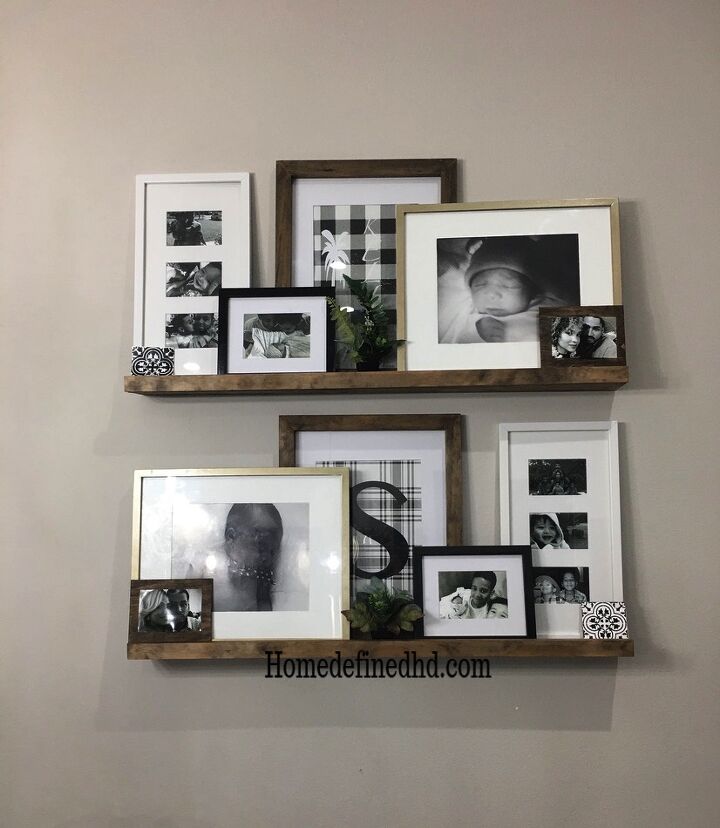
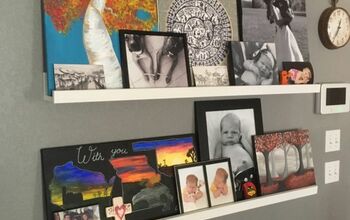
Need small floating shelves to display family photos, decor, and much more? Learn how to make this easy and inexpensive picture ledge that is sure to create a wow factor in any room.This simple project solved two of our many dilemmas in our lovely home.The first was how to fill up the huge wall behave between our dining and living area that it is also right in front of our open kitchen.We wanted something simple, yet grand. Something decorative, yet useful.The second was that my lovely husband wanted our pictures displayed somewhere in the house ( like seeing us on a daily basis wasn’t enough). I am not a big fan of having personal pictures as wall art but he convinced me.By putting 3 pieces of wood together we immediately had something to fill up the empty wall while allowing us to put up some wall art.What I love the most is that I can change the pieces of art and pictures as I please without having to worry about messing up the wall with nail holes!!!Check out some of our other DIY wood projects.
This is how you too can make this picture ledge...
Supplies:
- 2- 1x4x8
- 1- 1x2x8
- Wood glue
- Wood screws
- 150 grit sandpaper
- Minwax Dark Walnut stain
- Wood sealer
Tools:
- Miter saw
- Stud finder
- Kreg jig
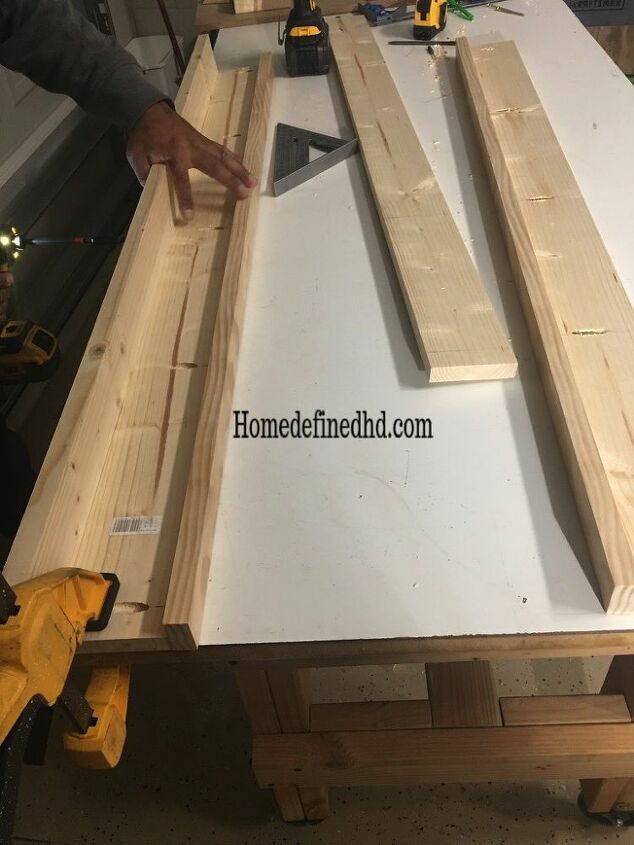
Step 1: Figure out the size of your picture ledge.
We decided to go with 1/3 of the wall size and that we wanted 2 the pictures ledges.Step 2: Cut your wood.
Your measurements will vary depending on how long you want your ledge.Cut the 2-1x4 and the 1x2 to the same length using a miter saw.Add pocket hole screws to the bottom piece of wood - 1 approximately every 6-8 inches.Step 3: Assemble.
Attach the bottom 1x4 with the predrilled pocket hole screws to the 1x2. Make sure to add glue prior to screwing the pieces together.Then attach the last 1x4 to the other 1x4 using wood screws.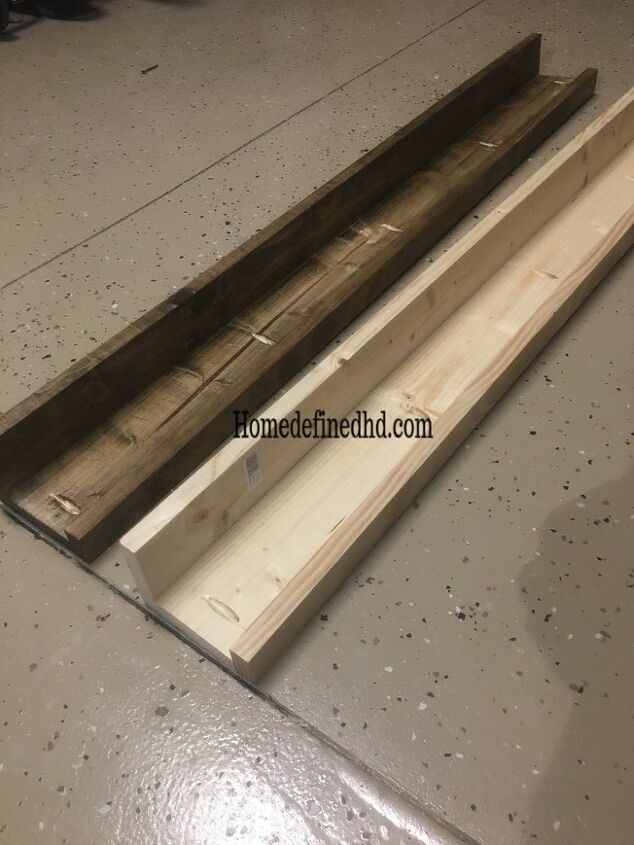
Step 4: Sand and Stain.
- Sand the picture ledge using 150 grit sandpaper.
- Then continue to apply a coat of the Minwax Dark Walnut stain.
- Followed by the wood sealer of your choice.
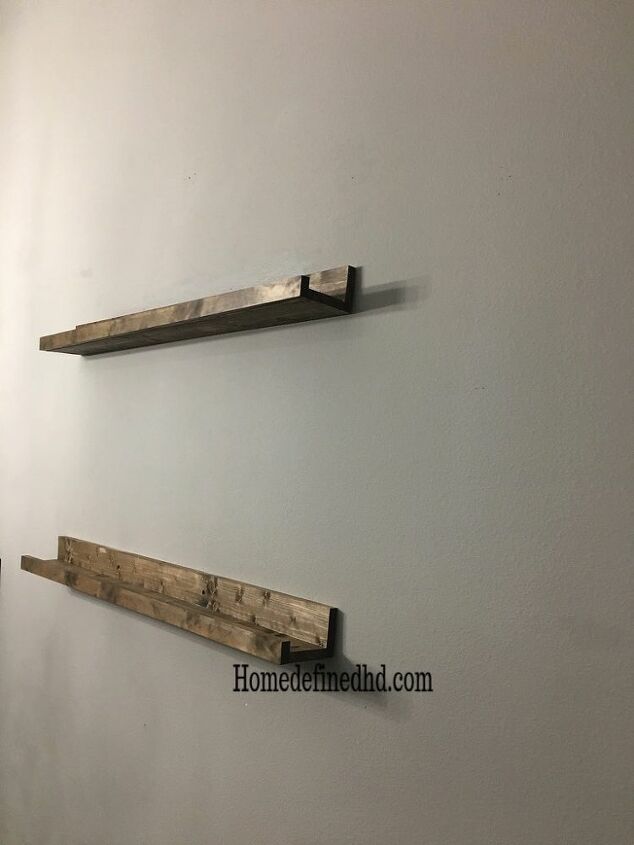
Step 5: Hang.
- Using the stud finder, locate the studs on your wall where you will be placing your ledge.
- Using wood screws attach the ledge to as many wood studs as possible.
Step 6: Enjoy your Picture ledge.
These inexpensive “floating shelves” have made a huge statement in our great room. We are proudly displaying our pictures and some wall art as well.Are you considering building a picture ledge? If so, where would you put it? We would love to know in the comments below!Don’t forget to subscribe for more DIY’s.
Want more details about this and other DIY projects? Check out my blog post!
Comments
Join the conversation
2 of 5 comments
-
Looks like a piece cake for my husband to do!
 !!!
!!! -
Looks fantastic!


Frequently asked questions
Have a question about this project?