


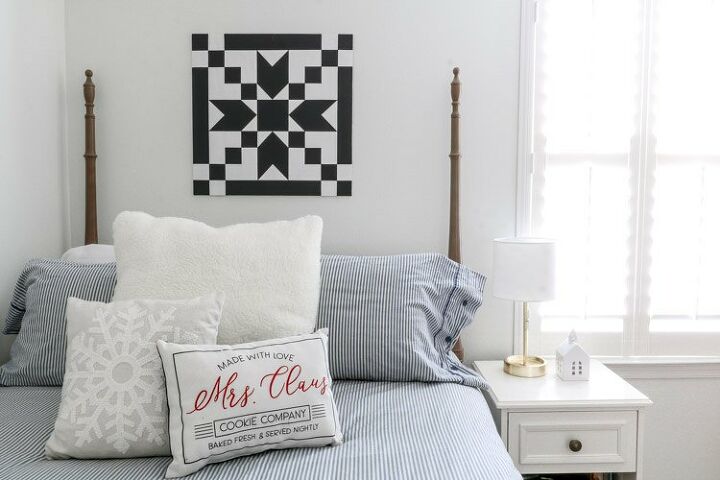
Easy DIY Barn Quilt

Barn quilts are super popular right now. Why not paint your own! There are so many different quilt patterns and it is easy to transfer one of those patterns onto wood with paint. Let me show you how.
First, cut your wood to the size you want for your home. I recommend finding a place for your barn quilt and then determining the size based on the wall where it will go.After you have cut your wood go ahead and sand it smooth and remove any sand from the wood with a damp cloth or tack cloth. Now it looks like you are ready.
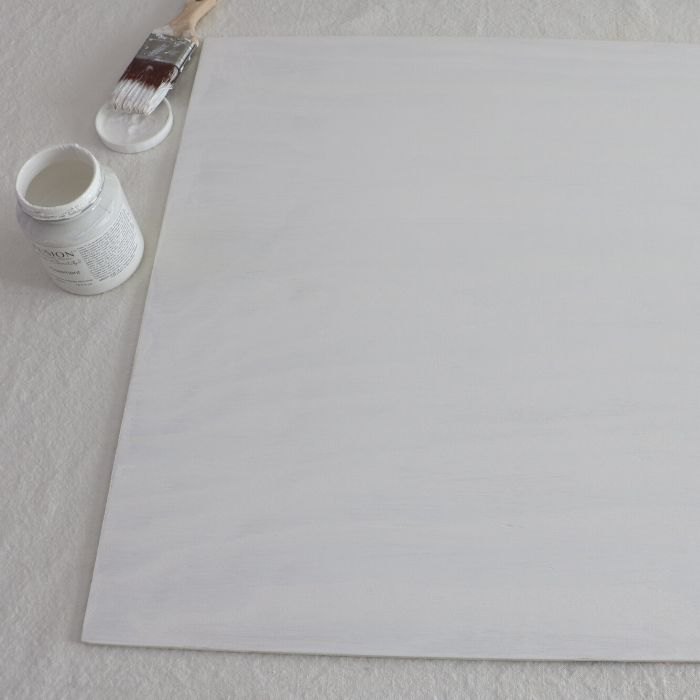
Begin by painting the whole board one color unless your background color is the wood. My board is white and black so I painted the background white.If your board has knots from a wood-like pine I recommend using some Kilz primer to bond the knots from bleeding through. Once you have painted your background use the blow dryer to dry the paint.
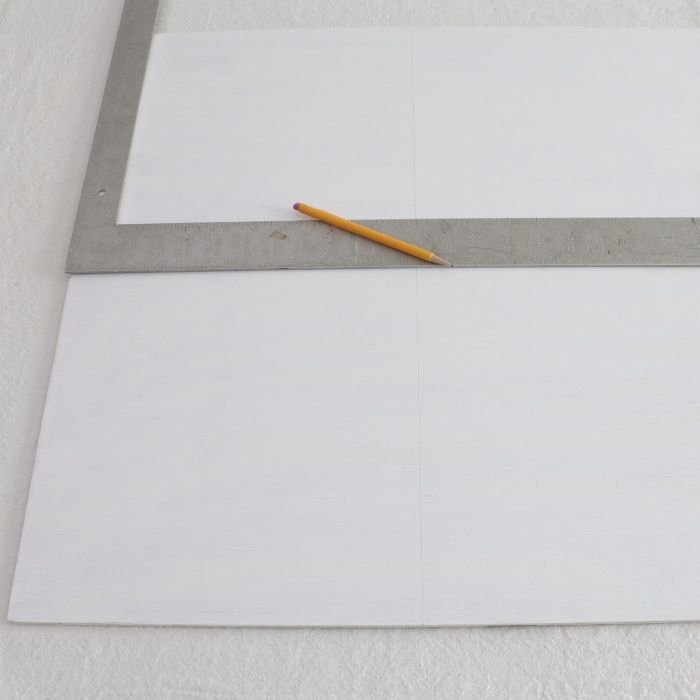
Grab your pencil and ruler and start by dividing your board into four quarters. Basically find the center and draw lines vertically and horizontally. This will make a cross on your board.The next lines will make a 10 x 10 grid on your board.
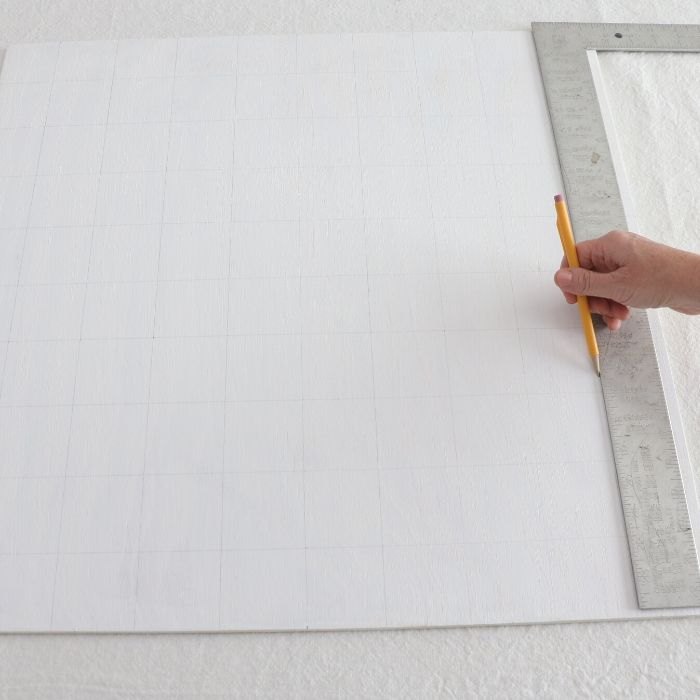
Next, divide each square with four vertical lines and repeat the process for each square. A short cut on this step is to go ahead and draw those lines all the way down and all the way across.Now you should have 10 boxes across the top and 10 boxes down the side and so on.

Make a mark on each box which ones will be black. Once you have all of them marked you will be able to see the stepping stone quilt design.
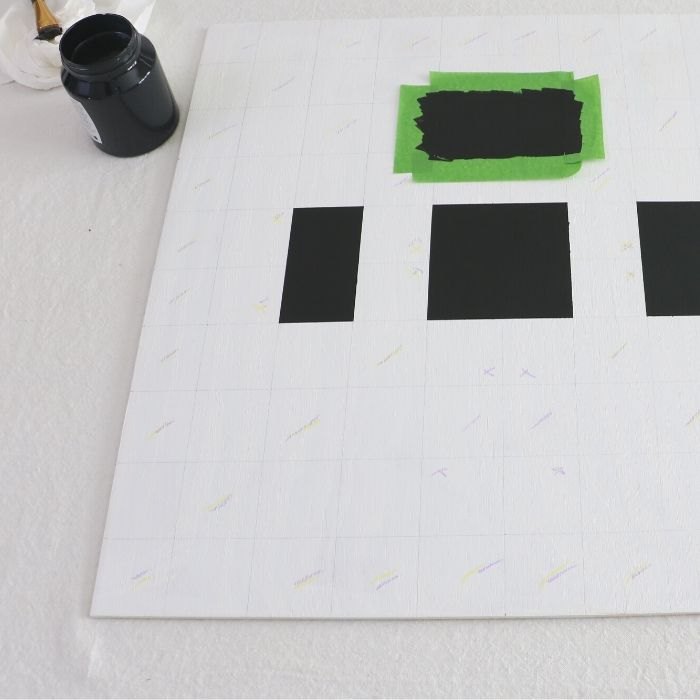
Now it is starting to get fun! I like to start in the middle so go ahead and tape off the four squares. Make sure to score the paint so no paint leaks under the tape.Next, shake up the fusion mineral paint and remove the lid. Then paint on a layer of the black fusion paint and blow dry it until you cannot see any shiny paint on the surface.
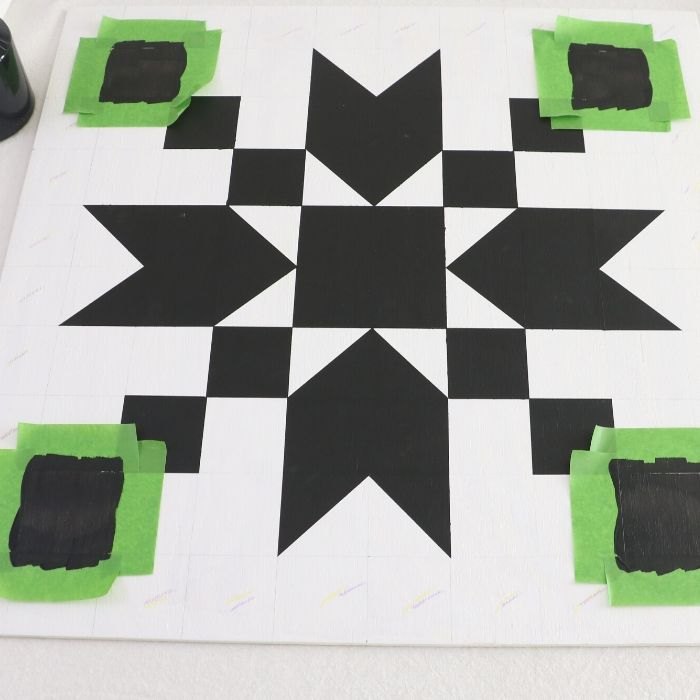
Basically from here on out you are continuing to tape, paint, blow-dry and remove the tape. Keep doing these steps until you have finished all the squares.Remember to score the tape so the paint doesn't bleed and make sure to paint the squares that you have marked. Also I kept a trash can close by so when I removed the tape all I had to do was toss it in the trash.
Resources for this project:
See all materials


Comments
Join the conversation
-
I'll look up barn quilt. My M.I.law quilted and I remember this pattern.
-
Learn something everyday!! A wooden board with the quilted design on it. Displayed on barns. I use to live next to Amish years ago. This must be a new thing for them to display on barns. They've always had Round painted boards, decorated with a good luck symbol. I have one on my front door in VA.
 It is nice....I like it! The Dutchmen are good people!!


Frequently asked questions
Have a question about this project?
What do you mean about scoring the tape?
Yes, what's meant by 'scoring the tape'? Thank you!