


Chalk Paint Coffee Table Makeover
5 Materials
$30
1 Day
Easy
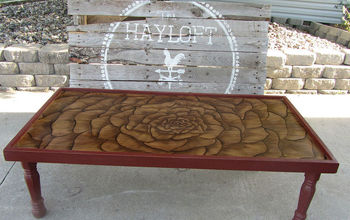
Do you love that rustic farmhouse style? This coffee table totally speaks farmhouse to me. We were asked to refinish this table for a client who was looking for that fresh farmhouse style. But let me tell you when I first saw this table, all I saw was a beat up table that I wasn’t sure was worth saving. However, keep scrolling and watch the dramatic transformation of this Chalk Paint Coffee Table Makeover.
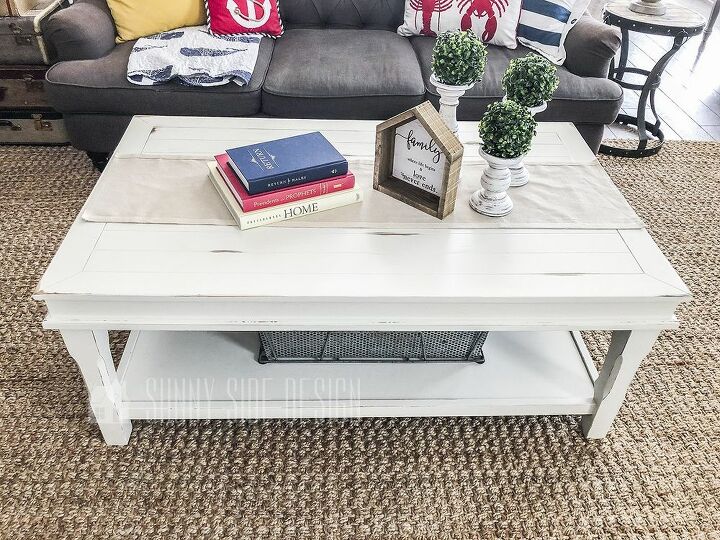
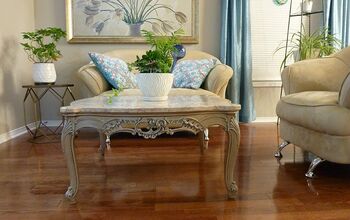
This coffee table looks beautiful now, however keep scrolling you won't believe the transformation!
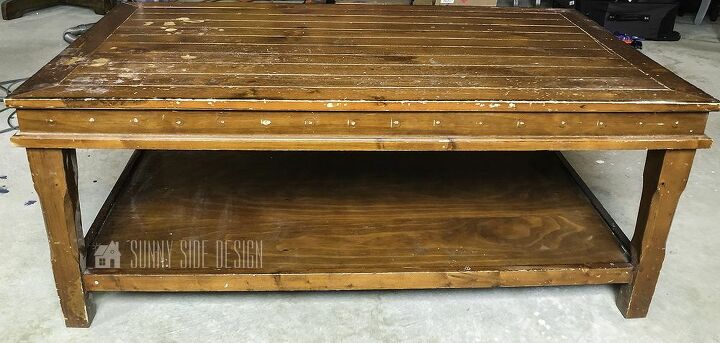
Without a doubt, this table was in rough shape! It had had a nailhead border that was removed. The finish was chipped, as well as water damaged.
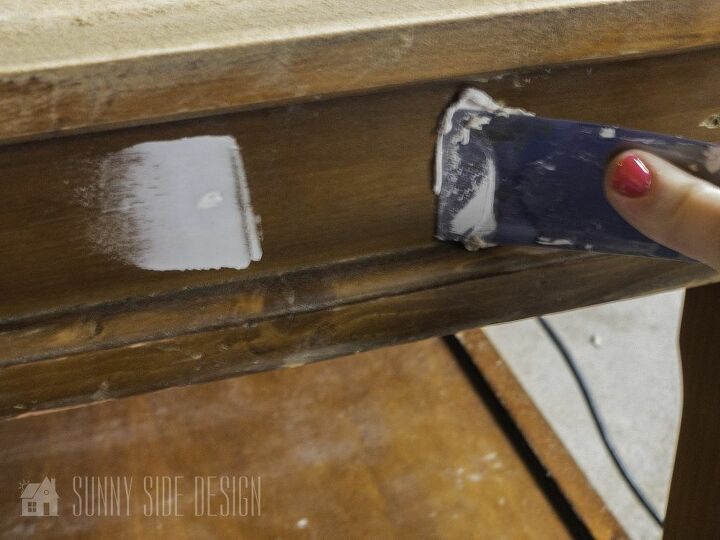
First of all, we needed to tackle all of the nail head holes. Using Drydex Spackling Paste and a small putty knife, we filled in all of the holes.
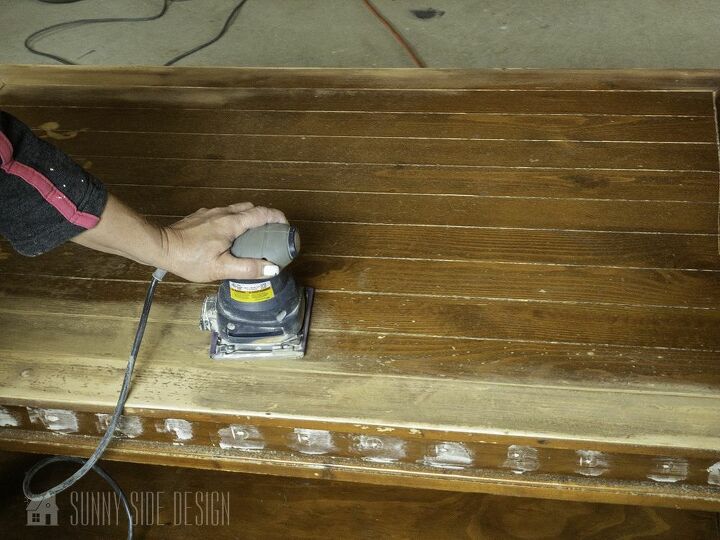
Normally when we refinish a table and use chalk paint, there is no need to sand. However, this table top was in such rough shape that if we did not sand the top, all of the divets would have stuck out like a sore thumb. So, we got out our palm sander and began sanding until the surface was smooth.
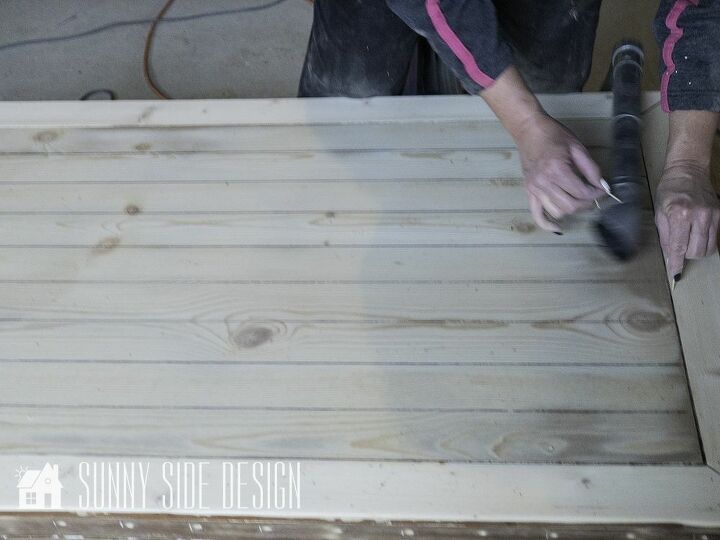
Now it’s time to clean the surface for paint. Since the table top is planks, we used the brush attachment on the vacuum to get the dust out of all the crevices. Then wiped the entire surface with a damp cloth.
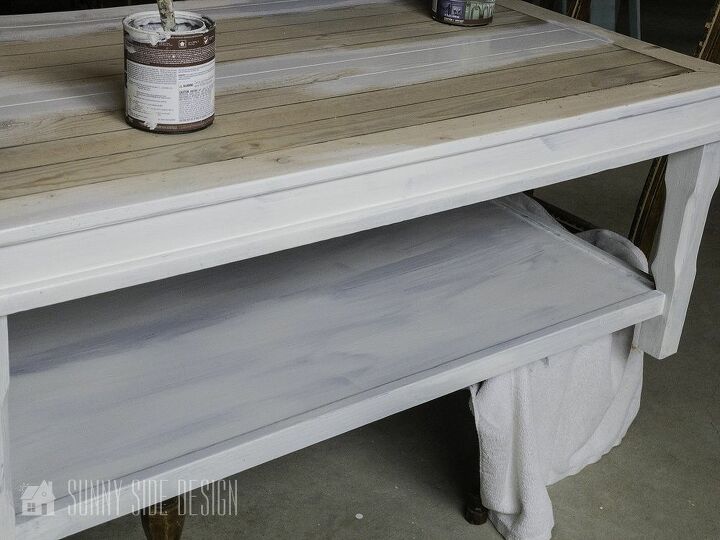
Ok, we are ready for the fun part, the paint. Using our favorite paint, Behr Chalk Paint in Farmhouse White and paint brush, we applied 3 coats of paint to get complete coverage. Let dry completely before distressing.
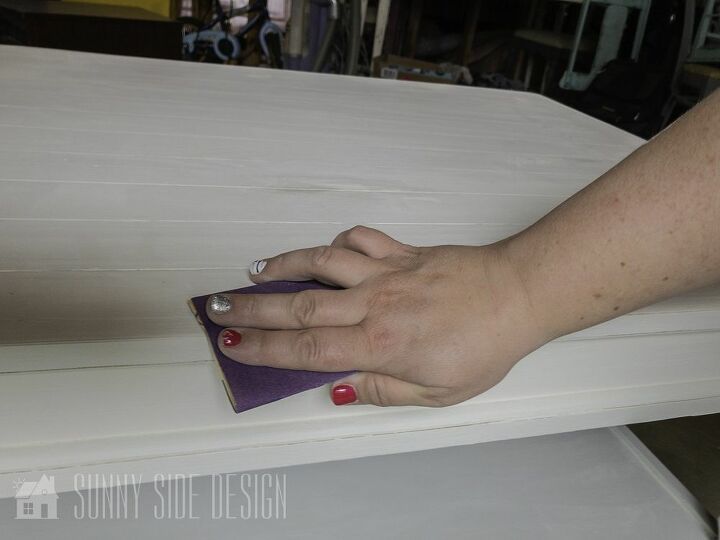
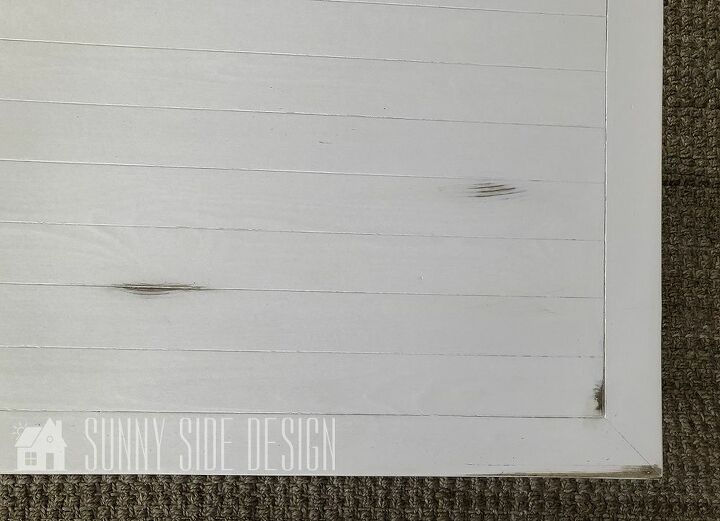
Distressing the finish is a necessary step to get that popular farmhouse style. It is best to do this by hand, this way you are able to better control the amount of distressing you would like.
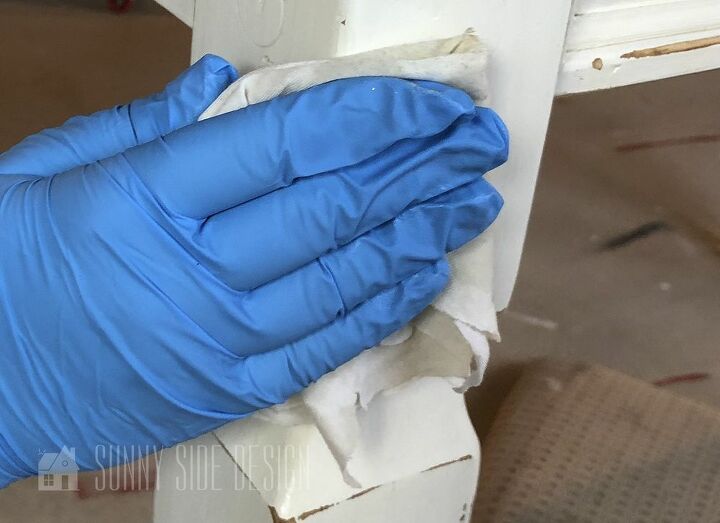
Using a fine sandpaper, gently sand off some of the chalk paint around the table, focusing on natural wear spots like the corners, as well as a few random spots.
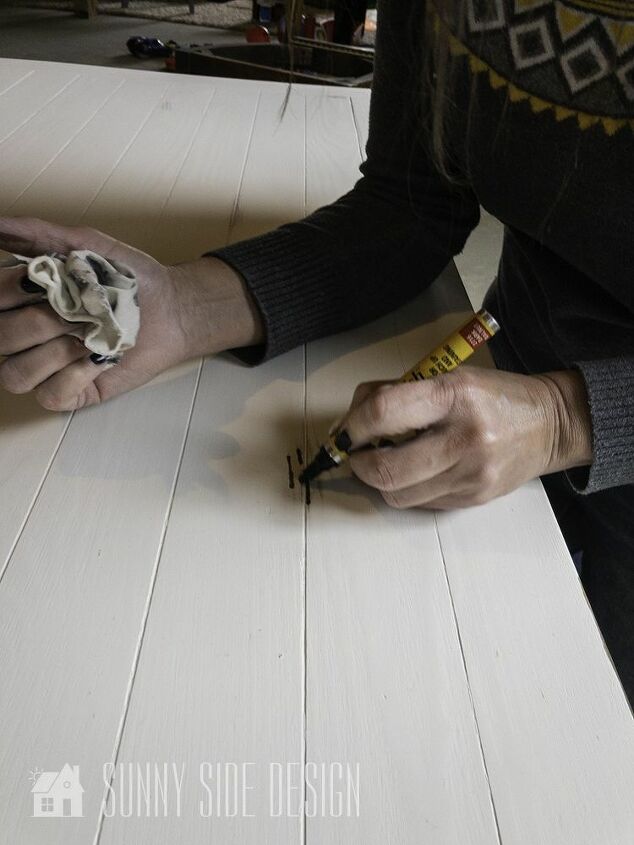
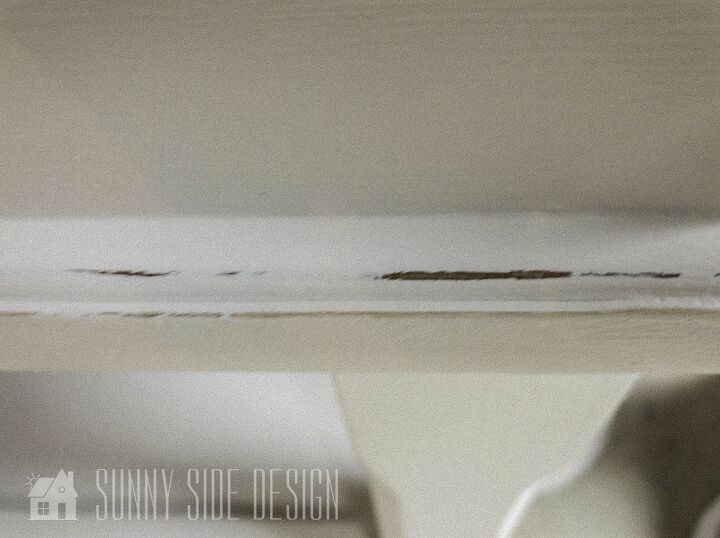
After distressing the table, we realized that the distressed area on the table top didn’t match the distressing on the rest of the table.
This little trick worked perfectly, so that all of the coloring on distressed areas matched.
All chalk paint requires some sort of protective top coat. Waxing is always a popular choice, however for this table we decided to use a poly finish.
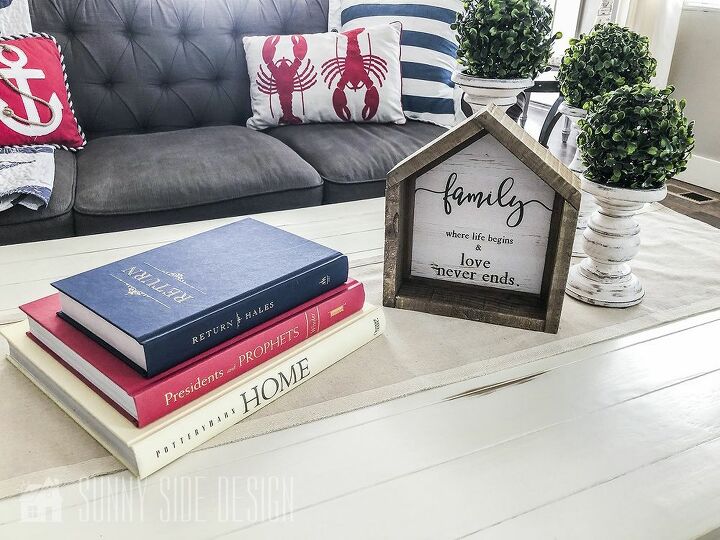
Doesn’t this finish look amazing? Look at that gorgeous, silky and smooth finish. When it turns out this great, I can’t keep my hands off of it, I just need to feel that silky surface.

Have you tried using chalk paint? It never ceases to amazing me what a little paint can do. Do you have a piece that you’ve been waiting to revamp? Please share what you are working on, we love to hear from you!
Resources for this project:
See all materials


Any price and availability information displayed on [relevant Amazon Site(s), as applicable] at the time of purchase will apply to the purchase of this product.
Hometalk may collect a small share of sales from the links on this page.More info

Want more details about this and other DIY projects? Check out my blog post!
Comments
Join the conversation
4 of 17 comments
-
Love it! WOW definitely gonna try this!
-
I have a 1930s sewing machine with cabinet. It is solid oak with a shiny finish. This is my first furniture project! I was going to sell it but decided it would be perfect in the guest room. I’m sanding the top and lightly sanding the rest. I’m using a Glidden brand white chalk paint. I don’t have any kind of top coat so I’ll be getting the wipe on you recommended.


Frequently asked questions
Have a question about this project?
What finish did you use for the poly? Satin, gloss..etc
You mention using Behr chalk paint in Farmhouse white,but your materials list is rustoleum linen,which one was used? And where to go for the Behr. When you click on list it takes you to Amazon and only rustoleum shows no Behr
I’d like to chalk paint a dresser that has a shiny coating. Does it need to be sanded first?