


DIY Planter Design
2 Materials
$20
1 Hour
Medium
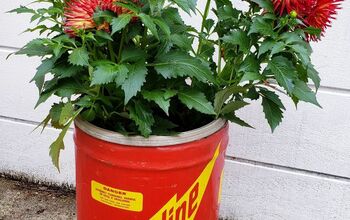
I used vinyl and my Cricut machine to update a faded planter and create my own DIY planter design. This is a super easy project with endless possibilities!
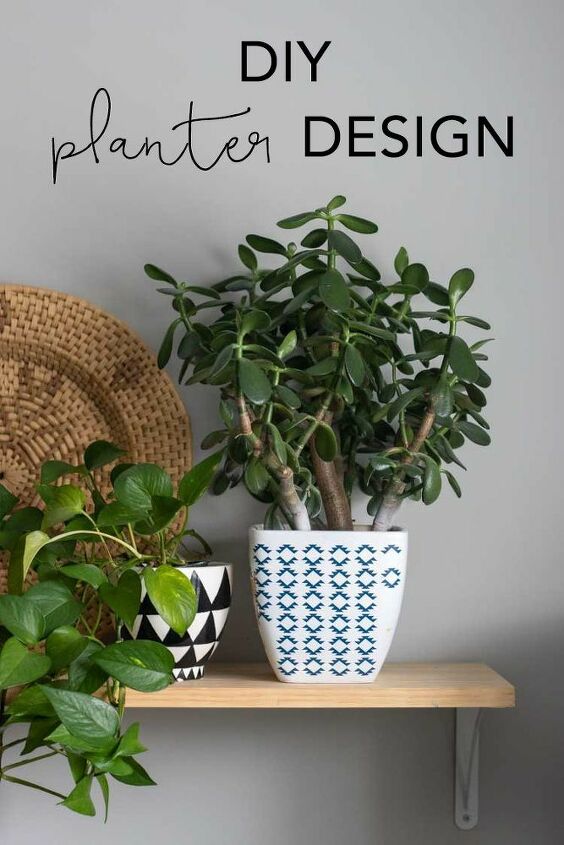
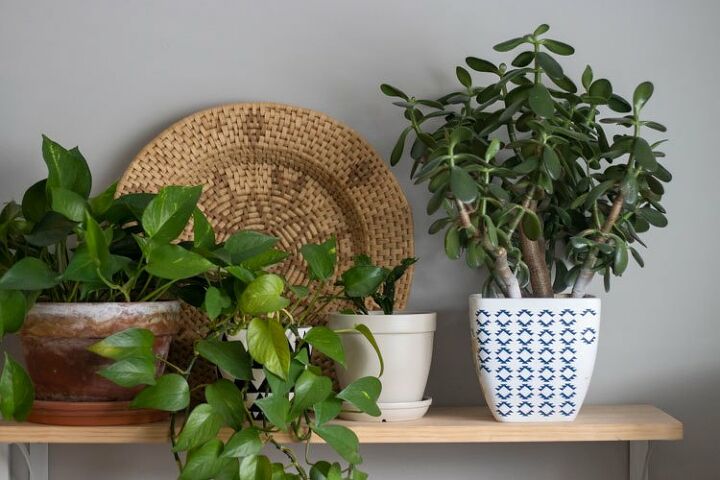
I am still so new to this Cricut party, so I wanted to try out a vinyl design. I’ve had this planter that’s needed a makeover for awhile now, so I thought this would be the perfect opportunity to turn it into something cute.
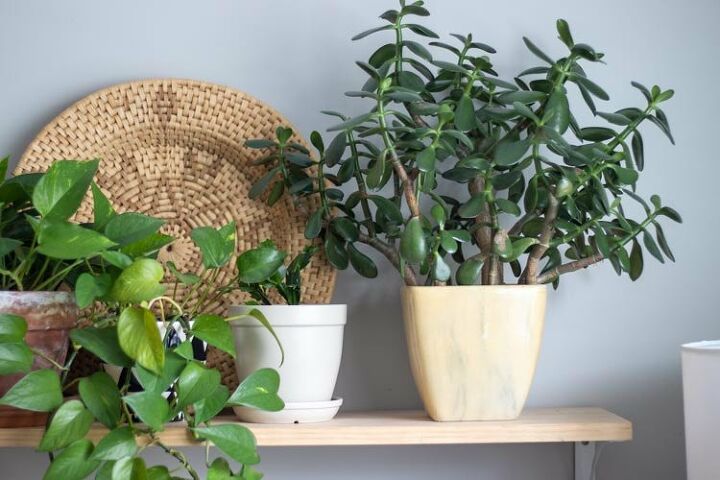
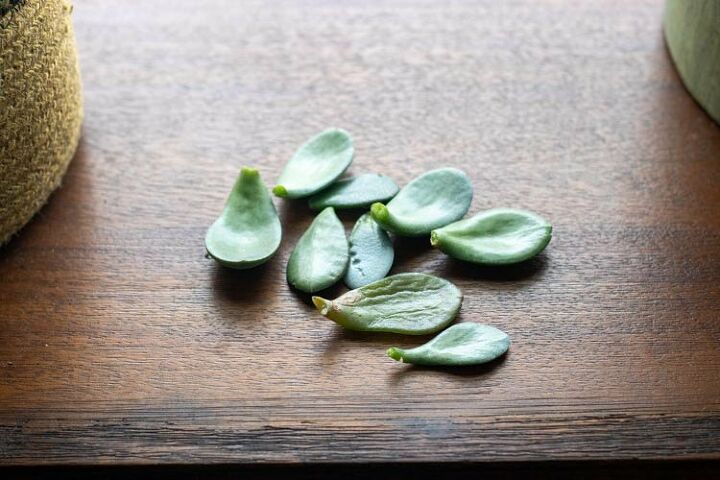
It’s currently the home for my jade plant. That thing has grown quite a bit lately so I decided to just makeover the pot with the plant in it. It resulted in some spray painted leaves and a few dropped leaves, but overall it wasn’t too bad. Just a little bulky to work with.
HOW TO MAKE YOUR OWN DIY PLANTER DESIGN
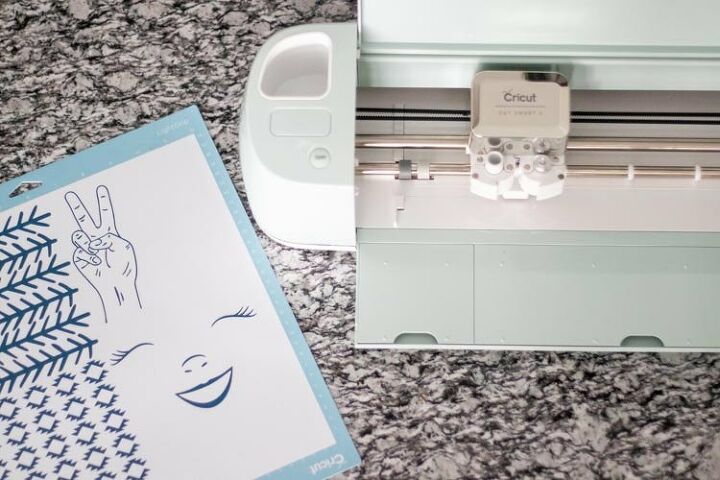
- Cricut machine (I’m using the Cricut Air Explore 2)
- Vinyl (I used the temporary vinyl)
- Transfer Tape
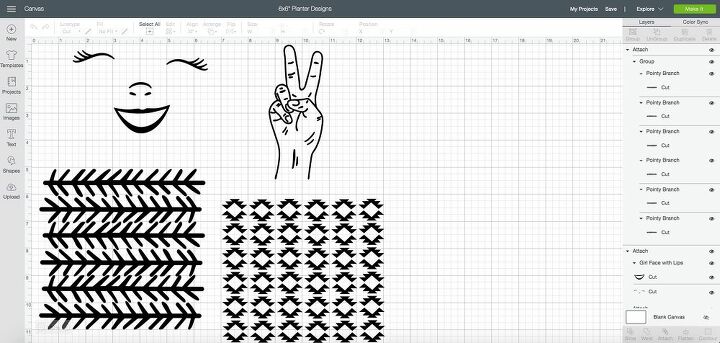
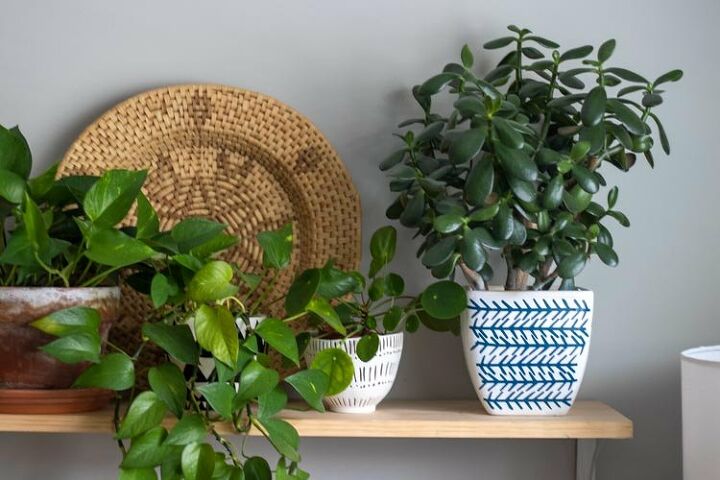
So I chose two patterns and a face image and a hand making a peace sign. I decided to do a different design for each side of my planter. I’m always rotating the plants so they don’t grow heavy on one side while they reach for the sun, so I thought it’d be fun to have a different view as it’s rotated.
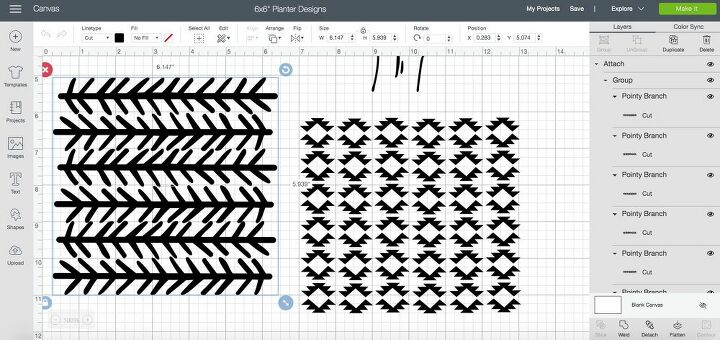
I took the images I liked and duplicated them to create a row. Then I selected the entire row and aligned them horizontally, then grouped them together. Next you can duplicate that entire row as many times as you need to create your pattern. To align them vertically just select all your rows at once and align them. After you get everything looking the way you want, be sure to attach them together so they don’t get reordered when it’s time to cut.
Once you have all your designs completed, make sure they’re the right size for your planter. I was working with a 6″ planter so I made sure the width and height were as close to 6″ as possible without going over. Then follow the directions to cut your vinyl.
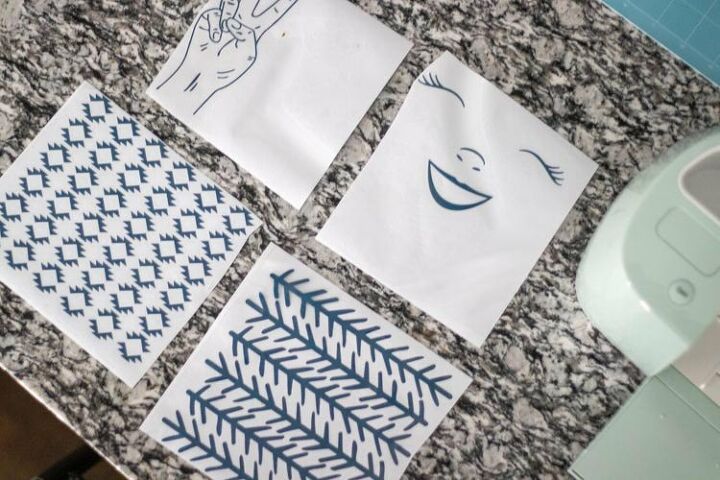
I will say that there was a bit of a learning curve to the transfer tape for me. You need to burnish the tape onto the vinyl design so it sticks. There is a tool for this but I don’t own it yet, so I just used a credit card to smooth everything out and remove all the bubbles.
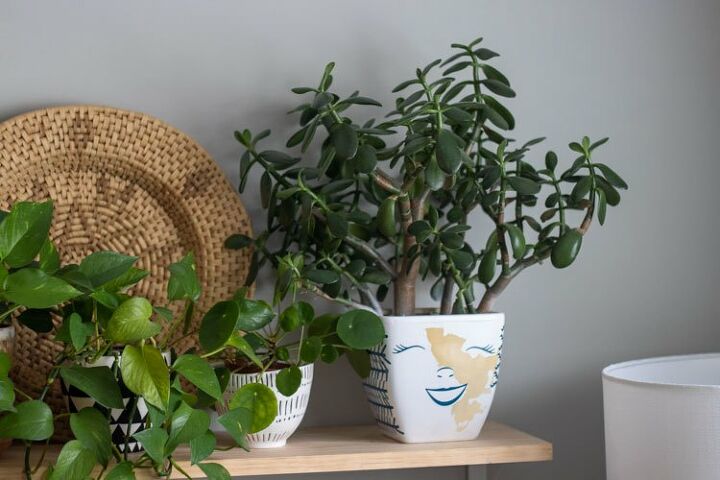
But the other 3 sides turned out really good.
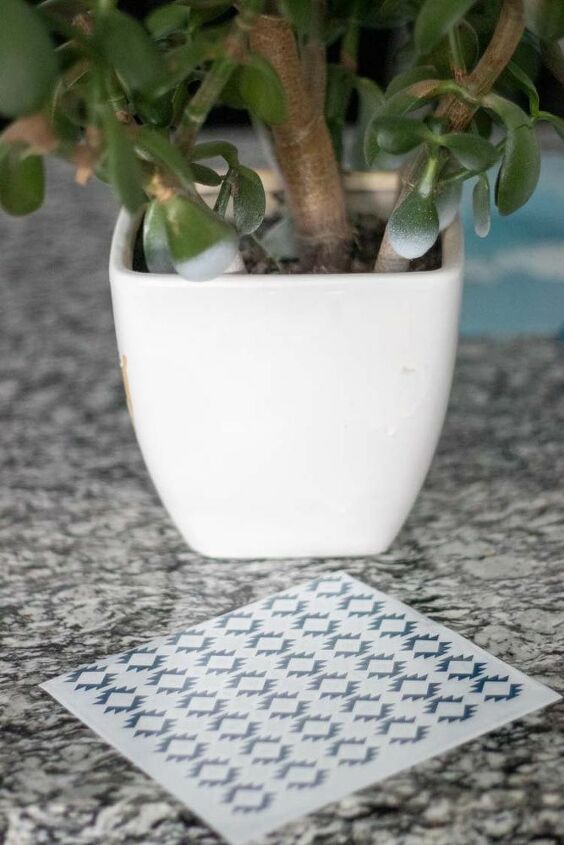
I had a couple of the aztec pieces get stuck to the transfer paper. Nothing that I couldn’t have easily fixed, but then I kind of liked the way the edge pieces were uneven. Looks like chipping tile or something. So I decided to leave it!
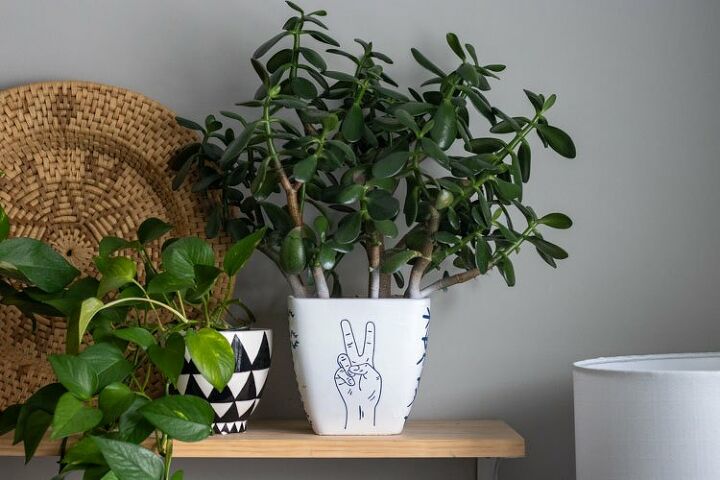
The peace sign is definitely my favorite. And I really would have liked that face too!
To be honest, I’m usually not a huge crafter. But I am loving how easily I can make things using the Cricut. It’s like crafting, but easier, ha!


Any price and availability information displayed on [relevant Amazon Site(s), as applicable] at the time of purchase will apply to the purchase of this product.
Hometalk may collect a small share of sales from the links on this page.More info

Want more details about this and other DIY projects? Check out my blog post!
Comments
Join the conversation
2 of 7 comments
-
You did a great job, looks fantastic!
-
The face isn’t an epic fail... it’s a birthmark made from love. Enjoy the individuality of her. 🦋🦋
Annie.


Frequently asked questions
Have a question about this project?
Did you know that you can break off a stem and just plant it and it will grow a new plant? Growing up in San Diego I filled the entire side of the house using just one stem for each plant that grew. It was an experiment that actually worked. I don't have a green thumb by any means.