


Phone Stand

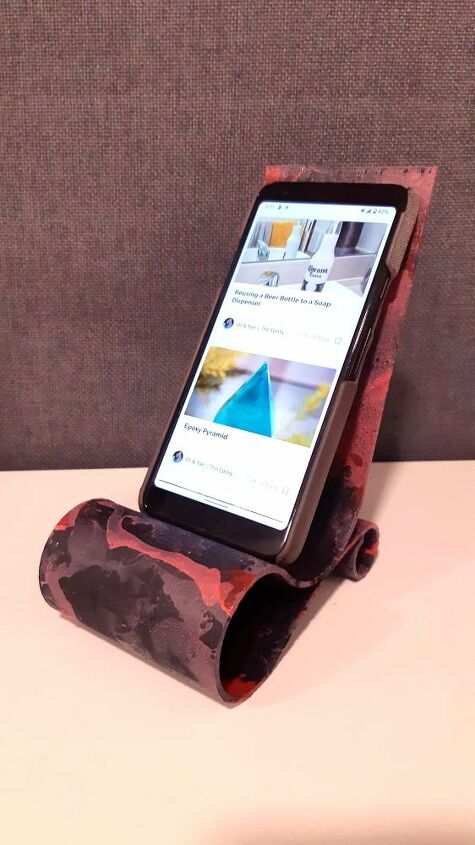
I printed a phone stand in a 3D printer to fit my needs; covered it with spray paint and nail polish, the results is breath-taken!
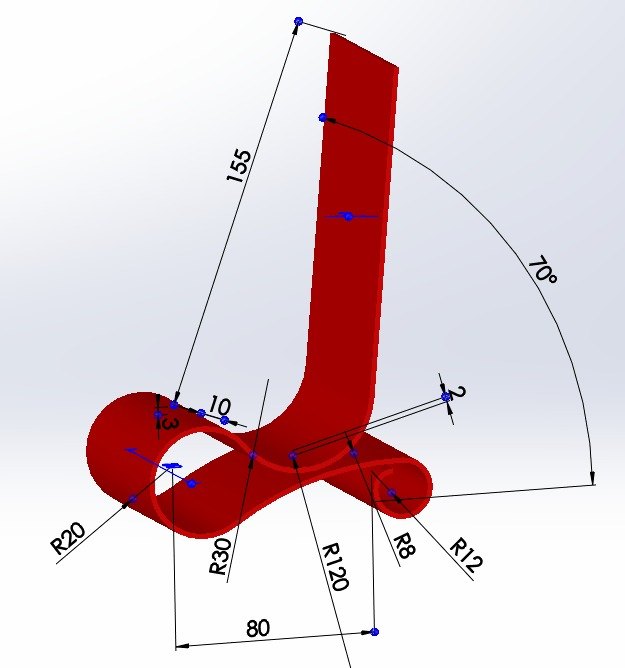
First, I measured my phone, Google Pixel 3A, and modelled it on SolidWorks.
I wanted a clean circular shape that looks as if it was made out of a firm scroll. All my random stuff on the table are in a red colour scheme, so this stand had to be red(ish) too.
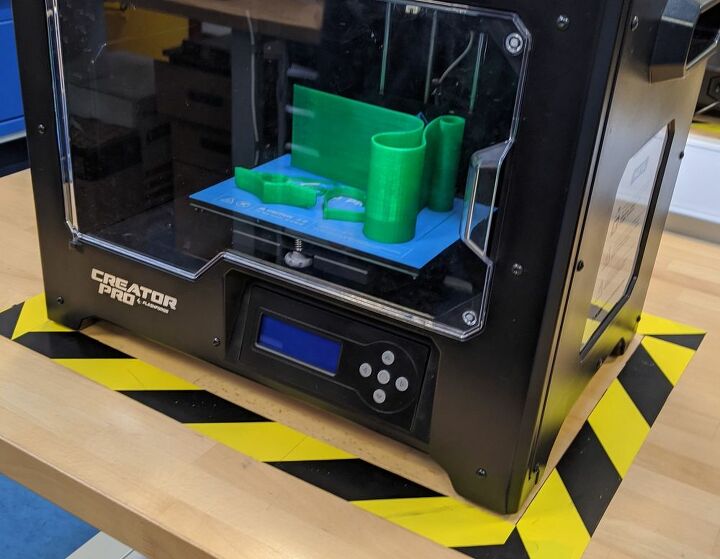
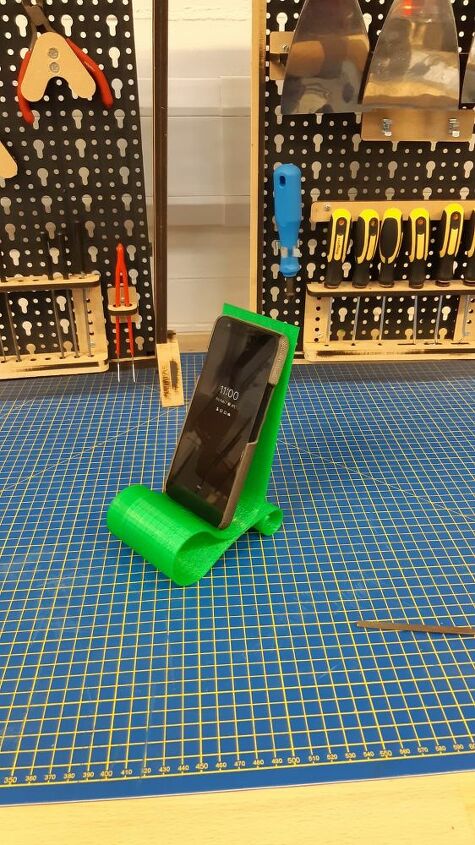
But when I sent it to the 3D machine, I accidentally chose a machine with a green filament wire.
The printing time was shy of 5 hours on a low resolution with about 25 meters of PLA filament wire.
Because it was a low-resolution printing, I had to sand the surface of the stand from remnants of the wire before placing my phone on it.
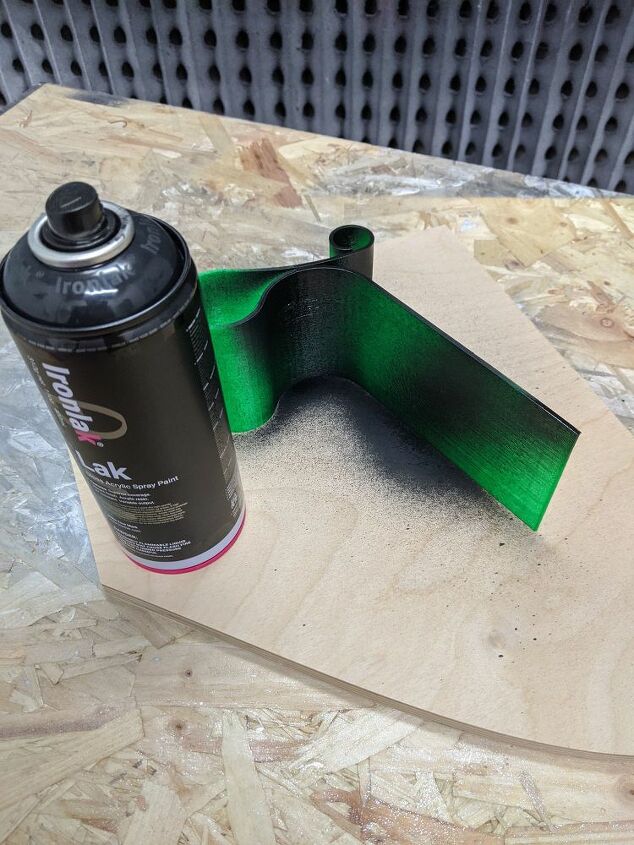
I bought a matt black spray painting, that is perfect for 3D printing (that doesn't create a chemical reaction with it)
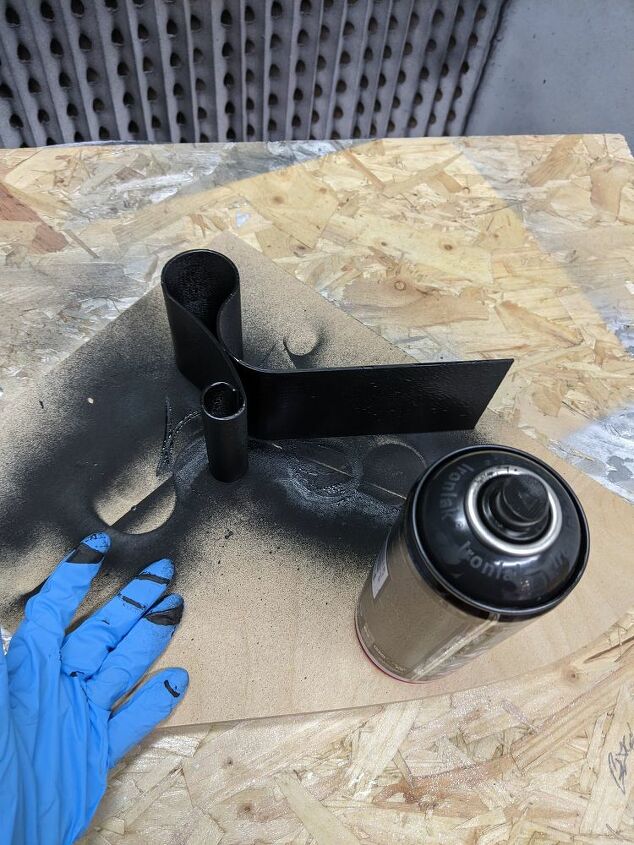
I spray-painted two layers. I left it outside for 3 hours in the cold air to dry and for that awful smell to pass.
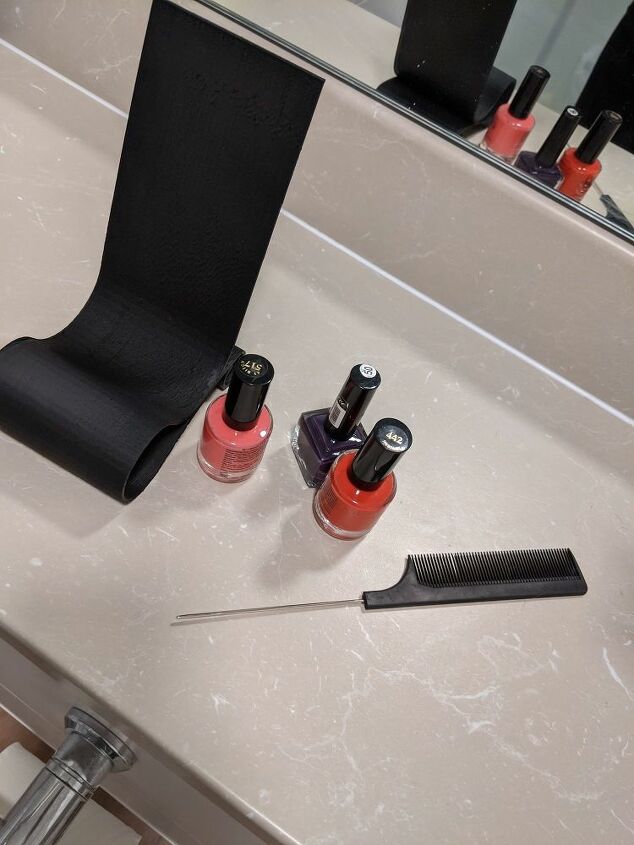
Then, I marbleised it with nail polish!
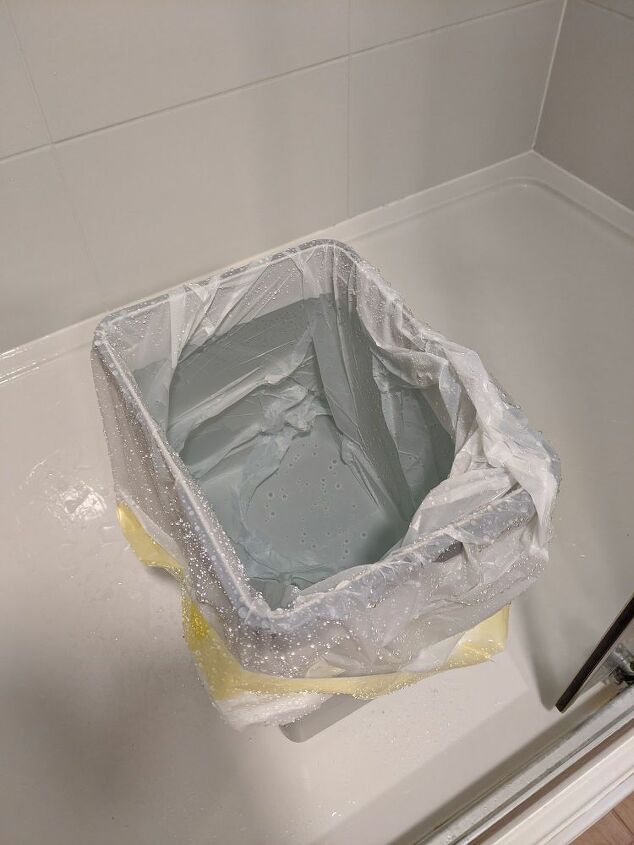
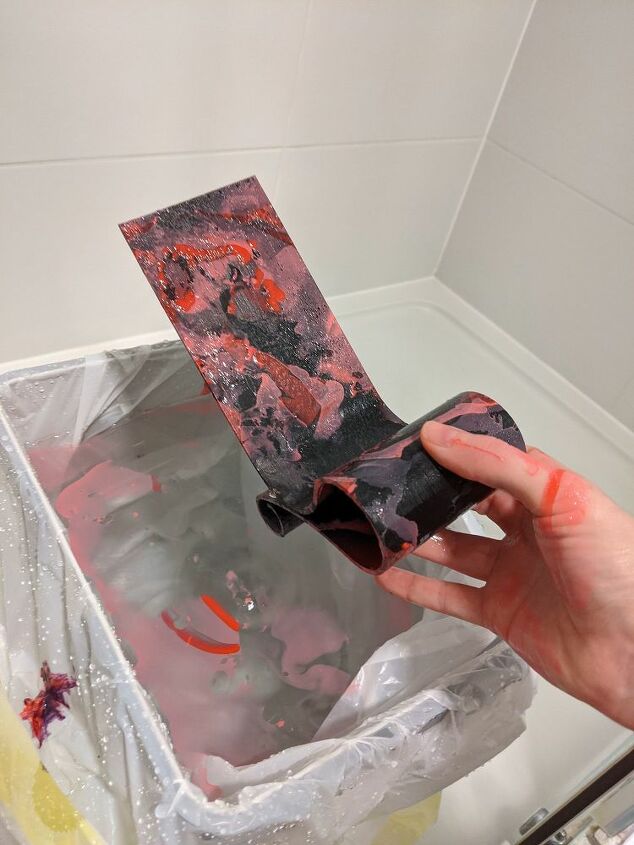
I took my cycling bin and placed a plastic bag in it. I filled it with enough room-temperature water so I can easily deep the stand in it. I set it in the bathroom and turned on the air ventilation.
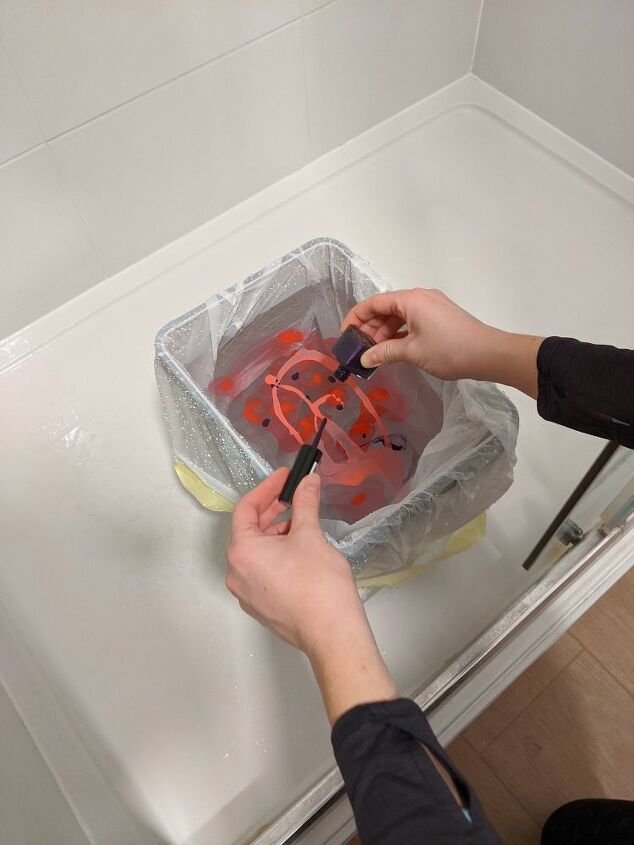
I started by dropping nail polish on the surface of the water. I tried to drop it the closest to the surface as possible so it won't sink into the water. The cheapest nail polish did the most beautiful marbleising compared to the expensive one that just stayed as a drop (see the purple one in the picture)
Then, I dipped the stand in the water. I had to make sure the water wasn't too warm because a 3D printed items made from PLA can deform in hot water.
The first layer turned out nice, but I wasn't too happy about it as a finished froduct,
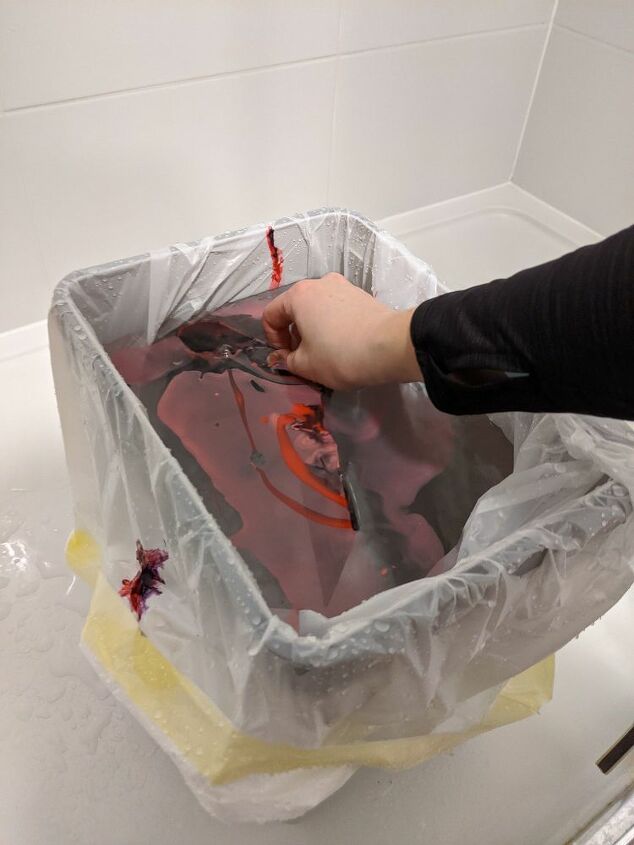
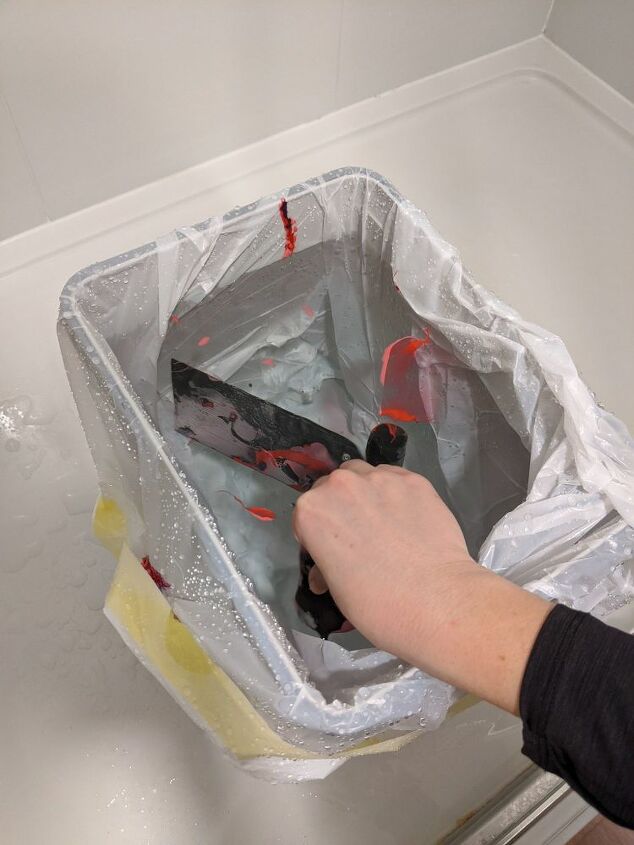
So I poured some more nail polish and dipped the stand again. I lifted it through the nail polish to catch more of it on the back of the stand as well.
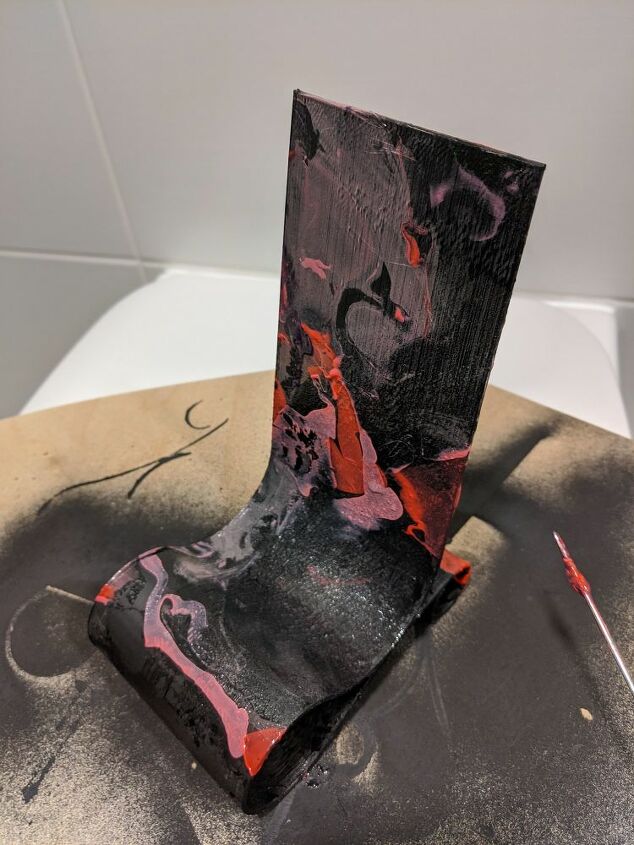
Second layer. Wow!
With Acetone on a Q-tip, I removed dots of the nail polish from the stand to make it more organise to some extent.
I left it to dry on it's own outside for an hour.
Note to self: next time use gloves! :)
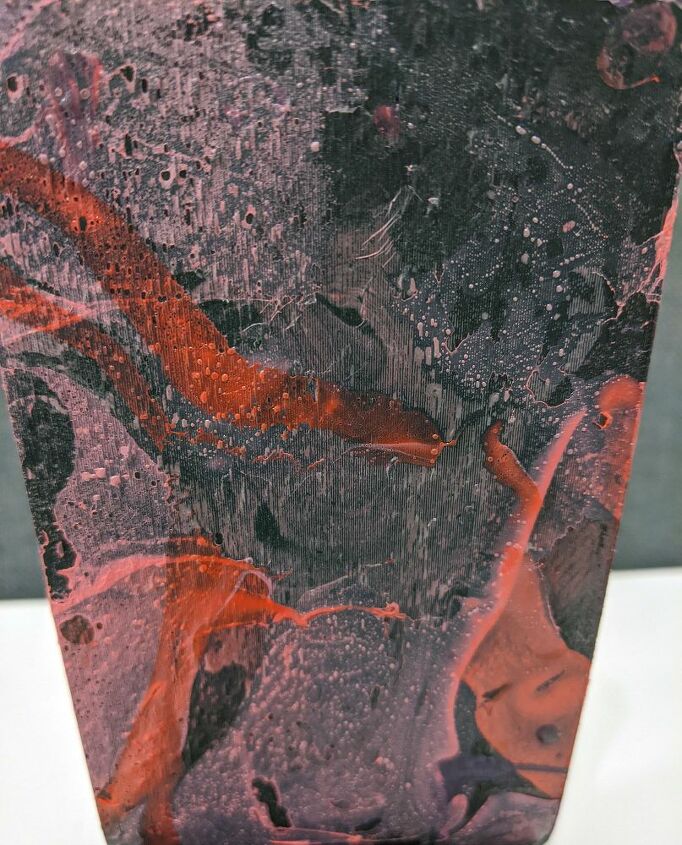
Close up
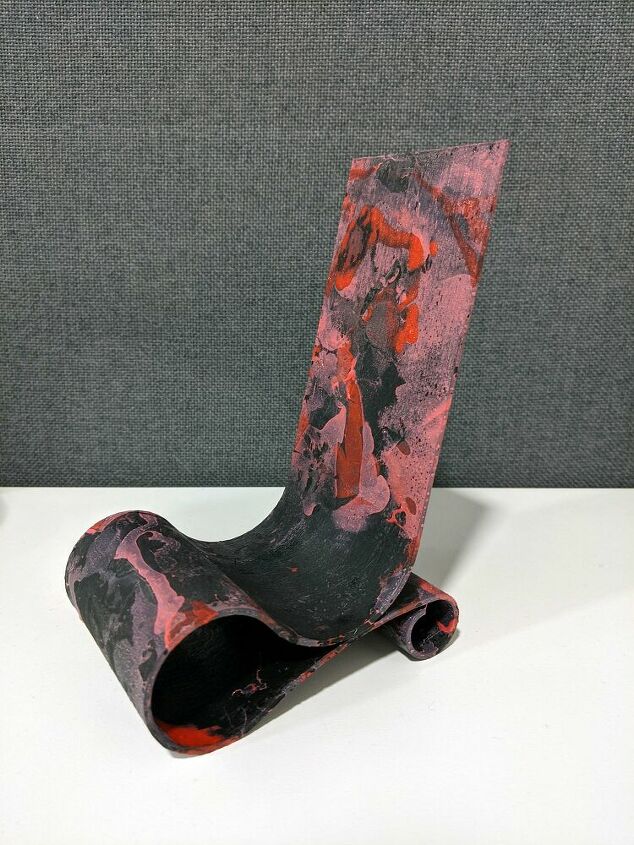
The finished product on my table 
Resources for this project:
See all materials


Comments
Join the conversation
-
If you would like a copy of my file, feel free to contact me
-
I wish I had the access and knowledge of 3D printing. It opens a whole new world!


Frequently asked questions
Have a question about this project?
A couple of questions: how easy is the design software to learn, is it like Autocad or easier? How much experience do you need? Could one, for instance, design something in Sketchup and send it away for printing? 2) You say this was a low res print, how long would a high-grade one have taken? 3) Excluding the printer, how much did this cost you to make? 4) Do you think it is feasible for a once-in-a-while crafter to get a printer or do you think one would have to make it work harder to jusitfy? I am drooling....😄
The spray paint that you used, is it a specialist spray or just one that works with plastic that you could get at a normal hardware shop?