


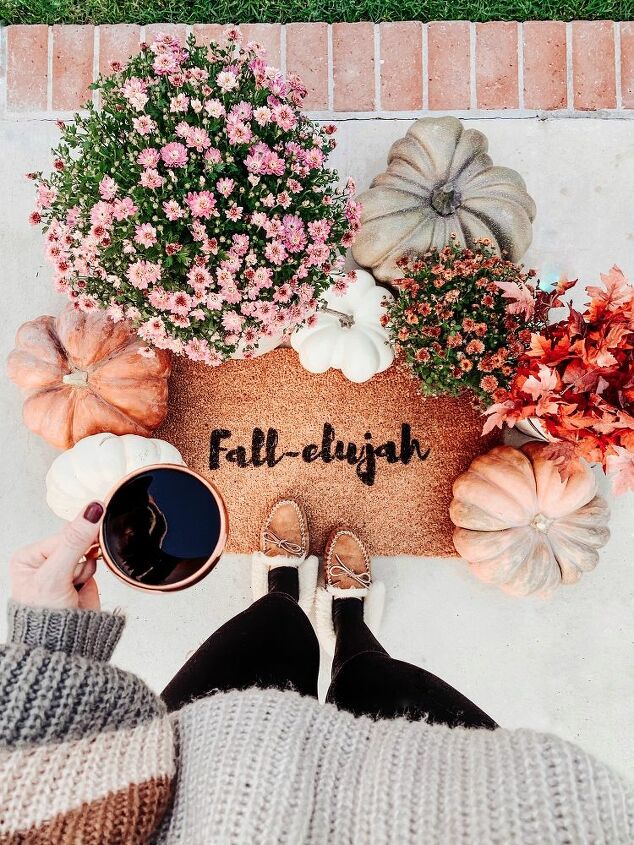
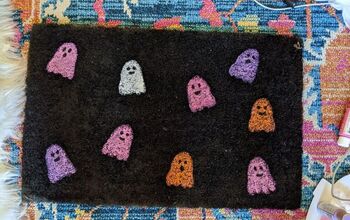
DIY Door Mat
Give your porch some personality with a custom door mat!
Hey friends!
Have you ever seen those adorable seasonal door mats?! I know I have and I swear I almost buy one EVERY. TIME. But then… the price! Ouch! And of course, you can get the standard ones pretty inexpensively from Target or Hobby Lobby, but they certainly won’t be custom to what you want them to say. And who wants the same door mat as all your neighbors anyway?
So, I decided to set out to make a couple custom DIY holiday door mats this year. Besides the door mats, which I got on Amazon, I already had all the materials I needed, so I created two doormats for about $40, which is typically what just one will run you on Etsy, and that doesn’t include shipping (Amazon Prime for the win)! You can also customize these to whatever size you need, which is amazing since it’s typically harder to find large seasonal doormats at a reasonable price!
First browse the internet to get a feel for what you want your door mat to say and what kind of font you like. The curvy fonts tend to be harder to cut out, so just keep that in mind!
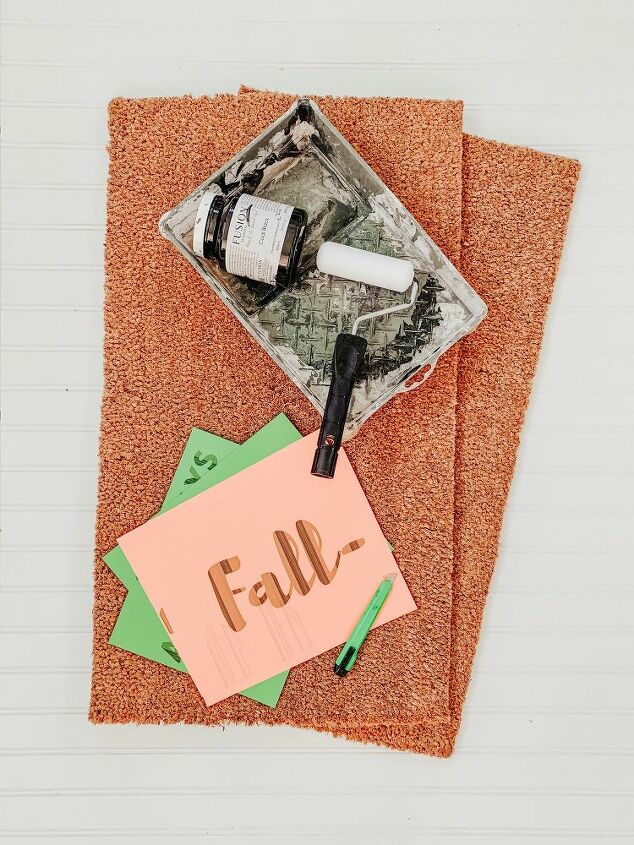
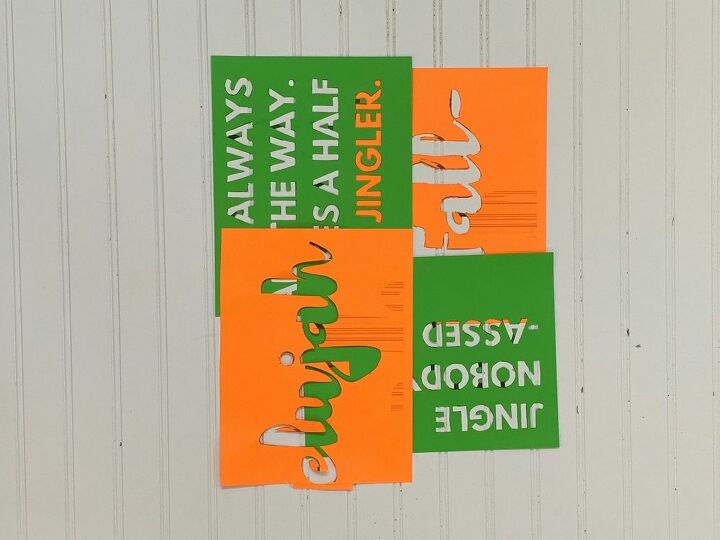
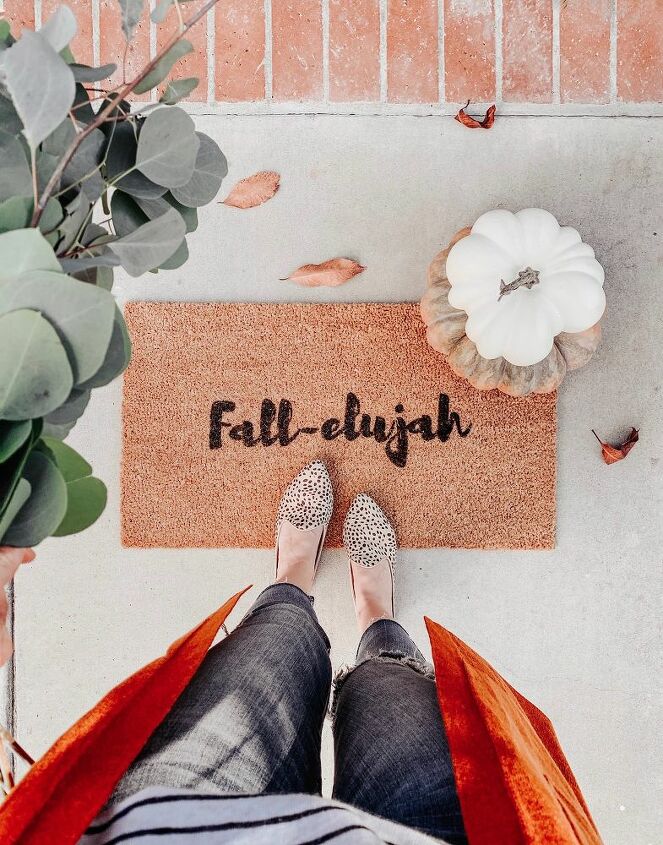
Design your doormat in Canva or whatever app you’ve decided to use. I made sure to orient my page in landscape, and I broke up the words onto two separate pages since I wanted it to be big enough for the mat (the bigger your mat, the more pages you’ll need to use). So for example, I broke up “Fall-elujah” into “Fall-” on one page and “elujah” on the next, and then made the font as big as I could to still fit on each individual page.
Print out your designs on card stock.
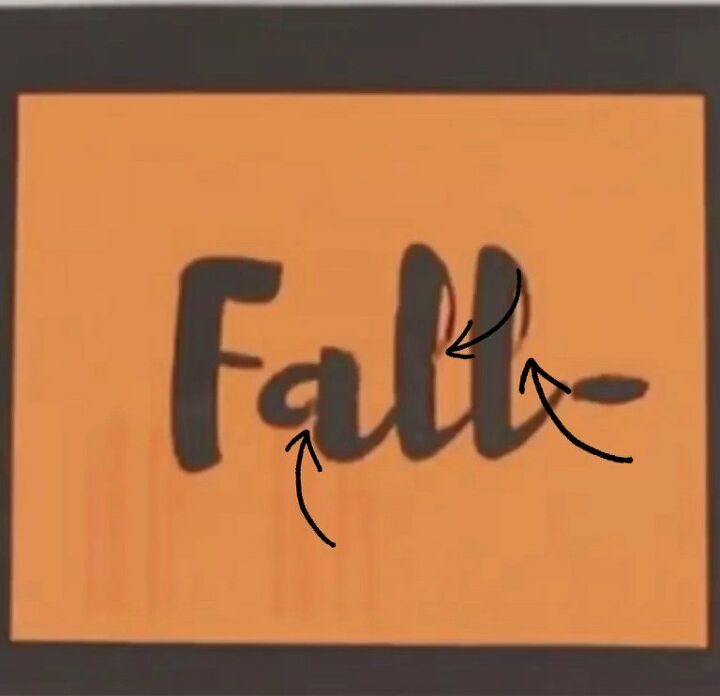
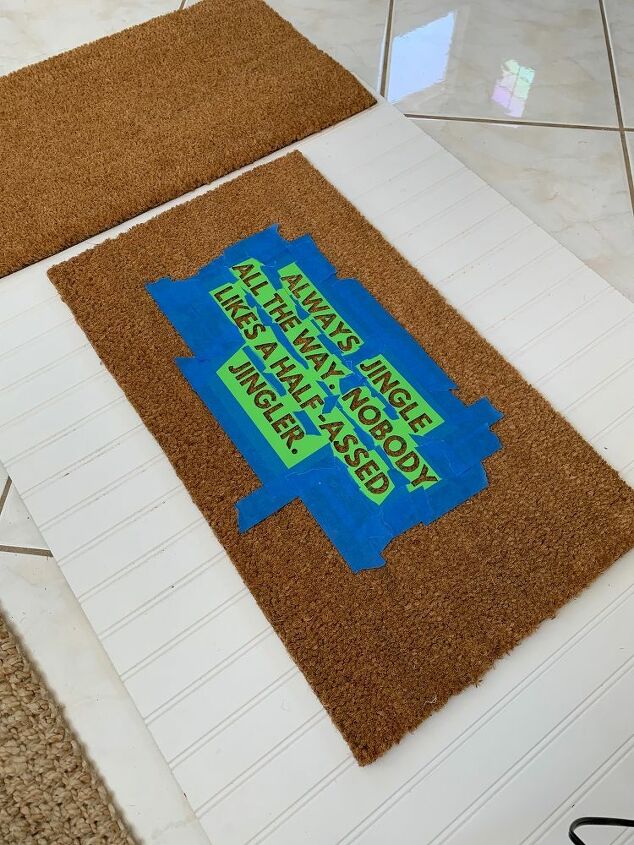
Lay your card stock onto a cutting board and CAREFULLY use your utility knife (or scissors for larger spaces) to cut out your design. Be carful though! Letters like “a” and “e” that have small areas of blank space in them are tricky – you’ll need to actually leave a small sliver of card stock attached to the main stencil your creating so that little space doesn’t fall out completely – otherwise your a’s and e’s and other similar letters will just be fully filled in with paint! If you mess up and that little area inside the letter does fall out, just keep it and stick it down with some rolled painters tape at the end when you place your stencil. It’s a little hard to see below, but where the arrows are pointing is where I left a small bit of card stock to keep the inner portion of the letter attached!
This is the part that takes the longest, so be patient! Your hand might get tired, too, but I promise it’s worth it! And after this step, it’s easy breezy!
Lay your stencil out onto your door mat. I just eyeballed the center, but if you want to bust out the ruler, more power to ya! I’m just lazy like that! Once the stencil is where you want it, use painters tape to tape it down thoroughly along all the edges. See below – I made sure to create a decent border around the stencil as well to make sure I didn’t roll black paint anywhere I didn’t intend it to go!
Use your paint roller to roll on the first layer of paint. Use your fingers to press down the stencil where you’re painting to prevent bleeding (although, the material of the mat itself helps prevent bleeding, as it does not actually absorb the paint).
Now go back over everything with with paint but this time using your stencil brush in a stippling manner. Always use the brush in a downward motion, not brushing along the mat as if you were using watercolors! Down, not across!
The EXCITING PART! Remove your stencil. Set aside if you want to use again on some paper towels to allow it to dry.
Use your touch up brush to touch up those little slivers of stencil you left from Step 4, and anything else you think needs touching up.
OPTIONAL. You can spray your mat lightly with a spray on waterproof clear coat in order to help prevent those little pieces of camel colored coir from coming off – we all know them! These mats do tend to shed, but by doing this you can help stop some of that from happening – it will also help to protect your design a bit better. That said, keep the coat light, or the door mat won’t do much for actually removing dirt from your guests shoes!
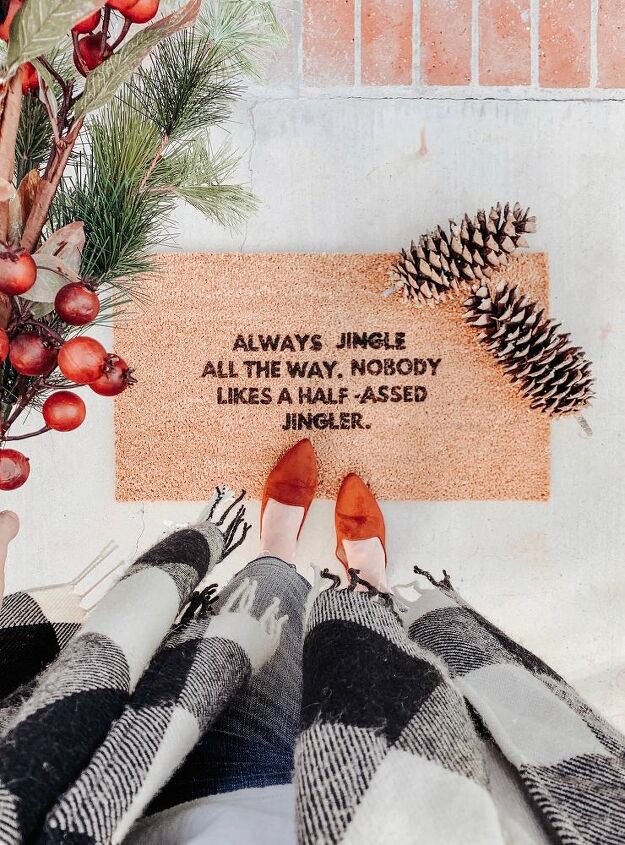
And that’s it! You’re all done! Now just TRY not to make more than one of these! I dare you! Plus, how cute would these DIY holiday door mats be as party favors! You could even use them as your guests place mats for dinner that they then get to take home! I swear I will do this one day!
You can also see the whole process in the short video below; this is such a great project for kids, too – well, minus the cutting part. Please don’t let your kids near a utility knife! And also please use caution cutting the stencils out yourself! No cut off fingers please!
XO,
Ana
And for more fun DIY projects, please visit me over on my blog: www.fiddleleafblog.com!
Resources for this project:
See all materials


Comments
Join the conversation
-
Love this
-
Great idea. I found really nice mats LOCALLY for much less than online. Also you can test
them for shedding in person.


Frequently asked questions
Have a question about this project?
Thinking same would work on a carpet remnant?
I’m very curious to know what “elujah” means. It sounds like Hebrew. Like the name Elijah means My God is Jehovah. And the word hallelujah means All people praise Jehovah. The shortened version of God’s name is Jah. So I’m thinking it must have something to do with Him… 🤔