


Organize Your Life With This Amazing Cabinet How To

Whether it be in your office, kitchen or garage, cubbies are the perfect way to keep your things neat and organized and you can build them yourself! Grab your power tools and some plywood and in no time at all, you will have a gorgeous cabinet fit for any space in your home.
Tools and Materials
- Circular saw
- Router
- Table saw
- Plywood (1" thick)
- Plywood (1/4" thick)
- 1" x 1" pine trim
- 2" wide pine trim
- 1/2" x 3" pin
- Luan wood (1/8" thick)
- Sandpaper
- Sanding block
- 2-3 sawhorses or a large table
- Measuring tape
- 4 piano hinges
- Lock (optional)
- Wood filler
- Paint
- Paint roller
- Paintbrushes
- Pallet wood
- Wood glue
- Wood screws
- Nail/staple gun
- Kreg jig
To make this cabinet unique to you and your home, measure the space where your cabinet will sit. You will need to figure out how wide, deep and tall your finished cabinet needs to be before beginning this project.

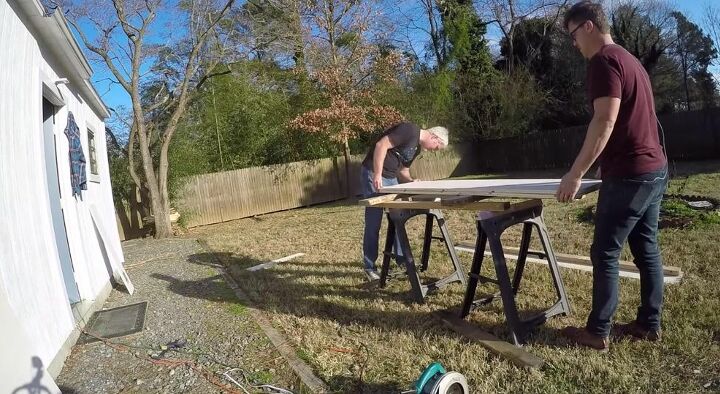
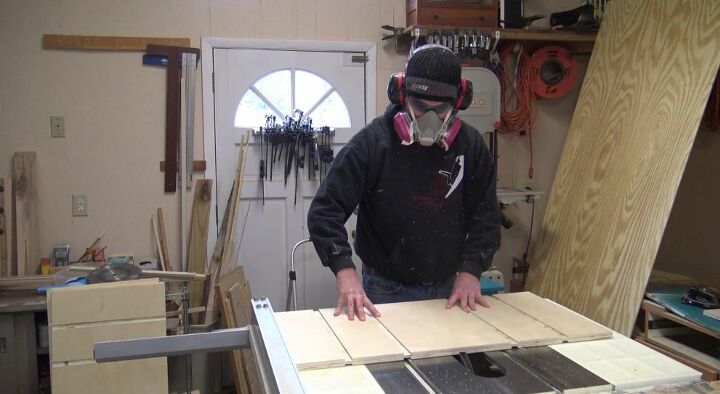
I started the project by using my circular saw to cut a large piece of 1” plywood into a size that equaled the height and width of my future cabinet. It is important when you are cutting your first piece that you cut it to equal both sides of your cabinet together. For example, if your cabinet will be 5 feet tall and 2 feet deep, cut the piece to be 5 feet by 4 feet.
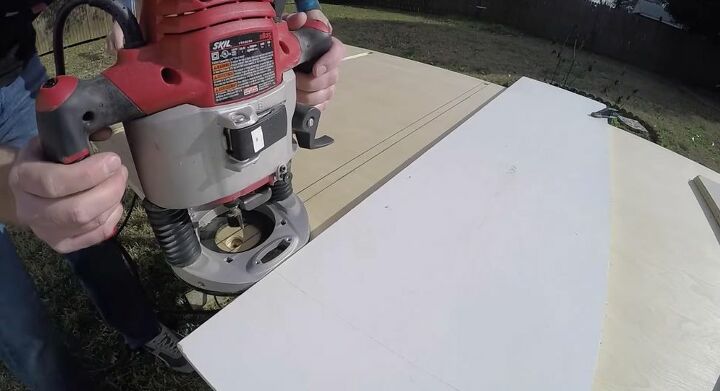
With my first piece laying flat (I find it easiest to lay it across several sawhorses), I made 5 long Dado stop cuts with my router. The cuts were made along the entire width of the board at the heights I wanted my shelves, as well as where the top and bottom boards will be. Make sure to stop short about a 1/2” from the edge and don’t forget to square up your cuts to make them nice and smooth.
Once the Dado cuts were done, I cut the entire board in half from top to bottom cutting right through the 5 Dado cuts. The 2 pieces became the sides of my cabinet. When you are putting the cabinet together later, remember to face the sides where the Dado cuts stop 1/2” from the end facing towards the front. This will create a lip for the doors and keep your shelves from sliding out.
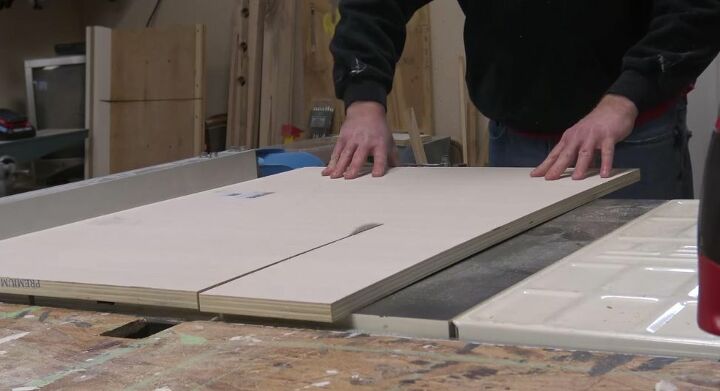
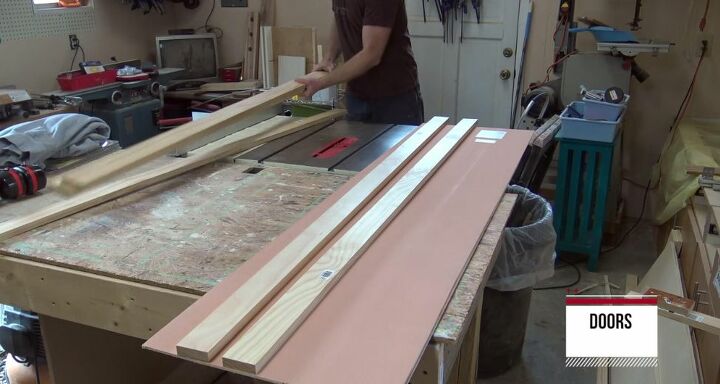
Next, I cut the wood for the shelves as well as for the top and bottom of the cabinet. I used a table saw to cut 5 pieces of the 1” plywood into pieces that were ½” shorter than the depth of the cabinet sides and the same width I wanted the cabinet to be. You need your pieces to be slightly shorter than the cabinet sides as the Dado cuts stop ½” from the edge.
For the 3 shelves, I cut one Dado into each shelf (both on the topside and underside) for each divider there would be. This allows you to easily slide in the dividers when you put the cabinet together and holds them securely in place. For the top and bottom, you will only need to make the Dado cuts on one side; the underside for the top piece and the side that will face up for the bottom piece.
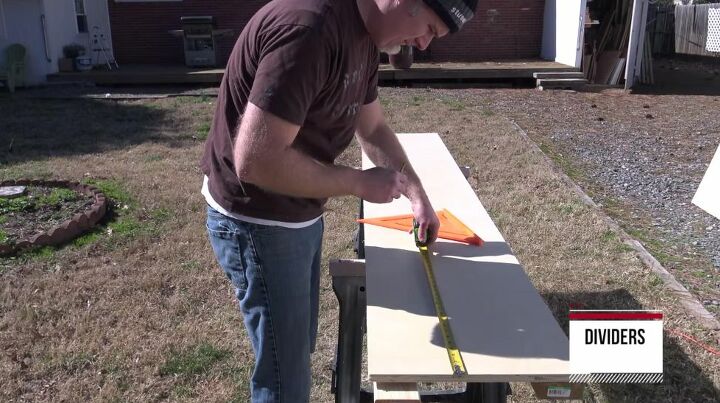
To make the dividers for the cubbies I used the same 1” thick plywood and cut them the same depth as the shelves. Their height will depend on how much space you left between your shelves. Remember to measure from the inside of the Dado cuts, not just the shelf surface. If you would like your cubbies to be larger than the ones I did, you will need fewer dividers.
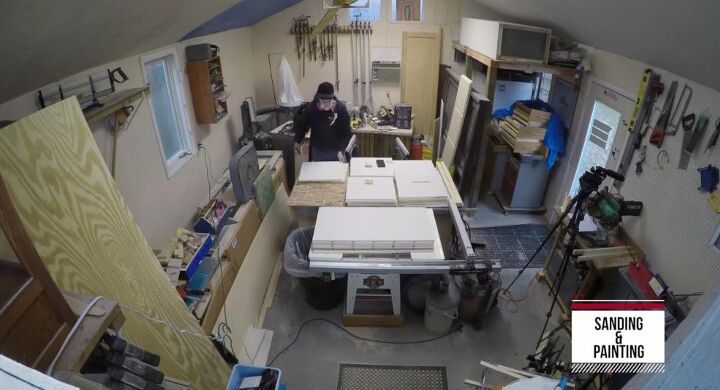
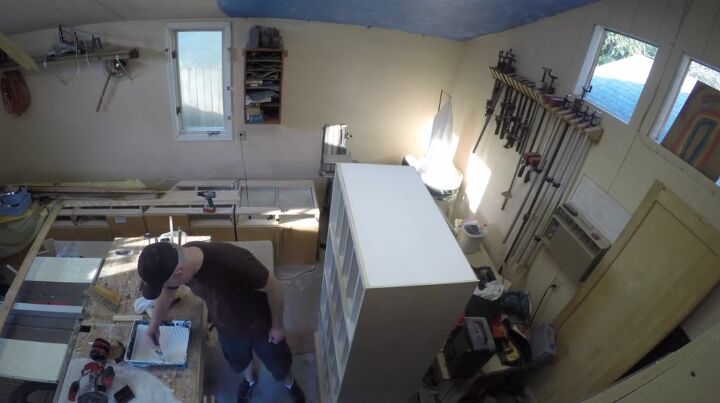
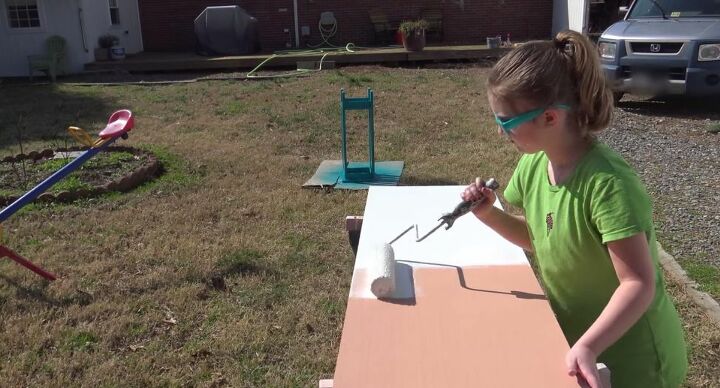
With all of the pieces cut to size and the Dado cuts done, I started sanding and painting. I wanted a nice smooth edge on all of the pieces and found a sanding block worked well for me to do this quickly. Once the pieces were all nice and smooth, they were ready for paint. To paint this many pieces, I found it easiest to use a paint roller, it goes much quicker for the initial coat. I laid the pieces out in the garage and rolled away.
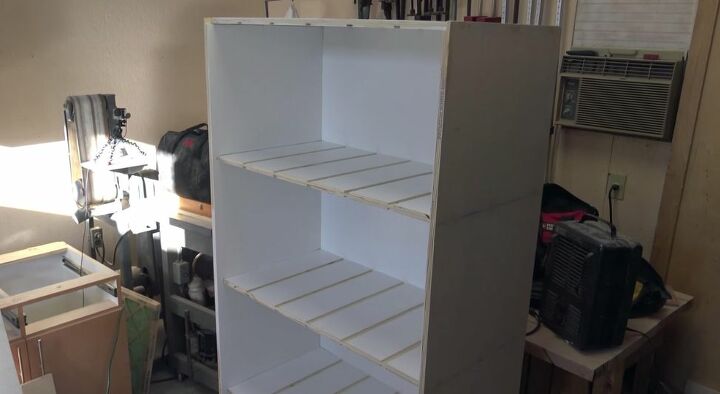
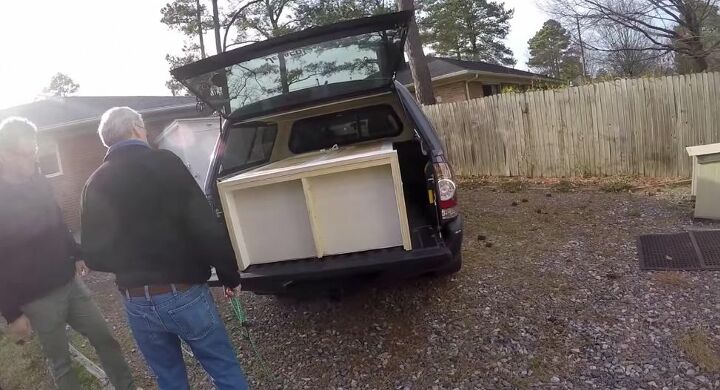
When the paint was dry, it was finally time to start putting the cabinet together. An extra set of hands comes in very “handy” for this part so if you can, find help! Don’t forget to use some wood glue in the joints as you are sliding the pieces together, it will help to hold everything nice and tight. You can also use wood screws for extra support.
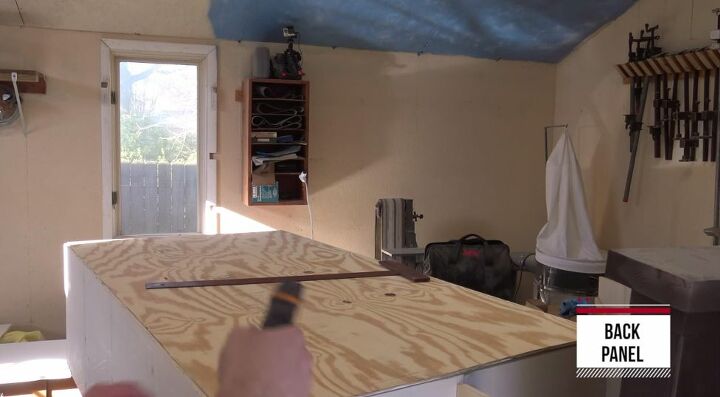
To create a back for the cabinet, I cut a piece of 1/4” plywood and used my nail gun to attach it to the back of the frame. I found it easiest to give it the first coat of paint before attaching it as well.
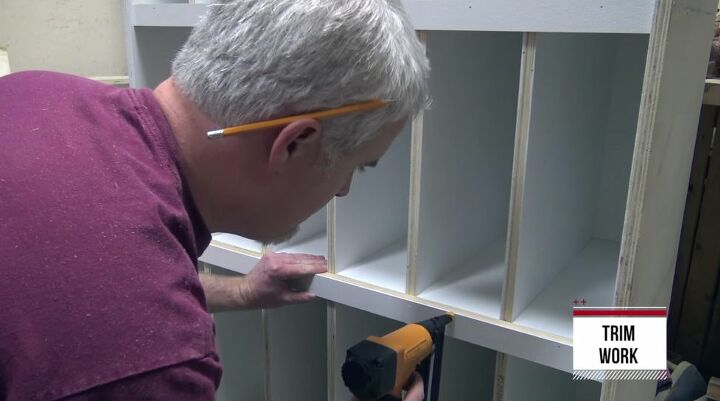
I wanted the cabinet to have a nice, finished look so cut some 2” wide pieces of pine trim and attached them to the front of the shelves. I also cut some 1”x1” pine trim for the dividers and attached them in the same way. The trim covered up all of the raw edges and gave the cabinet a professionally finished look.
A little note; depending on how large your cabinet is, you can either have it sit directly on the floor or you can build a frame for the bottom. If you frame out the bottom, don’t forget to add a piece under the center for support.
With the trim all in place, I filled all of the little nail holes with wood filler and then gave the entire cabinet another coat of paint.
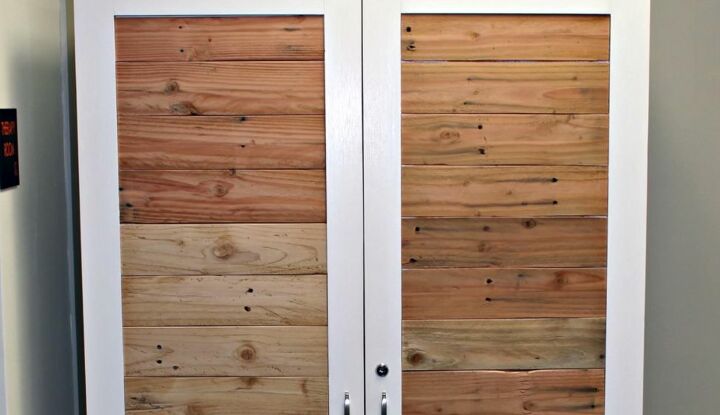
To give the cabinet a polished, finished look, I made some doors so that everything wasn’t readily visible. I decided to make the doors out of Luan wood and the frame around them out of pine. There would be two doors so I cut 2 pieces of Luan wood that together equaled the width of the cabinet. I also cut 4 pieces of 1/2” pine the length of the doors (2 for each door) and 4 pieces the width of each door minus the width of the pine trim. The smaller pieces were for the top and bottom of each door.
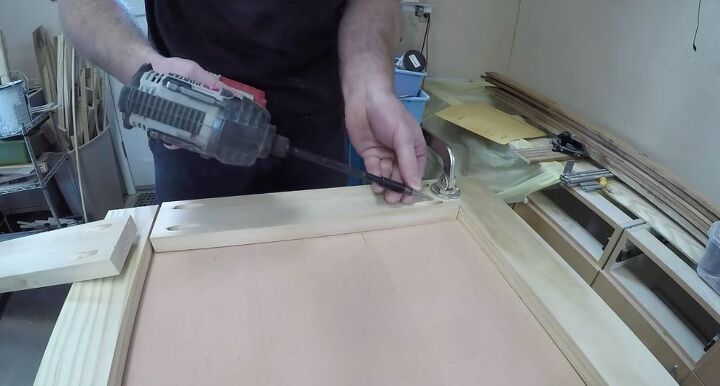
Using a Kreg jig and wood screws I was able to make a frame the size of each door. I then attached the Luan pieces to the back of the frames and held it in place using the nail gun. The Kreg jig gave the doors a much cleaner look and I was able to hide the screw holes against the Luan wood so they weren’t seen.
The doors both got two coats of the same paint as the body of the cabinet when I was done building them. These were much easier to paint than the cubbies.
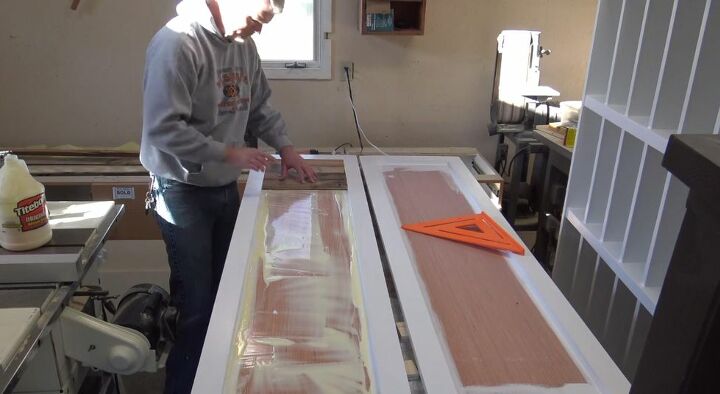
To make the doors look really unique and give them some added character, I grabbed some pallet wood and cut it down to fit inside each door frame. I didn’t need to do much to prep the pallet wood except sand the edges smooth. The pallet pieces were then attached to the doors with a hefty amount of wood glue. I placed some heavy objects on top to hold the pieces down while they were drying just as a precaution to make sure they fully adhered. Don’t forget that if you are going to use pallet wood on your cabinet, please check and make sure it is free of chemical treatments (look for symbols on the pallet that will tell you if it is treated or not).
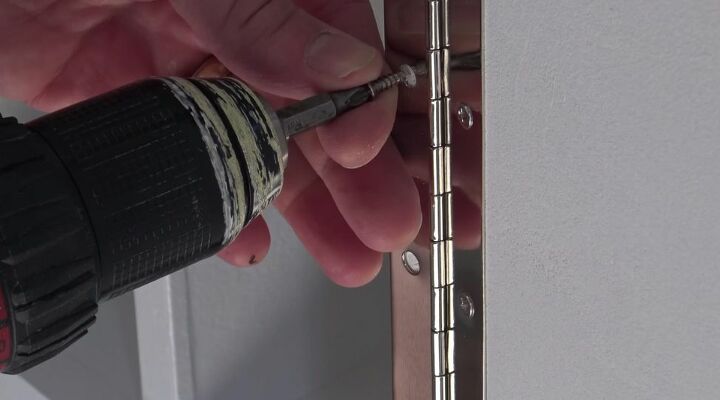
Once the doors were done, all that was left to do was attach them to the cabinet and add the handles. I wanted the doors to lay flush and open fully so used piano hinges to attach them to the cabinet body. I also added a lock but that isn’t needed if you are using the cubby cabinet in your home. To finish it off, you can also add vintage or replica label holders to each cubby to give your cabinet some extra character and charm.
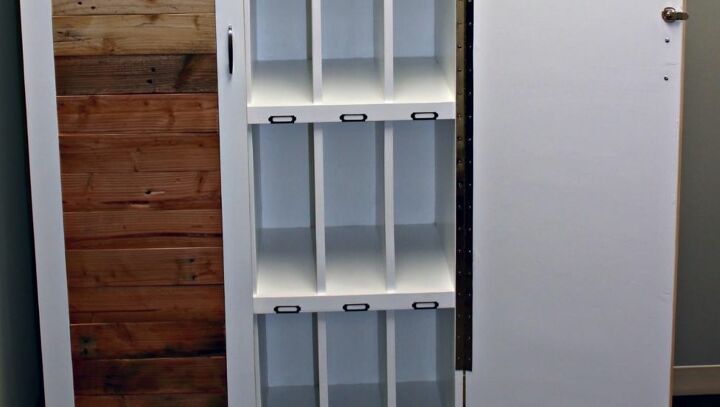
This cabinet took some time to build but it was so worth it. It turned out beautifully and I couldn’t be happier with the final look. If you are looking to try your hand at a wood project, I would definitely recommend one of these cabinets. The possibilities for it in your home are endless!


Comments
Join the conversation
-
I've been looking online to BUY something for extra kitchen storage for my new apartment. But everything is SO EXSPENCIVE!! I am on a fixed income and what I would really like was WAY OUT of my price range. Or "OUT OF STOCK" online, I think everyone is remodeling their homes right now during this Coronavirus shut in. So running across your DYI storage cabinet was perfect timing!! I can make it ANY size, color, texture I want and NEED..... I LOVE IT!!♥️ My roommate and I can't wait to get started on it. We don't have a saw..... But we decided to go to Home Depot and just have them cut everything we need to size and then we can sand it, paint it and assemble it all here at home. Thank you so much for sharing your idea and perfect directions!! You made the instructions so simple a kid could follow them. I craft, sew, draw and paint. My roommate... Well she can assemble anything that we order online even when they forget to put the instructions in the box. LOL... Oh and that happens more often then not.
Thank you again,
Gay Lynn Allison
San Antonio Texas
-
This would be perfect for my craft room!


Frequently asked questions
Have a question about this project?
Did you use a piano hinge for the door?