


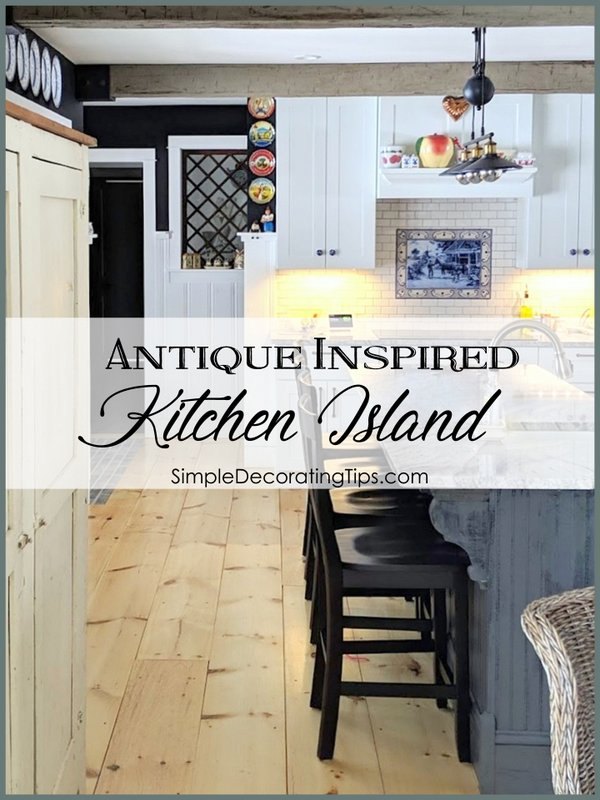
Antique Inspired Kitchen Island
Hi, I'm Liz from Simple Decorating Tips, a DIY and decorating blog. We have an antique inspired kitchen island in our newly renovated kitchen.
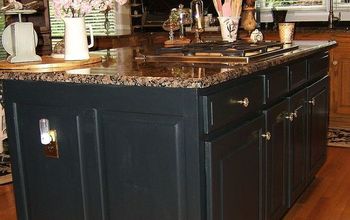
I saw an antique general store counter advertised for sale around the time I was planning our kitchen and considered buying it, but it was so far away and I was so busy, that it really wasn’t feasible to spend an entire day to go pick it up. Plus, to be honest, even though I loved the look of it, this island would be a workhorse for the function of the kitchen so I was a little concerned with it only offering all open shelving for storage. What we really needed were drawers for frequently used storage. Every time I would look it up on my phone, though, I felt an emotional pull toward it.
Do you ever do that? Buy something based solely on how it makes you feel, without really thinking it through?
Though I did love the way that antique store counter looked, it was clear that new cabinetry would be the most user friendly and offer the best function for our kitchen. Could I instead get a similar look and feel by using that vintage piece to give me an antique inspired kitchen island yet use only new cabinets?
Here is the antique inspiration:
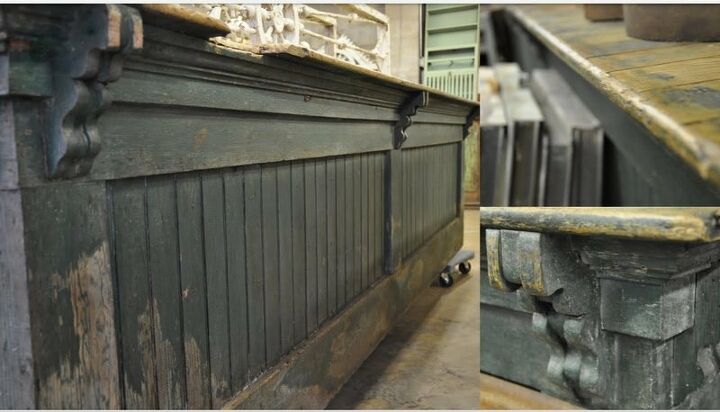
The old general store counter looks to only have a few inches of overhang, this was yet another reason it wouldn’t have been the best choice. For stools to comfortably sit at the counter the overhang should be a minimum of 12″, but can go up to 18″. I usually try to design for a 14″ overhang. It was the color, the beadboard, the wide base trim and wood corbel details that really caught my eye on the vintage inspiration piece.
(if you want to see a ‘before’, you can see that in last week’s post when I showed you the wall mounted pot rack I designed for the kitchen HERE)
For our kitchen redo, I designed the island, as well as the entire kitchen, with function being the priority. In this hard working room the important creed of ‘form follows function’ is so necessary and if not observed, sorely missed!. Once I figured out what I thought would be the best use of allotted space for the island, I could then spend my effort on the ‘form’ (style) of the island.
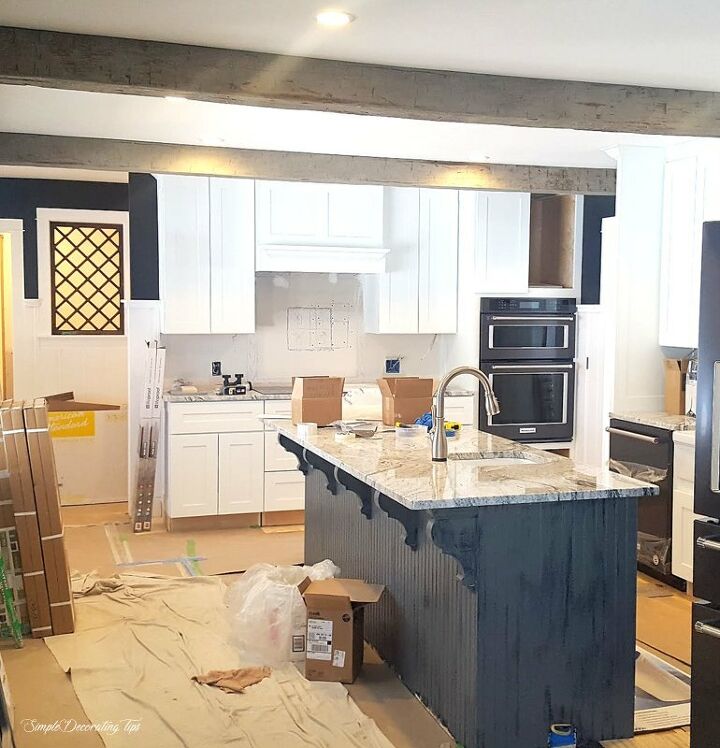
Below you can see the cabinets starting to go in. After months and months of demolition and mess, this was a very exciting day!
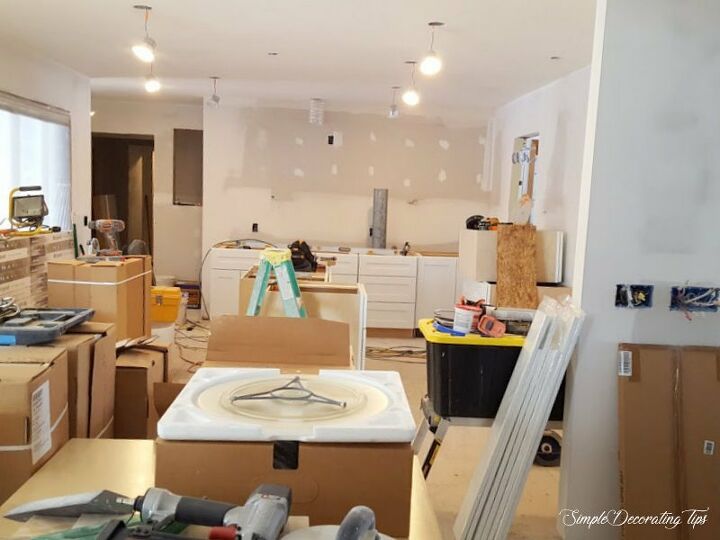
All the perimeter base cabinets were put in first, so that proper placement of the island was assured, (plus that also left the center of the room open for unpacking all those cabinets).
By the way, the cabinets in my kitchen are a favorite of mine, I’ve used them in several different kitchen renovations, both for myself and for clients. HERE is the shopping link for the cabinets. They are great quality and reasonably priced for this quality cabinet. It does take a little time and detail thoughtfulness to be sure all the right pieces are ordered for a whole kitchen renovation like this. I love to do it, (and am for hire! I’m in the process of setting up my e-design website, so if you need some help planning your kitchen I’d love to help you. I’ll be sharing that e-design website in a few weeks).
Once the island cabinets were installed, this is what it was looking like. I knew we’d be building our own custom backing on the island, so I ordered the cabinets without finished backs or sides, that’s a slight discount from finished sides.
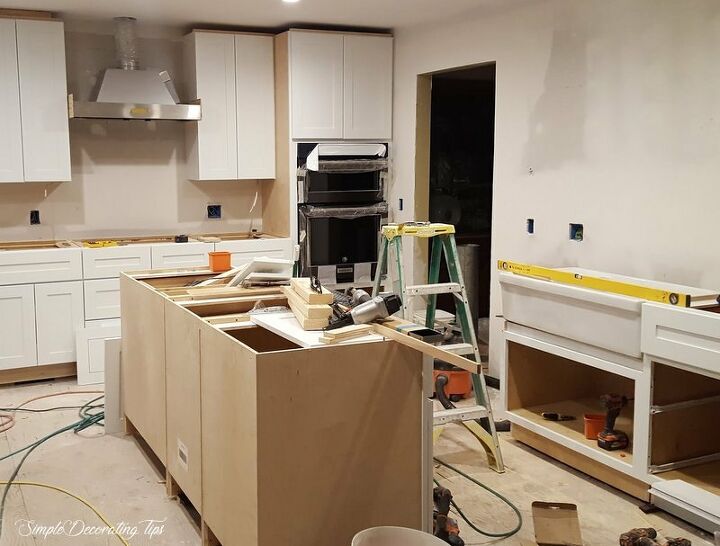
Along with the custom back, the carpenter would add a custom built piece on the end of the island with open shelves in it.
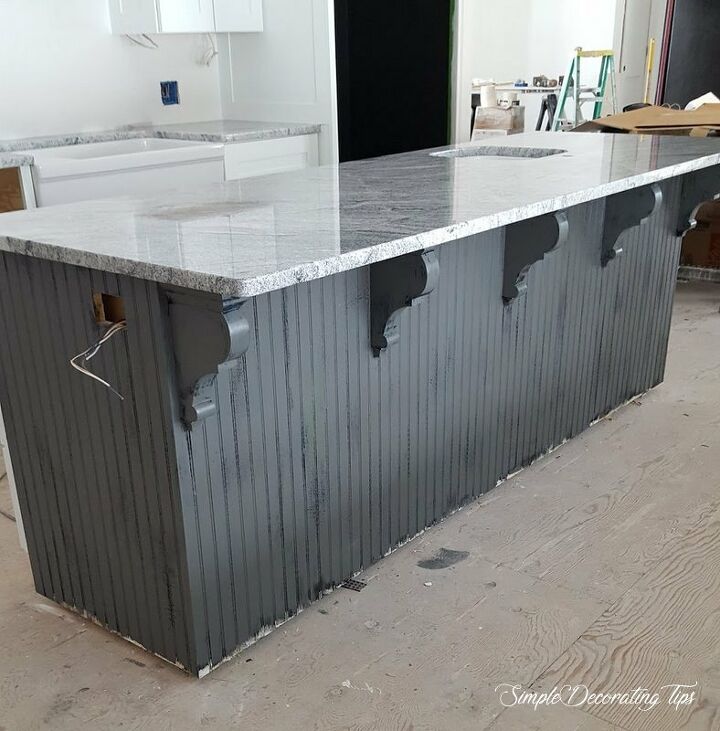
Below shows our carpenter, (who installed all the cabinets) adding the corbels once the beadboard was installed.
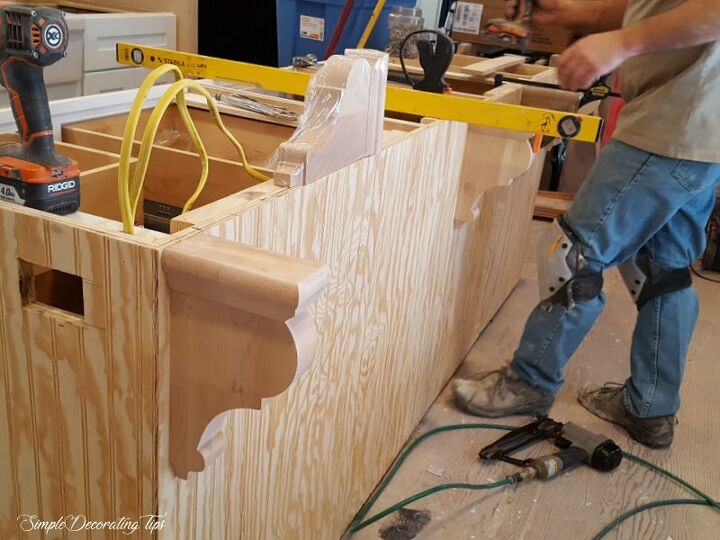
The island top would be granite, so it needed proper support for the 14″ overhang.
As soon as the carpenter was finished building the details of the island, I filled all the nail heads, primed and started painting the first coat of paint.
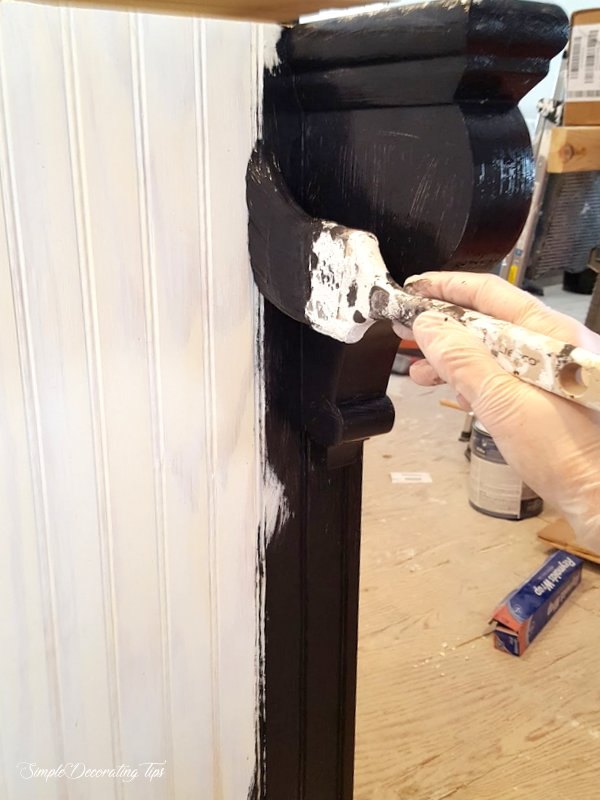
First coat of paint was black. Then, referring back to the original antique inspiration, I noticed the bright yellowish paint peeking through in spots.
I didn’t want yellow peeking through, but instead thought bright green would be good, so I randomly painted splotches of green on the dried coat of black.
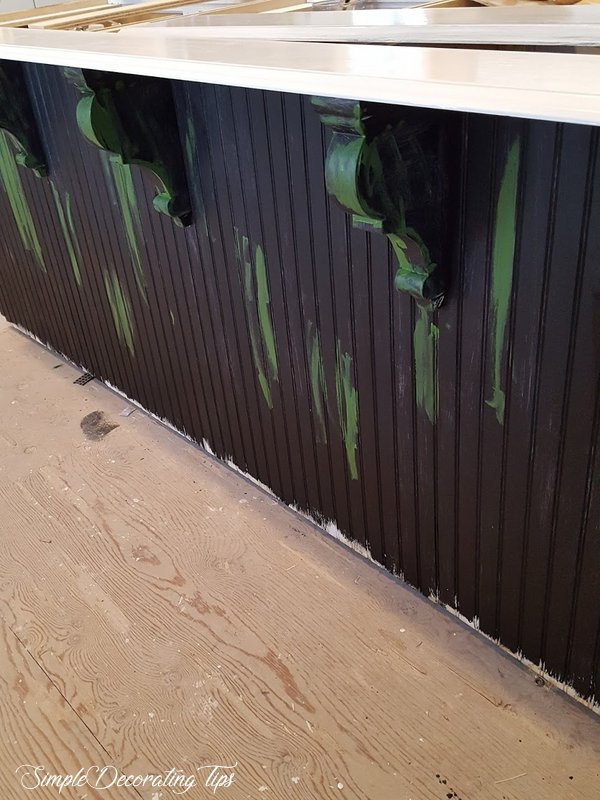
It was at this point one of our friends stopped by for a tour of the remodeling. I’m not sure what they thought of the island finish. I’ve gotten to the point in my life where I’m kind of naughty and I don’t always take the time to explain everything… just keep ’em guessing is my motto. LOL
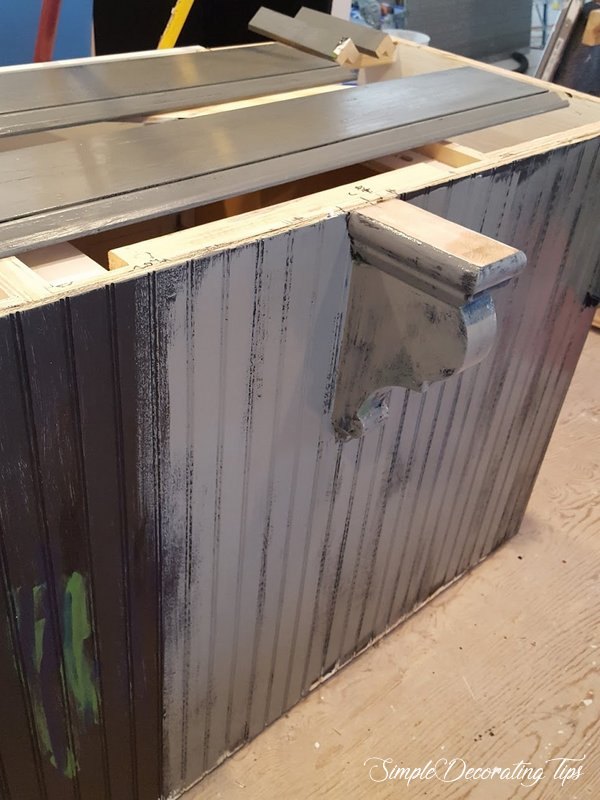
Once the kinda crazy green splotches were dry, I could paint on the final coat of medium/dark grey.
The base trim for the island would be installed after the pine plank flooring was installed, so as I was painting the island, I made sure I painted the base trim too.
I had to do one very careful, not over brushed, but well brushed coat of grey for this final layer. If I didn’t do it good enough, it’d need another coat of grey paint and that would risk covering the tiny amounts of black and green purposely exposed.
Below is the island after that single coat of grey paint was dry. It turned out with hardly any bright green paint showing through, only a tiny amount here and there and a fair amount of black in the cracks. In hindsight, I wished I would have put wax or vaseline or something on some spots of the green to be able to rub off more of the grey, maybe some day when I’m finally caught up with everything else I’ll redo that.
From the sink side of the island, I wanted to keep the original white finish the cabinets came with. It is a very durable finish plus light and bright for in the work area.
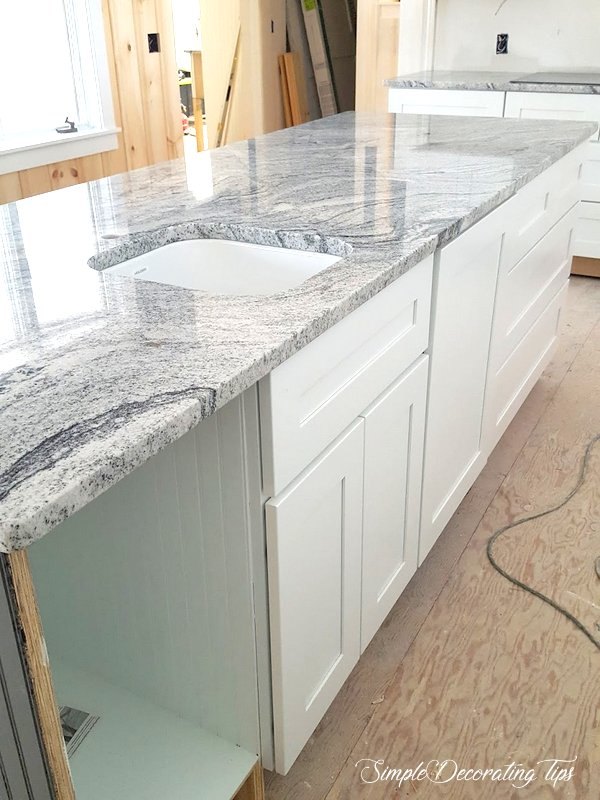
The new cabinets of the island included a sink cabinet then a pull out garbage/recycling drawer, then a final stack of drawers… see how much more user friendly this set up is than just all open shelving the antique piece offered?
In the picture above, I was starting to paint white on the inside of the custom shelving we added on the end.
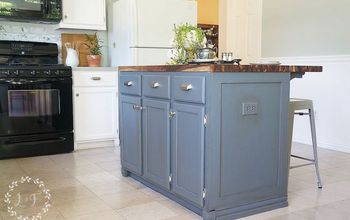
Back to the side where the stools would sit, the island has a very different look from the rest of the kitchen cabinets. Depending on the kitchen layout, I have preferred that idea of style for many kitchens I’ve worked on. I think to have a ‘furniture piece’ look to the island instead of just matching the cabinets is more interesting and offers a more ‘layered’ look to the room.
It is for sure that layered look I strive for in my design. My goal is for the space to look like it took decades, or even generations, for all the layers of the room to come together. In a full remodel like this kitchen was, it’s so easy to just do everything the same and not have a thoughtful design plan to create character that comes from layering. I feel it’s worth the extra effort.
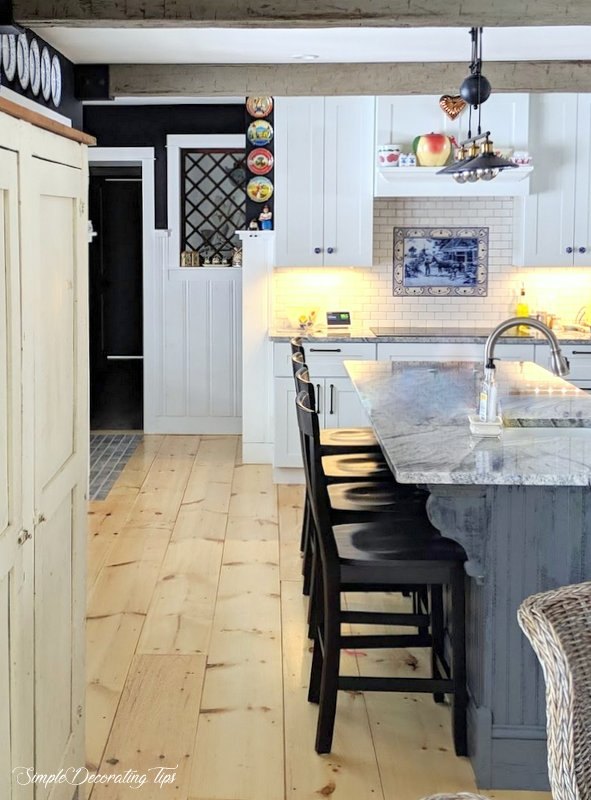
This is the antique inspired kitchen island all finished in our newly remodeled kitchen. It does have a vintage feel to it. Some of the pieces in the kitchen are vintage, like the diamond window in the background, and the creme cupboard in the foreground, which juxtapose the obviously new pieces.
When I would look at the antique store counter I emotionally wanted to buy it, but when I thought it out without the emotional pull, it would make sense to not buy it. The moral of the story is: Don’t buy things with an emotional decision, especially big semi-permanent things. It’s important to clearly think it out and make a decision based on what will truly work best. I’m super happy with the functionality of the kitchen island, and though it’s not an actual vintage piece it does give a feeling of that vintage look.
Resources for this project:
See all materials


Comments
Join the conversation
-
OMG I LOVE this island! Great job!
your floors are awesome too, are they pine?
-
I have a question about the instillation of the Vent over the cook top. Was it installed first and then the cabinetry . What is the normal height of the hood? This seems a bit high. Do you have a tutorial for this instillation?


Frequently asked questions
Have a question about this project?
Is that sink big enough?
It's beautiful! But I LOVE the flooring! What is it? Real wood? Engineered?
Lovely. Also interested in your floor. What is that ? Pine? Plywood? and looks nailed? How did you finish it? Thank you.