


My Secret Method to Install a Plate Wall

An easy step by step tutorial to install a plate wall anywhere in your home with eclectic plates for a charming grandmillennial look!
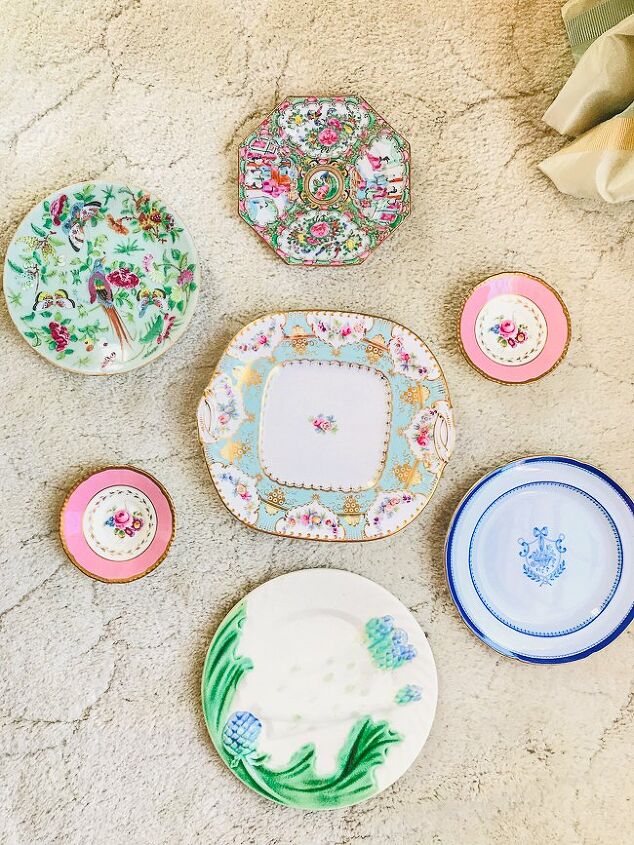
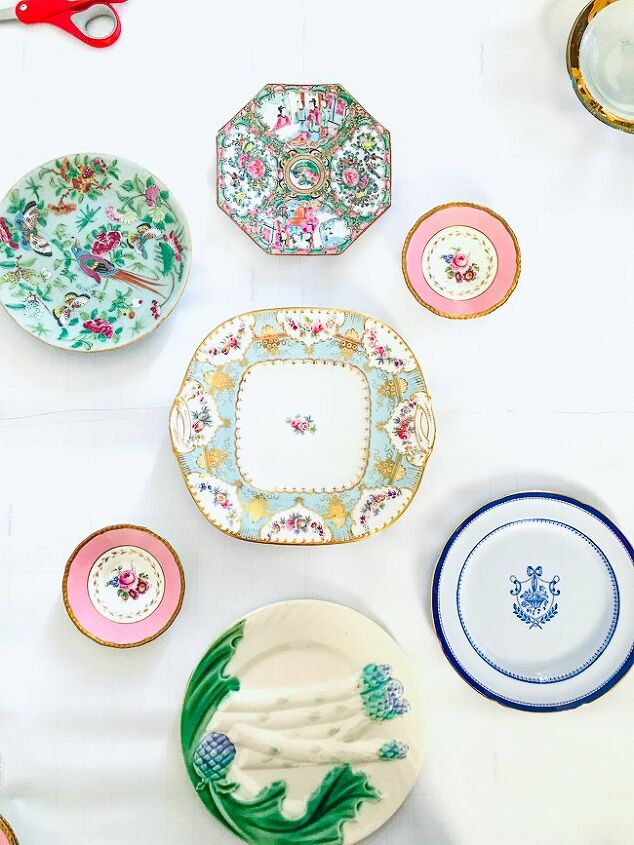
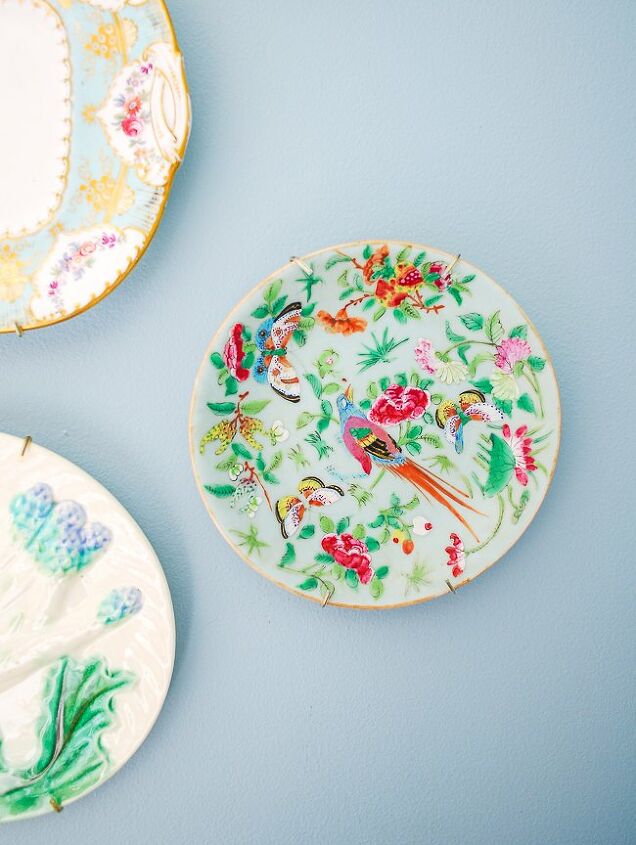
I love a good gallery wall, especially when it showcases antique plates! For me each of these ceramic beauties is its own little work of art. What better way to display them then on a prettily arranged plate wall in my grandmillennial style dining room? Today, lovely peonies I’m sharing with you my secret method to install a plate wall that is hassle free and will prevent a dozen mistake holes from being nailed into your wall!What’s the secret you ask? Well, I create a paper layout template, using wrapping paper with a measuring grid on the reverse!
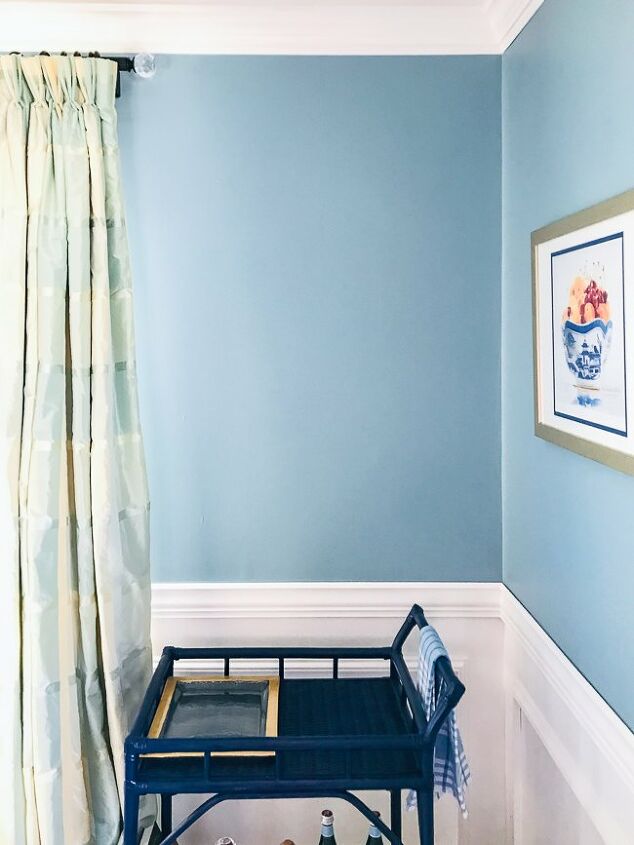
Here is the blank wall in my dining room above my bar cart where I installed the plate wall.
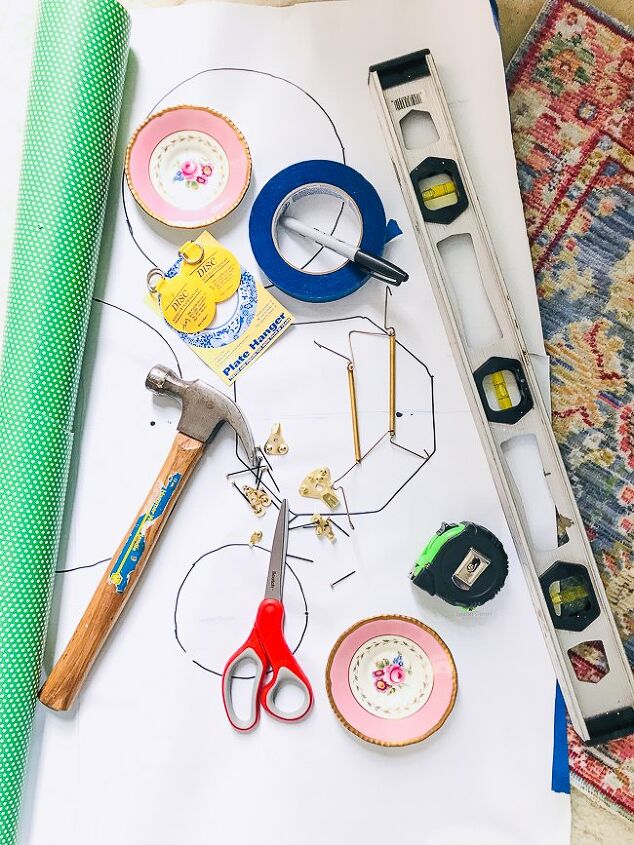
You will need a hammer, scissors, measuring tape, level, plate hangers ( wire mounts, disc mounts), picture hooks, painter’s tape, wrapping paper with measuring grid, marker, and of course a variety of plates.

The important thing here is to create an arrangement that fits the space and showcases the plates. Consider the width and length of the wall space and the level of symmetry you are looking for as well as the shape of your plates. Play with the plates on the floor below the wall where you want to hang them, so you can easily visualize them in the space.Color and pattern are important considerations if you are using an eclectic grouping, instead of one china pattern or style. The colors should harmonize together. Avoid positioning two busy patterns close together.
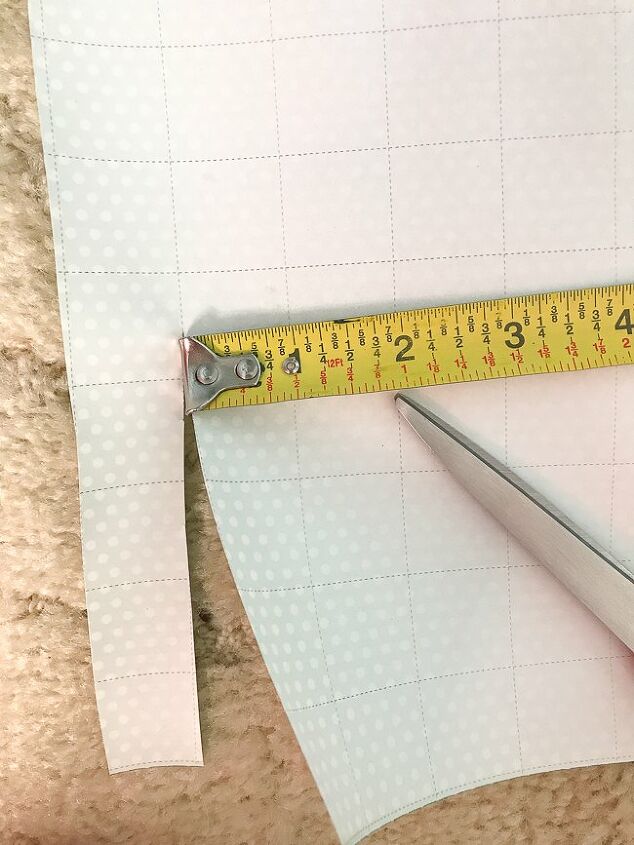
Measure the height and width of the space on the wall you want your plate arrangement to fill. Then cut your wrapping paper to this size using the grid lines on the back to get straight lines. Be sure you are starting with a straight line too. Take a moment to measure the grid lines on your paper. Mine were one inch, which is pretty standard. This will be important in a moment.
First find the center of the paper and mark the horizontal and vertical center lines. Then place your main plate there. Next position your other central plates, and finally layout the outer ones. Use the grid lines to get even spacing between plates. Where the plates were at a diagonal, I also measured with my tape to make sure spacing was even.
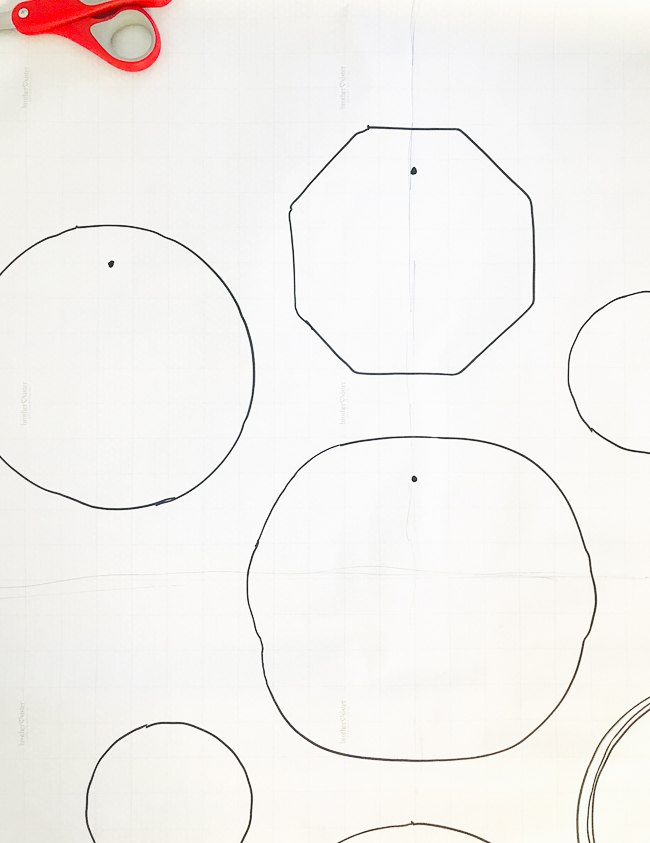
Once your arrangement is finalized take a marker or pencil and trace around the outside of the plate. Be sure to angle your pencil in a little to get a more exact measurement of the plates. When I measured my plates and the traced circles, there was a slight 1/8″ difference. This won’t matter too much in the end, but you can compensate for it a bit in the next step.Put the plate hangers on the plates.
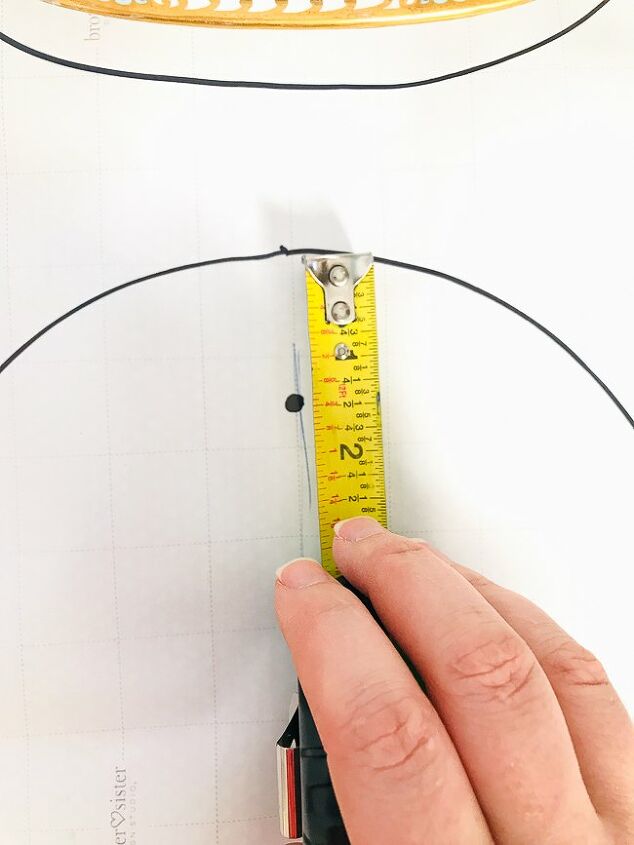
Measure the space between the plate hanger and the top of your plate. Then from the top center of the outline on your template paper mark this point. Use the grid lines to help you find the center. The mark is where the hanging hook will need to be placed on the wall. To compensate for the outlines being a touch bigger than the plate, I moved my tape measure down inside the line of the circle.
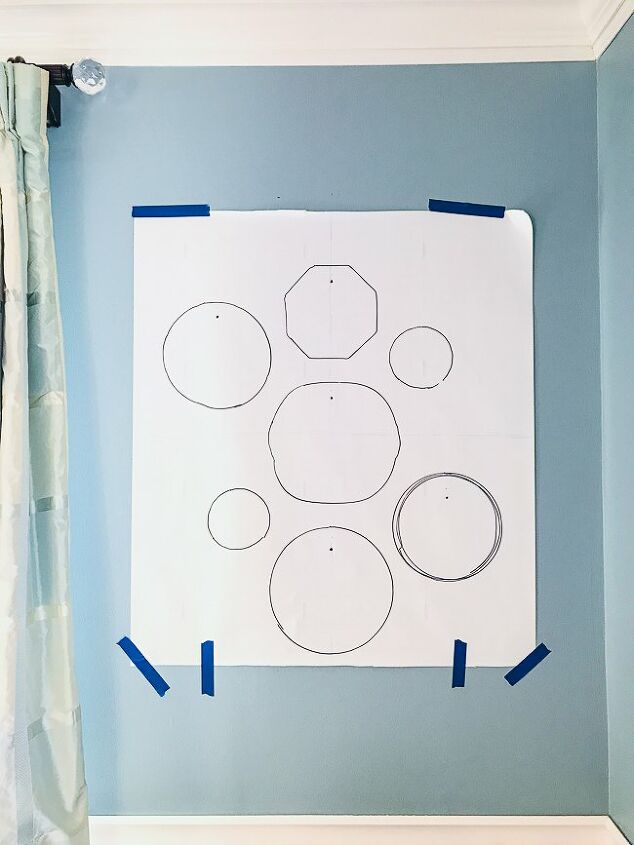
Decide where on the wall you want to hang your paper layout template. I centered mine within the space and put the top of the center plate at the halfway point. Lightly tape paper layout template to wall.With a level at at the top of the template, make your template level on the wall. This takes a bit of maneuvering. I recommend working from the top down, and smoothing out the paper to then tape the bottom down.
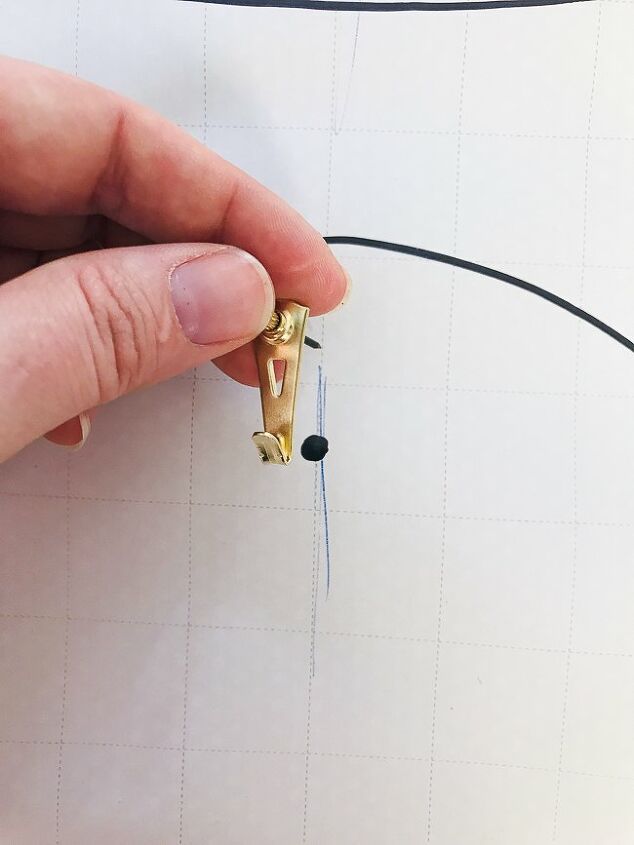
Place the hook part of the hanger on the mark you made earlier. This accounts for the dropdown difference between the nail and the hook. If you are just using nails, then you would put your nail on the mark instead.After nailing in all your hooks, remove them from the wall and take down your paper template. Then push the hooks and nails back into the holes you created.
I recommend bending the hook part of the wire plate hanger out from the plate for easier hanging. For smaller plates, you can use these Disc plate hangers. They have an adhesive activated by water, so you do have to allow several hours for them to set up before hanging.
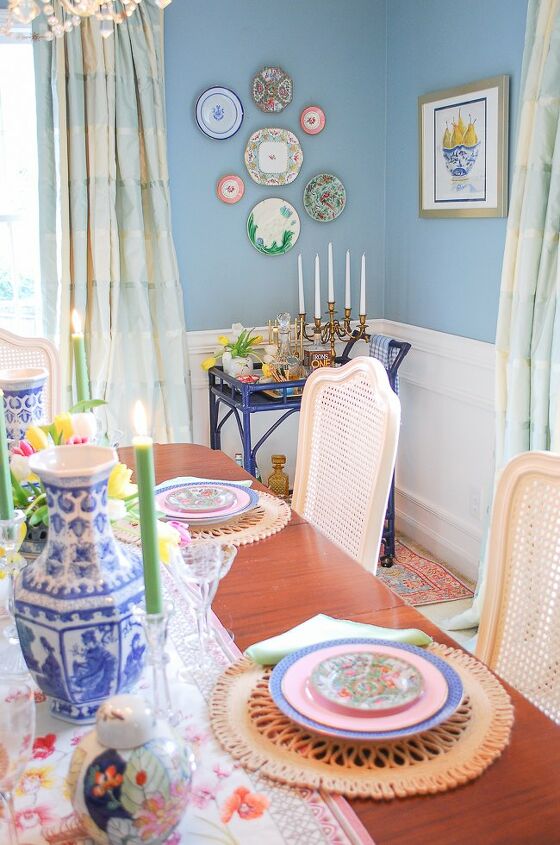
So how easy is that? Just 8 steps to hang a lovely plate wall with eclectic antique plates! My wrapping paper with grid lines is the secret tool you need to make this installation easy peasy. Head over to Pender & Peony for more pictures and details of this tutorial.
Resources for this project:
See all materials


Comments
Join the conversation
-
I admire your ingenuity and persistence to get it "right". They look great!
-
The gridded wrapping paper idea is genius! This will also work for groupings of picture frames or mirrors, baskets, etc! Thanks! Great tutorial!


Frequently asked questions
Have a question about this project?
I love the idea but is there a way to hang plates without using the plate hangers? I have very old plates and those metal hangers could damage the edges of the plate.
I love your wall color. What brand of paint is it and what is the color?