


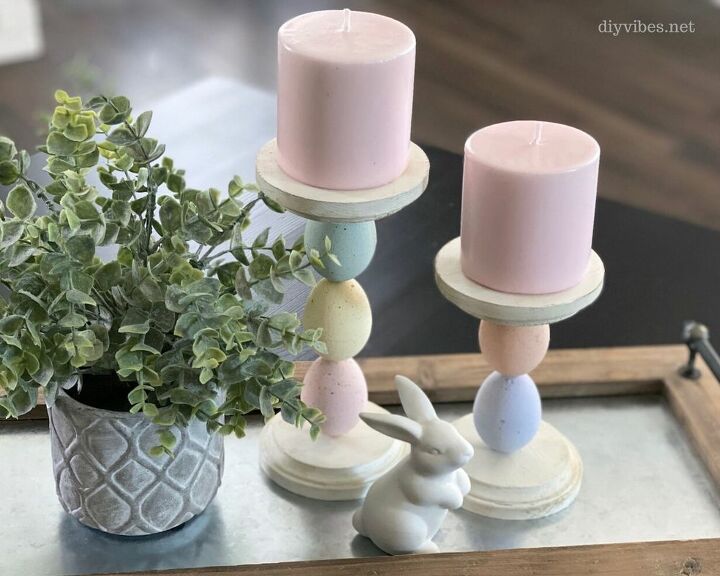
DIY Easter Egg Candle Holders
Plastic easter eggs combine all different shapes, sizes and colors. They are one of the easiest and most inexpensive ways to add color to your Easter decor. Today I'll show you how to take plastic eggs and turn them into cute candle holders. Here is what you'll need:

- Plastic Easter eggs
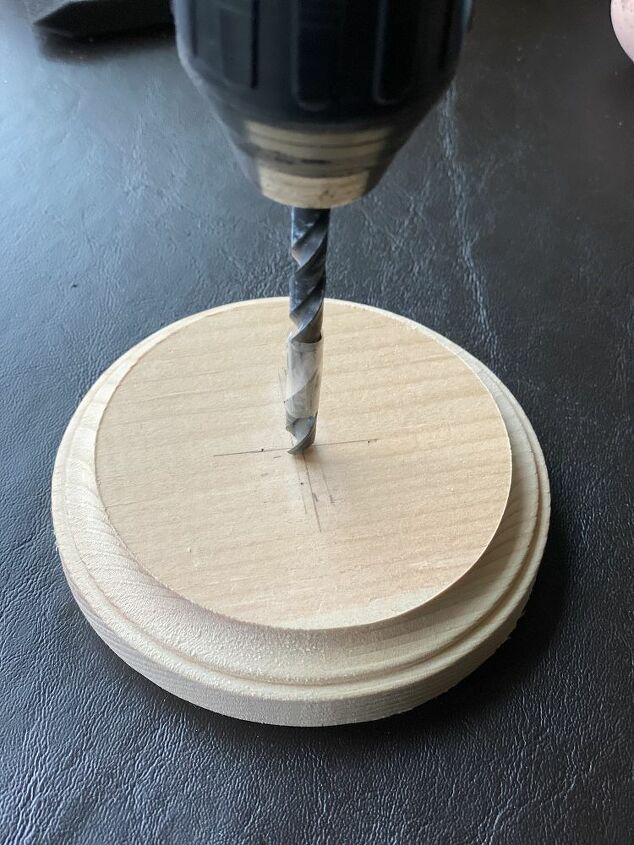
- 4 Circular wooden discs
- 1/4″ dowel
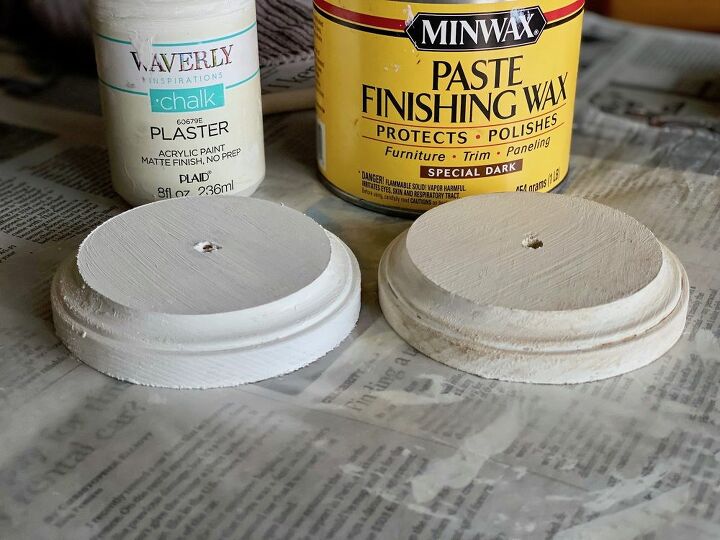
- Chalk paint
- Dark finishing wax
- Wood glue
- drill/ 1/4″ drill bit
- tape
- rag/brush
- hand saw
Next I painted my discs with chalk paint. After they dried, I took my rag and dipped it in dark finishing wax and rubbed it all over the discs, wiping off the access with an old rag. The wax sinks into the rougher areas of the wood and gives it a more rustic look. You can see the “before and after” waxing below.
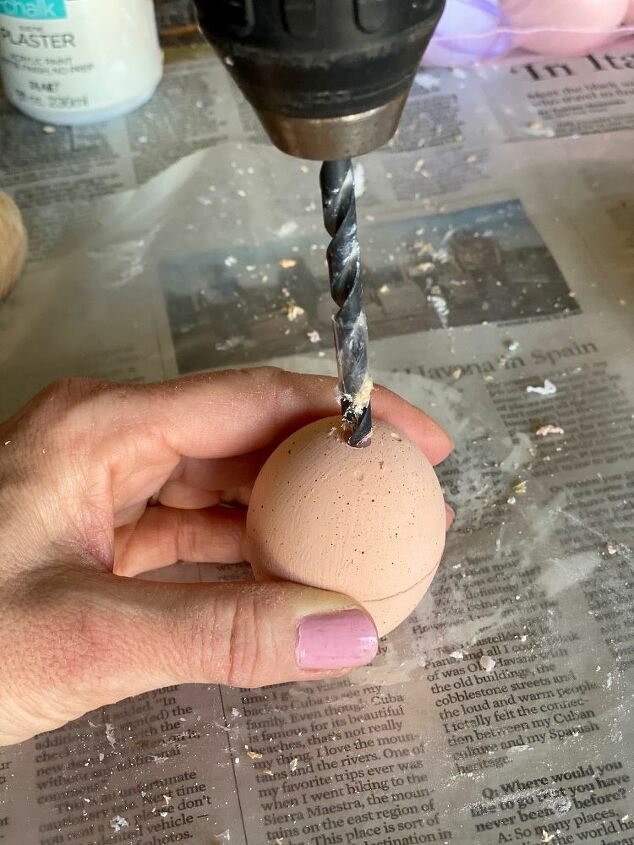
To drill holes in the ends of the Easter eggs, I found it helpful use the divot at the center of the top and bottom of the plastic Easter eggs to guide me. I used a 1/4″ drill bit since I was using a 1/4″ dowel. I went REALLY SLOW to drill the holes. I am very comfortable using a drill with a drill bit but I suggest that you DON’T do what I did for safety reasons. Please disassemble the egg and drill it while apart. The reason I didn’t do this was because I painted these eggs myself (See how, HERE) and was trying to keep the look of the line in the middle to a minimum.
Once my eggs were drilled, I placed the dowel in one of the discs then slid my eggs down the dowel. Once I had the number of plastic Easter eggs I wanted on the dowel, I measured 1/2″ above the top of the egg, marked it, and cut the rest of the dowel off. I placed another disc on top of the dowel and made sure I couldn’t see any of the dowel on the completed Easter egg candle holder.
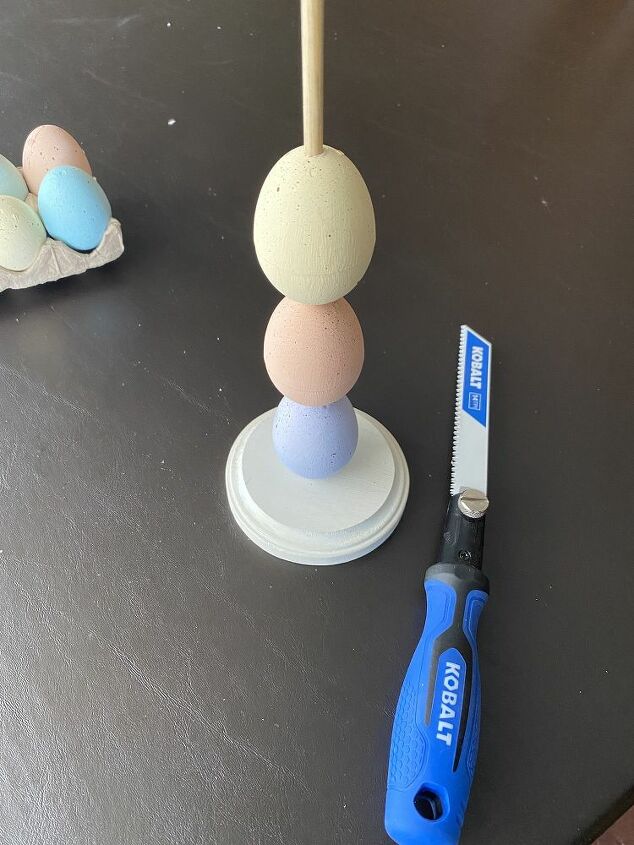
I did the same with the other discs and eggs and when I was satisfied with my color arrangement, I used the wood glue to secure the dowels to the circular discs. Then I let them dry before adding the candles.
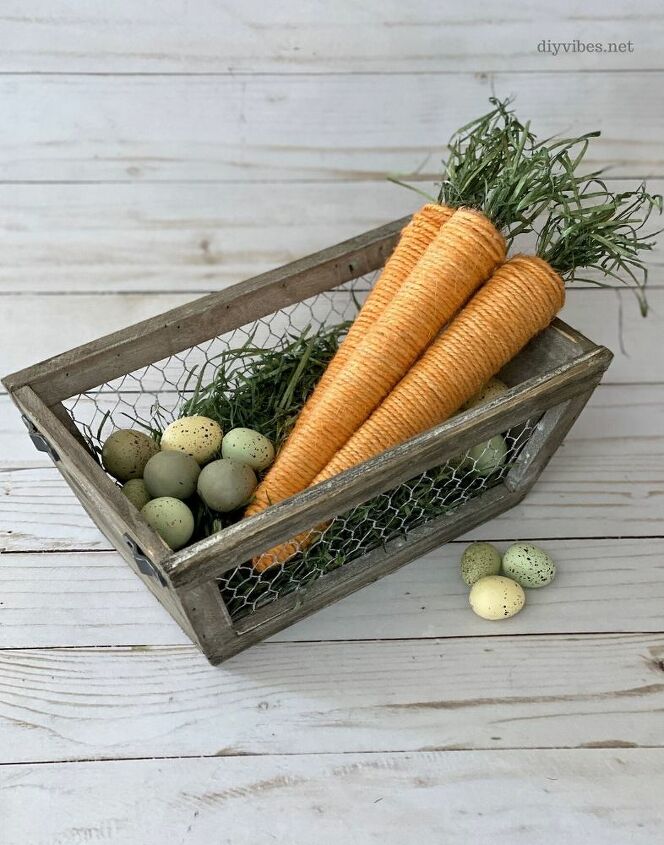
You might also like my DIY Twine Carrots.
Resources for this project:
See all materials


Comments
Join the conversation
-
I tried these an eggs kept cracking and breaking, what am I doing wrong
-
So creative and perfect! Love it!


Frequently asked questions
Have a question about this project?
Did you paint the eggs with chalk paint too?
These aren't the traditional plastic eggs- what are they?
Wouldn't it work just as well, maybe easier, to drill your holes before painting? Then they can be in two pieces, which you said was easier, and no worry about the line around the center.