


Unlock Your Creativity With These Simple Popsicle Stick Decorations

One of the most versatile materials to use when making projects for the home is the simple popsicle stick. Memories of crafting popsicle stick cities and spending summers collecting them from friends and family will come flooding back, as you find out how this handy kid's craft material can be used to enhance your home aesthetic.
Fancy Gold Popsicle Stick Wall Decor

Tools & Materials
For this project, I used:
- A pack of popsicle sticks
- Elmer's wood glue
- Glue gun
- Spray paint
- Rust-oleum metal finish
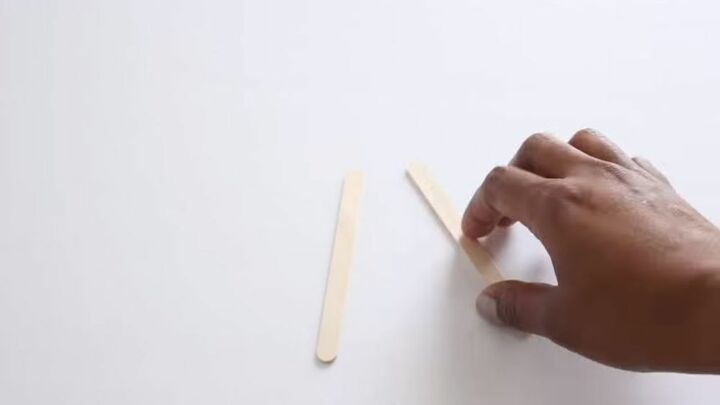
Step 1: Gather Your Tools and Materials
The first step was to gather together the materials I needed for my popsicle stick wall décor project. A pack of popsicle sticks is a must, as well as some glue and a spray paint of your choosing. I opted for a metallic gold to fit the room I was going to hang the piece in. I also used Elmer’s Wood Glue to make the squares of popsicle sticks and then the glue gun to fix the pieces together.
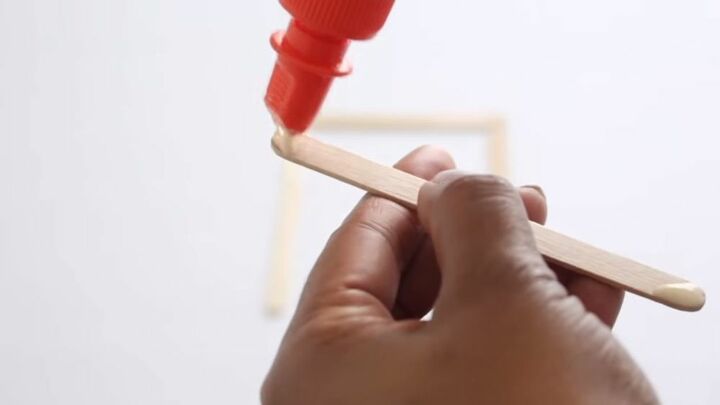
Step 2: Glue the Popsicle Sticks into Squares
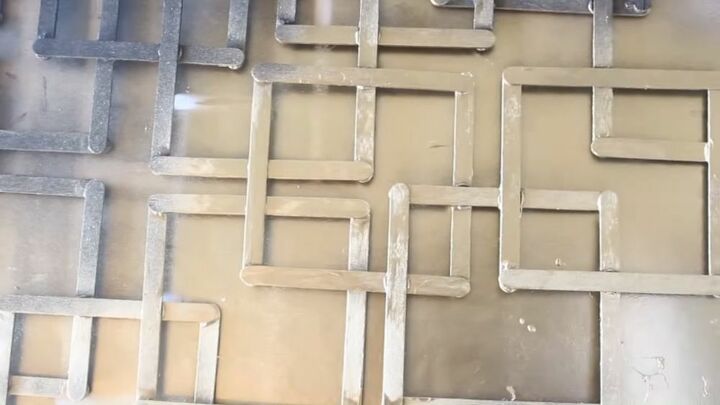
Once the materials are collected, the first step is to create the squares of popsicle sticks. This piece has an artistic look that comes from a series of squares of four popsicle sticks glued together and then placed haphazardly on top of one another. The end result will be a crescendo of squares fanned out. Simply create a square of four popsicle sticks and glue them together.
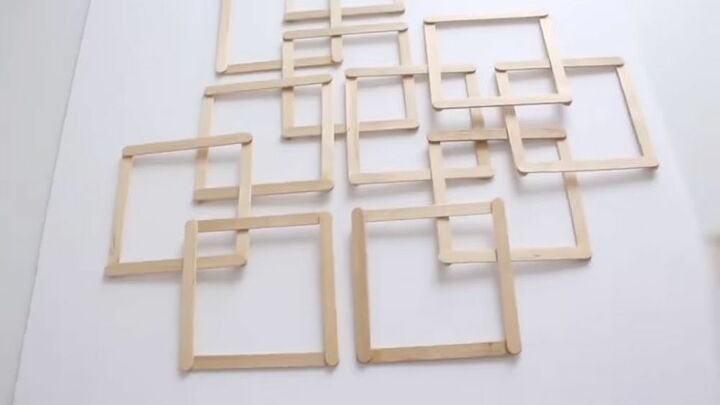
Step 3: Lay Out Your Design
You’ll then need to create several more of the squares of four popsicle sticks. Once you are confident you have as many squares as you’d like, it’s time to lay out the design. You can be creative with this and have it as extravagant or as simple as you like. It’s best to do this over something that will protect the surfaces you are using.
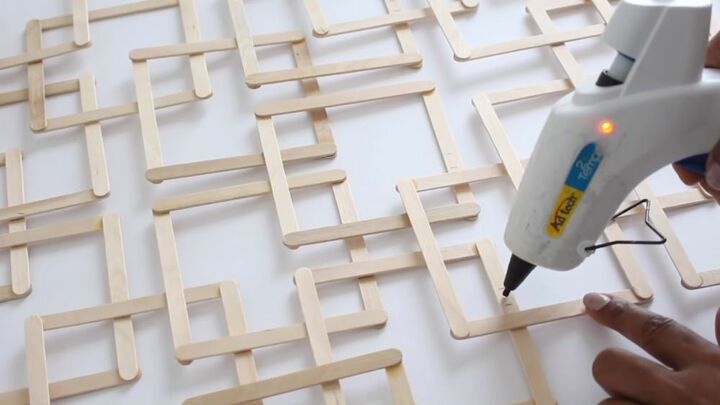
Step 4: Glue the Squares Together
Once you’re pleased with your design, it’s time to glue everything into place. If you’d prefer, you could do this as you go along, or you could wait until the end and glue them one by one. Make sure that each individual square is glued to at least one other, preferably secured in two places, so that the piece holds up at the end.
Step 5: Spray Paint
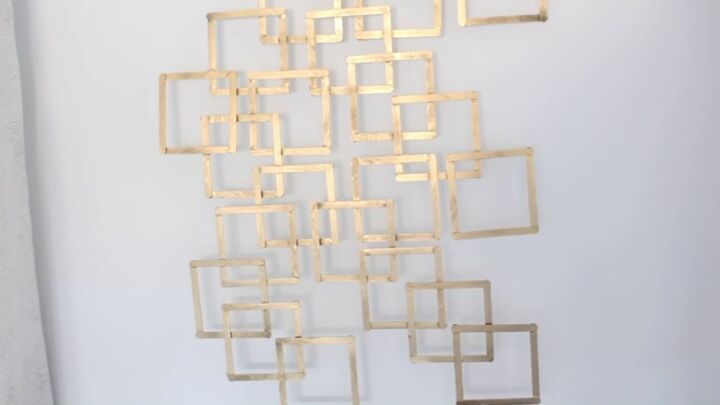
When the glue has dried, you can choose a color to paint the piece. I opted for a metallic gold effect to create this shimmering aesthetic. You could be creative with other colors or even a range of colors, although, I felt that the metallic effect helped give the piece a touch of class. Make sure there is something protective placed down under your project so that the paint doesn’t damage anything beneath it.
Step 6: Hang
The final step was to hang the piece. I chose a section of wall that fitted the overall design of the popsicle masterpiece. You can choose almost any room and have the guarantee that people will be impressed as soon as they walk in. A simple picture hook will do to fix the piece into place on the wall. I chose a white wall, so the metallic color stood out a little more. Wherever you decide to hang it, you can always adapt the color of the project to suit any room!

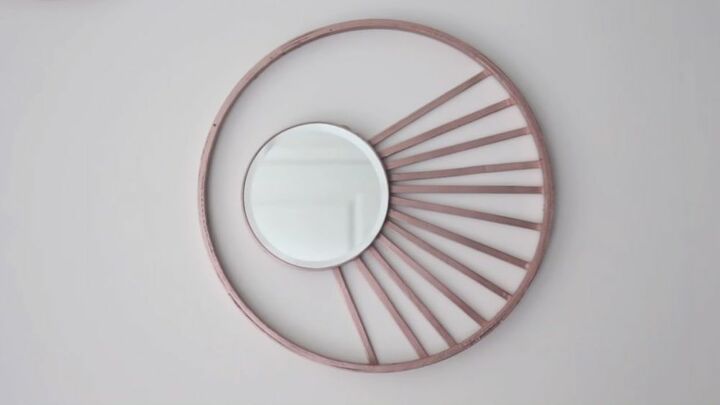
Popsicle Stick Mirror
Tools & Materials
For this project, I used:
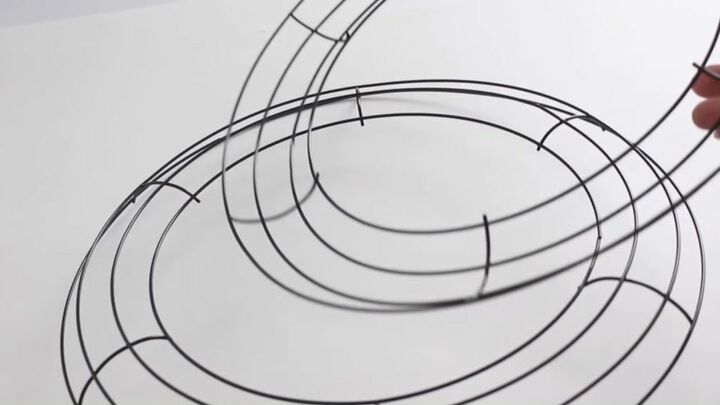
- Circles of wood/embroidery hoops (x2 – one larger, one smaller)
- Superglue
- A pack of slimmer, longer popsicle sticks
- Small circular mirror
- Paint
- Stain blocker
More DIY Embroidery Hoop Ideas
Step 1: Gather Your Tools and Materials
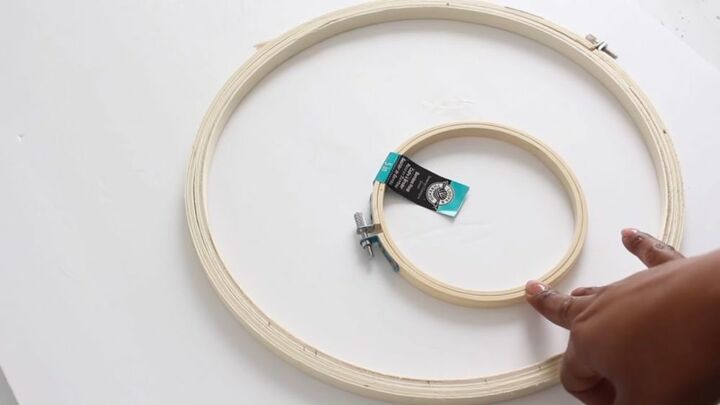
The first step for creating the popsicle stick mirror is to gather your materials. I found two circles of wood or embroidery hoops – one large and one slightly smaller – and a mirror, which fit neatly onto the smaller circle. Then, I found a pack of popsicle sticks. They were longer and thinner than normal popsicle sticks, which help give the piece a different kind of look.
Step 2: Remove the Inner Hoop from the Embroidery Hoops
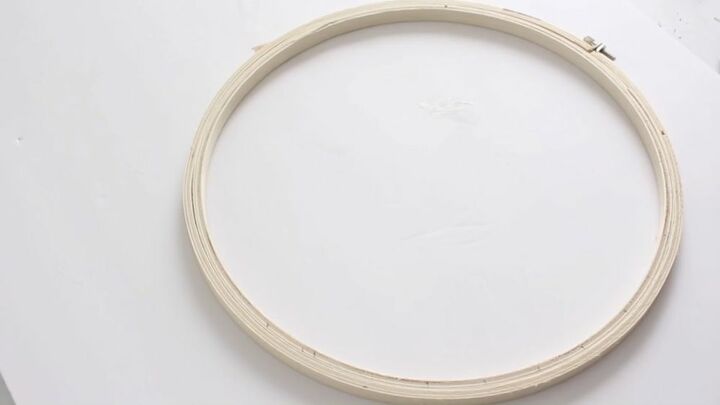
The next step was to remove the inner hoop from the embroidery hoop. This would be used as the main element of the piece. You can save the rest of the hoop for another project as the inner hoop is the only thing needed.
Step 3: Lay Out Your Design
Now it’s time to lay out your design. My design is a template and you can either use the exact same layout or, if you’re feeling confident, you can change it up. I lined up the smaller hoop inside the bigger hoop and laid out the popsicle sticks that would connect the two together.
Step 4: Glue
Once you’re happy with the design, it’s time to glue it in place. Start by gluing the popsicle stick ends to each of the circles they are placed over. This will keep the circles in place and ensure the piece is sturdy when it is in use. The amount of sticks you use is up to you, but make sure that there are enough to keep the circles attached to one another.
Step 5: Spray Paint
Once the glue has dried, it’s time to spray paint the project. I started with some stain blocker and then once that had set, used a metallic bronze color paint. You can choose any color you want, but the metallic look fits with the inspiration from this piece that you can see in many homeware stores. Plus, the color elevates and adds a touch of class to the design.
Step 6: Insert the Mirror
The next stage is to insert the mirror into the smaller hoop. Finding one that fits can be tricky, but there’s no right or wrong way of doing this. Once you’ve found a mirror that you like the look of, superglue it into the hoop. The mirror and metallic color of the paint go well together and add that touch of modern to the classic design.
Step 7: Hang
Once you’ve completed the project, it’s time to hang it. Choose somewhere that will catch the light so that the metallic paint and mirror work well together. The best thing about this particular popsicle stick decoration is that it's extremely functional and can be used on a daily basis, in different rooms throughout the house.
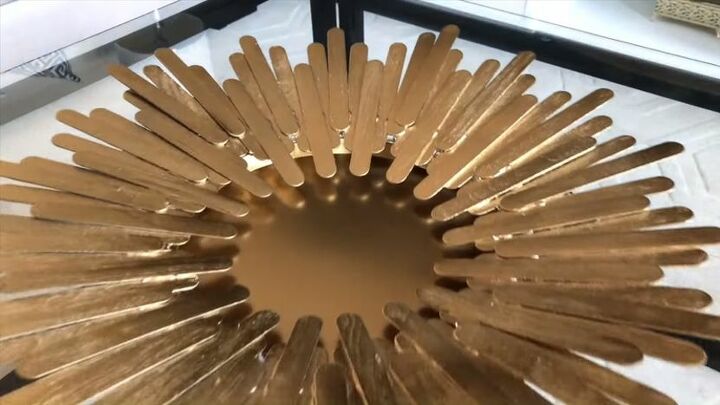
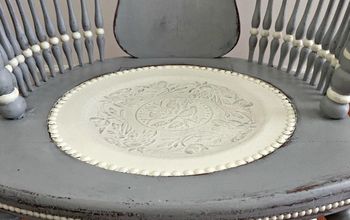
Popsicle Stick Tray
Tools & Materials
For this project, I used:
- Wreath frame
- Glue gun
- Black paint
- Pack of shorter, fatter popsicle sticks
- Brush
- Tray
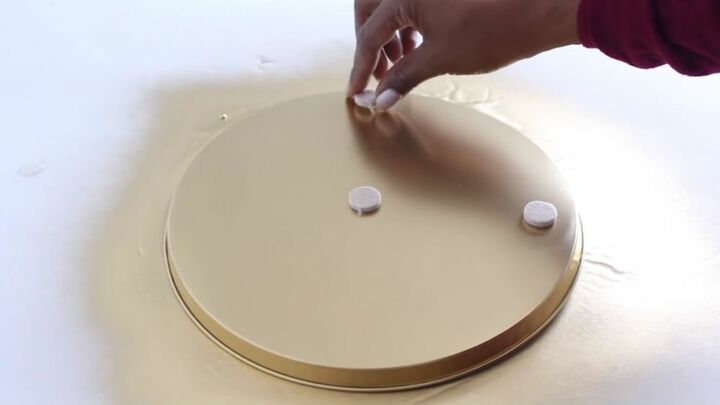
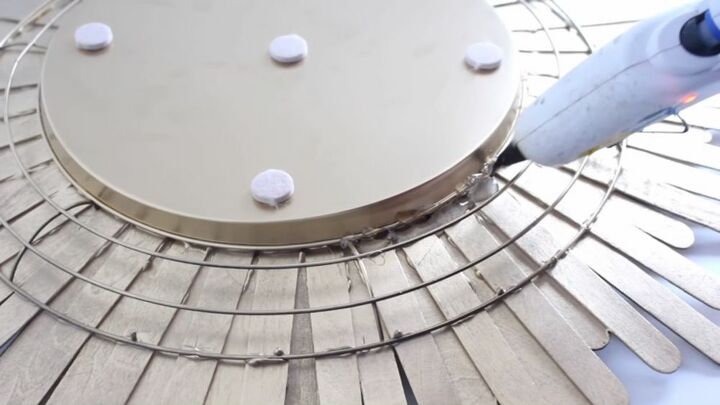
- Grip dots
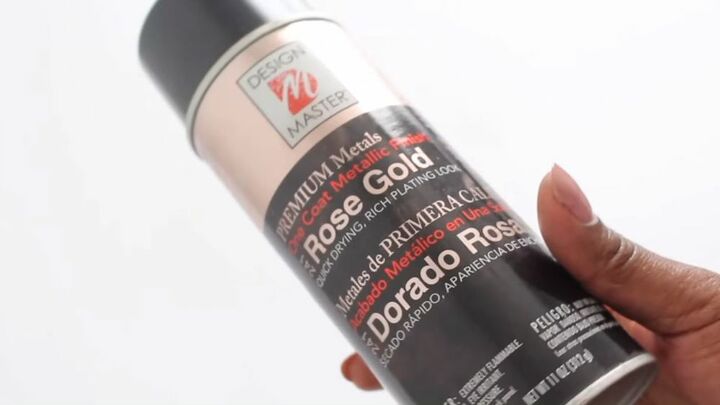
- Spray paint (metallic gold)
Step 1: Gather Your Tools and Materials
The first step for this DIY popsicle stick décor is to collect your materials. You’ll need a wreath frame to use as the backbone of the project. Of course, we’ll need the popsicle sticks – for this one I chose shorter, fatter sticks. You’ll also need some paint, preferably black, although you could choose another color. You’ll also need a tray, some metallic spray paint, and some grips to make the tray more functional.
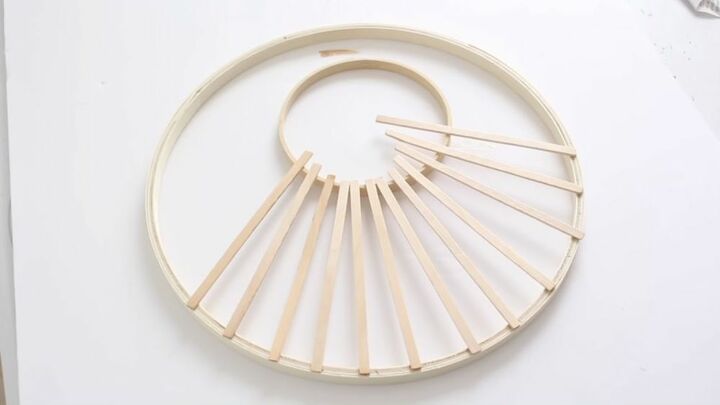
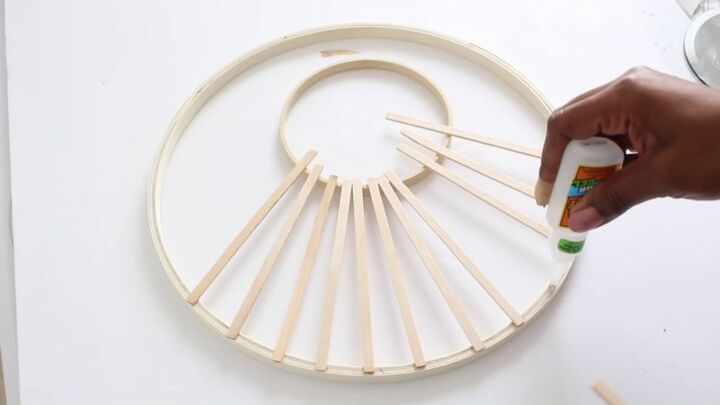
Step 2: Glue Popsicle Sticks to the Wreath Frame
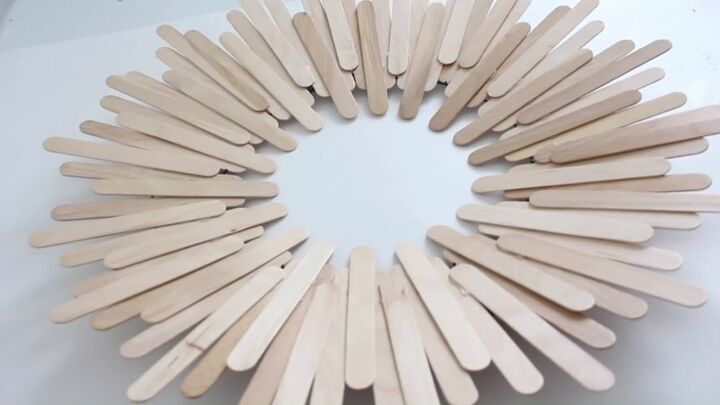
The next step was to lay out the popsicle sticks and affix them to the wreath frame. Simply place the popsicle sticks around the frame and then go back and fill in any gaps. I varied the position so that they created a sunburst effect. The fatter popsicle sticks are more useful here as you won’t need to use quite so many.
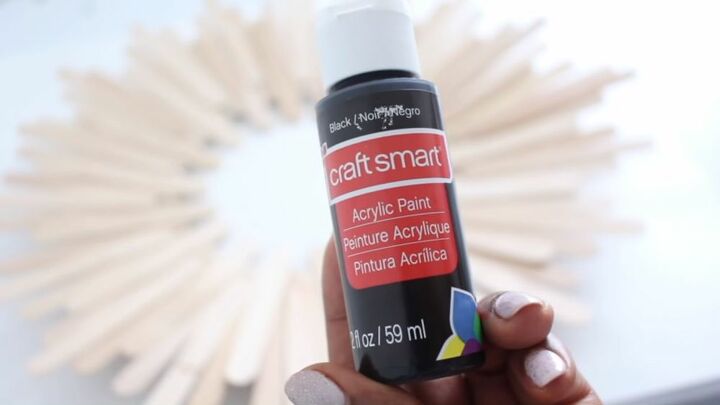
Step 3: Paint Black
Once your sticks are in place, it’s time to paint it black. I chose black as it worked for the later stages. You could choose another color, but it won’t really matter as we won’t see it once the final coat of spray paint is added. The color helps to bind the wreath frame and the popsicle sticks together.
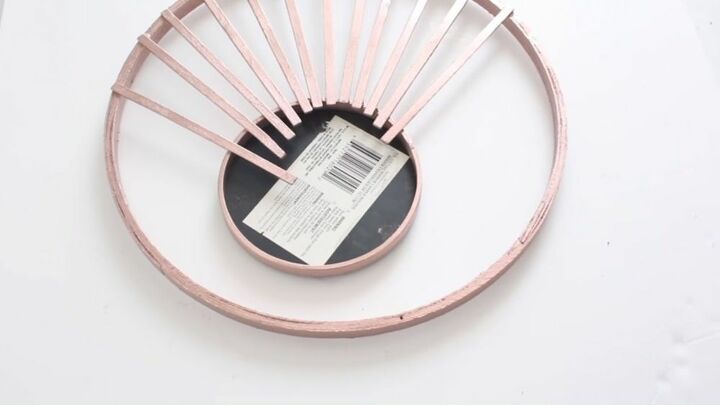
Step 4: Spray Paint the Plate
Take the tray you’ve found – mine had a slogan on it so I needed to make sure everything was evenly covered– and spray paint it whatever color you want the finished piece to be. I chose a striking metallic gold paint.
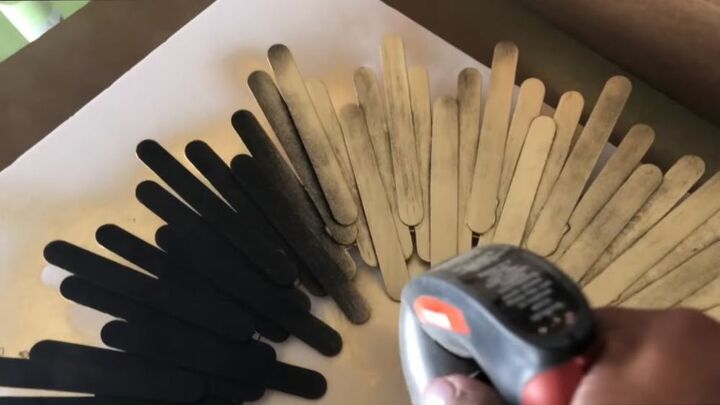
Step 5: Spray Paint the Popsicle Sticks
The next step was to spray paint the popsicle sticks whatever color you chose for the tray. I chose metallic gold again, to match perfectly with my plate. Make sure to cover every inch of them and not allow any of the black paint to poke through. You want a nice, neat, professional finish!
Step 6: Attach Plate to Popsicle Sticks
The final step is to attach the tray to the popsicle sticks. I added some grip dots to the underside of the tray so that it wouldn’t slip and slide when on a surface, and so that the piece was functional as well as aesthetically pleasing. Use glue to attach the tray to the wreath.
DIY popsicle stick crafts
Working with popsicle sticks is very rewarding and leads to some exciting finished products. Popsicle stick decorations can be as extravagant as you want them to be and, when completed, many would be surprised to find that these pieces of artwork are actually made of a material you normally throw into the trash.
The materials themselves are cheap and easy to find, and are suitable for all skill levels when it comes to DIY. You can hang the pieces in almost any room and customize them so that they fit in with the taste and aesthetic of your home.
If you enjoyed making any of these projects, don’t forget to tell us how you did. Make sure to share the project with any friends, family members, or fellow Hometalkers who might love to make some of this DIY popsicle stick décor!


Comments
Join the conversation
-
I agree ... SO creative!
-
Hi Trisha, All three of your projects are beautiful. Your tray is lovely and unique. The only problem I see with its usefulness is glue gunning the tray to the wreath frame. I think E-6000 glue or a two part Epoxy glue would hold up better. I am not sure if you use this as decorative or as a serving tray but just to be on the safe side another kind of glue should be used. I was also thinking if you attached mirror to the tray or a picture and covered the picture with a glass round, it would make a beautiful frame. Good job


Frequently asked questions
Have a question about this project?