


Veneer Removal, Paint, and Stain of Antique Buffet

I have wanted an antique sideboard buffet for years! Unfortunately, they can be hard to find for a decent price. I typically see them, unfinished, going for around $500. That was way out of my price range, since I knew I would be repainting it.
I was fortunate to find this beauty on the fB Marketplace, for $250! I wasn't about to let that one slip through my fingers! It definitely took some work; but in the end, she turned out exactly how I imagined!
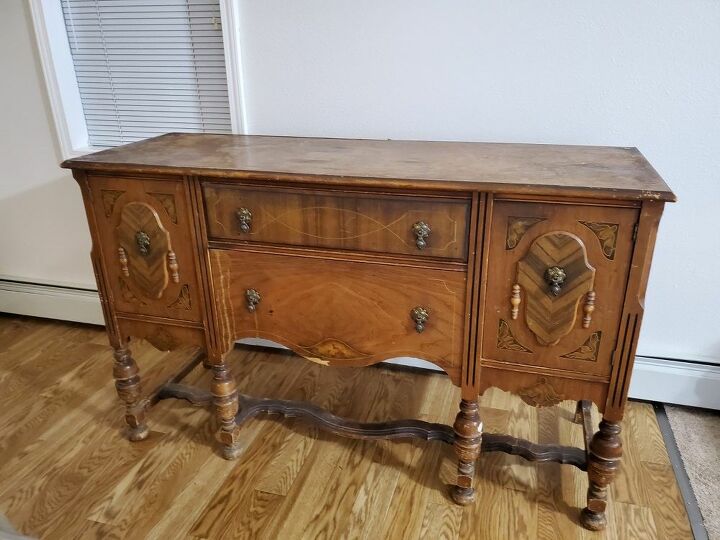
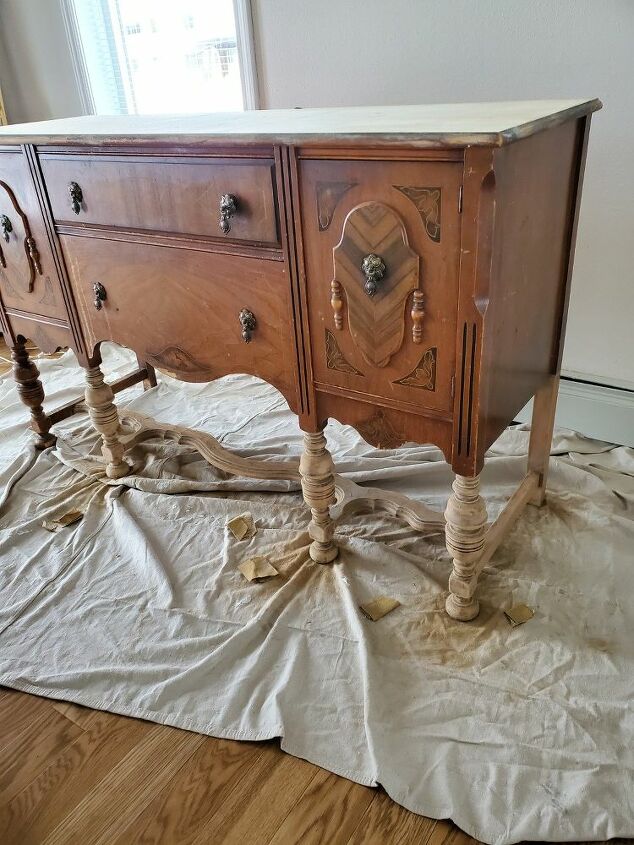
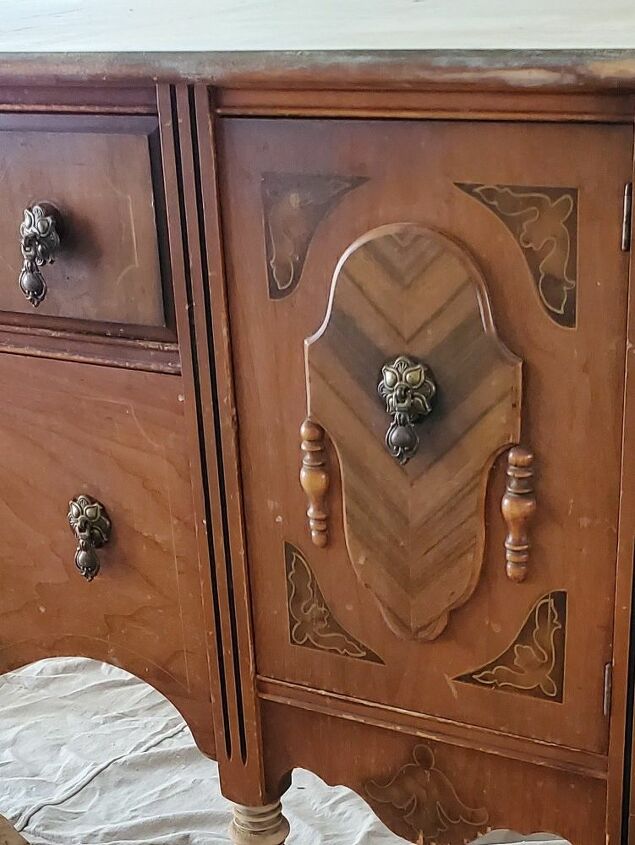
This is what she looked like when I picked her up. For the most part, she was in good condition; but had some broken veneer on the top. Veneer can be a nightmare, if not in good condition. I have never really had to deal with veneer in poor condition before, so this was a learning experience for me!
I forgot to take pictures of all the products I used, so I decided to create collections of the products used.
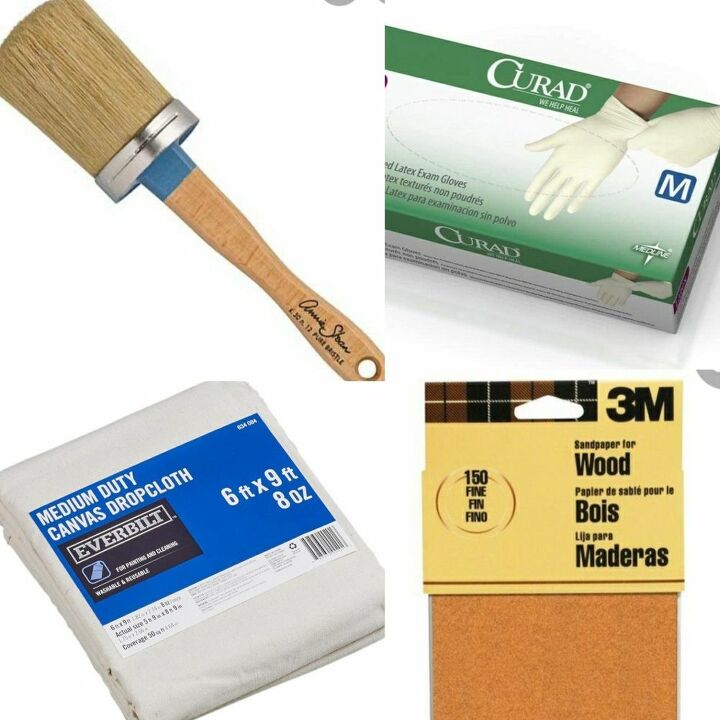
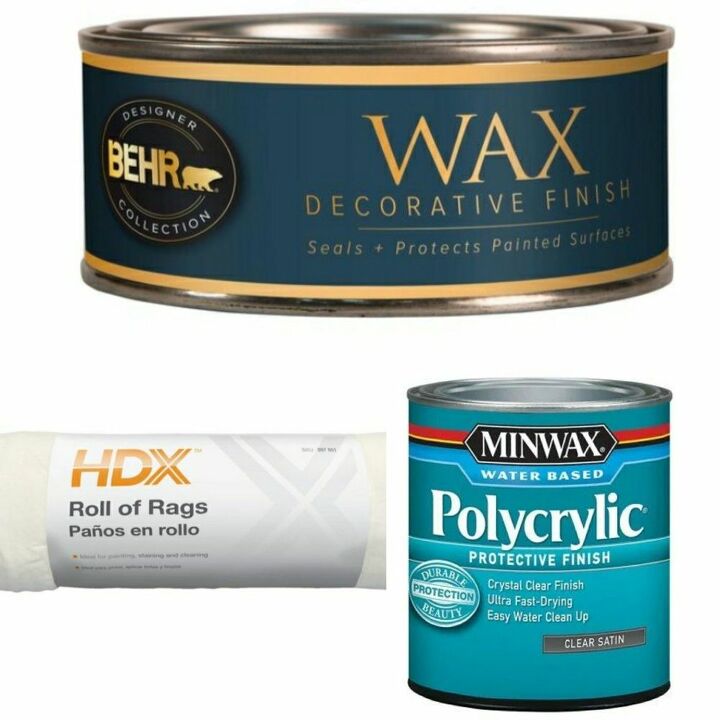
These are the basic products you will need to get started. First and foremost, I suggest having a good drop cloth under your project before starting anything. This will help protect your flooring. You can find a drop cloth at any home improvement store. I buy mine at either Home Depot or Lowes.
Also make sure to have some latex gloves on hand! These are really important when it comes to staining your piece. The gloves will help keep the stain off your skin (which is a huge pain to get off!) Latex gloves can also be purchased at Home Depot or Lowes. You can probably find them on Amazon as well.
Sand paper will be needed to remove the finishing off the areas you plan to stain. I recommend you purchase a variety pack, ranging from 80-320 grit. You can find sand paper in any home improvement store as well.
Also, equally important is a good quality paint brush. I prefer the Annie Sloan chalk paint brush. This brush is a little on the pricey side, costing around $40; but worth it. I have had this brush for at least 5 yrs now, and it still works great. You can find it at any boutique location that sells Annie Sloan products, or the Annie Sloan website.
.
.
Of course, any good paint brush will work. Wooster, which can be found at Home Depot and Lowes, also makes a good, sturdy brush.
I have never had to remove veneer; so I went to trusty Pinterest for an easy way to accomplish this! I am one for finding the easiest way to accomplish a project; so of course I chose one that seemed easy enough.
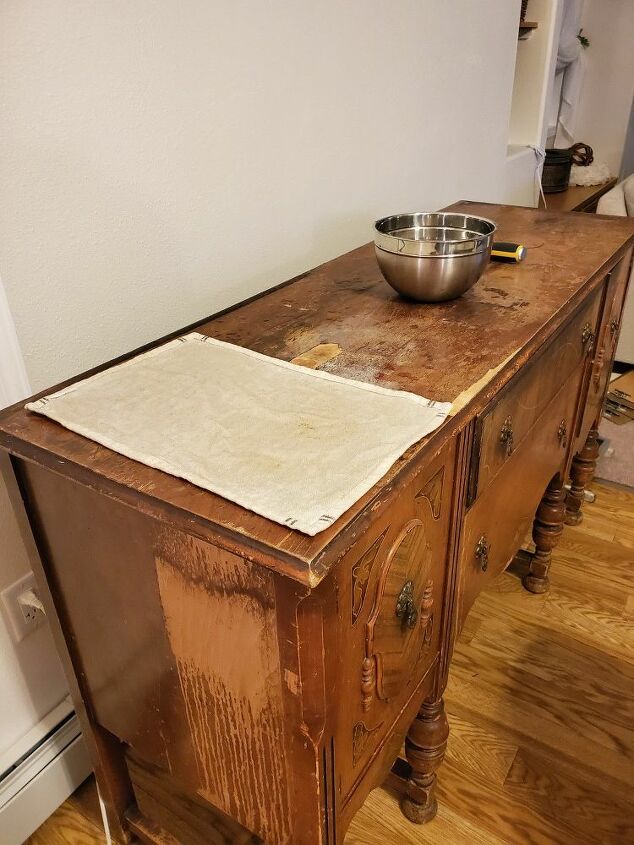
I decided to go with the wet towel and iron process. This process was definitely easy; but very time consuming. I used an old towel, soaked it in a bowl of water, and placed it on a section of the veneer. I went in sections; but I suppose you could always use multiple towels to cover the entire surface. You want to make sure your towel is soaking wet. This is definitely messy; but by working in sections, I was better able to control the mess.
After you have placed your wet towel on the section of veneer you are working with, place a hot iron on top of the towel. Put light-medium pressure on the iron, to ensure it really gets to the wood. I moved the iron around the entire towel, and checked the veneer under the towel as I ironed.
Once the heat and water loosen the glue, the veneer should come off easily. Remove veneer, and continue the same process until all the veneer is removed.
Once the veneer is removed, you should see the original wood. You can see in the picture above, I have removed all the veneer from the top, revealing the original wood.
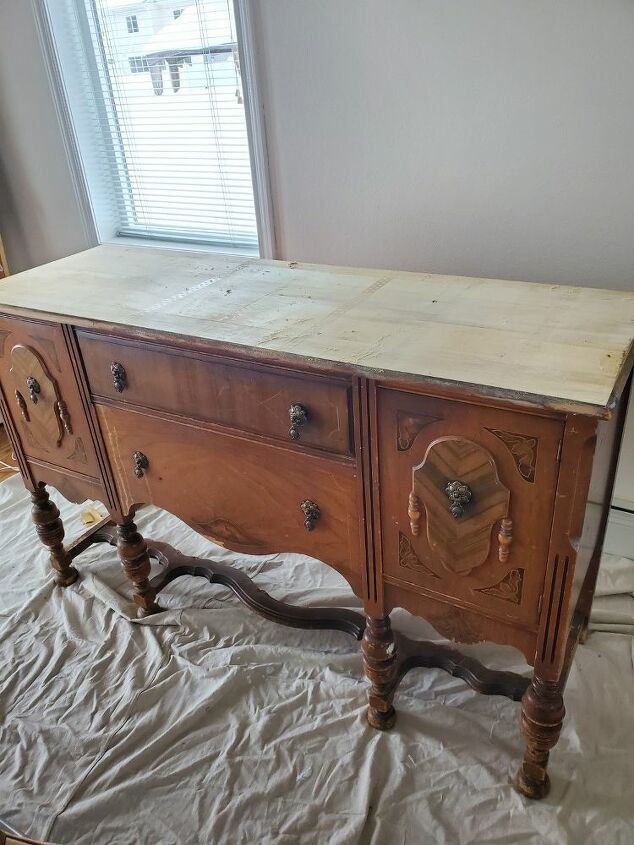
The wood was is really good condition; but was a bit rough. Since veneer was added, I don't believe smoothing the original wood was important, when made. I used a 320 grit sand paper, and lightly sanded the top for a smoother surface. You could definitely use a hand sander, which would probably be easier; but I was working inside my home, and didn't want to use an electric sander.
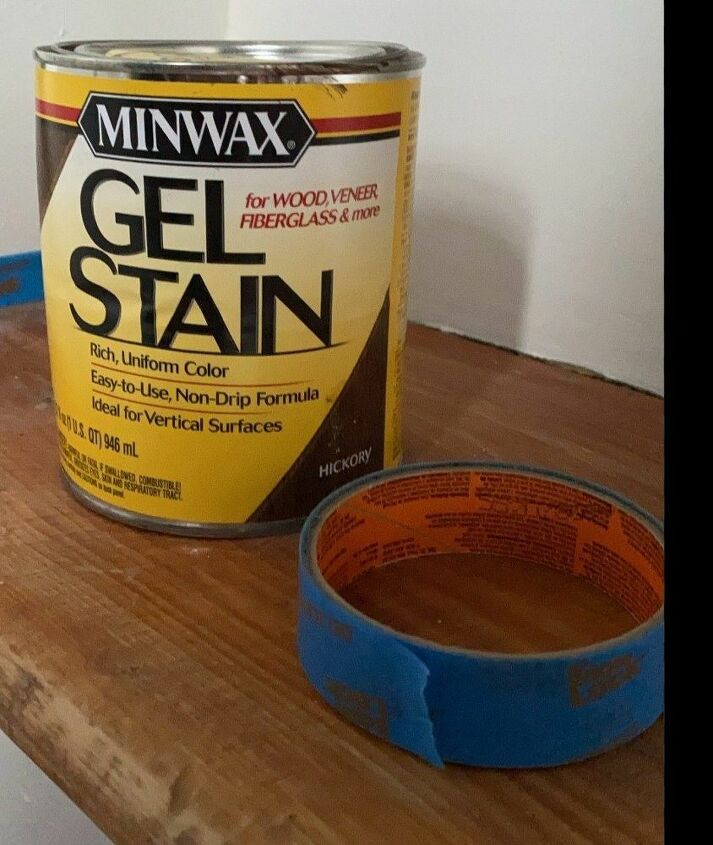
I chose to use gel stain on the top part of my piece. This type of stain is definitely not necessary, depending on the look you are going for. Gel stain is a much different consistency than standard wood stain. It is very thick, and like a paint. It does not require wood be sanded down, before applying, and it can be applied over previous stain, and even paint.
After some research and reading reviews, I decided to go for Minwax gel stain, in Hickory. This brand was reasonably priced, at around $17 a can. A higher end brand will cost closer to $30, for a third amount of the product.
I also used painter's tape, which I had on hand. You can also find this at any home improvement store, in the paint section.

I mainly decided to go with gel stain vs wood stain because the veneer glue left a residue behind on the natural wood. No matter how much I tried, I could not remove it at all! Gel stain has much better coverage, as it goes on more like a paint.
In most cases, two coats of stain should be enough, depending on the look you are going for. I applied three, due to the damage of the wood.
I applied a glob of stain to a large sponge brush, and started from one end to the other. I went in sections, straight across. I found this to be the easiest way. Once your stain is applied, allow it to sit for 3-5 mins, before taking a clean stain cloth and wiping the excess stain off.
With gel stain, you will have to wait around 10-12 hours between coats. This is one down fall to gel stain. I would suggest applying your stain in the evening, and allowing it set overnight.
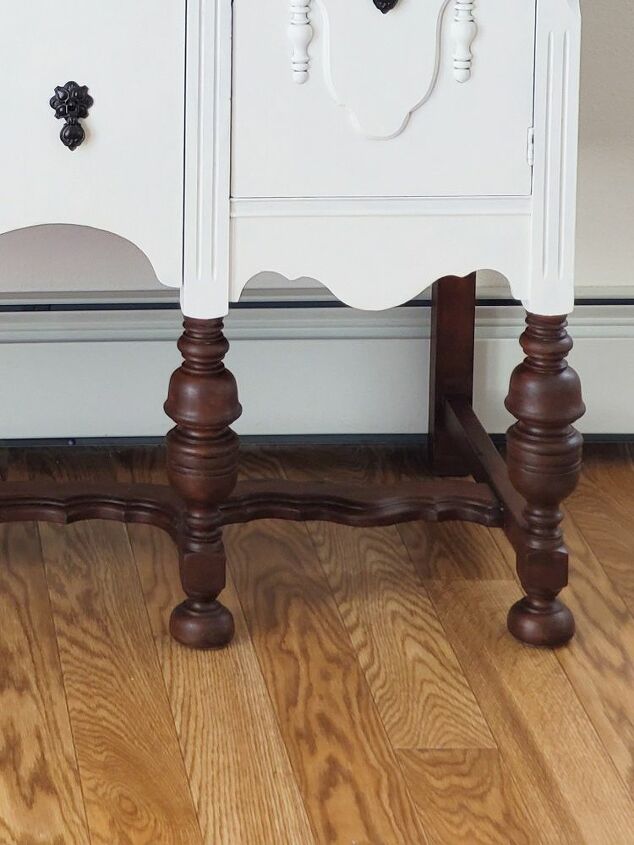
When I chose this project, I knew I wanted to stain the legs vs. paint them. This was definitely an extra step, as it required I sand the legs down to bare wood. I placed painter's tape at the base of the buffet (right above each leg.) This helped ensure I did not sand parts I planned to paint vs. Stain.
Due to the round legs, I hand sanded. I used a 120 grit, which took most of the stain off with ease. Occasionally I used an 80 grit on spots that were a little tougher to remove.
Once I finished sanding, I used a clean cloth to remove the sanding dust left behind.
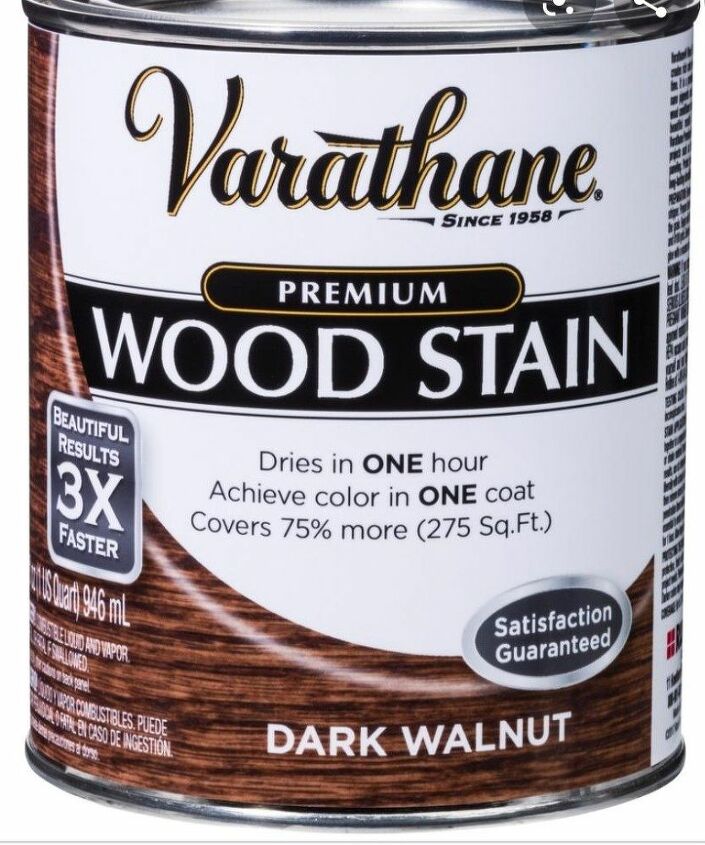
I used Varathane wood stain, in Dark Walnut, to stain the bottom part of my buffet.
I had this on hand, which is why I chose this brand. I always suggest looking to see what you already have on hand, as stains and paints can be get pricey.
You can find this brand at Home Depot; but other brands can be found at Lowes.
***Don't forget to put your gloves on before applying stain! Stain can get messy and very hard to get off your skin.
Unfortunately, I did not document this part in photographs. Hopefully I can explain it throughly for you.
As I mentioned above, I applied painter's tape to the area right above the legs, before sanding. Imagine blue painter's tape covering the white sections above the legs. I kept the tape on, and reapplied where needed, before staining.
I used a clean, staining cloth to rub the stain on. You can also use a sponge; but I suggest using a rag. The rag creates a good coverage and allows for more control. Make sure to apply the stain into all areas of the wood, for an even coverage. When applying wood stain, you don't need a huge amount of stain on your rag to create a nice coverage. The stain is very thin, and a little goes a long way.
I applied two coats of stain to get the look I was going for. Make sure to wipe off the excess stain after applying.

I have painted quite a few pieces of furniture, and chalk paint is always my go to paint! The most important part of applying chalk paint, is a good brush. I talk more about brushes in Step 2: supplies needed.
When applying chalk paint, a little goes a long way. You will ony need a small amount of paint on your brush for a good coverage. Typically two coats is enough to cover your piece. I worked in sections, as the paint dries quickly.
Make sure each coat is dry before applying another. Some people suggest a light sanding between coats; but I typically do not do so.
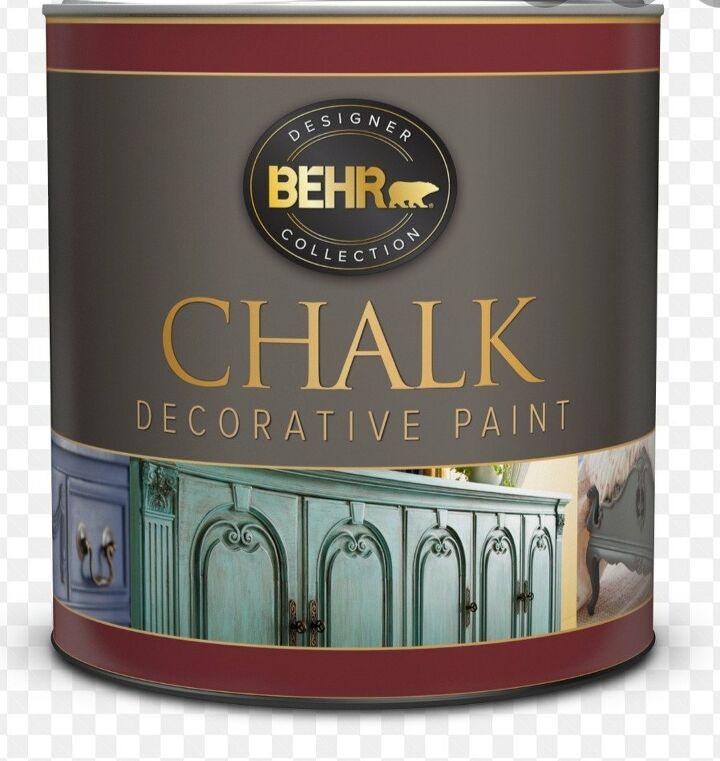
I personally enjoy using chalk paint, when it comes to painting furniture. It's pretty easy to work with; and requires little prep work before applying.
Based on a review from a friend, I decided to give Behr Chalk paint a try. It can be found at Home Depot; and can be mixed to create any color you want. I went with a standard Behr chalk color, Farmhouse White. This is a nice off white color. It's very similar to Annie Sloan's Old White.
This will cost you around $20 a can, which will be more than enough for various projects.
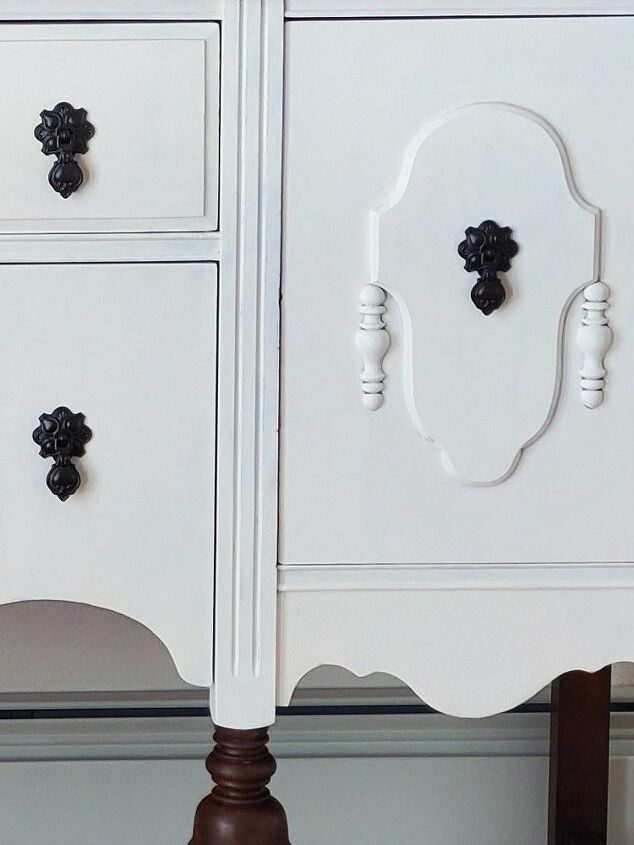
I absolutely loved the original hardware; but knew it needed a refresh to go with the new paint and stain. I removed them by unscrewing then from the inside of the drawer. They easily came off; which was nice. Sometimes old hardware can be difficult to remove due to stripping of the screws.
I placed the pieces into a small cardboard box, and put them aside for spray paint.
*make sure to remove hardware before applying paint to the body of the piece.
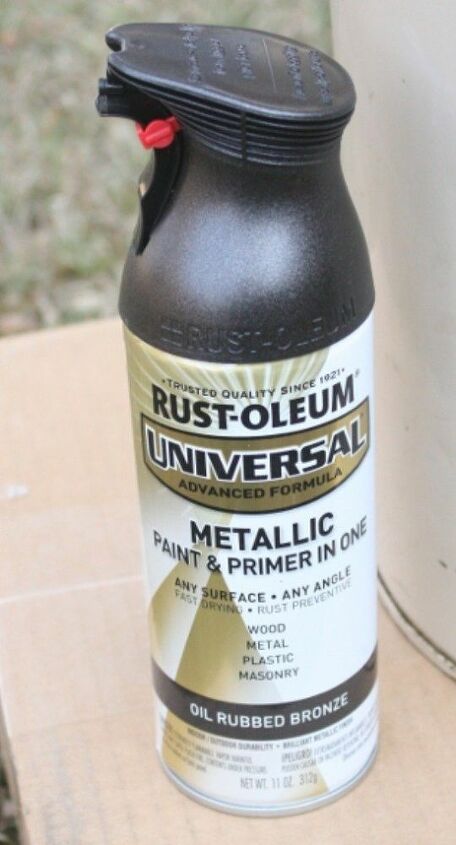
I love the look of oil rubbed bronze! It's so classy and the perfect color for white pieces. The best part is, you can find it in a spray paint! Super easy!
I used Rustoleum spray paint, which can be found at Lowes and Home Depot. I think this can cost around $7.
I only needed one can for this project.
As I mentioned above, I place each piece of hardware in a cardboard box, before applying the spray paint. I laid each piece flat and sectioned out in the box, for optimal coverage.
I used a sweeping motion while spraying, in order to prevent dripping. I did two coats.
For this project, I used two types of sealant. This really comes down to personal preference. Chalk paint can be sealed in either a wax (which is suggested by the product) or a poly type sealant.
Poly is a much stronger sealant; and should be used for high traffic pieces. I knew the painted portion of my buffet would not see lots of use; so I used wax over the chalk paint.
I used a clean staining cloth to apply my wax. It is important to only apply a small amount of wax to your cloth. Work in sections, while applying, and rub into the paint for good protection.
For the legs and top, I chose to use polycrylic to seal the stains. I personally prefer polycrylic over polyurethane because polyurethane can yellow over time. Polycrylic seems to stay clear without issues.
When applying the polycrylic over the top, I suggest applying it from one end to the other, in sections, with a clean staining cloth. For a stronger protection, apply two to three coats.
Same goes for the legs, apply two to three coats of polycrylic using a clean staining cloth.
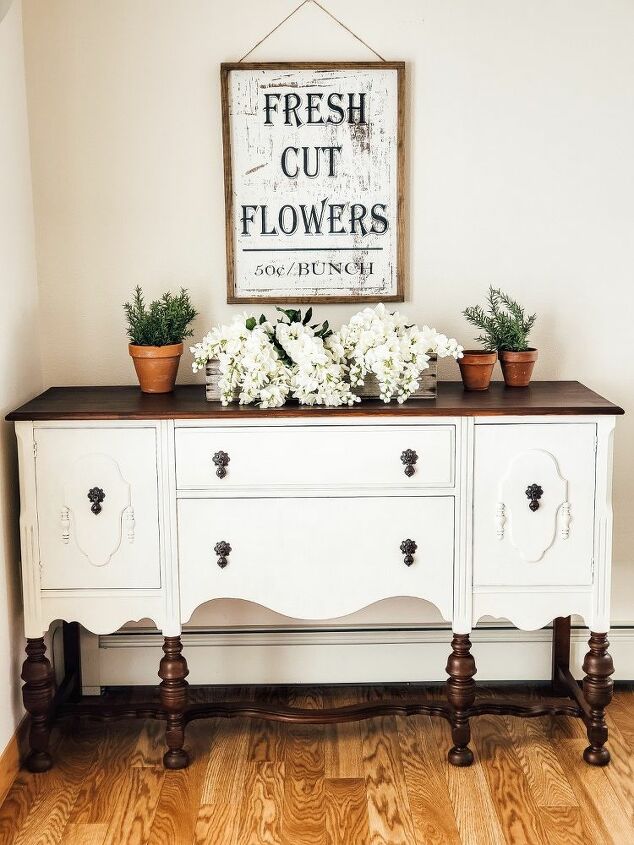
Once I let my sealants sit for 24 hrs, I reapplied the hardware, and got her back inside. I absolutely love the way she turned out!
Resources for this project:
See all materials


Comments
Join the conversation
-
A beautiful job! This beauty has a new life!
-
I don’t have a question but I think what you did to this piece of furniture is absolutely beautiful. I have my grandma’s bedroom furniture and is veneer and I wish I had talent like you have. Great job, Diana


Frequently asked questions
Have a question about this project?
Did you like the Behr paint? I recently bought a can of black and it was awful. The coverage was terribly, very uneven and splotchy, the paint is very thin, and the color was also uneven. In some places it looked gray and others black. Cheap chalk paint did better. I use very expensive brushes so I know that wasn’t the issue. Has anyone else used Behr chalk paint? What was your experience with it?
This is beautiful. I am currently working on an antique vanity. How did you know your buffet had a veneer top? I am still not sure if my piece has veneer. I did some sanding and some stripper but I don't know how much more to sand or strip. Any suggestions? I'd like to stain the top and legs and paint the rest.
You did a great job on this piece, but I think I would have chosen a softer color. The white looks too stark for me, but that's just me. Maybe it looks better in 'real life' as opposed to photos?