


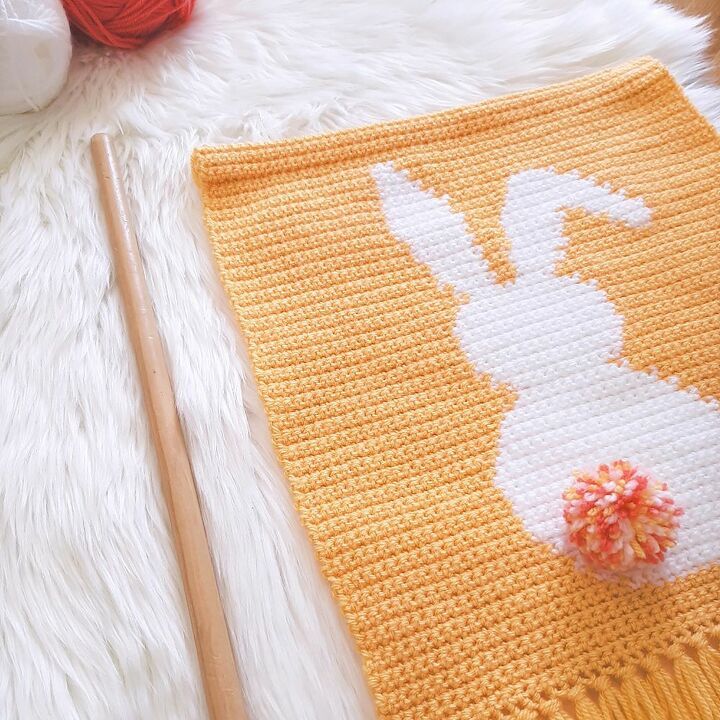
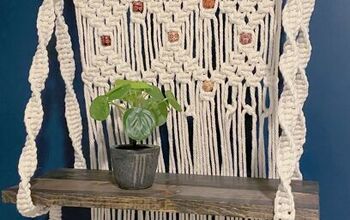
Easter Bunny Wall Hanging

This cute bunny crochet wall hanging is a perfect DIY Easter decor project! This wall hanging is crocheted using the “intarsia” crochet technique, where you use a different “bobbin” of yarn for each block of color. As crochet colorwork goes, this is a really easy project; perfect if you want to dip your toe (or hand!) into the world of tapestry or intarsia crochet.
Construction
- This project is crocheted from the bottom up, in 3 sections:
- Base rows
- Bunny (colorwork)
- Top rows
- Extra length is added to the top of the wall hanging to enable you to wrap it around a dowel rod/stick.
- Tassels and a pom pom for the bunny’s tail are added at the end.
You can find the complete pattern here: https://nedandmimi.com/bunny-wall-hanging-free-crochet-pattern/
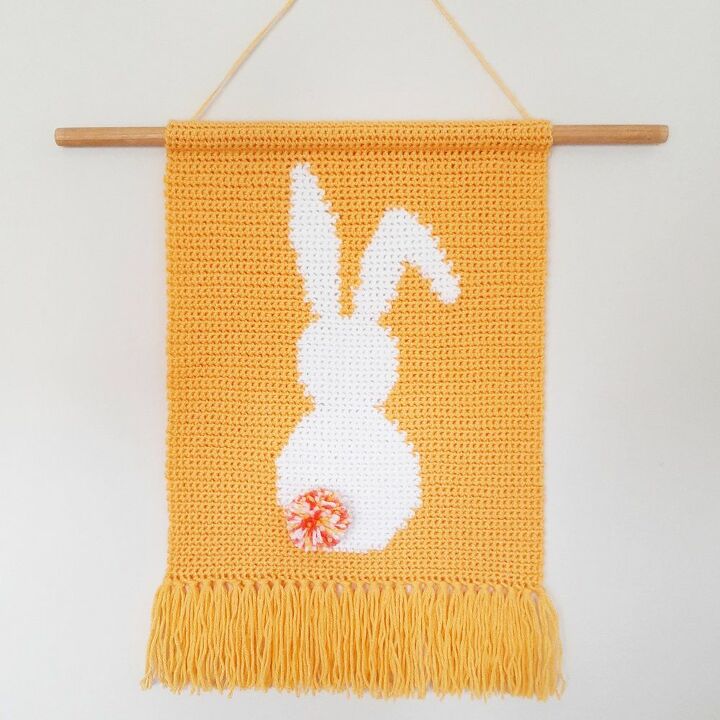
The base of the wall hanging is a block of 6 rows of single crochet worked in one color.
Next you will work the color work section to create the 'bunny'.
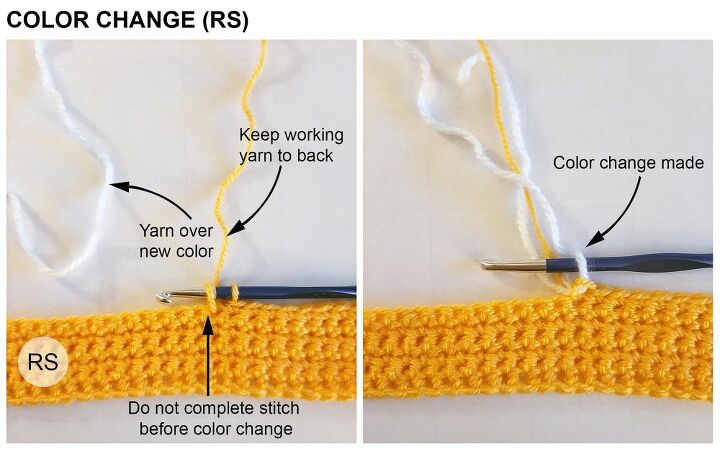
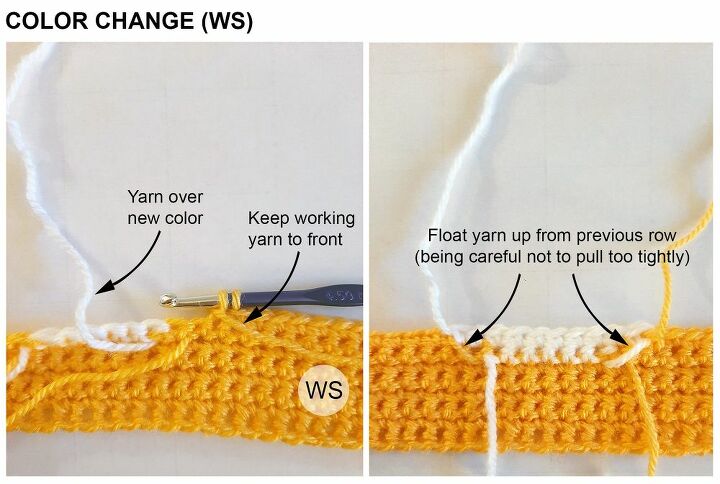
Colorwork Notes
- Use a separate “bobbin” of yarn for each block of color.
- Do not carry the non-working yarn behind your work. When you need to start a new block of color, join in a new bobbin of yarn. Once you have started a new bobbin, you can ‘float’ it up to the next row as required.
- Once you reach the “ears”, you can simply join in smaller bobbins of the required color as needed (by this stage you will have a pretty good idea of how to do it).
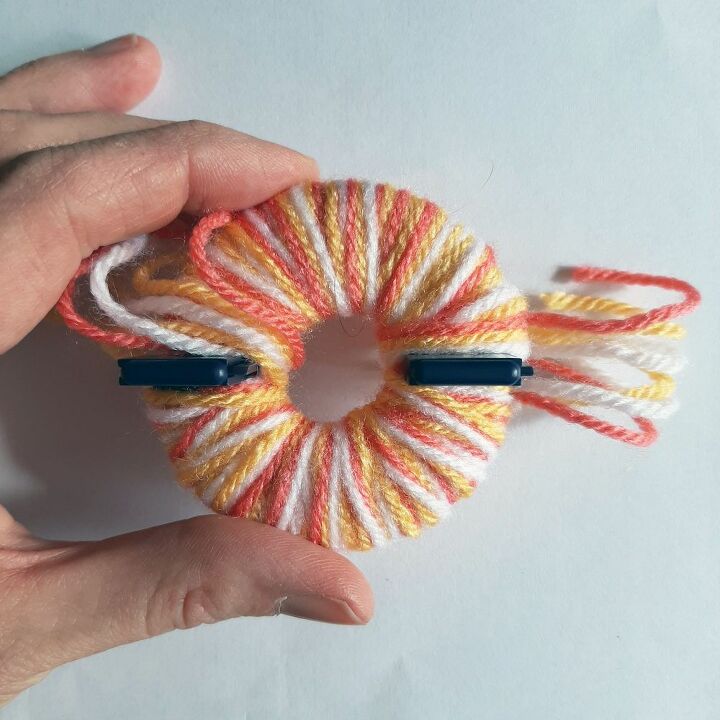
Pom Pom
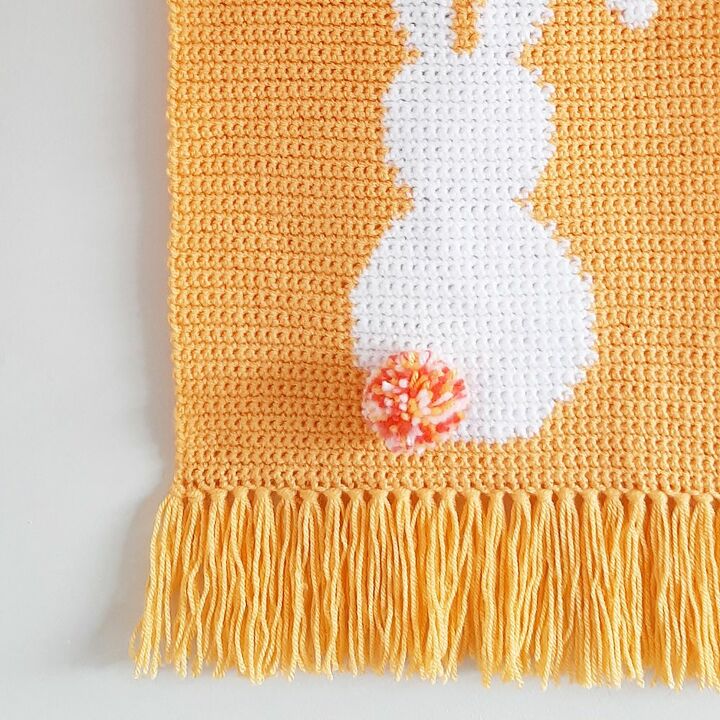
I used a 2.5” pom pom maker and held three strands of different colors at the same time to get the ‘confetti’ look. Feel free to use any color combo that you like!
Tassels
You will need 28 tassels (2 at each corner and then one every other row). I used 4 strands of yarn per tassel at approx. 10”/25cm in length => 112 strands. Once you have added all the tassels, trim the ends evenly.
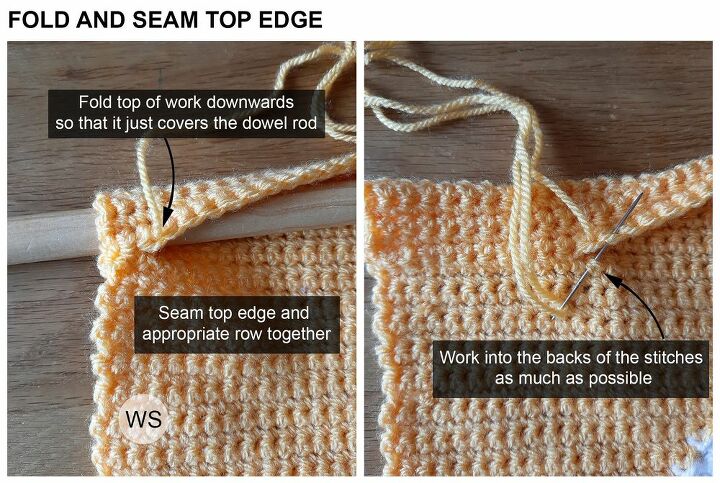
With WS facing you, fold top edge of your work downwards so that it covers the dowel rod. Carefully seam top edge to the appropriate row.
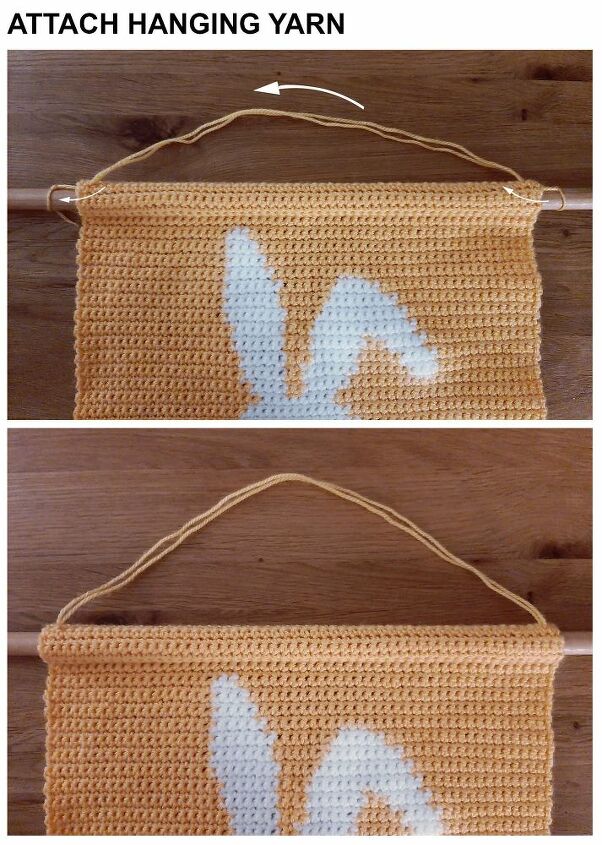
- Cut a length of yarn of approx. 40” and fold in two.
- Tie one end to the RHS of your dowel rod. Pass the yarn through the fold created in 1. above, and out through the top of your work (approx. 2-3 stitches from the edge).
- On the LHS, pass the yarn down into the fold and out the other side. Tie to the dowel rod. Hide the knots inside the folded section.
Resources for this project:


Frequently asked questions
Have a question about this project?