


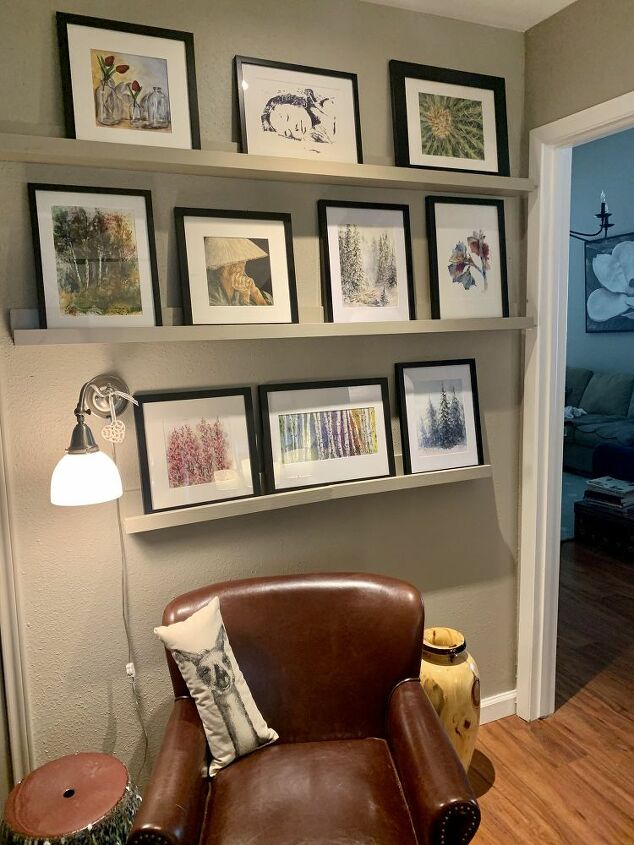
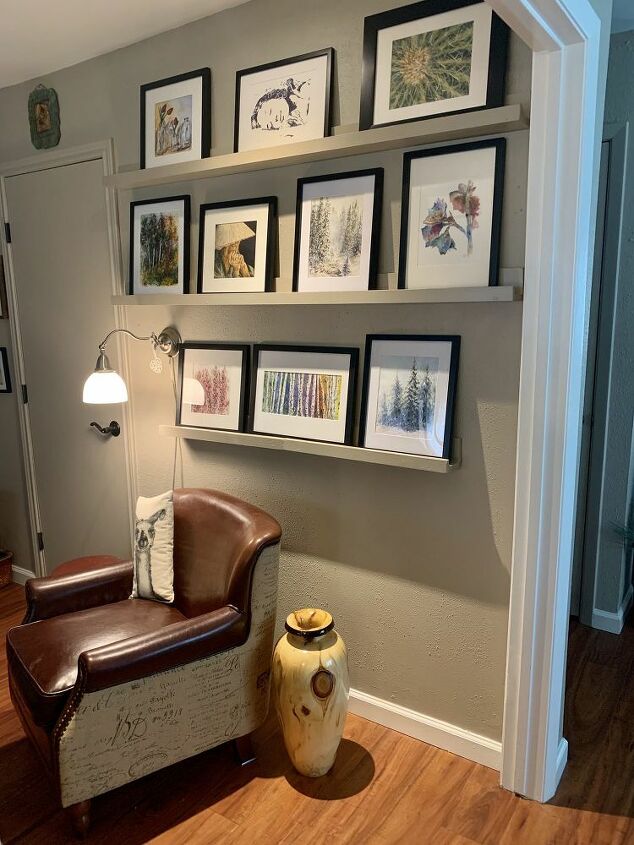
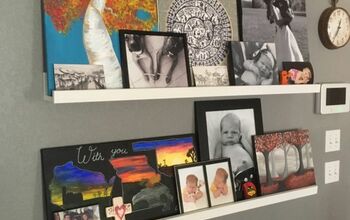
Picture Rails!!

I like to do watercolors and my "collection" changes over time. I wanted a system that would enable me to not put 1,000 holes in a wall.
So... I looked at finished picture rails --- WOW! they can be pricey!
Since it's CV19 isolation time, I got productive with the boards that I had purchased weeks earlier! ...and I am VERY pleased with the results! ...and I did it all by myself! -- Win!
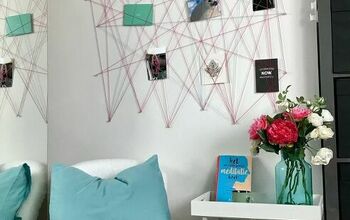
(I initially started my display wall with monofilament that hung from the top of wall and had slide "hooks" down the length. This did not work well, as the pictures were always wonky -- and even Museum Mud stuck on the backs would not hold to my stippled walls.)
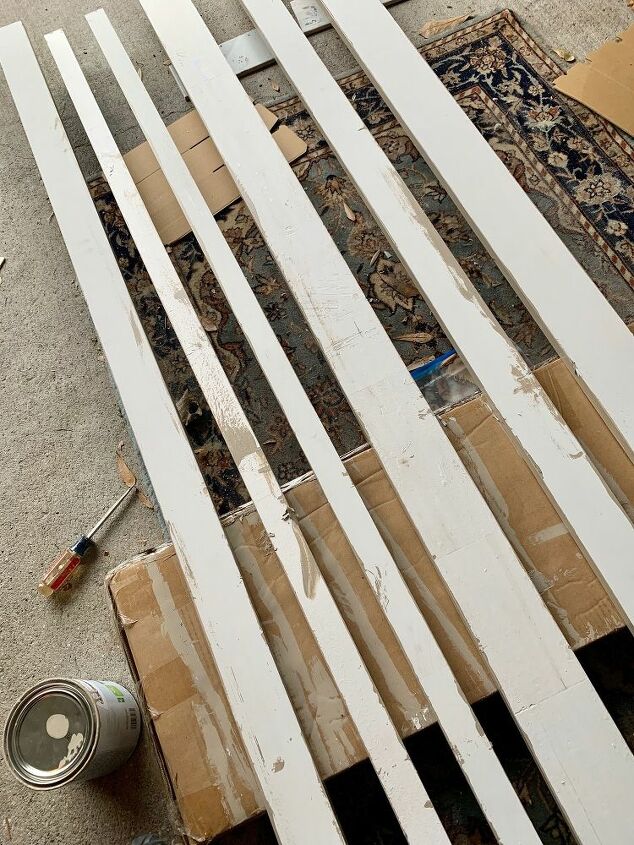
I started with 8' long (primed) boards from Lowes. (I don't think you need primed boards -- these just appeared in better condition than the unprimed ones that were available... and only cost about $1 more.). Each plank was 3/4" thick.
I bought two each: 4" wide, 3" wide, 1" wide
I put two coats of Valspar Satin finish paint on all sides.
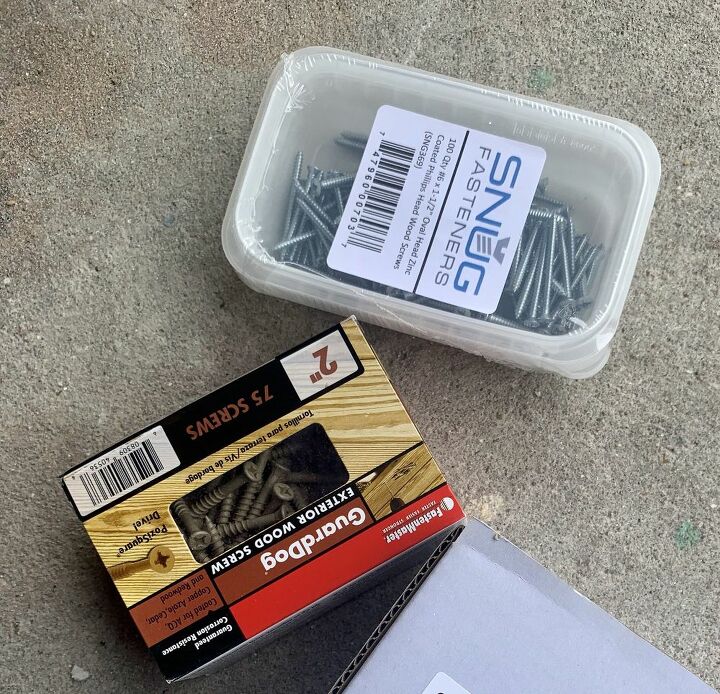
Wood screws: 1.5" and 2"
...used 1.5" for assembly of rails. The 2" ones were used to attach to the wall/studs.
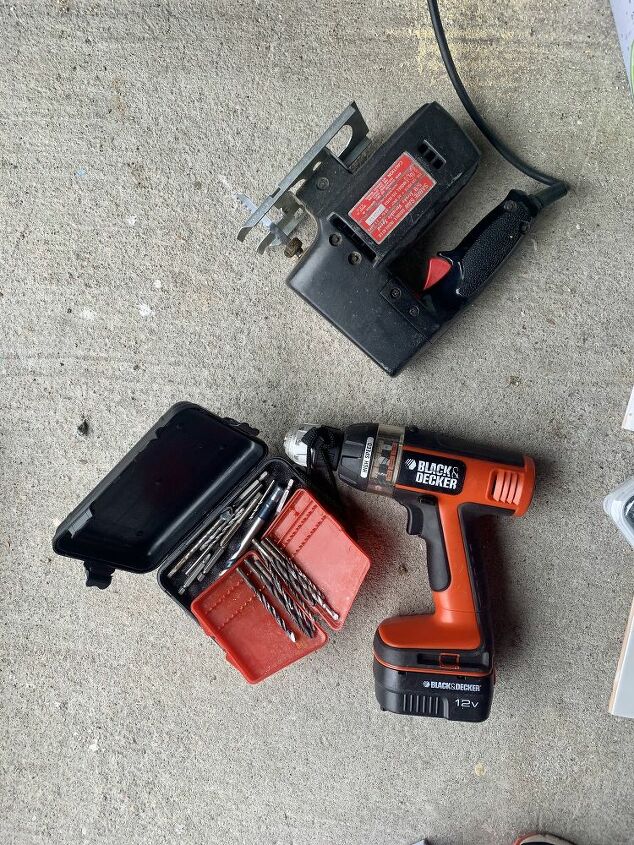
I also had to use a small wood saw to correct an error --- see below.
Note: the jig saw was not really necessary... a circular saw would have been better. (I don't have one.) --- So, I found actually liked using a hand saw more than the jig.
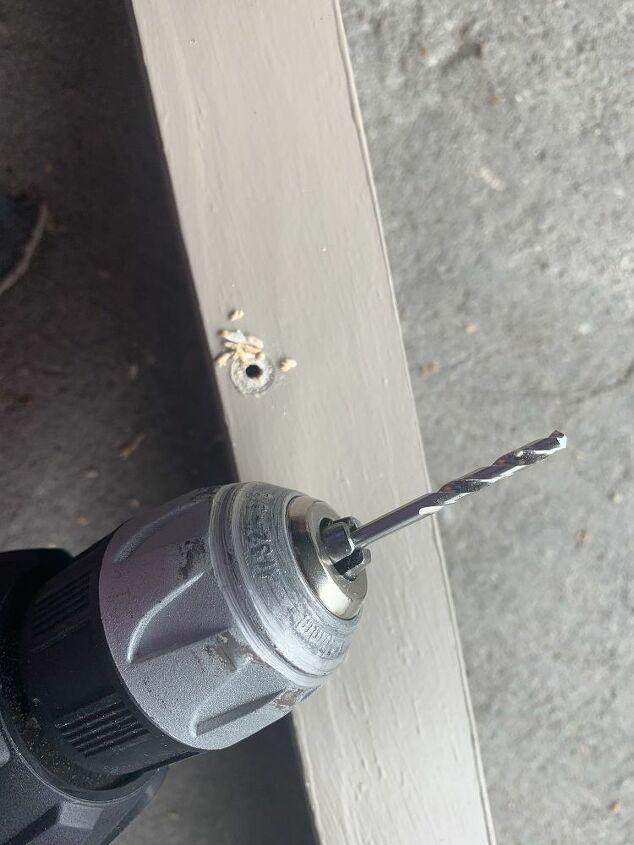
Once I had my lengths cut, I drilled pilot holes for each of the screws --- this makes life WAY easier!
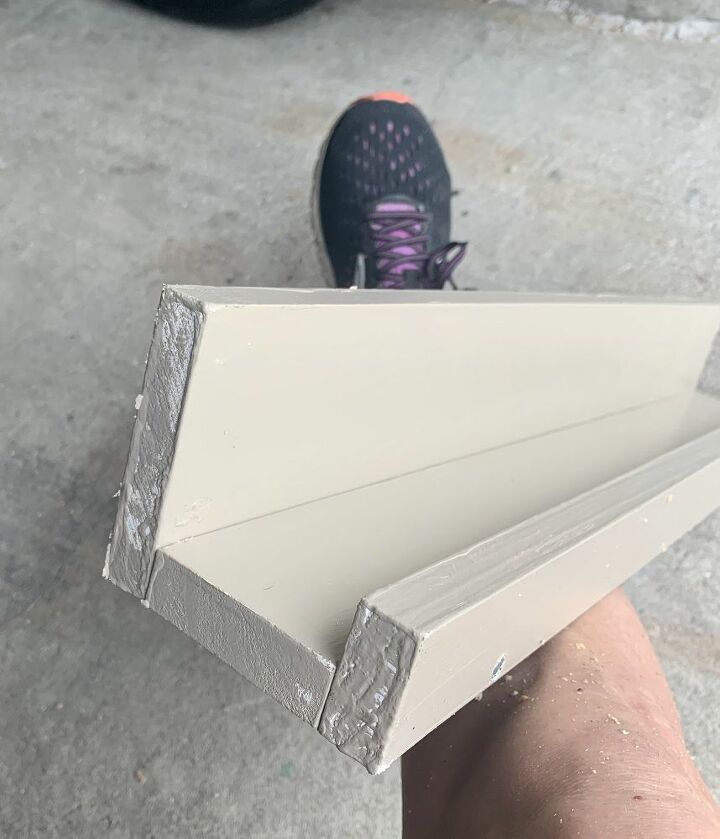
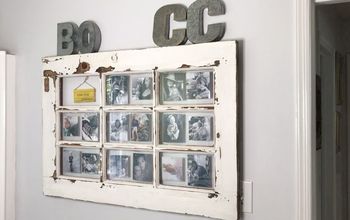
Each rail has a "J" like configuration. The 4" was on the "back" -- to be attached to the wall, the 3" was the bottom, and the 1" was facing to the front.
(The ends still needed to be sanded.)
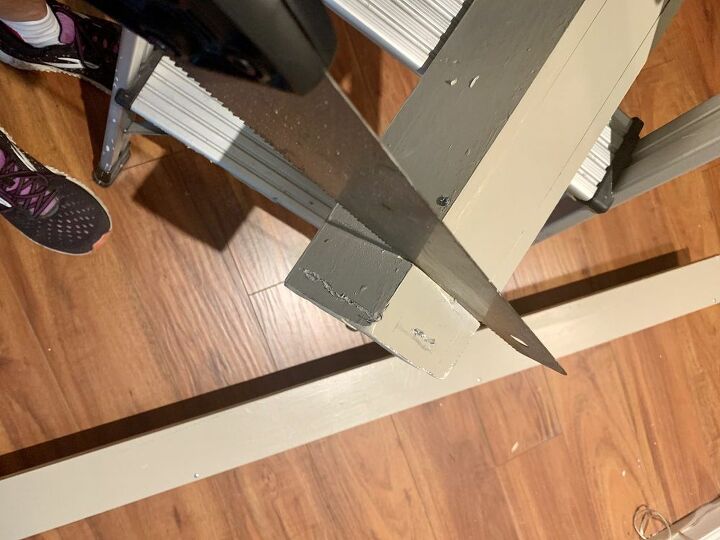
...there is wisdom to this philosophy! ...Here's what happened when I measured incorrectly... I had to cut 2" from the end of the railings!!
These (top) rails are now about 5'4" long
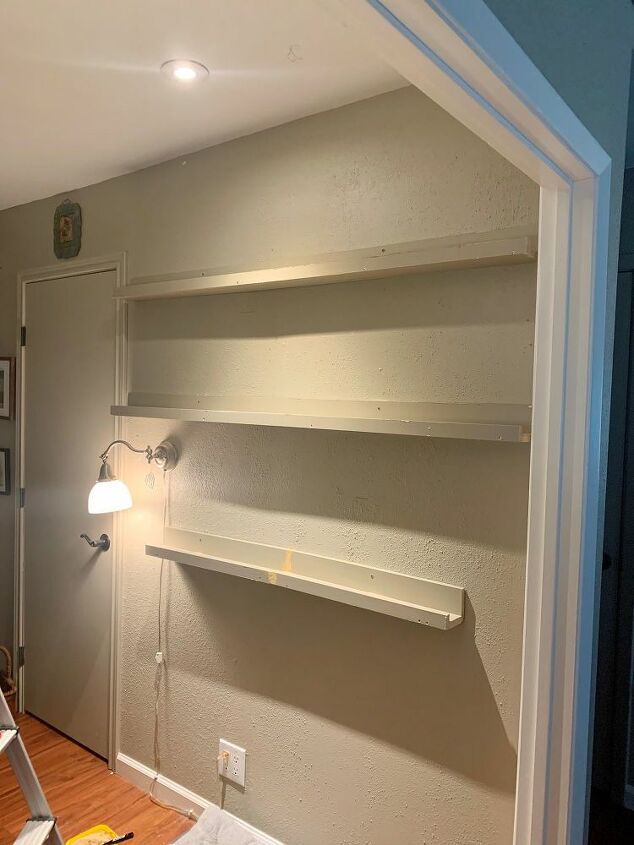
...for the install, I used a stud finder and small level. Again, I drilled pilot holes -- before screwing that 4" back piece to wall/stud.
I wanted a smaller shelf on the bottom... near the chair. Since we are in isolation (and I wanted to do my part) there was no returning to Lowes. (Plus, hate to waste anything!)
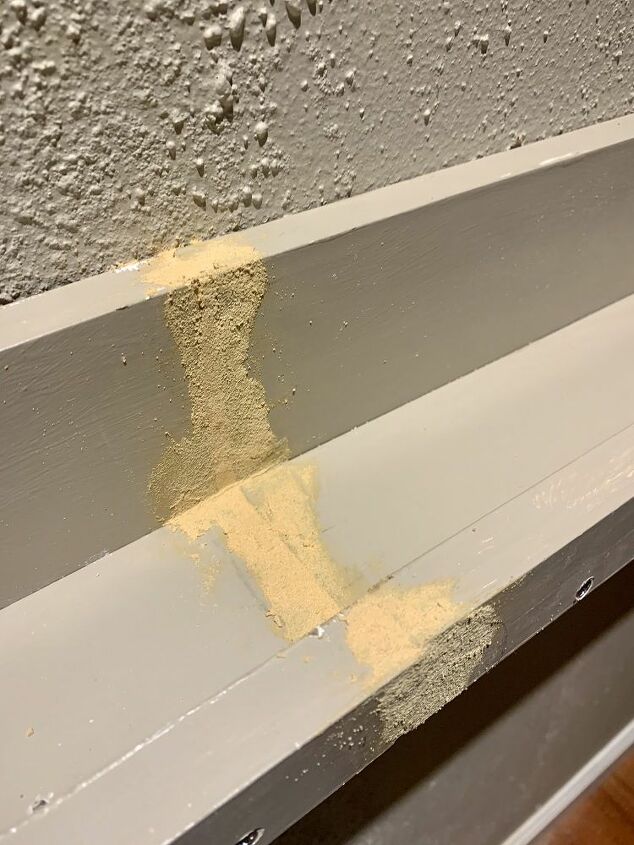
I put two 24" pieces together to create the lower shelf. (This is the wood putty that I used.).

This isn't pretty, But, underneath, I used a scrap 3/4" x 1" x 6" piece to form a "bridge" between the two pieces of wood -- and secured it with four wood screws. Then I wood puttied the open gaps.
Note: this needs to be done on a VERY level surface. I used my kitchen counter tops.
(You can see the other puttied side in the previous photo.)
Note: you cannot see this patch piece when looking at the completed rails. (I think because the bottom rail is below eye level.)
I sanded and painted the edges, burrs, and that lower shelf joint. (I patch-painted any scratches that happened during the install.)
Resources for this project:
See all materials


Comments
Join the conversation
-
I have been procrastinating doing this project, now you inspired me 👏🏼
-
Picture rails are indeed very expensive. I found some at Ikea, and honestly, they were not the best quality. So I thought to try picture frames for my photos. I ordered some from Amazon, but the color didn't match the walls. It looked different in the photos than in real life. I have found https://www.frameshop.com.au/custom-picture-frames later that week. I ordered some, and they came strictly at the size and color I chose. And they matched perfectly with my wall, looking way better than with any picture rails. You should try them. And they are not as expensive.


Frequently asked questions
Have a question about this project?
Do you sell your artwork?