


Give a Tiny Picture More Presence With a Picture Ledge.

Sometimes a picture is just too small to hang on its own. How about using a cutting board and old drawer knobs to make it look larger?
I was given a small picture that I am very sentimental about. The problem is that it is to tiny that it tends to get lost amongst other items, so I decided to give it more presence. You may recognize this craft as something that is often used to display jewelry but changing the design slightly also makes for a great picture ledge.
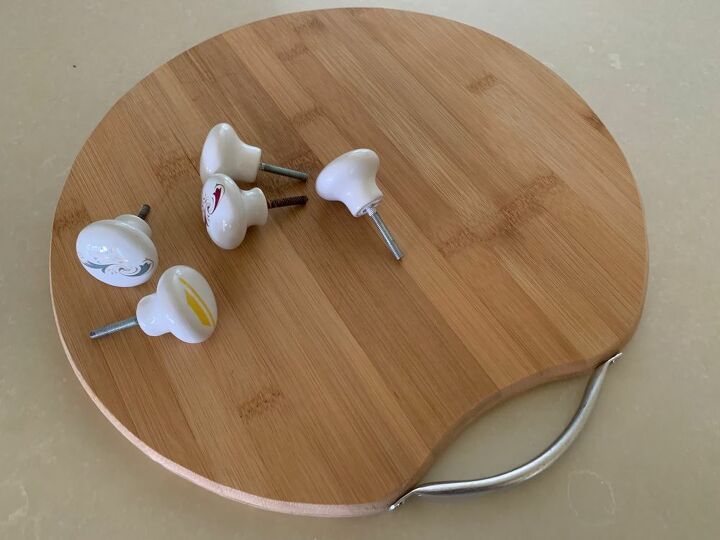
The basic items required are a wood cutting board, knobs with screws and nuts and a picture with a frame that is narrow enough to fit behind the knobs. The way that it hangs on the wall or is decorated will depend on yourself. You will also need some tools such as screwdrivers, a drill and possibly a metal saw.
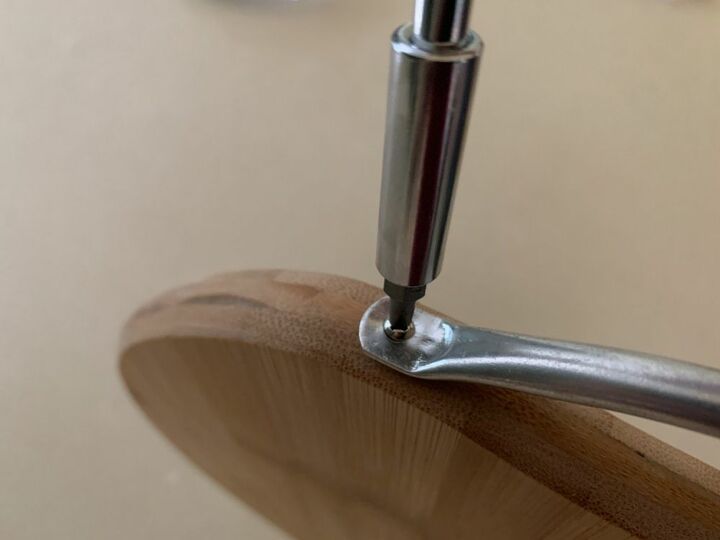
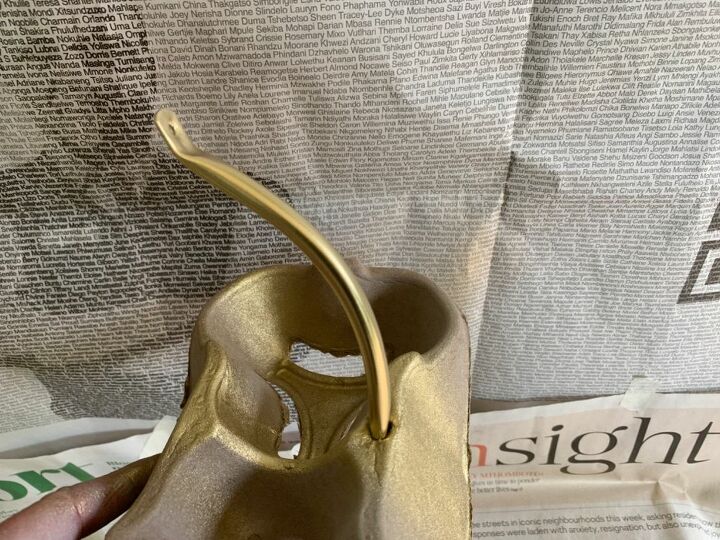
I wanted to change the colour of the chopping board's handle so I unscrewed and sprayed it gold. The spray paint I was used was not specifically formulated for metal so I played it safe and first did a coat of primer followed by two coats of gold.
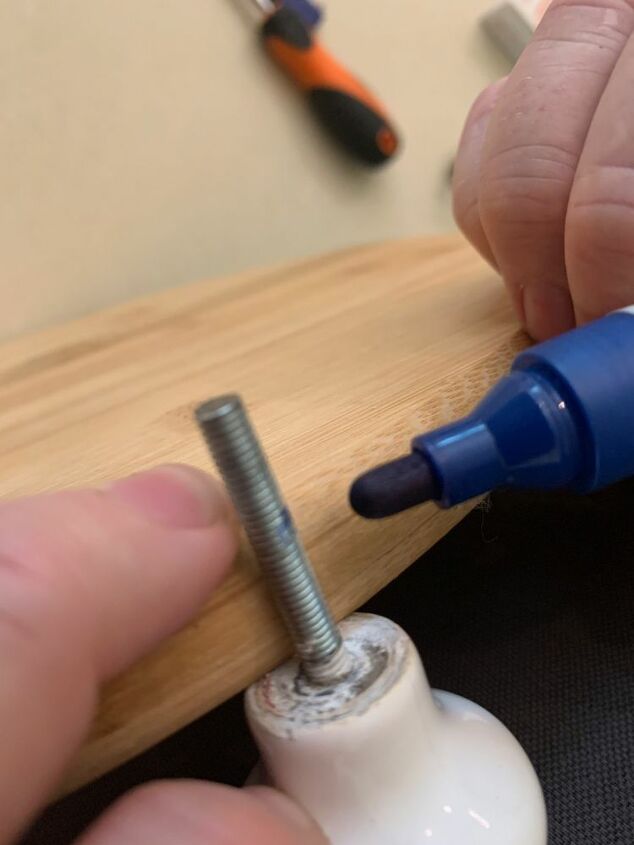
The screws on my thrifted knobs were too long. They were measured and cut shorter with a metal saw to the depth of the wooden board. The blue mark you see above is the maximum length. They should be even shorter so that they can be sunk into the board together with their respective nuts. By doing so they will not scratch the surface of whatever they will be hanging against.
Be sure to check that your frame will actually fit into the gap. If your frame is too thick I don't think that leaving a tiny bit of the thread exposed in the front will make a huge difference to the end product. You could always paint it and make it look intentional. Or if your frame doesn't fit at all, follow the step below.
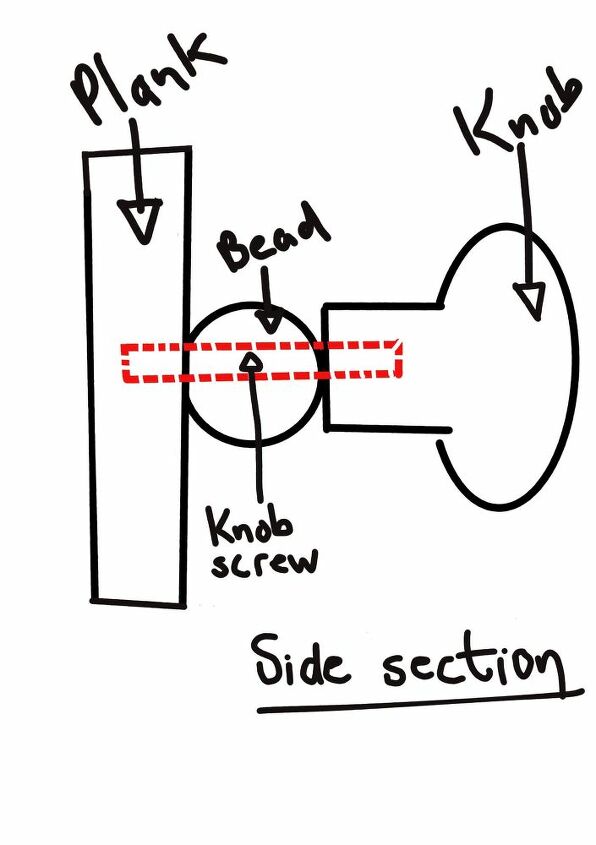
If your frame does not fit between the plank and knob, add a suitably sized bead or decoration as shown above.
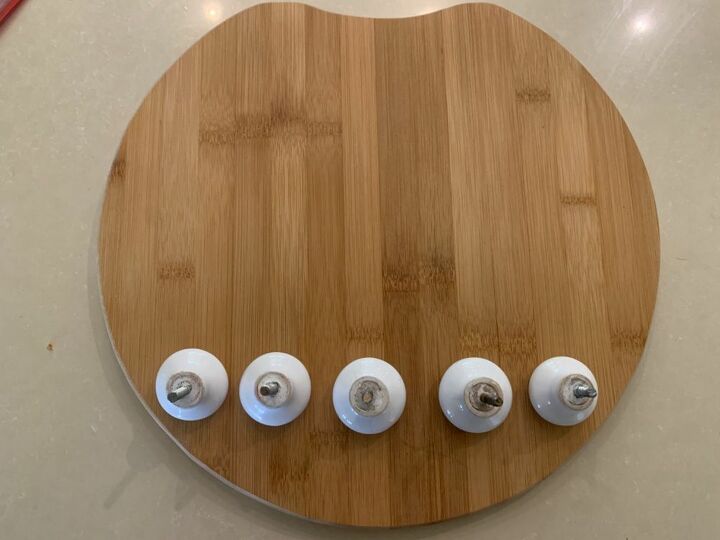
What differentiates this design from similiar ones meant to display jewelry is that the knobs should be more closely spaced so that the frame will have more to rest on. Draw a light horizontal line in the centre of the row of knobs and then make evenly spaced marks on this line of where you want to position each one.
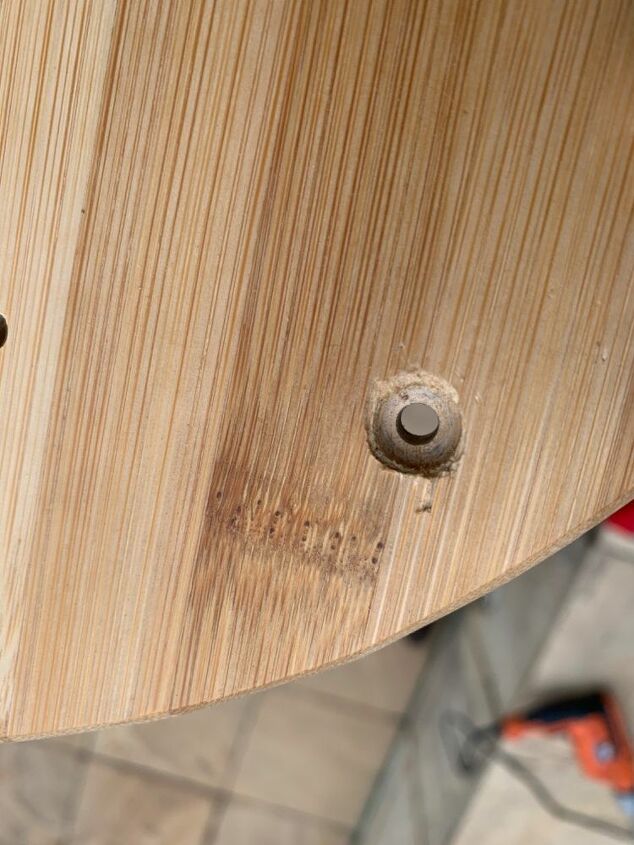
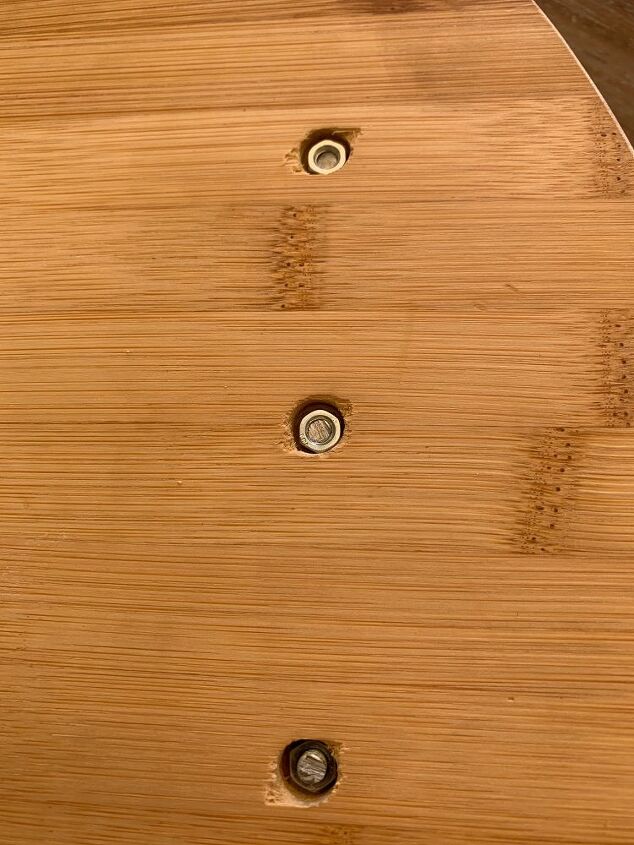
First drill from the front to the back and then from the back to halfway through the board with a bigger drill bit. You will notice that my holes are slightly wider at the back of the board. This is to make provision for sinking the nuts.
I gave the knobs a coat of primer followed by two uneven coats of grey spray paint. The fact that the coats were uneven and blotchy actually gave a beautiful bleed effect. All very intentional of course!
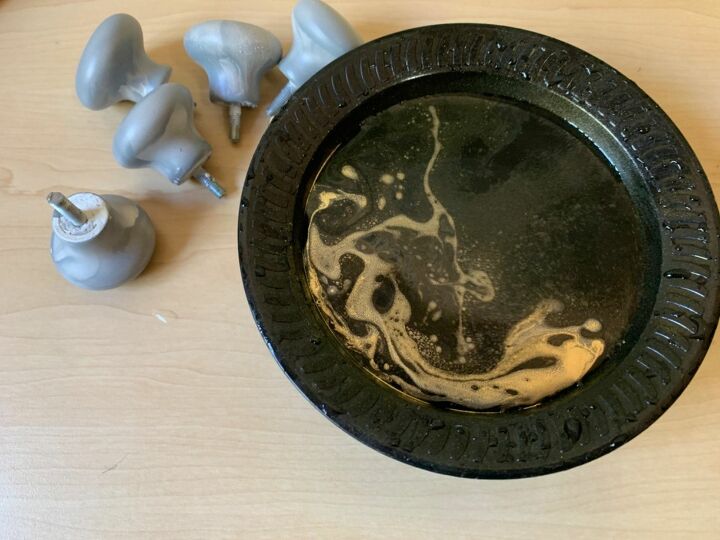
Because the knobs had an interesting effect, I decided to enhance this. I had seen a technique where you spray paint onto water and then use this to get a marbled effect and decided to try it here. You literally run the knobs with the dried base coat through the paint layer and put it out to dry.
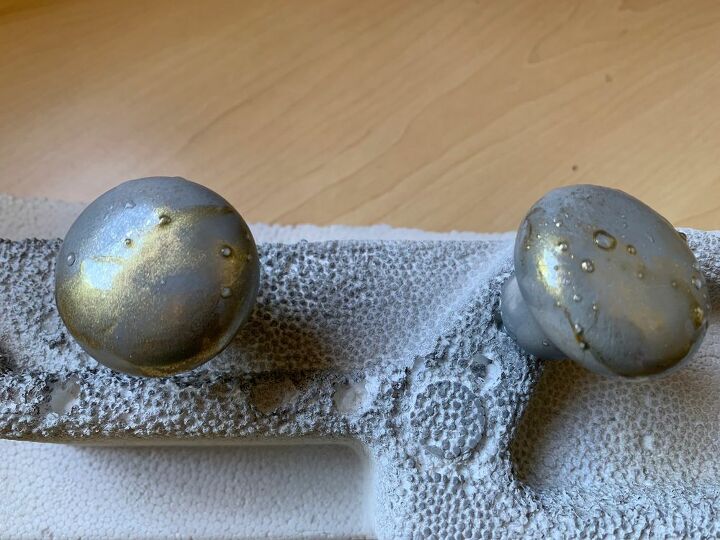
The end result had a couple of unexpected bubbles which may be due to the fact that I used two different brands of of spray paint. Nevertheless, it still looked great!
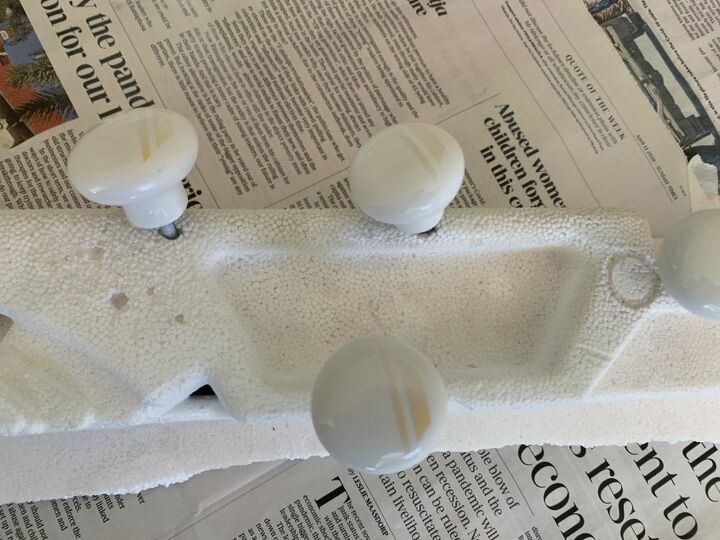
Screw all the loose bits back into place. Above you can see how the nuts are sunken into the wood.
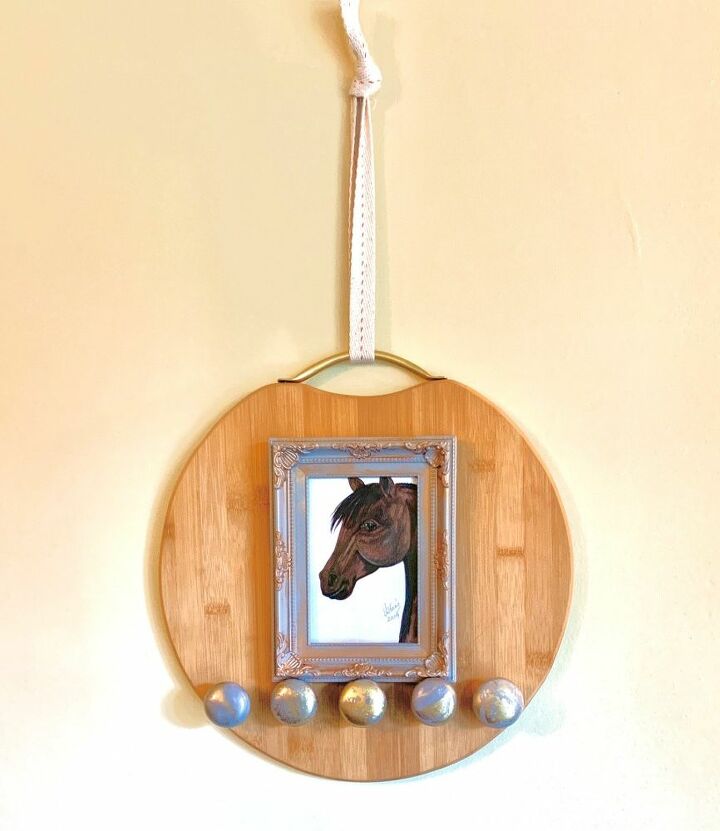
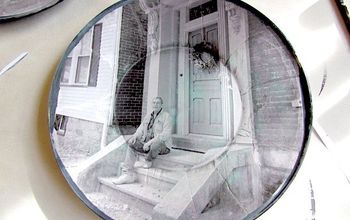
I tied a piece of rope to mine, placed the picture (I added some tack to secure it further) and hung it .
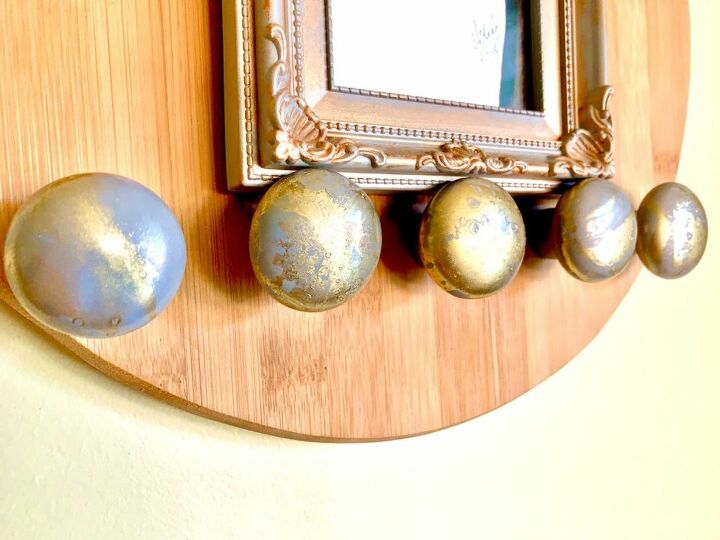
I really love the knob finish.
Resources for this project:
See all materials


Comments
Join the conversation
-
Cute, I'm going to try this! :)
-
LOVE that pic!!! I can see why you want to keep it in a good spot. : )


Frequently asked questions
Have a question about this project?
where did you add the tacks? would adding a knob or two on each side to secure the picture, become too fancy (cutsey) ?