


DIY Board and Batten Accent Wall

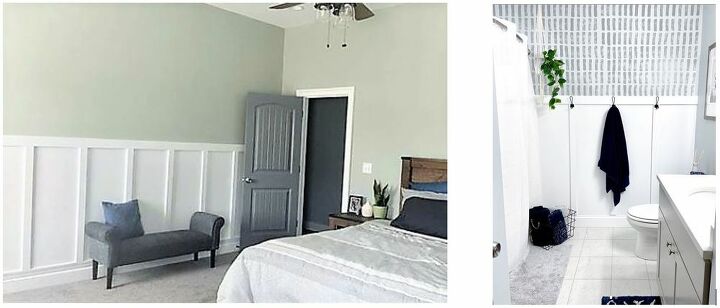
This has been a pretty highly requested tutorial after I shared the sponge wall in our bathroom. We loved this type of accent wall so much that we did it in two places in our home, our bedroom and our guest bathroom. I have a third, slightly different variation in mind too, but until then here is a quick “how to” for a simple board and batten wall.
What you’ll need:
1x3s (primed pine or MDF)
1x4s (primed pine or MDF)
Piece of molding (optional)
Miter saw
Liquid nails
Nail gun (Brad nailer)
Level
Caulk
Paint / brushes / roller
Hooks (optional)
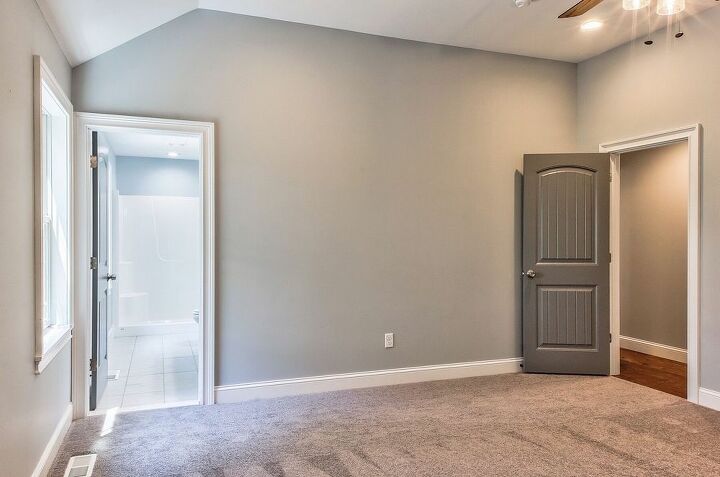
Step 1: Plan
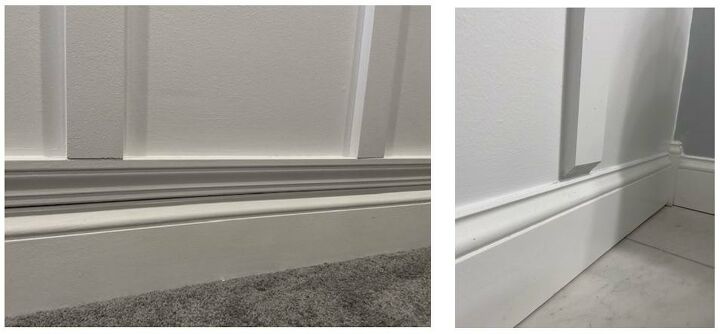
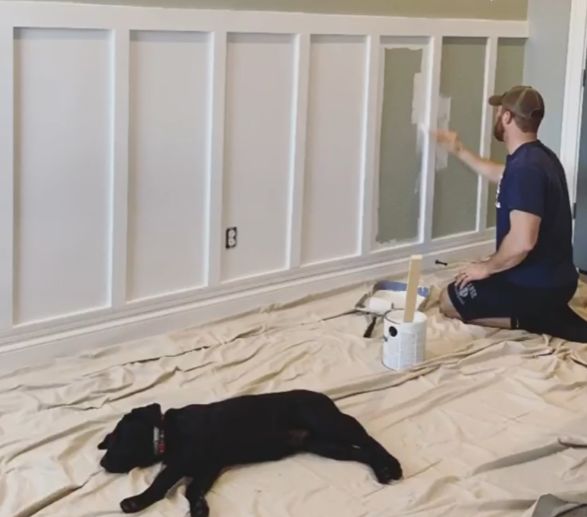
First, you need to decide how you want the board and batten to meet the floor/existing molding. Having a 1x3 come right into the molding may look funny because it sticks out so much. Some people remove the existing molding and run a 1x4 along the bottom, so your vertical 1x3s will be flush. We didn’t want to remove our existing molding, so we opted for some different methods.
In our bedroom (on the left), we added an additional piece of molding upside down to the existing molding. This made the thicker part on top, so our vertical 1x3s sat flush against it. In our bathroom (right), Kyle cut 45° angles at end of each 1x3, so they tapered off into the molding a little better. Both were simple and effective, just depends what look you’re going for!
Step 2: Measure and decide on material
Measure the wall you’re planning to cover. You will need to decide how many vertical boards you want, and how high you want the board and batten to go. Typically, the distance between vertical pieces range from 12” - 24” depending on the length of the wall you’re working with. The vertical can be as high as you’d like. We just eyeballed what looked right in our rooms.
As for materials, for our bedroom we used MDF boards. Kyle was hesitant to use MDF in a bathroom because of the humidity, so we went with primed pine in the bathroom. Both were easy to work with and worked well.
Step 3: Measure, cut, and apply your horizontal pieces (1x4/molding)
Measure and cut your 1x4 (and molding if applicable). We attached them using liquid nails and a nail gun, using a level to ensure they were straight.
We learned that walls are not always perfectly straight. If you have large gaps you may need to use a shim. If it’s a small gap though, you can just fill it with caulk later on.
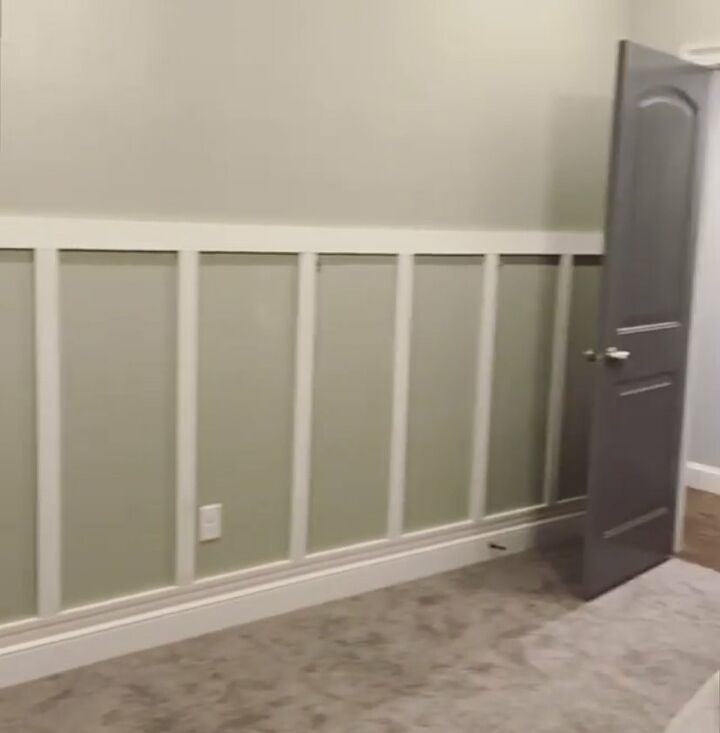
Step 4: Apply vertical pieces (1x3s)
For this, you will need to measure for each piece individually because they may all be slightly different in size. We labeled each piece as we went to make sure we didn’t mix them up.
If you’ve decided to cut 45° at the bottoms, don’t forget that step here! Also be sure to cut the 45° BEFORE cutting the length of your board, otherwise you may take too much off when you cut the angle.
Again we applied these pieces with liquid nails and a nail gun, using a level to make sure they were straight.
Step 5: Caulk
After letting the liquid nails dry, we caulked all of our seams- between the horizontal and vertical boards, the horizontal boards and the corners, and any holes made by the nail gun. Be sure to use paintable caulk.
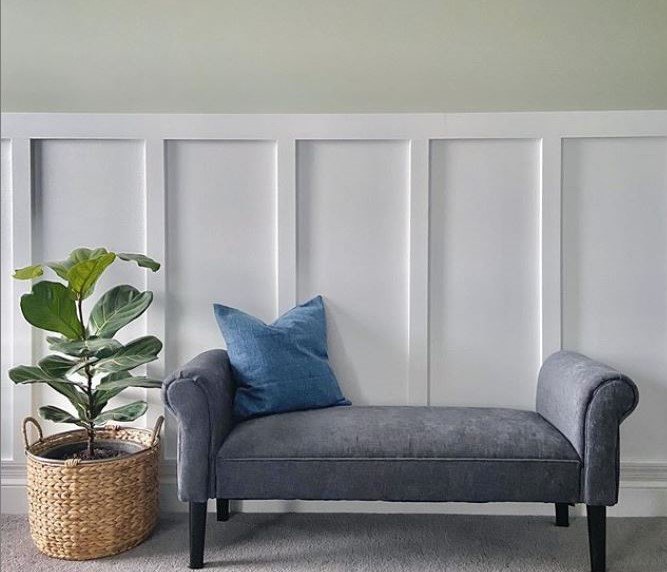
Step 6: Paint
Once the caulk dries, you're ready to paint. We used white for both of our board and batten walls, but I’ve seen some amazing colored board and batten walls done as well.

(Optional) Step 7: Add hooks
In our bathroom we decided to add towel hooks to make it a bit more functional.
This is a great weekend project that will instantly add some character to your home! As always, leave any questions below.


Comments
Join the conversation
-
I love the classic look of what you have done. It is lovely. I would really like this in my front entrance going 2/3 up my wall.
-
I love this. And what a great idea to put a fancier molding on the bottom, instead of taking the old molding off. certainly saves a lot of time. It looks beautiful. I'm thinking of doing my guest bath the same. Thankyou so much for sharing.


Frequently asked questions
Have a question about this project?
Great jobs! I love how you chose to adjust the widths - in both rooms - to make a better transition between the width of the floor molding and the verticals! Did you have to think about fixing that or was it a given? (Because I hate it when two different levels just bump up to each other, no matter how primitive a look people are wanting to achieve.)
My other question was, did you consider using a thinner vertical, so that your verticals and horizontals were the same width? I've never seen that, except when they exchange the floor molding for a 1× 4. I'd love your opinion on that. Thanks! And again, great look, great job! 🙌