


Tea Towel With Tea Cup Embroidery
Do you enjoy a hot cuppa tea? Do you enjoy farmhouse style? Ticking fabric? Embroidery? All of the above? You came to the right place today, because I’ve got a sweet tea towel project for you. It’s super simple and super adorable.

- 13″ wide by 21″ long piece of ticking fabric, with stripes running lengthwise
- small scrap of white linen or cotton
- navy blue embroidery thread & embroidery needle, fabric pen
- template for the tea cup available from our subscriber resource library on the blog (You need to be an email subscriber to gain access. The blog post will show you how.)
- sewing machine, scissors, pinking shears, thread, iron
- optional – embroidery stitch guide book
Cut a piece of ticking stripe fabric 13″ wide by 21″ long, with stripes running lengthwise.
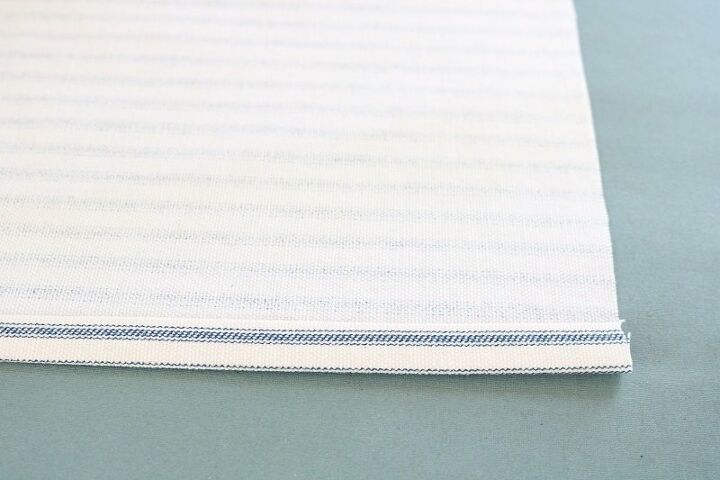
Fold each long edge of the fabric in toward the wrong side 1/4″ and press. Fold each edge in again another 1/4″ and press.
Sew a seam down each pressed edge.
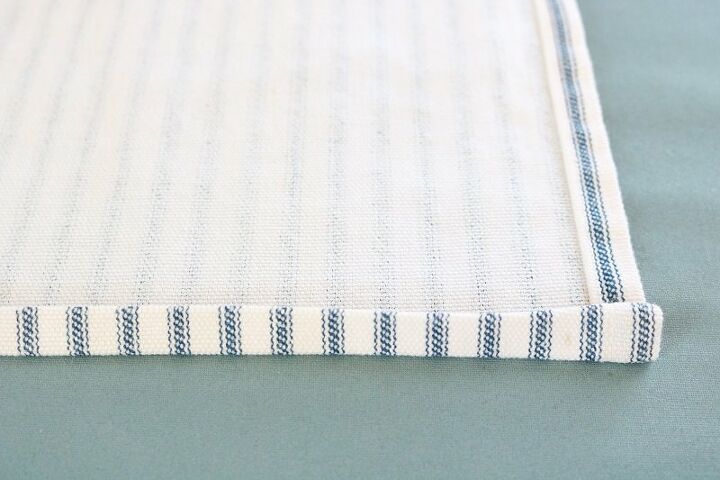
Likewise, fold each short edge of the fabric in toward the wrong side 1/4″ and press. Fold again another 1/4″ and press. (Another option here is to miter these corner if you have the skill to do so. It provides a nice finished look).
Sew a seam down each short edge.
Next you will embroider a tea cup on a white patch of linen or cotton.
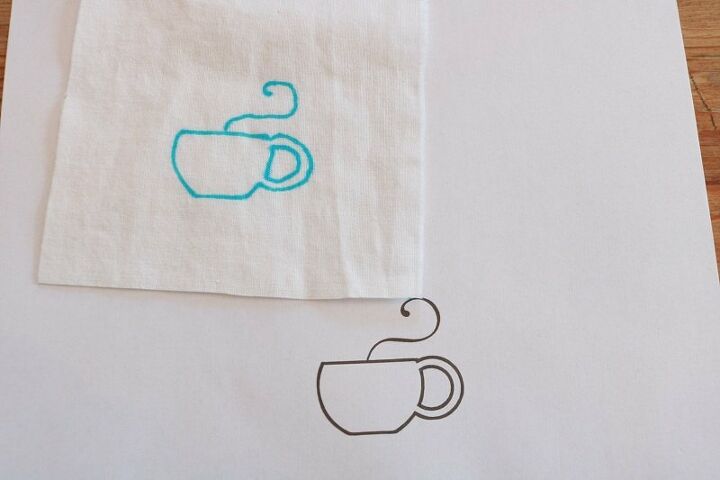
Find a small swatch of white linen or cotton (about 5-6″ square or bigger if you’d prefer to use an embroidery hoop).
Using the tea cup template available in our Subscriber Resource Library (on the blog), copy the tea cup onto the white fabric with a fabric pen. My cotton fabric was thin enough that I could trace the pattern by placing a printout of the template under the fabric. You could also try to free-hand the design using the tea cup template as a guide.
Fasten the fabric in an embroidery hoop if you’d like (and you have a big enough fabric piece).
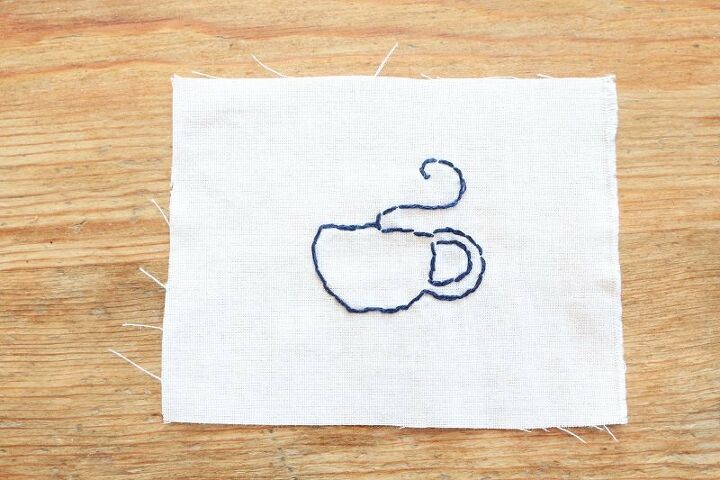
Embroider the tea cup design onto the fabric using your favorite embroidery stitch. I used the back stitch, but I think an outline or stem stitch would also work well.
Trim loose threads.
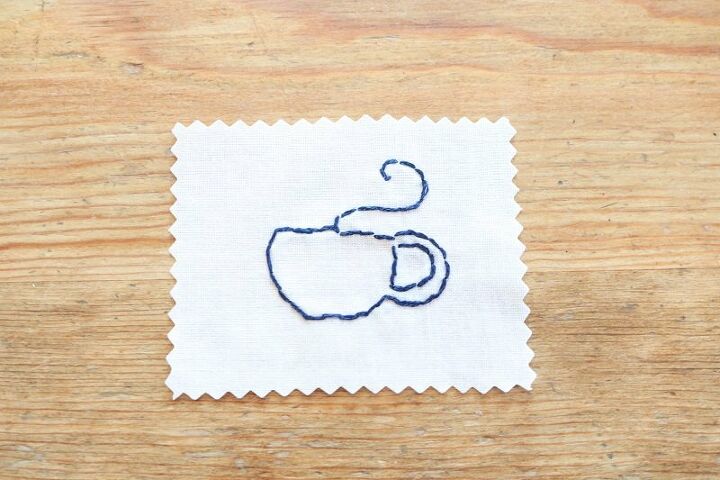
Trim the white fabric swatch with the embroidered tea cup to your desired size using pinking shears.
It can be a small square or rectangle patch that you will attach to the towel.
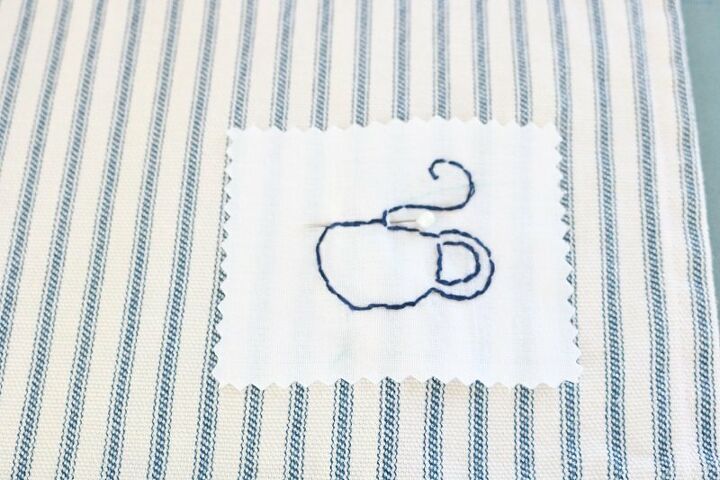
Next, place the patch in the desired position on the towel, ensuring it will be showcased! I chose the bottom right corner of the towel.
Pin the swatch in place on the ticking towel.
You will be using the zig-zag stitch on your sewing machine to secure the patch to the towel. I strongly recommend practicing this stitch with scrap fabrics to get the stitch sizing you prefer prior to stitching your swatch on the towel. I made sure to do that!
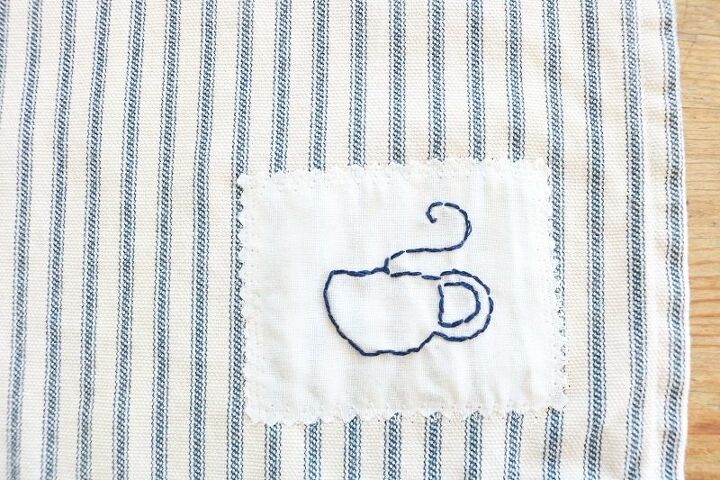
Sew the patch onto the ticking stripe tea towel using this zig-zag stitch, beginning at one corner and sewing all the way around the patch.
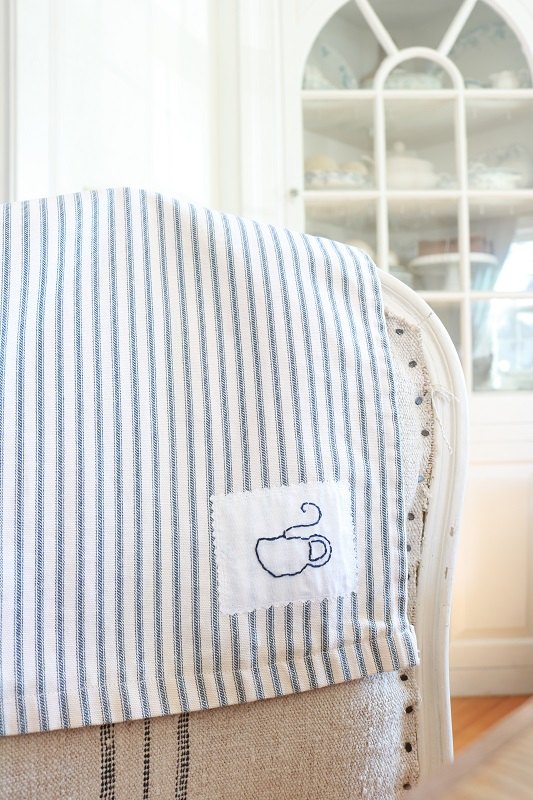
Now your adorable tea towel is ready to be displayed in a farmhouse or cottage style kitchen. Give it as a gift to someone who loves this style or as a hostess or housewarming token. It will remind them to Keep Calm and Have a Cup of Tea.
If you liked this craft, you may like these similar DIY projects at my blog.
And be sure to visit my blog for ' A Year of Farmhouse Crafts' free guide!


Frequently asked questions
Have a question about this project?