


Passover Centrepiece

An epoxy made centrepiece for Passover table, or any celebration.
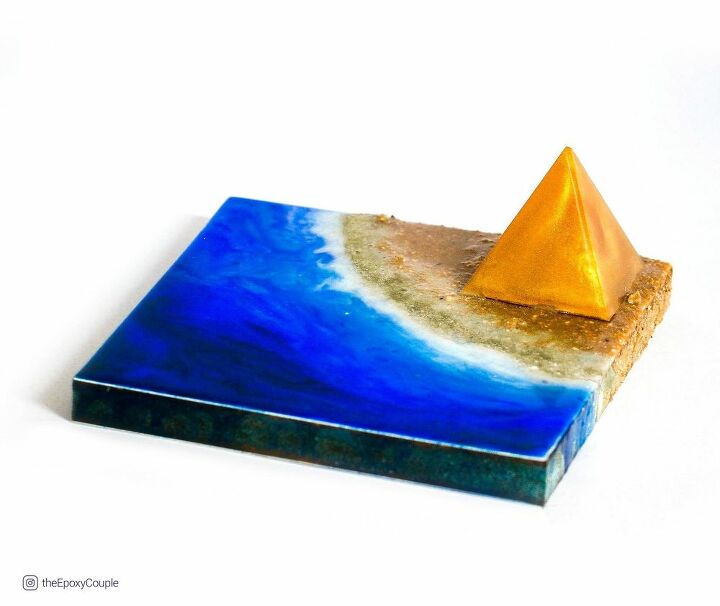
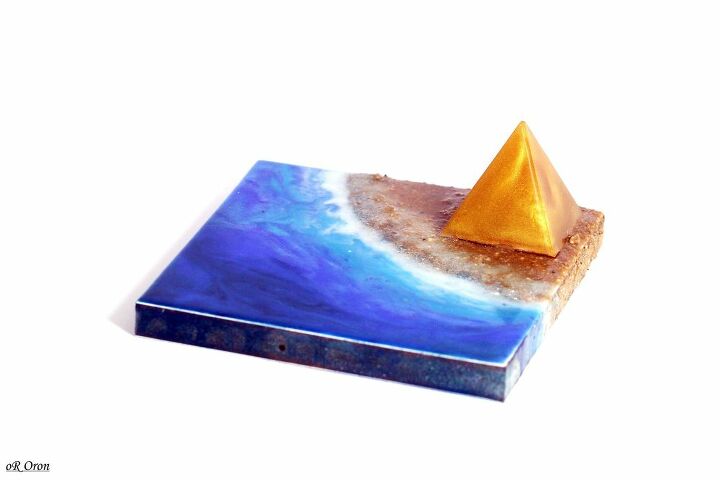
On a square plywood laminated with white Formica, we created a made-up Egypt scene (well, there aren't any pyramid on the seafront). The plywood was placed on top of a silicone mould, to allow the epoxy to run on the faces of the plywood.
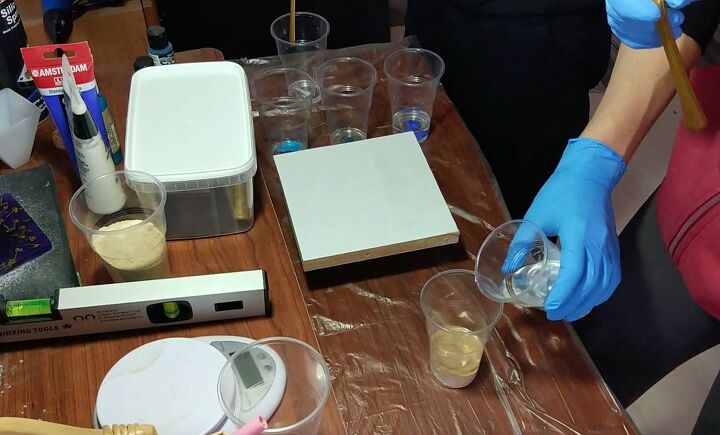
We mixed epoxy in plastic cups. This epoxy, 2:1 epoxy, has to be mixed in a different container first; otherwise, it won't cure completely, which means that we first mixed all the epoxy, about 250gr, in a big container and divided it into cups.
To each cup we added a different coloured acrylic; light blue, dark royal-blue, deep blue, white, and one with sand from the beach, that I have collected the previous day. We began by pouring the mixed sand with epoxy on the square. Position it on the corner of the square, to make the rest as the sea.
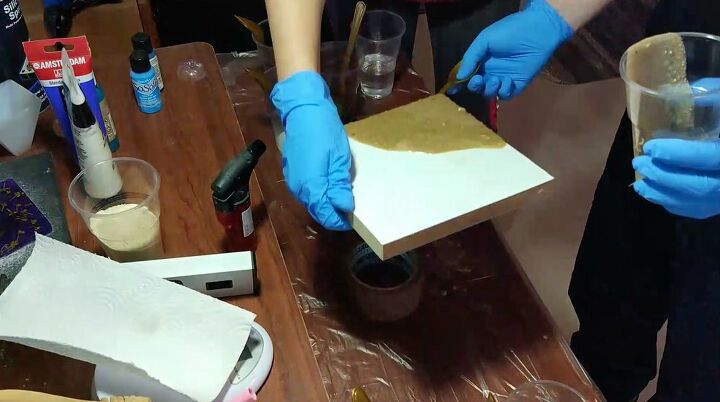
Then, on the opposite side, we poured the dark royal blue mixed with epoxy. We covered the side-face of the plywood too.
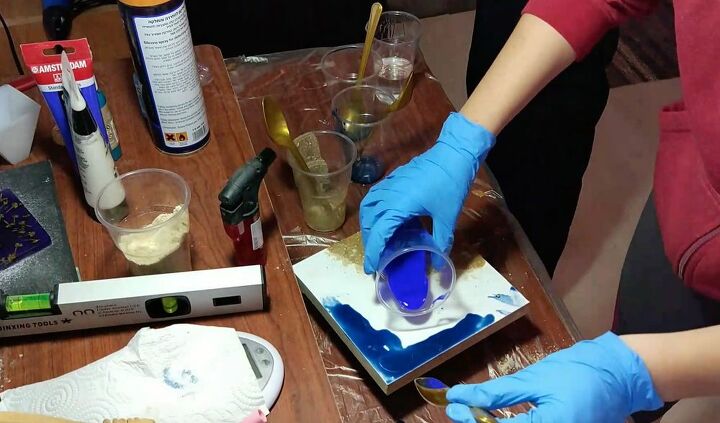
Afterwards, came the deep blue colour. This blue is one of my favourite Amsterdam's colours. So vivid, yet not taking-over other colours' attention.
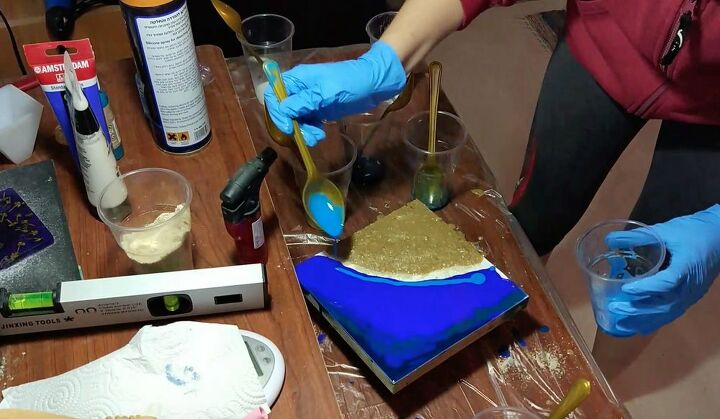
We tilted the plywood up and down to create a gradient.
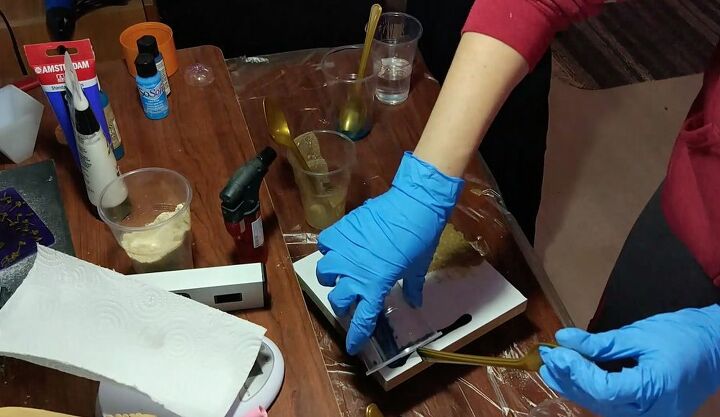
On top of the blue, we added with spoon strips of light blue.

Again, we moved the coloured using the power of gravity.
Then, we mixed the white. In the white cup we added epoxy, white Amsterdam's acrylic and silicone spray. The silicone creates a cool unique effect that looks similar to the waves washing the shore.
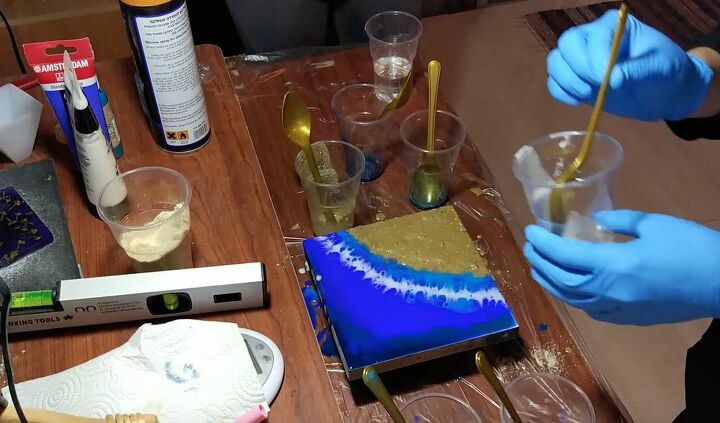
We added another one closer to the "shore".
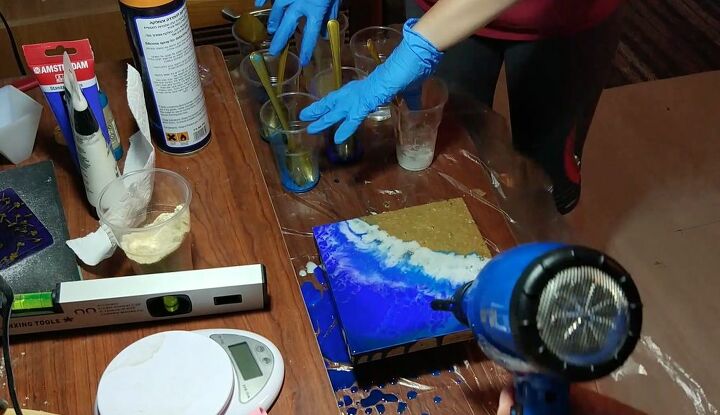
Using a hairdryer (which I am starting to think I am using more often for arts & crafts other than on my hair), we air blown the white colour on top of the sand. Immediately, afterwards, we moved it the opposite way, from the shore back to the sea. It made it look as if the wave is striking the beach and going back to the sea.

Close up on the white colour with the silicone.
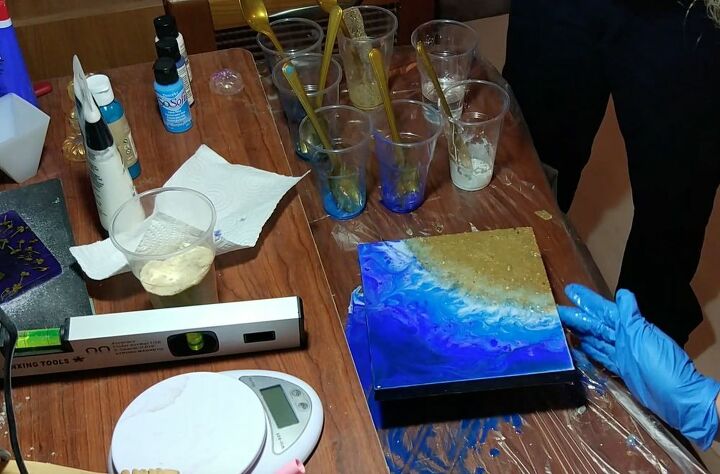
Once we were pleased with it, we made sure that the faces of the plywood are covered with acrylic too.
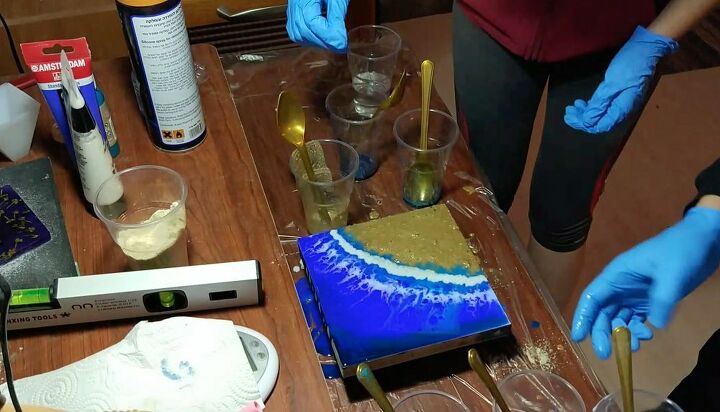
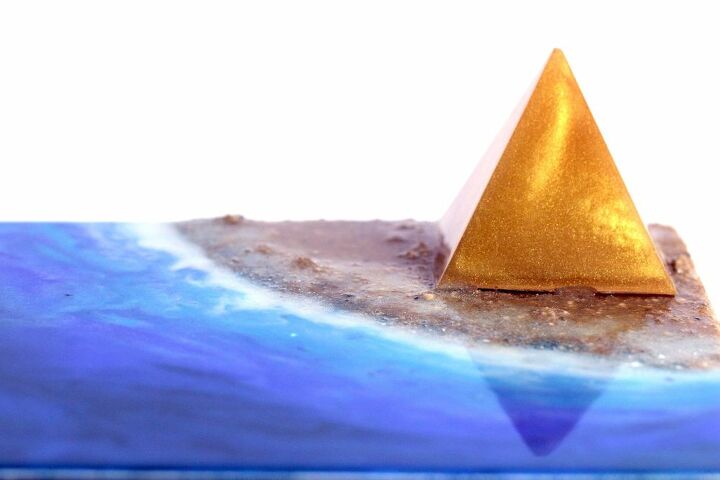
Then, we added a pre-made pyramid. Here is a link to the pyramid tutorial- https://www.hometalk.com/diy/decorate/rooms/epoxy-pyramid-44253959.
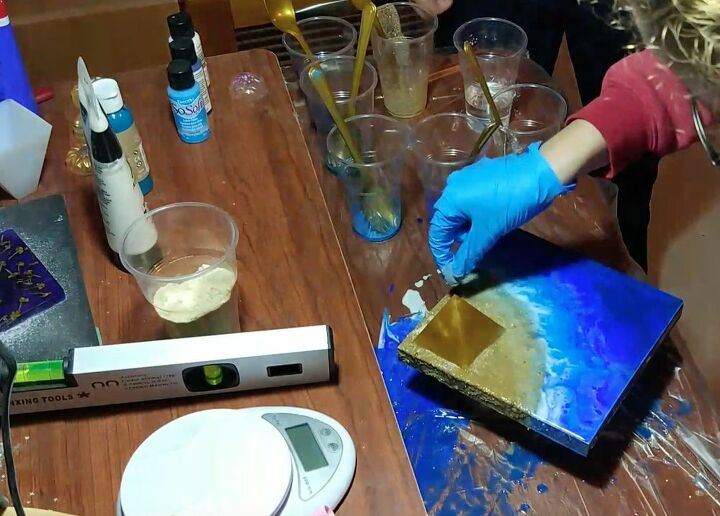
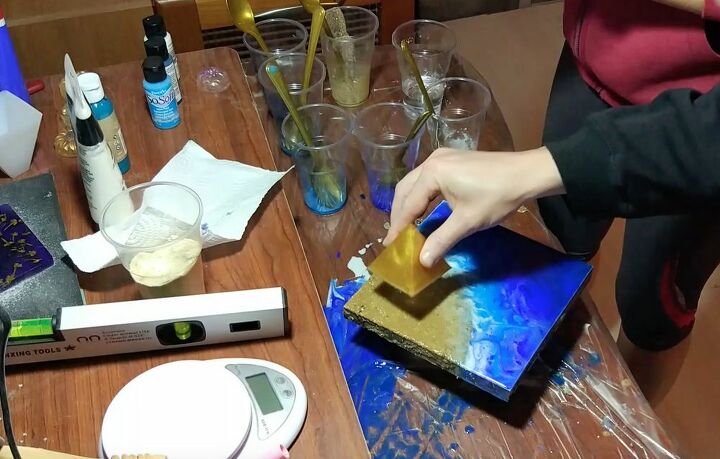
We added a bit of sand on the edges of the pyramid, to make it look as it is set in the sand, and not just placed there.
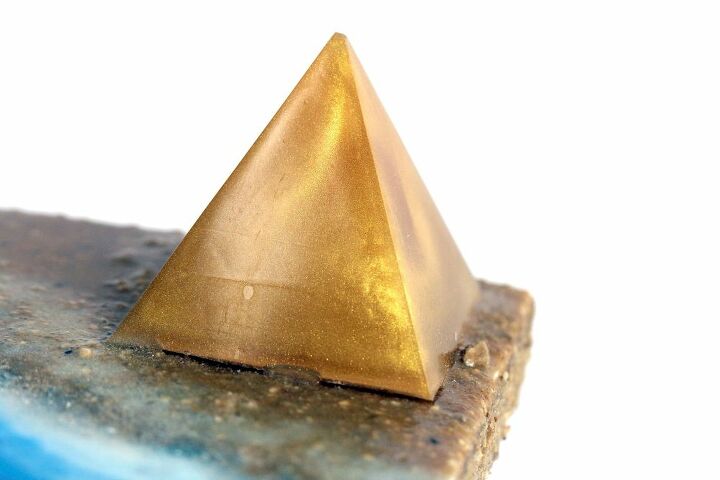
Our pyramid was an epoxy-based, mixed with glorious metallic gold pigment.
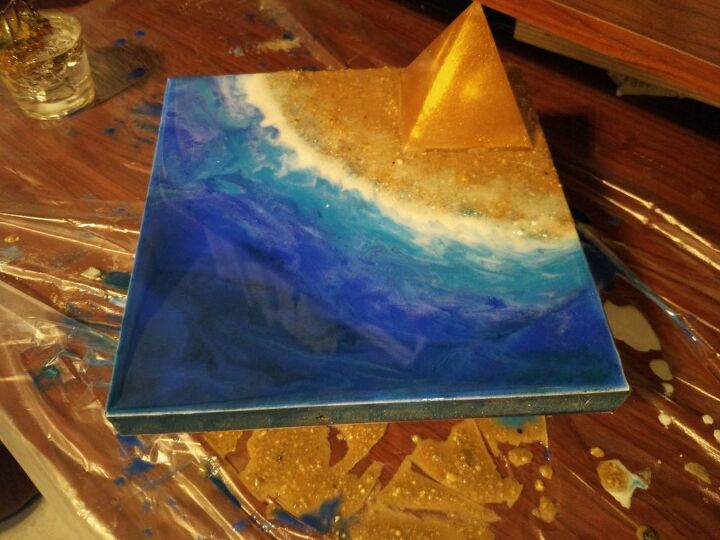
We left it to cure on top of the silicone mould for 24 hours. As you can see, the table was a mess... Luckily, it was covered with a plastic sheet to protect the table.
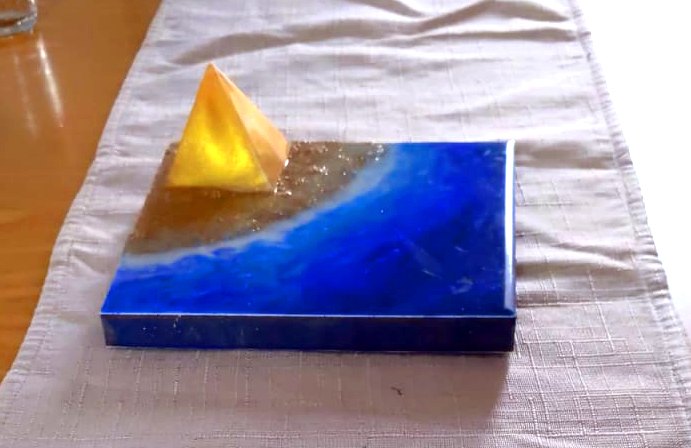
A glance on how it looks on the Passover table...
I like how the epoxy creates a reflective surface.
Happy Passover! 

Comments
Join the conversation
-
Wow! I love the concept, nothing twee about it.
-
So cool!


Frequently asked questions
Have a question about this project?