


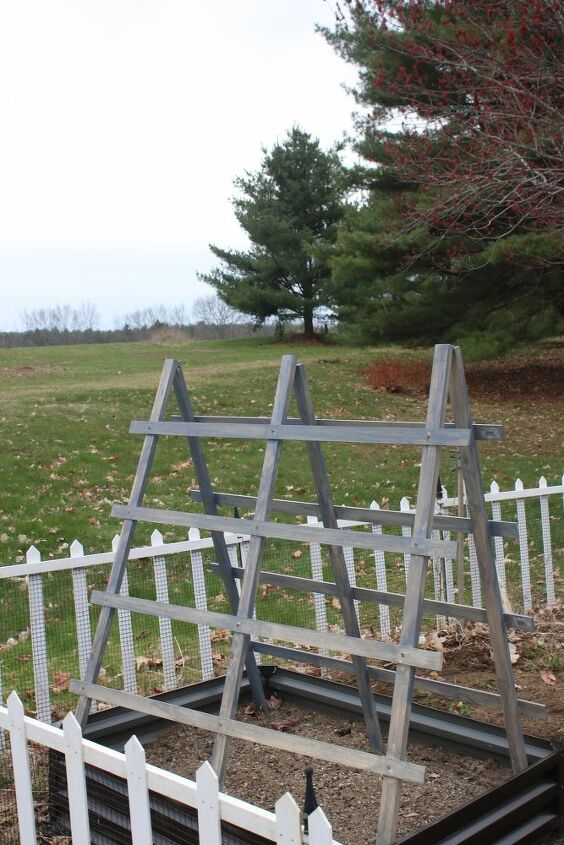
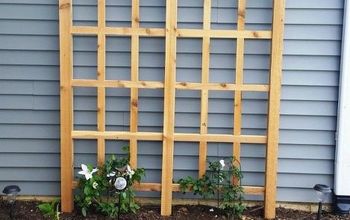
Folding Garden Trellis
The calendar says it’s Spring here in New Hampshire but it’s been unseasonably cold, that hasn’t stopped me from getting my garden ready though! It’s time to plant early veggies here and I needed a trellis for my snow peas and sugar snaps so I built one!
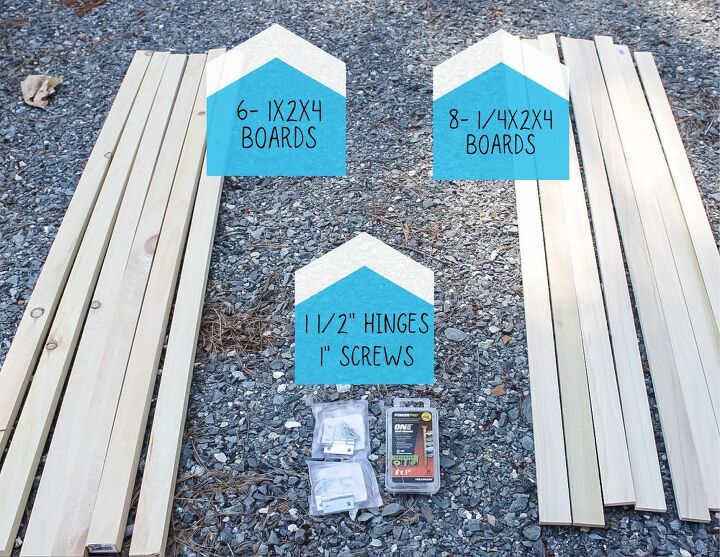
To make this project even easier I bought precut boards to use. You will need 6 1”x2”x4’ boards (to make the frame) and 8 1/4”x2”x4’s to run across. Also, 1 1/2” narrow hinges and 1” exterior screws.
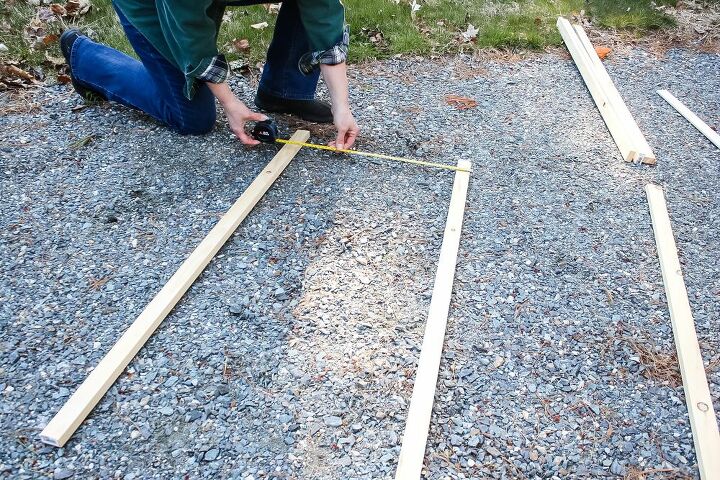
I put 3 of the thicker boards (1x2x4s) on the ground and made sure the tops were all level with each other; this step is very important for when you need to attach the hinges later on.
I spaced out the 3 boards 20 inches apart.
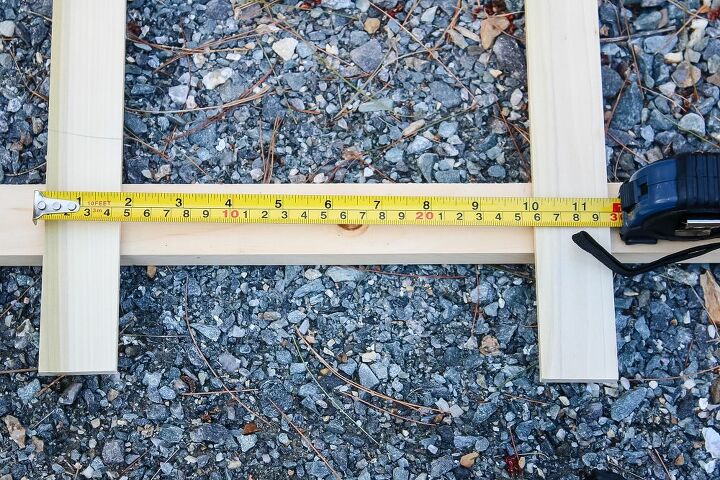
Starting 8 inches from the top I placed my first horizontal slat. I measured 10 inches between the 4 boards. I used a pencil to mark the frame to make sure the slats stayed level when I screwed them in.
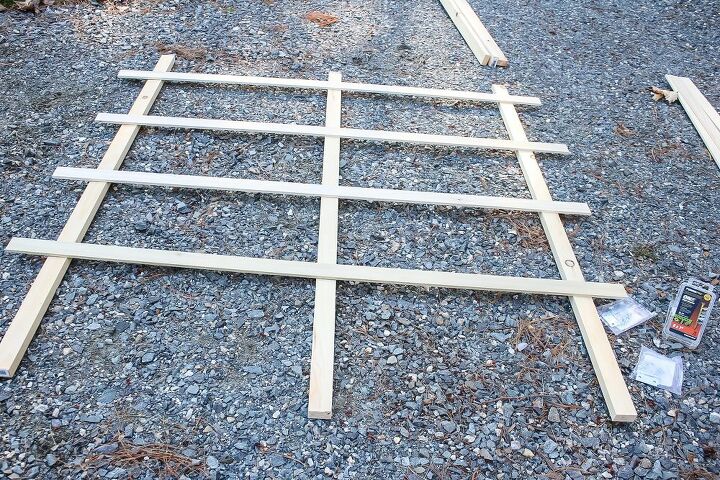
This is what the frame should look like.
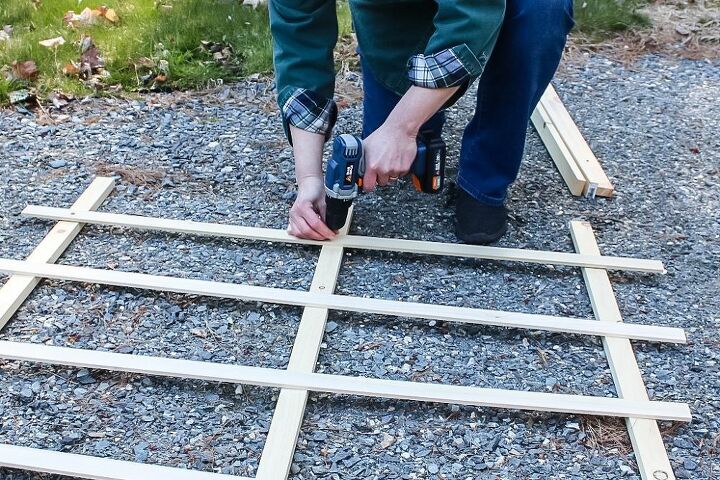
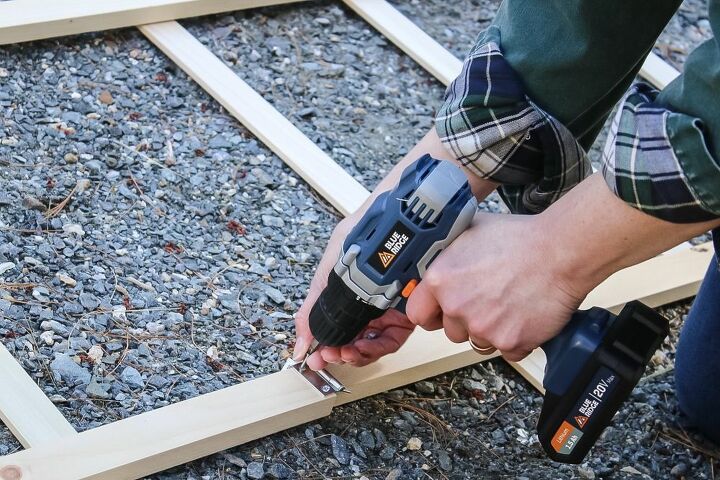
I used 1” exterior screws to attach the slats to the frame using my cordless drill. The pencil marks in the previous step made this step much quicker because I could just zip across and attach the slats without having to stop and measure out each one.
🔹I repeated the above steps to make the other side of the folding trellis.🔹
Now that both sides of the trellis are done it’s time to attach them together. I put the two frames on the ground so the tops were touching...this is when you will find out if you did a good job measuring! I used 1 1/2 inch narrow hinges to attach the tops together.
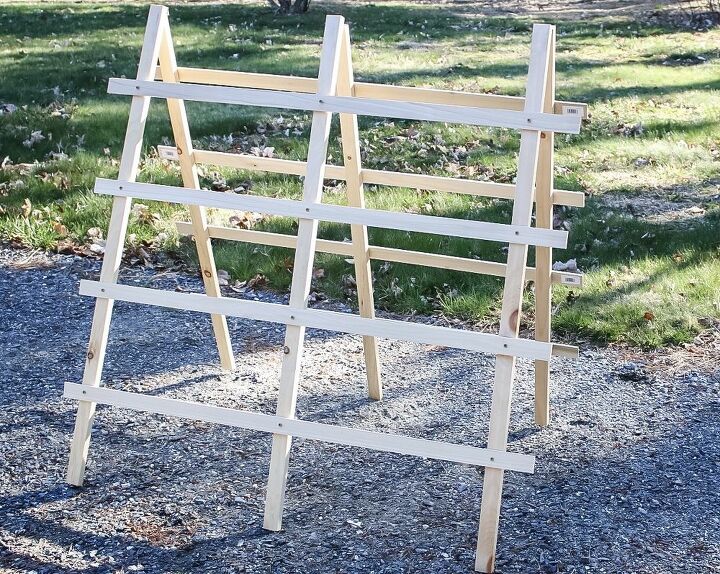
All built! Now it’s time to stain it.
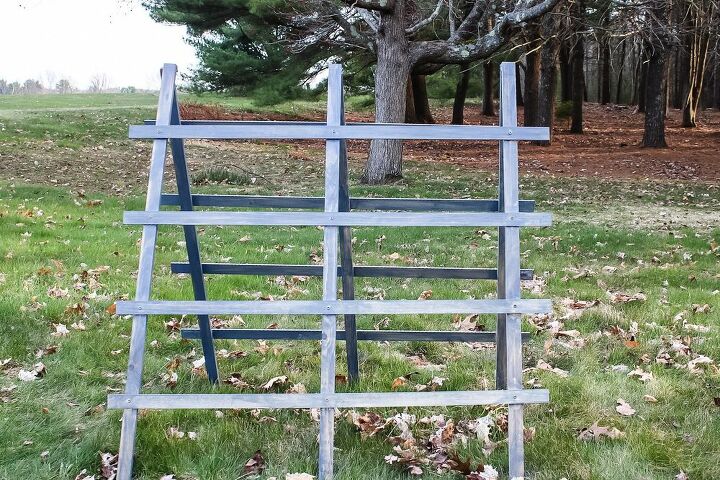
I used Minwax “Classic Gray” stain; I love that weathered look! Now time to put it in the garden and get those peas growing!
Happy Gardening Friends! You can read more about how I started my vegetable garden here
Resources for this project:
See all materials


Comments
Join the conversation
-
This looks great!
-
This was our first project inspired by Hometalk and it was simple and fun!! We modified it to our planter and made it a bit taller almost six feet!! Also used 1”x2”x4’ on each side in case we grow anything heavy like melons. Thank you so much!!


Frequently asked questions
Have a question about this project?
Hi Jennifer! Looks FABULOUS! 👍🏼
Finally an idea I can use, and I love that you can fold it up at the end of gardening season. Easy to follow photos too, thanks!
I think the only thing I would do differently is to stain the wood before assembling it.
Again, Great Idea! 🥰🌱