


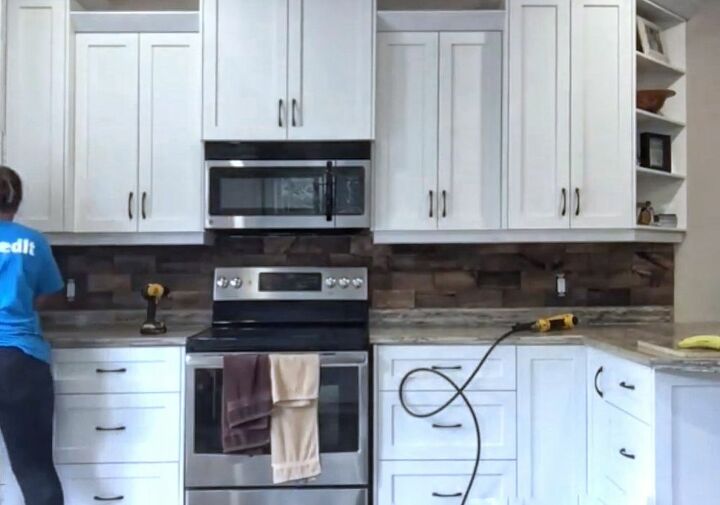
DIY Wooden Backsplash

If your looking for an inexpensive way to upgrade your kitchen this DIY backsplash is a fraction of the cost per tile and has a major WOW factor!
Here is a link to my DIY video showing you exactly how to get this look!
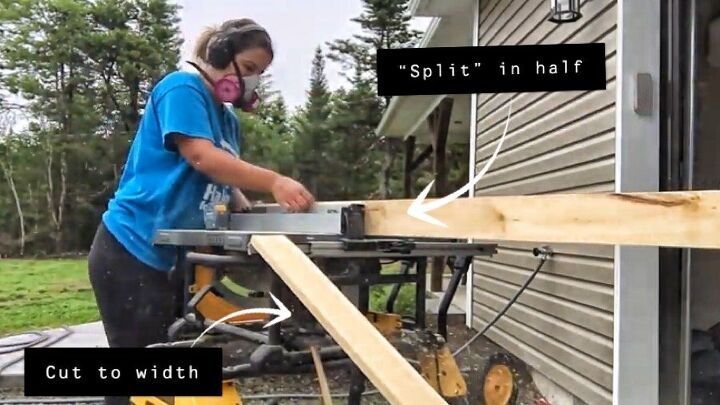
DO NOT OPERATE THE TABLE SAW IF YOU DON'T KNOW HOW** Ask for help and practice proper PPE
I am a licensed Carpenter by trade.
I cut my boards down to 3 1/2 inches wide (they are 1 inches thick)
BUT the trick to this DIY is once they are cut to width you will then turn them on their 1inch edge, raise your blade and cut them into TWO boards. Now instead of having just one board thats 3 1/2 inches wide you have two.
How thick they are doesn't matter because its not structural and this allows you to only need to buy HALF of the square footage you need because you turn one board into two.
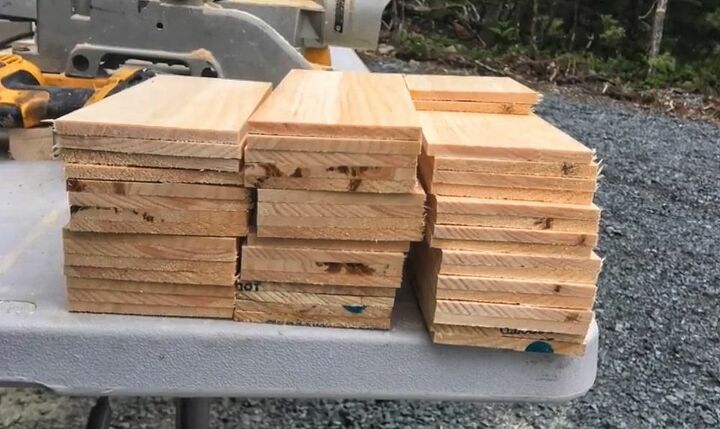
Then I cut my tiles to 6 inches long so i end up with 3/12 wide by 6in length and just under 1/2 thick.
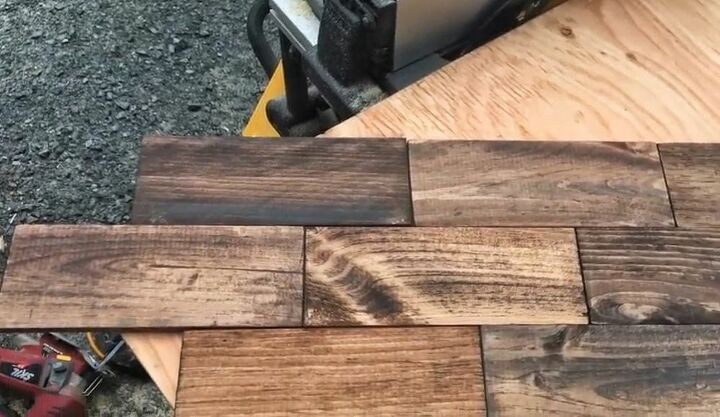
Then I stained each piece. I used three different color stains that I had to create dimensions when I put them on the wall. light medium and dark
I suggest staining them first instead of staining them on the wall, a lot less mess this way.
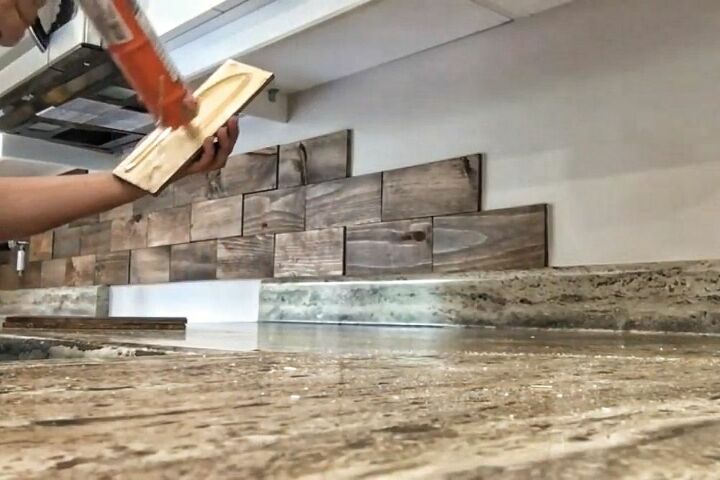
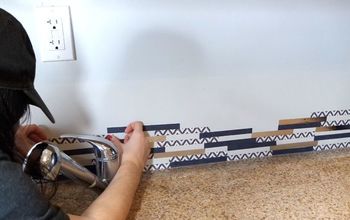
Once all of your pieces are dried, bring them inside and start to glue them on with PL Premium (Construction grade adhesive)
TIP: Once your pieces are dry you can top coat them in a waterproof shellac the same way, before they go on OR you can wait and do it when they are all in place on your backsplash
Your all done! For a fraction of the cost you can really make your backsplash pop!
Click the video link in the beginning of my tutorial to see how i cut out around the outlets, its a great how-to when you can see it happening.
Happy DIY-ing!


Comments
Join the conversation
-
Beach girl, the laminated counter goes up the wall about 4 inch's.
that is considered a backsplash, I know its small but still
-
So maybe to keep it easy to clean you could seal it.


Frequently asked questions
Have a question about this project?
Beautiful! I’ve been wanting to do this for a long time and you’ve given me the incentive! Thank you!
why didn't you pick a stain for the wood, that matches your counters
I like your project Denika ~
When I clicked on your video to see how you trimmed out the electric fixtures I could only hear loud music and static with a faint sound of a woman speaking that would fade in and out. Could not understand what you were saying at all. Did anyone else have this problem?
You did a great job, thank you for sharing!