


How To Attach Your Dock to Land

Hey Everyone! If you loved my DIY Floating dock, you'll love this HOW-TO attach it to land. You can enjoy it longer in your season, because here in Nova Scotia were only willing to swim out to the dock for 3-4 months of the year. This way we can enjoy it even in the cold weather, with a blanket and a glass of wine you turn your deck into a year round pleasure!
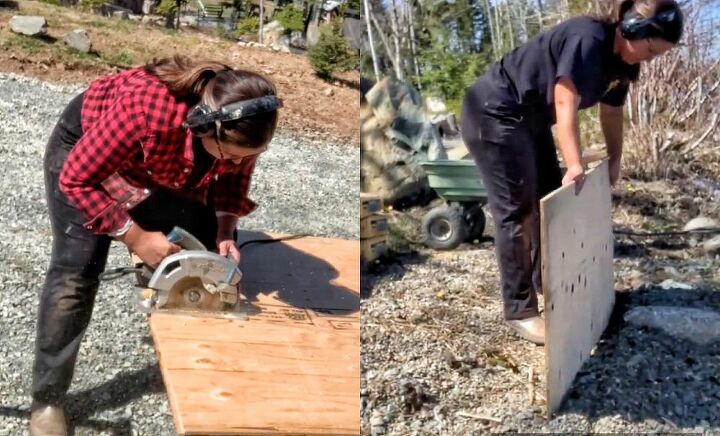
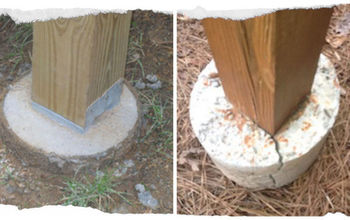
The first step in attaching your dock to land is building a form to pour your concrete.
I suggest building the form in place if there is any slop to your yard. If you build a box first and try to put it in place, it will be slanted like your land and you want your walls to stand straight up.
This will all come together in the next two steps - bare with me!
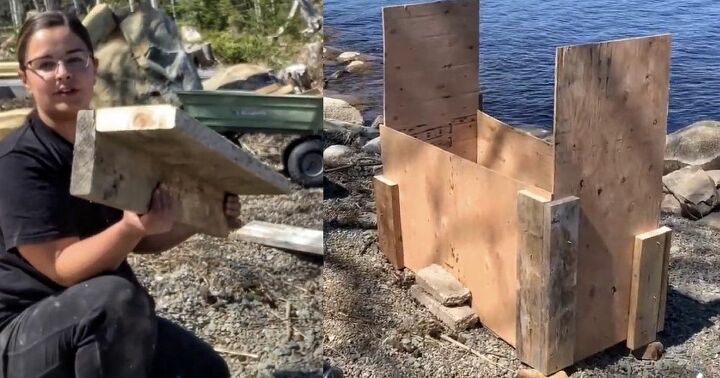
Then I took 2x6 scrap wood that I had and screwed them together to secure the corners.
Disclaimer: This is my FIRST time building a concrete form so i am not saying this is professional (but it works great!)
I also could of cut the sides lower, i know.
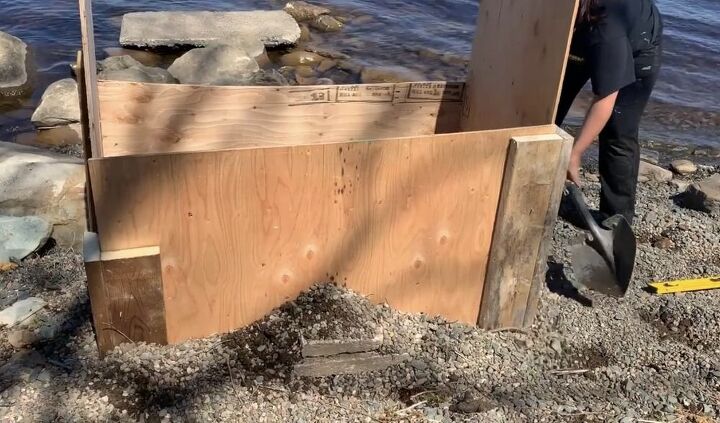
Since we built the form in place, the ground isn't level. Neither is where the boards touch the ground. so thats why I then shovelled gravel around the base (inside the form also) so when i pour the first bit of concrete it doesn't seep out. if you don't have gravel you can just use regular dirt.
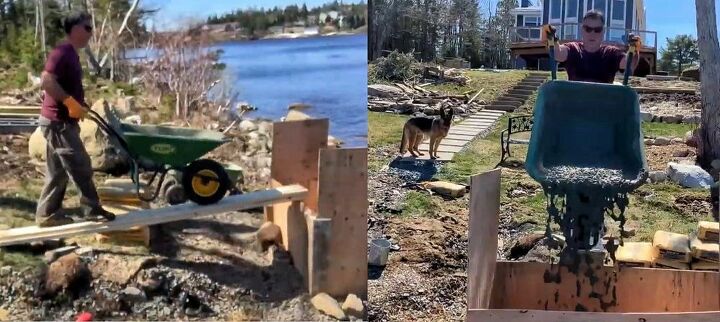
We set up a make shift ramp and mixed the concrete one bag at a time in the wheel barrow. Then pushed it to the top and poured it in.
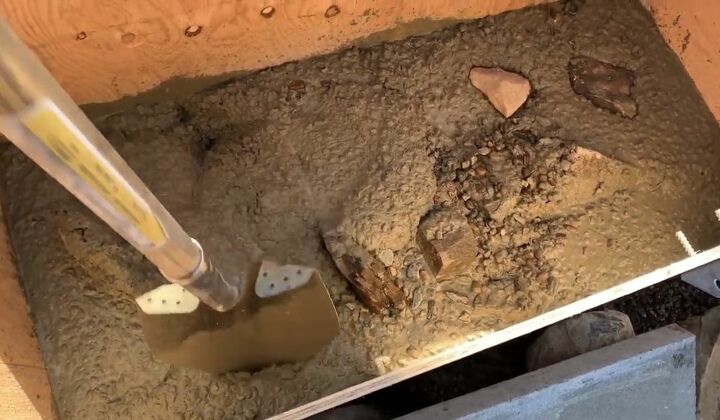
In between each pour we added large rocks to create a space filler so the 12 bags of concrete went much further and it acted as rebar. you don't have to do this.
Also after every bag went in we "Tamped" the concrete by just hitting the outside of the form and "stabbing" it with the shovel so any air bubbles rise to the surface.
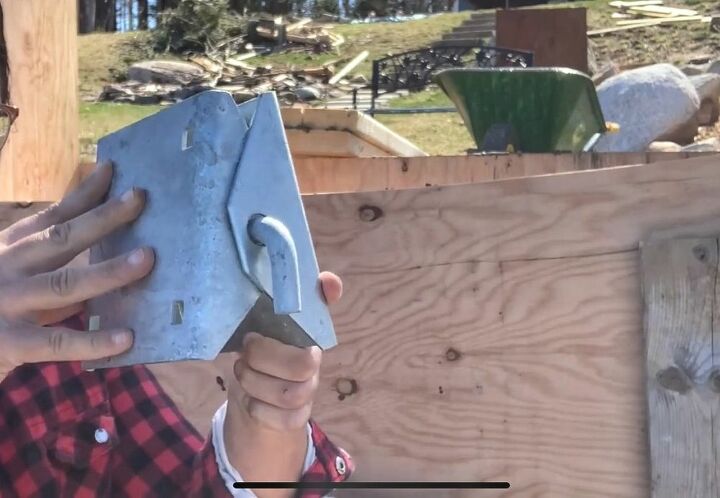
These are the hinges that will be attached to the form and attached to the dock. You simply remove that little bar and it separates into two pieces. One piece for your dock and one piece for your concrete.
These allow the waves to move your dock up and down but stay stable on the concrete as well. In the next step i show you how to attach them.
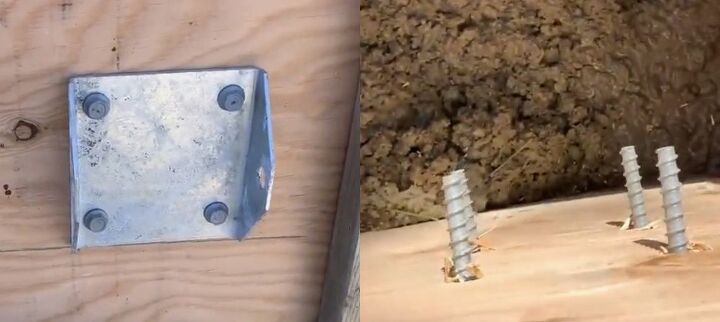
I predrilled into the form (just before the concrete was poured) and attached one side of the hinge with galvanized bolts. Then we continued to pour concrete until the bolts were buried about 6 inches down. Once the concrete dries the bolts will be secure in the concrete.
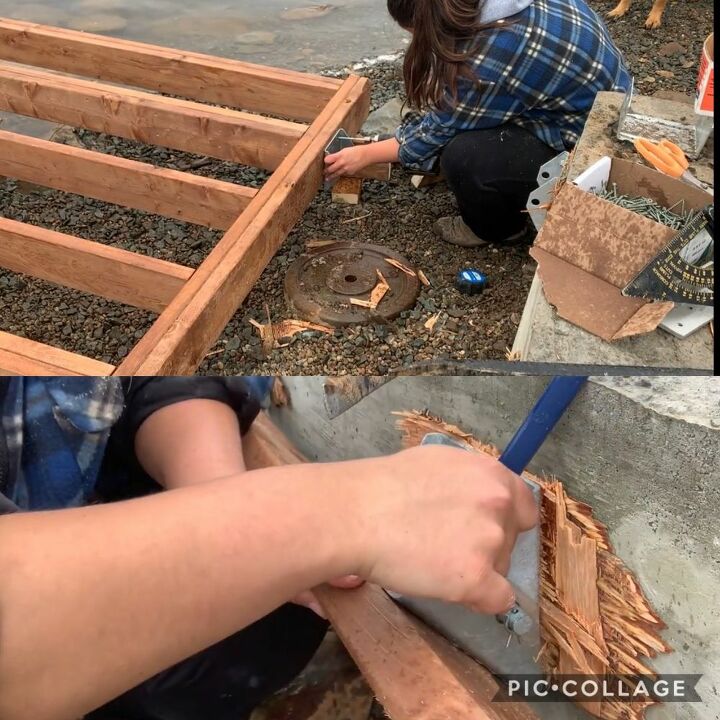
You can then measure how far apart they are are mark that onto your dock. Or you can do it the easy way and take a piece of 2x6 and use your pencil on the hinge and mark the measurements.
THEN attach your 2x6 onto the dock and drill the hinge on. Your hinges should like up great!
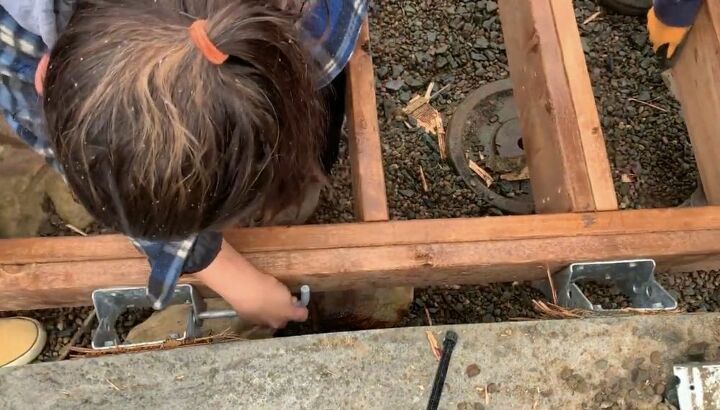
Don't mind all that sawdust in my hair!
Now you can attach your hinges by lining up the holes and putting the "pin" threw.
I didn't attach deck boards to the top of my dock yet because its super each (24 feet long) and just incase I had to play with the hinge placement first.
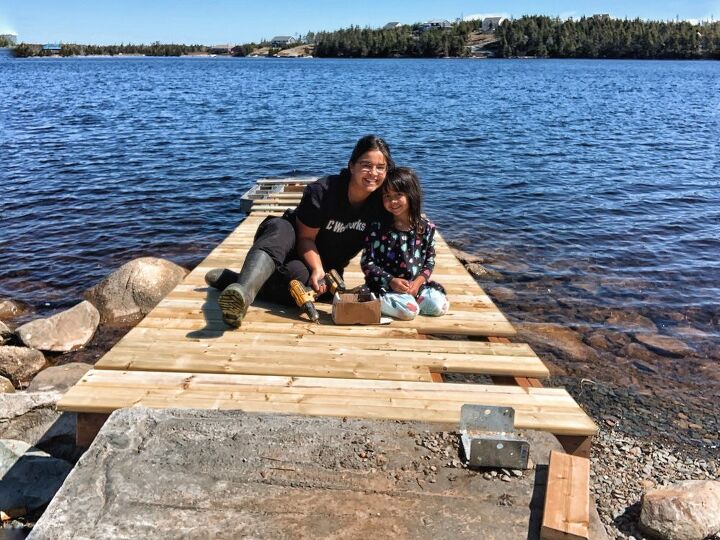
One is was attached, we then added all the deck boards to the top so we could walk out. She's an awesome helper!
If you're wondering how to build the frame, my video link is below and as well as my first Dock DIY in my profile will allow you to see how to build a dock from scratch.
Goodluck!
Its more heavy then it is hard, don't let the size of this DIY scare you!
Here is a full video showing you how I completed this project.


Frequently asked questions
Have a question about this project?