


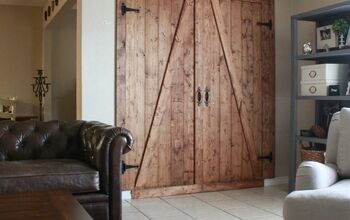
Simple Sliding Barn Door

It seems like everyone is making sliding barn doors these days. They are everywhere! The great thing about them is that they add so much character to a home and are fairly inexpensive to build. The problem is that there are so many different styles to choose from! I wanted something simple so I went with a Craftsman style door. Having never built any kind of door before, I thought I'd share how my sliding barn door project went with you guys so you can create your own!
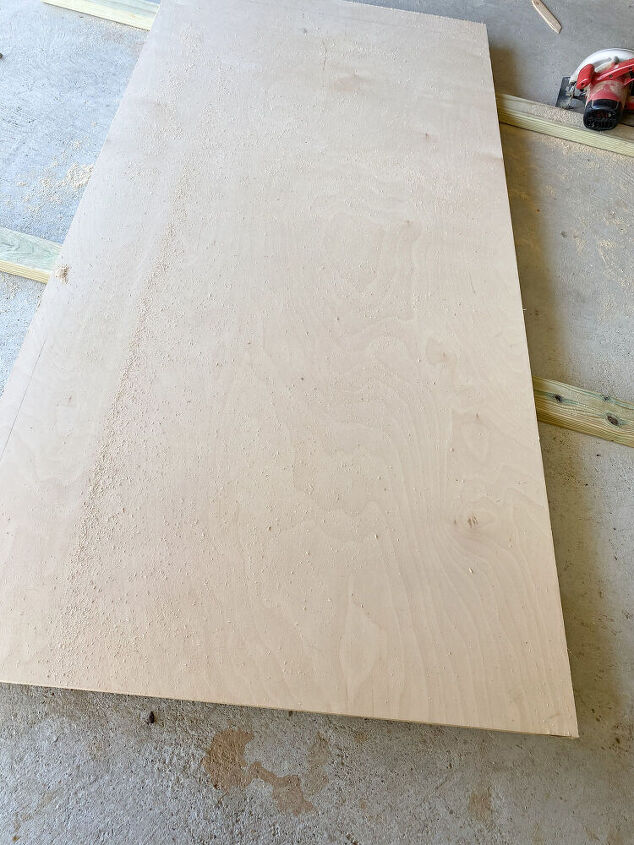
Measure your doorway including the trim around the door if you have any. Also refer to the hardware guide to allow for track and floor clearance when determining length. Once you have the measurements, rip your plywood. I used birch plywood for this project.
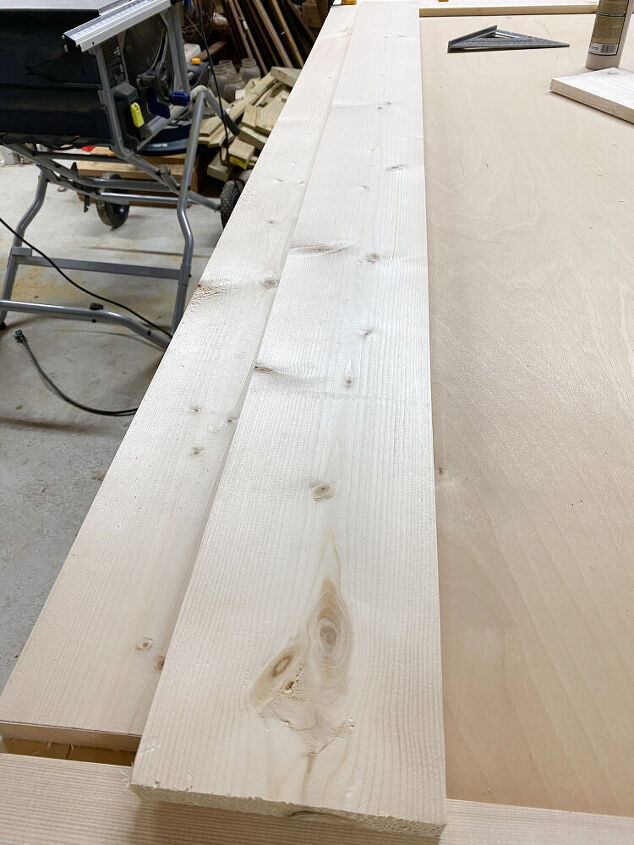
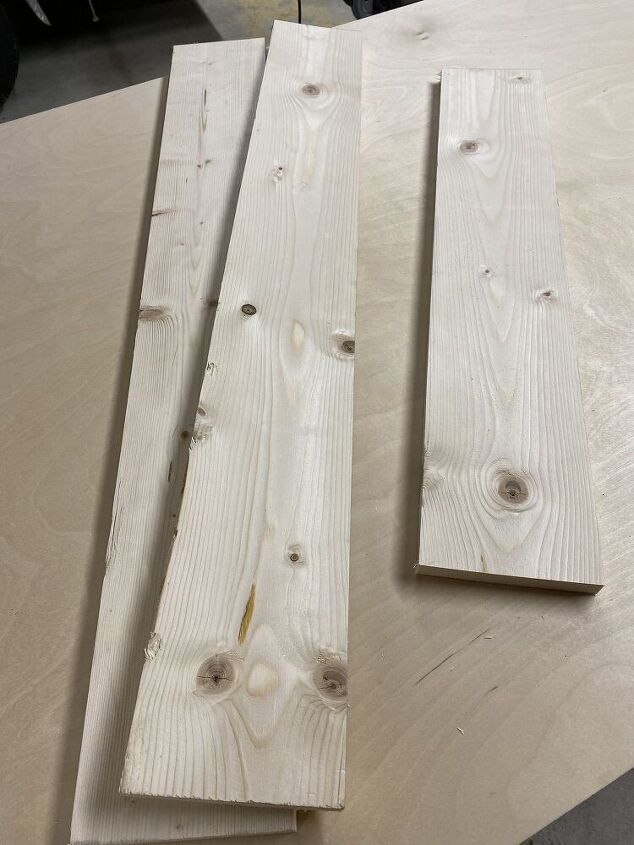
You will need enough 1x6 boards to frame the plywood and for the "T" in the center of the door. Measure your plywood and cut your 1x6 boards accordingly.
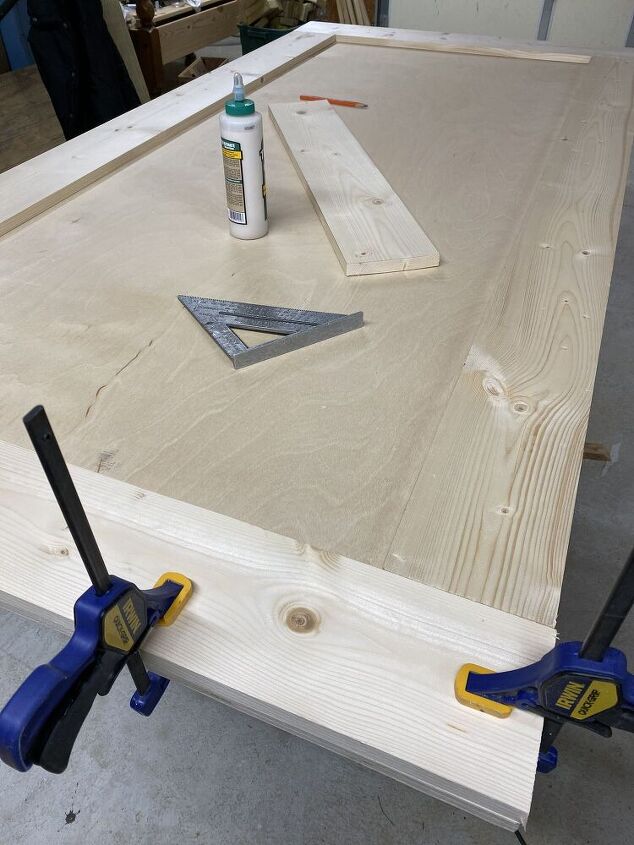
Use wood glue to attach the 1x6 boards then clamp in place while the glue dries. Once all the glue has time to dry, go back and secure the boards with a brad nailer and 1" brad nails.
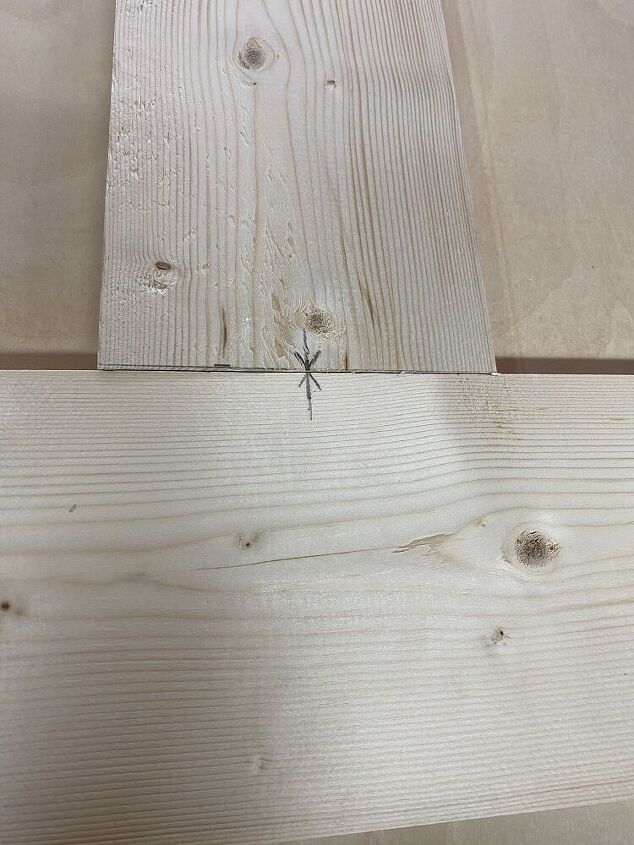
For the "T" boards, mark the center of both boards so they line up perfectly then repeat steps as above.
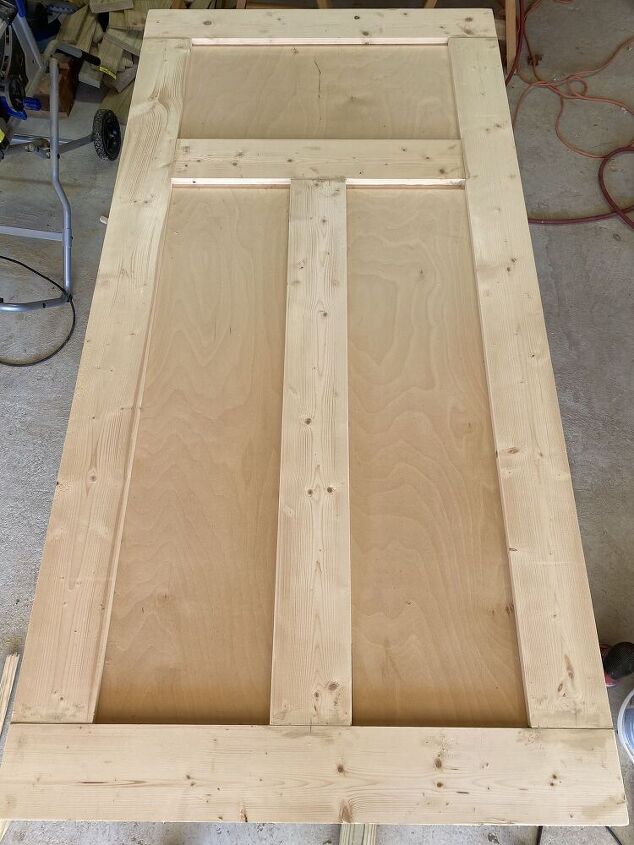
Here is the door after it is built! Go back and fill in the nail holes with stainable wood filler then sand the entire door to get ready for paint or stain, whichever you choose. I stained mine a mixture of Minwax Weathered Gray, Gunstock, and Early American.

*Be sure to follow the directions that come with your barn door hardware kit!*
Use a stud finder to mark the location of the studs above your door. If the studs don't line up with the holes in the track, a header board will have to be used. Drill pilot holes first then secure the board to the studs using 3" wood screws at the top and bottom.
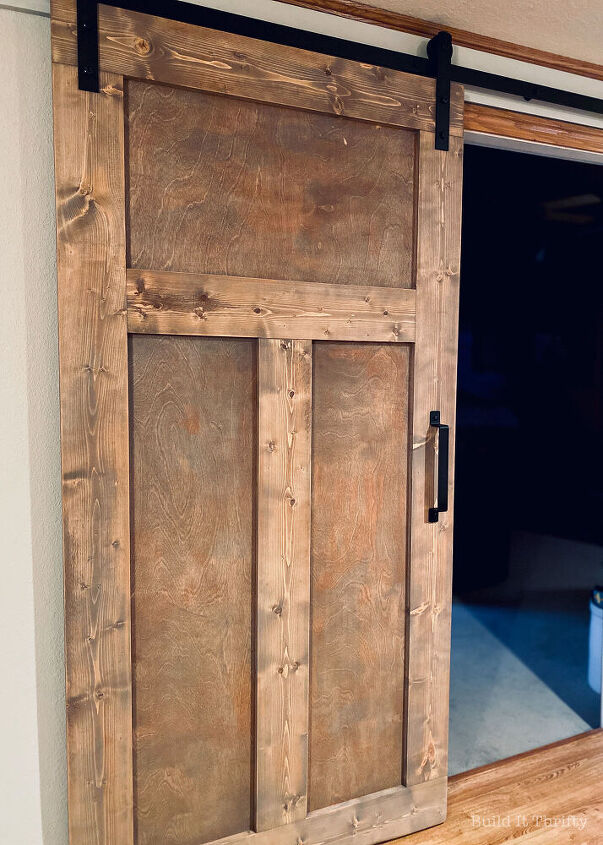
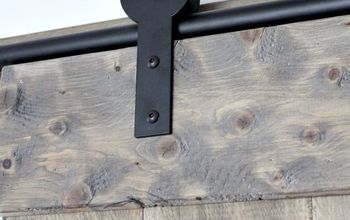
Attach the hangers to the barn door. Once again, refer to hardware directions to determine hole placement. Mark and drill the pilot holes and then attach the hangers. Attach the handle then hang your new door!
For more detailed step-by-step instructions and for links to products used in this project, click here to head to the blog.
To see what other projects I've been working on lately, check out my Instagram.
Resources for this project:
See all materials


Comments
Join the conversation
-
Yes I will
-
I love it! Absolutely beautiful job!


Frequently asked questions
Have a question about this project?
Can you show a picture of the other side of the door?
What thickness of plywood did you use
Being in Tennessee, love the T !! What spacing did you use for the top bar ? Doors look great, trying them in our basement.