


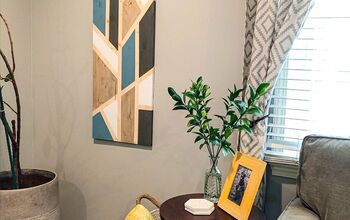
How to Turn Scrap Wood Into Art

Disclosure: This post was written in collaboration with Blue Ridge Tools. All opinions are my own.
Do you have scrap wood laying around that’s begging to be turned into something beautiful? With just a couple of tools and a few hours, you can turn scrap wood into custom wall decor. And this isn’t your run-of-the-mill artwork. It has dimension and texture to make it uniquely yours.
Let’s start DIY-ing!
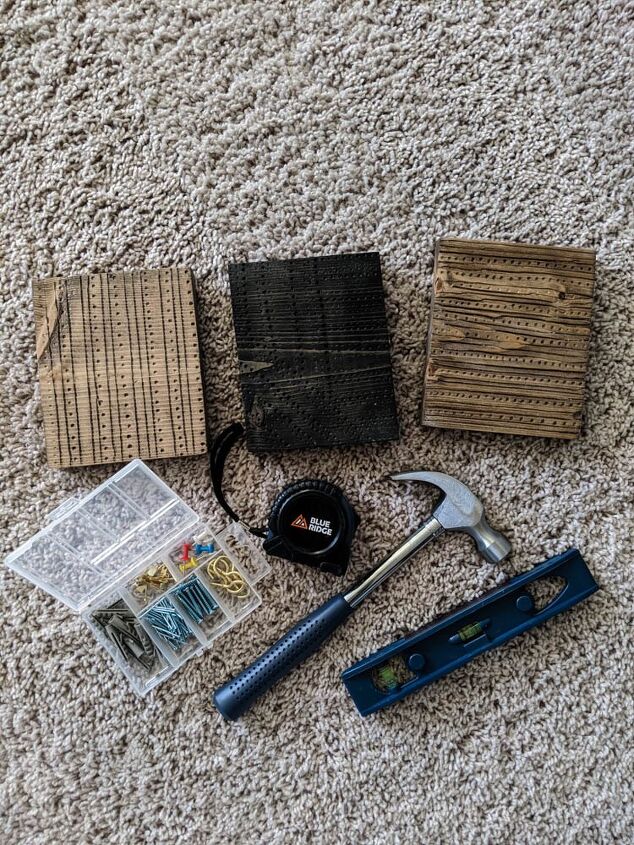
Materials and Tools

- Blue Ridge Tools 251pc Hobby Tool Kit
- Blue Ridge Tools Rechargeable Screwdriver with Bit Storage
- Nails, measuring tape, hammer, and level (all conveniently part of the Blue Ridge Tools 145pc Deluxe Household Toolkit)
- Scrap wood (or a few pieces from your local craft store)
- Sandpaper
- Spare piece of wood
- Clamp
- Stain (we used Minwax Special Walnut and True Black stains)
- Sawtooth hangers
1.Sand your wood
We want to make sure we’re starting with a smooth surface, so start by sanding your wood with 120 grit sandpaper.
2.Sketch your pattern
Before breaking out your hobby tool kit, you want to make sure you have a game plan. I like to start by sketching out my design on a piece of paper to get a general idea of what I want to create.
3.Practice on a piece of spare wood
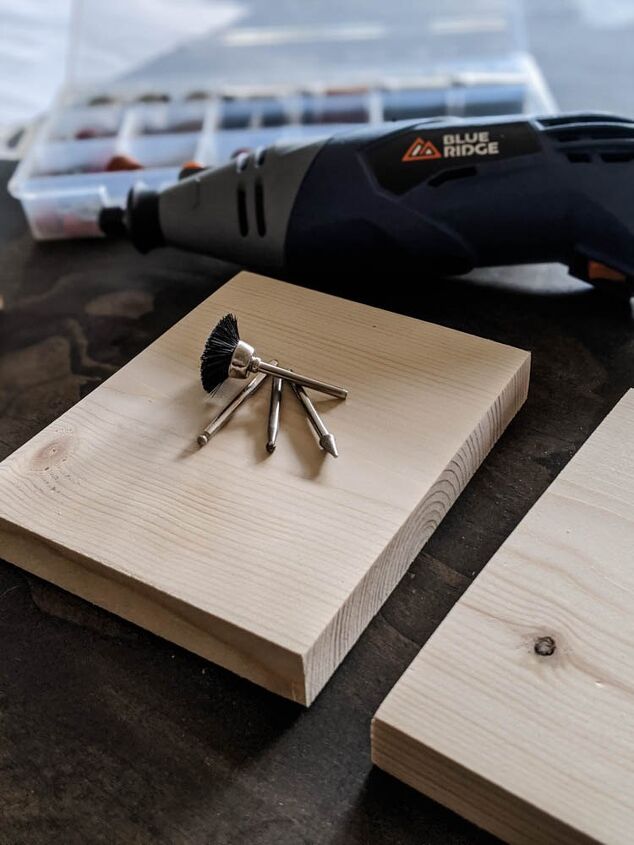
For starters, you want to use a softwood. Think balsa wood or pine. Grab your hobby tool kit and select the bit you want to use. You can see which bits we used in the above photo.
Once you secure your bit in your hobby tool, you need to set the speed. For the carving portion, we went with the highest speed and set the tool to a 6. Before moving onto our actual wood art pieces, we practiced using the tool on a spare piece to make sure we got the hang of it.
Here are a few general tips for using your hobby tool:
- Follow minimum speed guidelines that are included in your instruction manual.
- The higher the speed, the less pressure you need to apply. You barely need to apply any pressure at top speeds!
- Hold it similar to how you would hold a pencil.
- Carve in the direction of the wood grain (sometimes you won’t be able to, but we’ll get to that soon!)
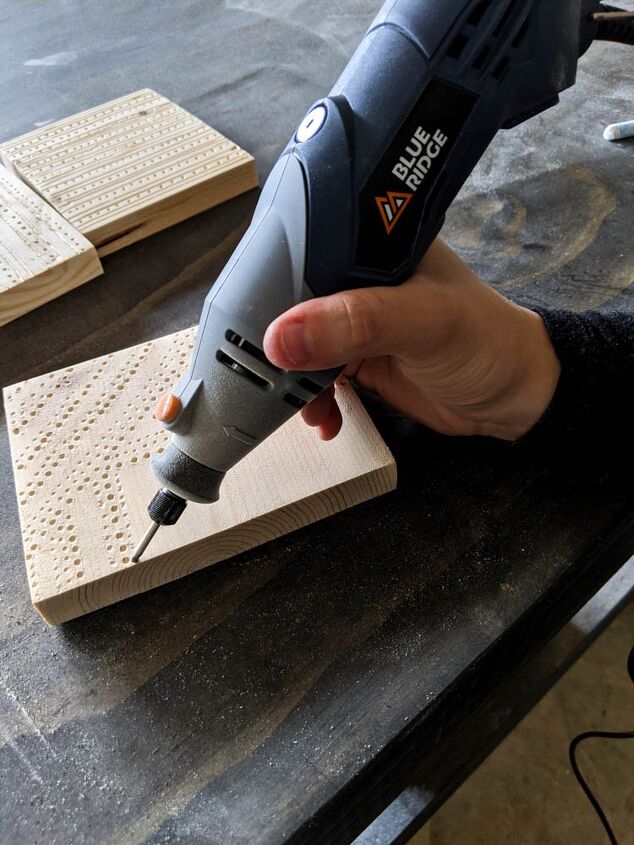
4.Carve your wood
Start with the horizontal straight lines. If you freehand it and follow the wood grain, you’ll get decently straight lines. But, beware of knots in the wood. Those might cause you to veer off the straight path and they require more pressure to carve into.
The great part about this art is that it isn’t meant to be perfect. Embrace imperfections because they add character. In the spirit of embracing imperfections, we didn’t measure our spacing. We just kept drawing lines, leaving various gaps between each line.
Once I carved the straight lines, I changed my bit and started making the dots. The dots are especially fun because you can move pretty quickly and they all look pretty uniform with little effort!
For our next piece of wood, we wanted the lines to run opposite of the wood grain. If you try to freehand this, it’s really difficult to get a straight line, so we’re going to use a piece of spare wood and a clamp.
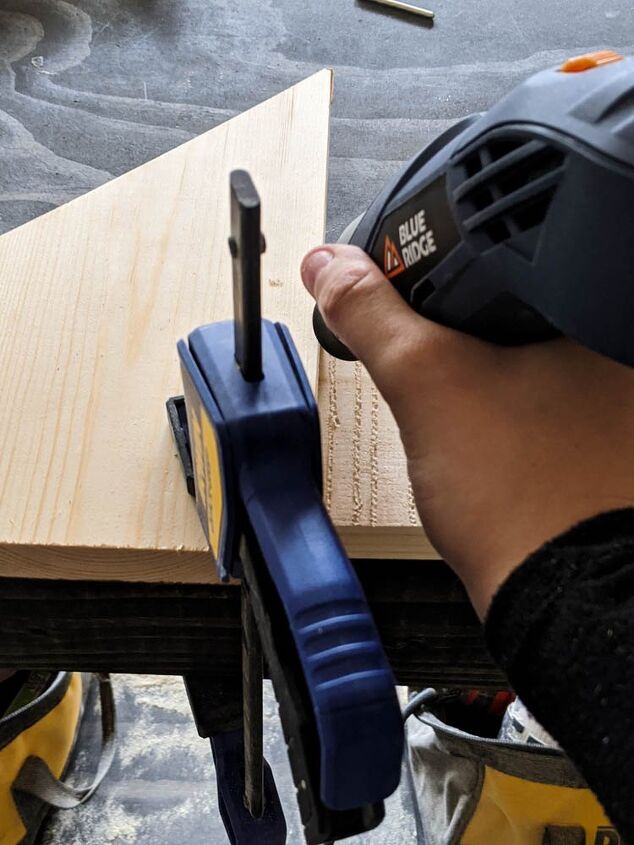
Simply clamp the spare wood to your art board and run your hobby tool along the clamped board. Release, reposition, reclamp, and continue carving.
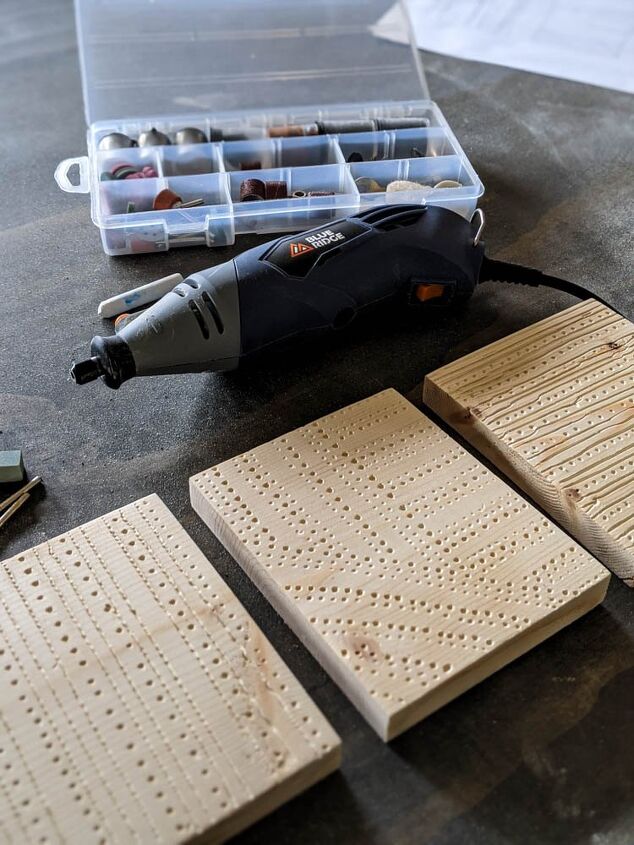
For our middle piece, we wanted to change the direction of the dots in a few places. Before carving, we marked with chalk where those changes would happen. If you have a more intricate pattern, you can draw it on your wood with a pencil before starting. Then it’s just a matter of tracing the pattern with your hobby tool.
5.Smooth it out
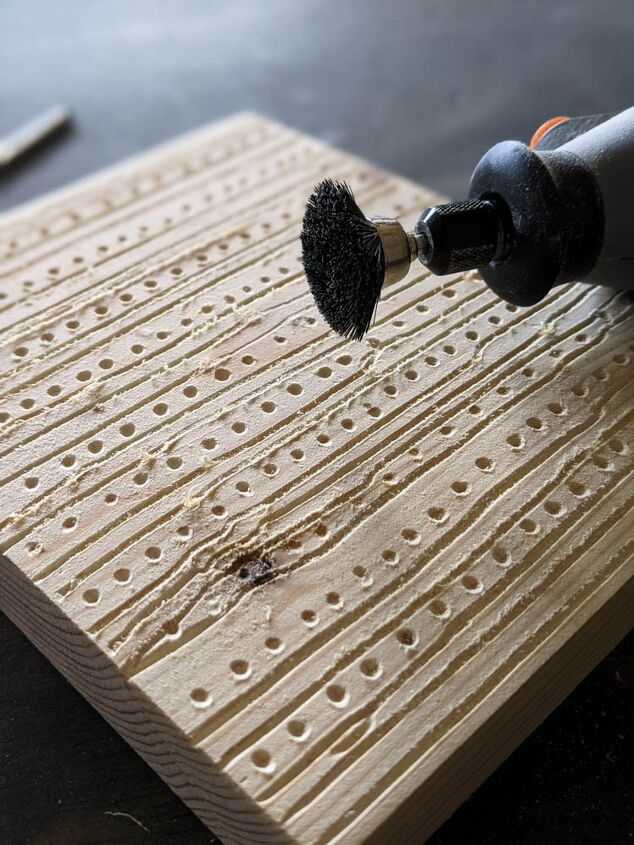
This is where your carvings start to look extra good. Replace the bit on your hobby tool with the one that looks like a black brush. Turn your speed down and start running your tool along the crevices in the wood. It’ll clean it right up!
If you want to take it a step further, you can grab your 120 or 220 grit sandpaper and quickly sand the surface of the wood or use the mini sanding black that’s included in the kit.
6.Stain
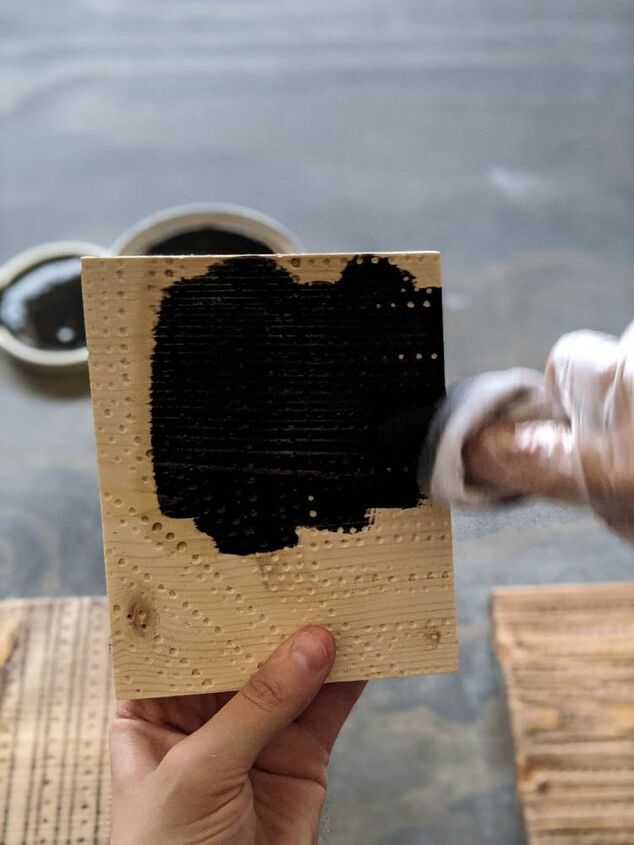
Stain your wood to the color of your choosing. If you dip your rag into your stain color and wipe off the majority of it before touching your wood, you can actually keep the carved pieces the natural wood color. For this art, we decided to stain it all.
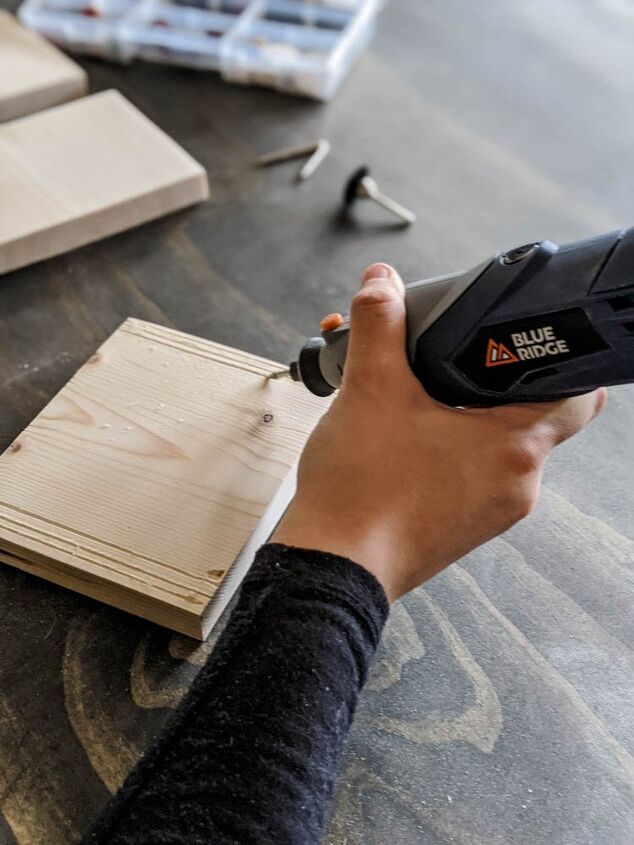
7.Attach sawtooth hangers
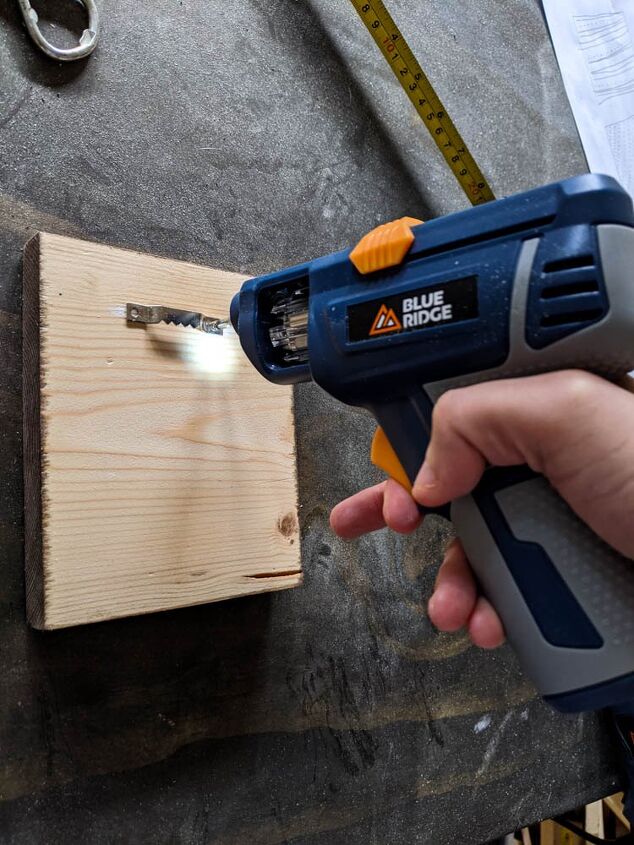
Measure 1” from the top of your wood art to place your sawtooth hangers. Easily screw them in using your Blue Ridge Tools Rechargeable Screwdriver.
8.Hang your art up!
Grab your nails, level, measuring tape, and hammer to hang up your wood art. Place the first nail then measure equal distance on either side. Grab your level to make sure your nails are actually on the same plane.
Hang your wood art and enjoy!

There you have it! Now you know how to turn scrap wood into unique wood art. And I have a feeling that after this project, you’re going to be obsessed with the limitless possibilities that the hobby tool kit opens up!
Time to find another project to carve :)

Resources for this project:
See all materials


Comments
Join the conversation
-
What a great idea !!! I just may have to try that !
-
Really great idea and tutorial! Thank you! I am excited to make my own.


Frequently asked questions
Have a question about this project?