


A FREE Vintage Dresser Makeover
3 Materials
$20
3 Hours
Medium
As you know from previous blog posts, not too long ago I was able to score a truckload of free furniture off the Facebook Marketplace. It included a sideboard cabinet without drawers which the Hubs and I repurposed into a kitchen island. You can see it HERE if you haven’t already. It also included a long dresser and a shorter dresser. It also included this vintage dresser. Now, onto the free vintage dresser makeover.
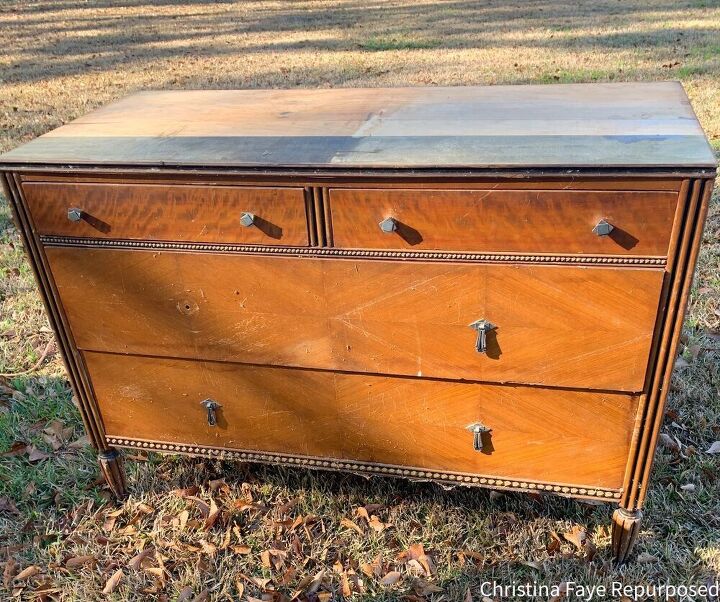
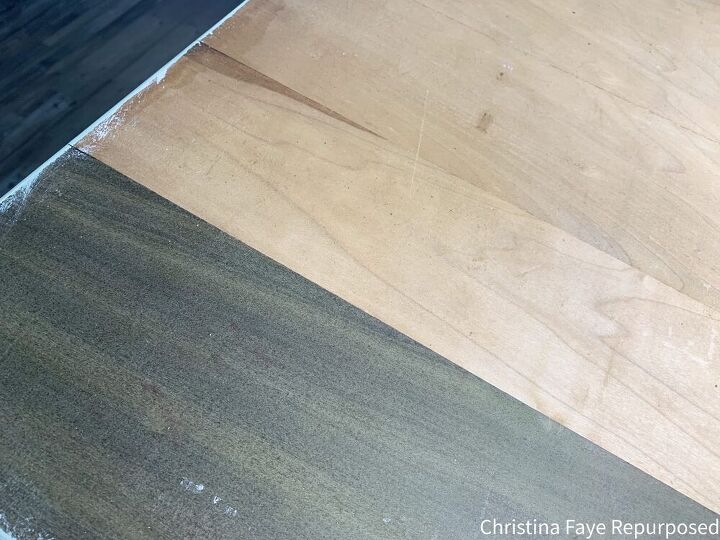
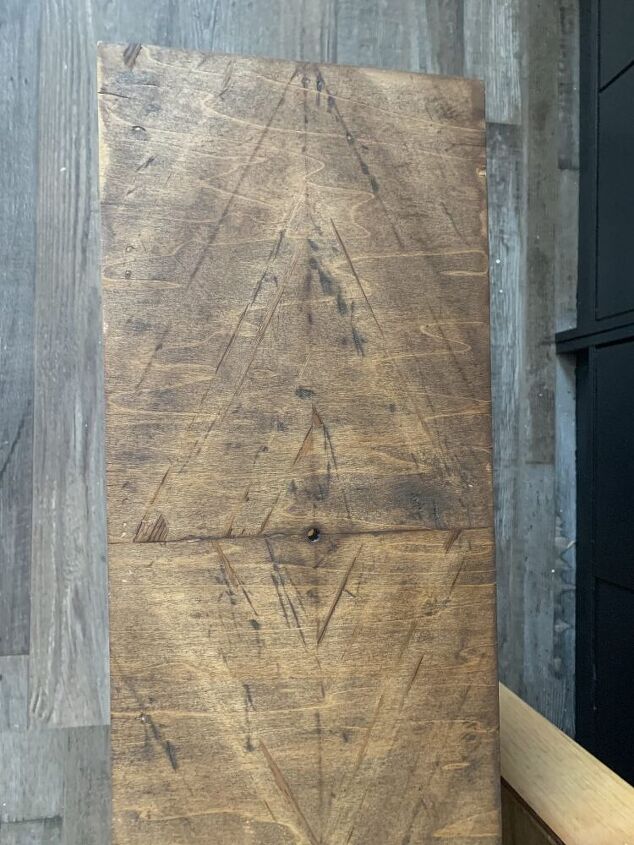
It had seen better days. It appeared that someone had attempted to redo it. They really gave the top a fierce sanding. The dresser’s top had been sanded down where there was not much wood left on the surface. It also had this green, wood board. Does anyone know what it is? I have researched it and can’t find anything. If you know what it is and why it’s green, please email me. You can see where the veneer has been removed.
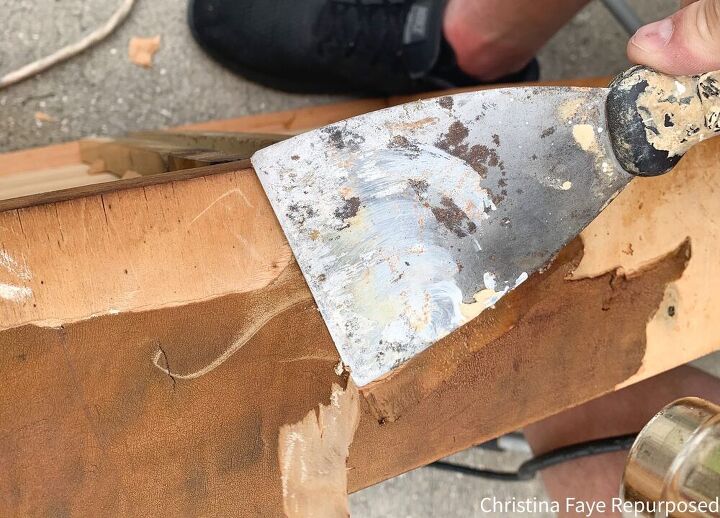
My plan was to stain the top and the drawer fronts to match. But the green wood does NOT look good stained and I do not like using gel stain. It compromises the wood grain and the original look of the wood (just my opinion).Therefore, my plans had to be revised a bit. I would have to paint the entire dresser or add a new wood top. And unfortunately, buying wood now is out of the question, so I am going with painting. I really wanted to keep the dresser in its original state as much as possible.The first to step to whip this vintage dresser back into shape is a step the Hubs and I tackled together. It was removing the damaged veneer from the drawer fronts. We did this outside on the patio and used a heat gun. We have used this method before and it was not too hard.
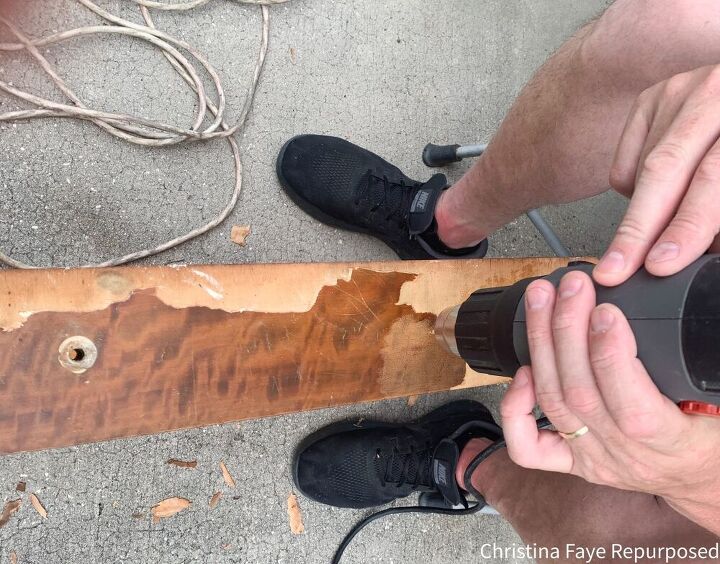
We worked in sections, heating up a small area and then using our paint scraper to get underneath the damaged veneer and raising it up until it could be removed.
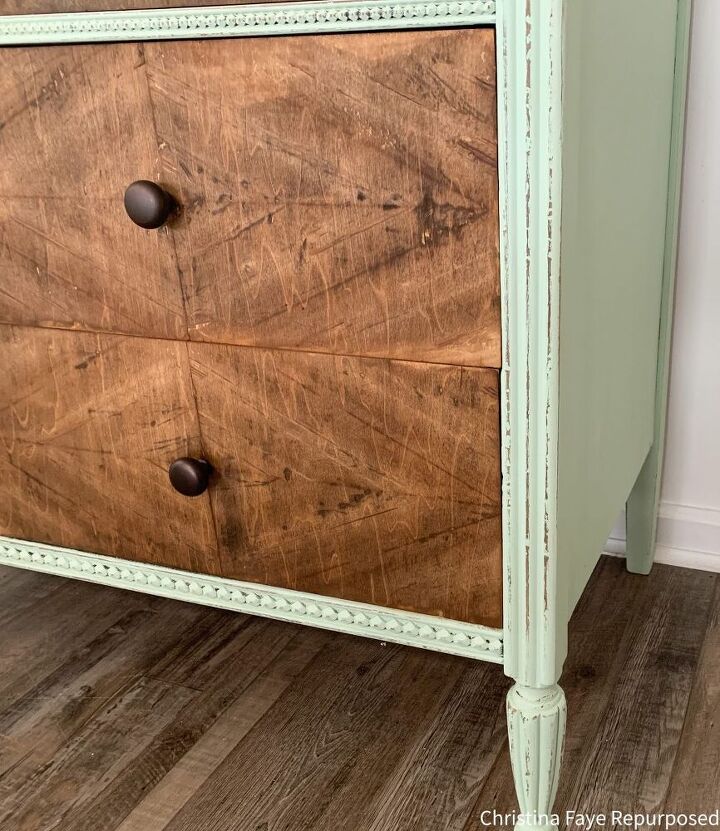
Look at the beautiful wood. There were a few scratches and dings, but that was fine with me! I did not want to sand too much. While sanding one of the drawers, we noticed that green colored wood surfacing.

After I wiped away the sanding dust, I applied one coat of Minwax Special Walnut. I love how you can see the grain of the wood!
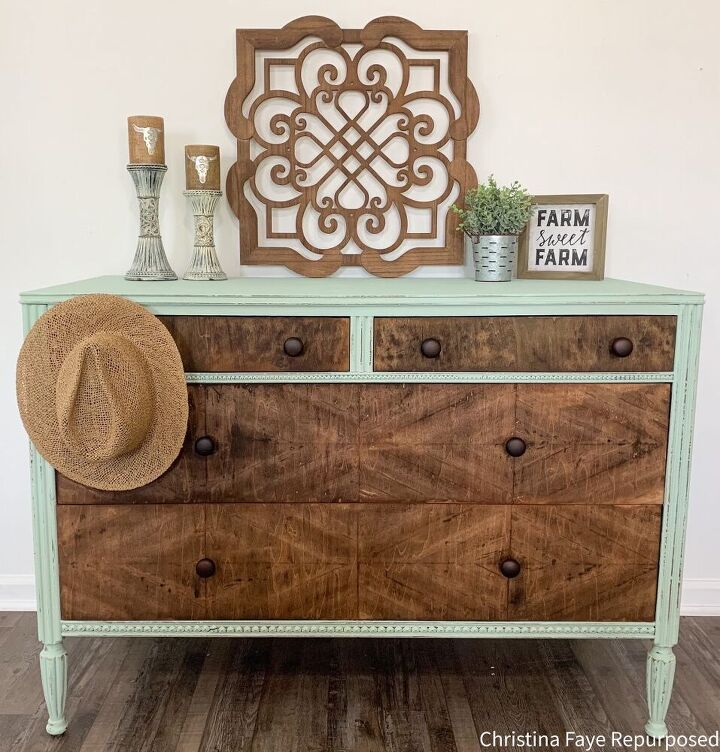
My plan was to paint the dresser with Dixie Belle’s Farmhouse Green. Like we did this hutch top makeover you can see HERE. But I didn’t have any ughhh! And I didn’t want to have to order paint and wait (yep, inpatient).So, I used what I had. I mixed Dixie Belle Cotton and Mint Julep to make a pastel green. It’s not Farmhouse Green, but it’s still beautiful. Do not be afraid to mix colors and explore!
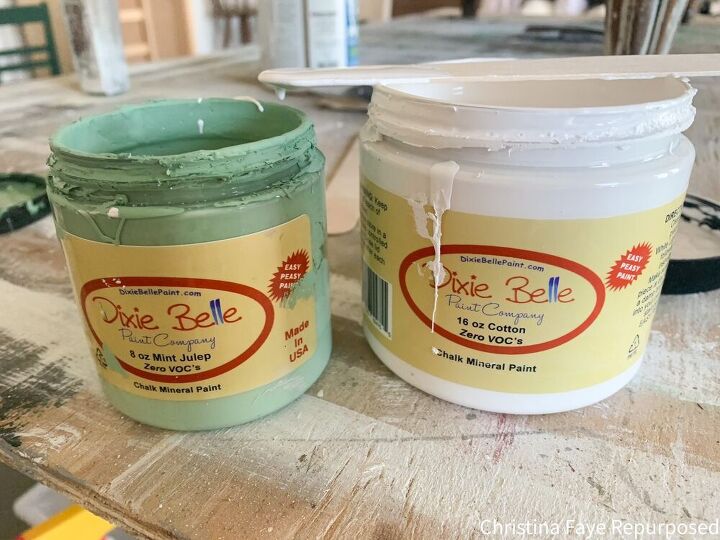
The Cotton just lightened up the Mint Julep a bit.

It took two coats of paint to fully cover the dresser. You can see here that the left is after two coats and the right is one coat.
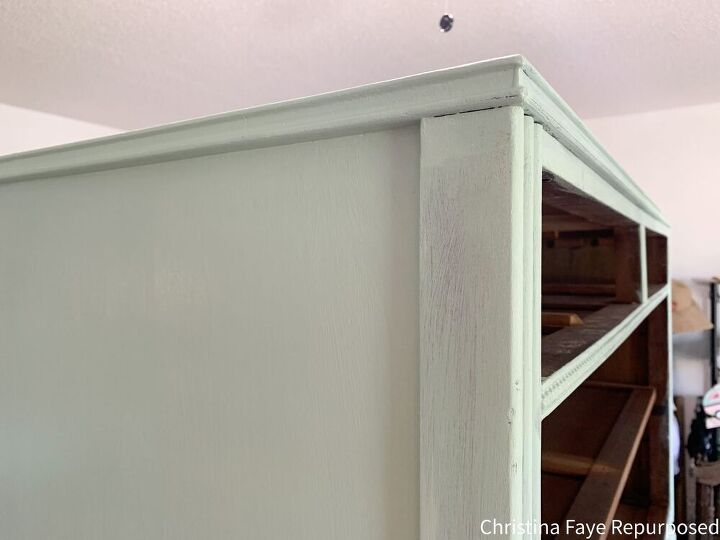
The next step was to distress the dresser to show some of the beautiful wood. I used a piece of 120-grit to sand around the edges and the beautiful carvings. I also heavily distressed the adorable front legs. Look at those beautiful curves.
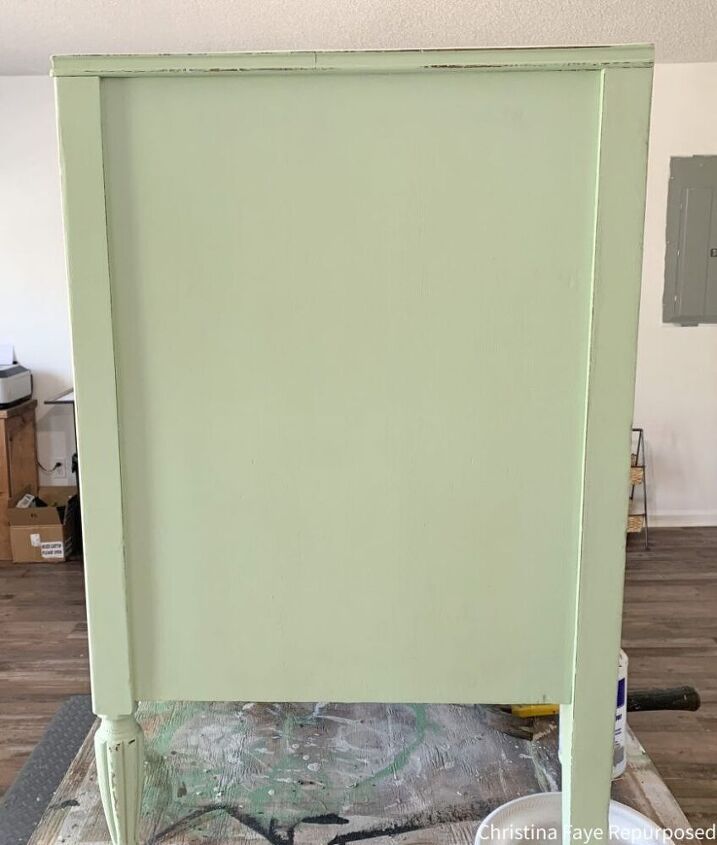
Using a piece of tack cloth, I removed all the sanding dust. To seal the piece, I decided to try my hand at Dixie Belle’s Spray Wax. This was my first time ever using it, and I am HOOKED! It was so easy to use. You spray the wax working in small sections and then wipe. BAM! It’s that easy. I also sprayed a coat on the drawers.Luckily, I had a set of knobs on hand. I couldn’t really be choosy at this point. I had recently ordered these off Amazon, and never used them. But I am happy with the way it turned out. Free furniture is well worth the work.
I love the western, rustic look!
Resources for this project:


Any price and availability information displayed on [relevant Amazon Site(s), as applicable] at the time of purchase will apply to the purchase of this product.
Hometalk may collect a small share of sales from the links on this page.More info

Want more details about this and other DIY projects? Check out my blog post!
Comments
Join the conversation
2 of 45 comments
-
Loved the way the stains from the wood you scraped off left the chevron - that was a lucky find underneath - really nice job - gives that tired piece a new life.
-
Gorgeous!!


Frequently asked questions
Have a question about this project?
Does anyone know if the green wood can be bleached?