


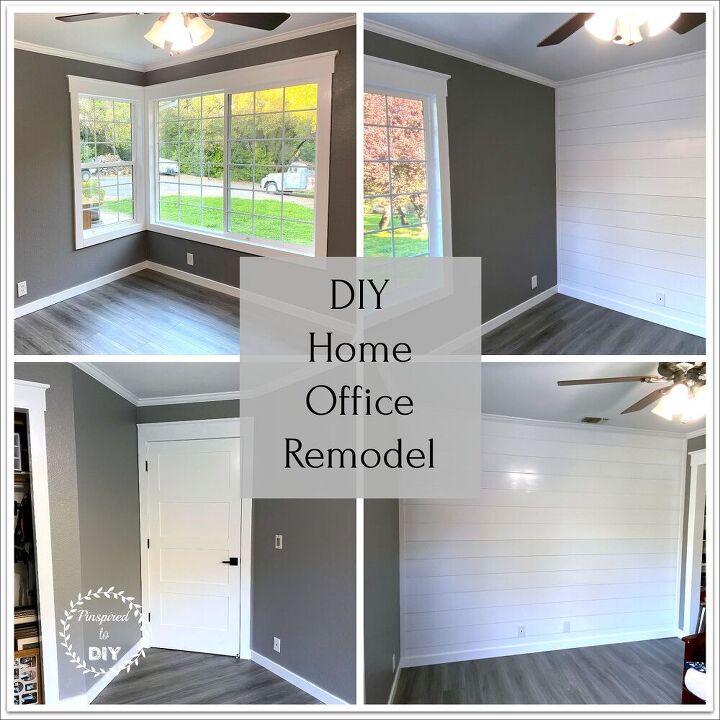
DIY Home Office Remodel
Come check out how we completed a DIY remodel of our home office! Our 3rd bedroom in our home is used as my husband's home office since he works at home full-time. The office still looked as it did when we bought the house almost 10 years ago, and even back then, the paint, windows, and trim were not very flattering, and the room looked dull and boring. In addition, we had some possible structural issues that needed fixing, so we decided to undertake a renovation of our home office.
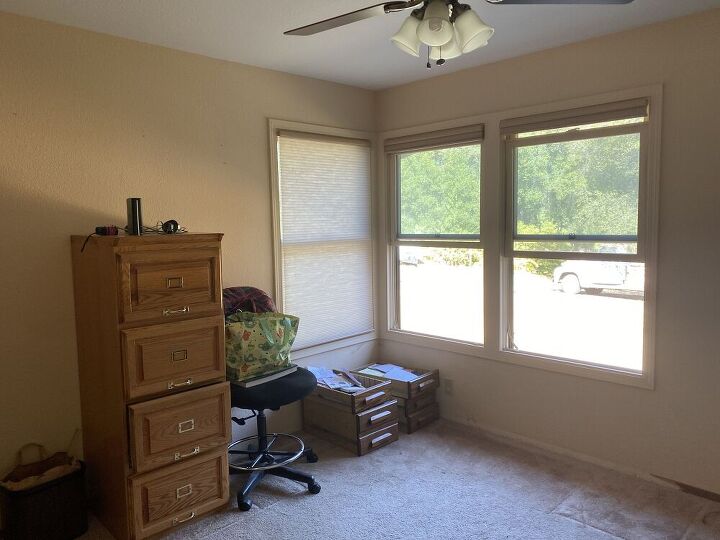
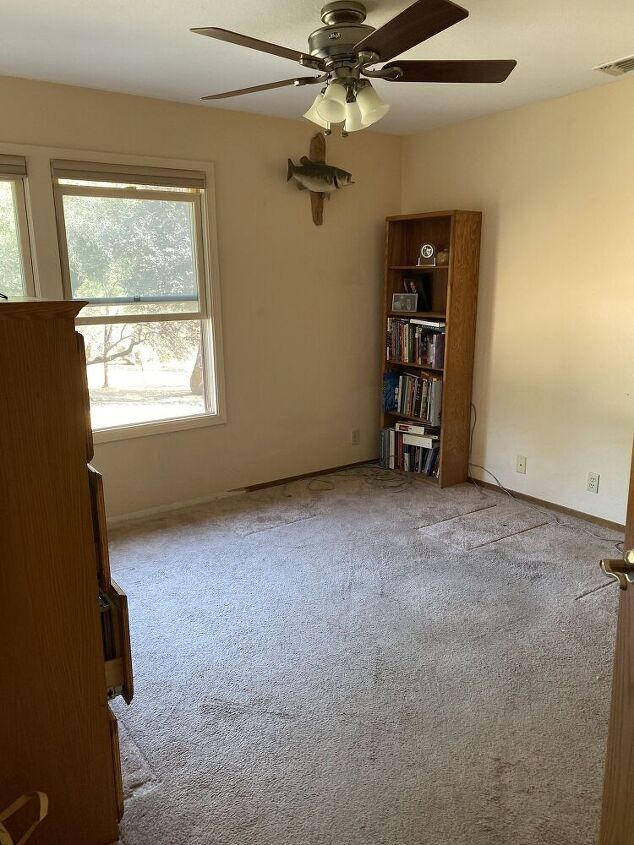
Here are some before pics of the office. At this point, we had already started moving some of the furniture out of the room. As you can see, the walls were a dull peachy color and the trim was a medium brown wood trim that somehow miraculously survived the 1980s (even though our house was built in 1990...)! The windows were actually nice dual pane windows, that is until the original owners painted the vinyl that dull peachy color to match the walls, making the windows not so nice anymore and hard to open.
Here is an abbreviated description for how we remodeled our home office, for full details and more pictures, please visit my blog post.
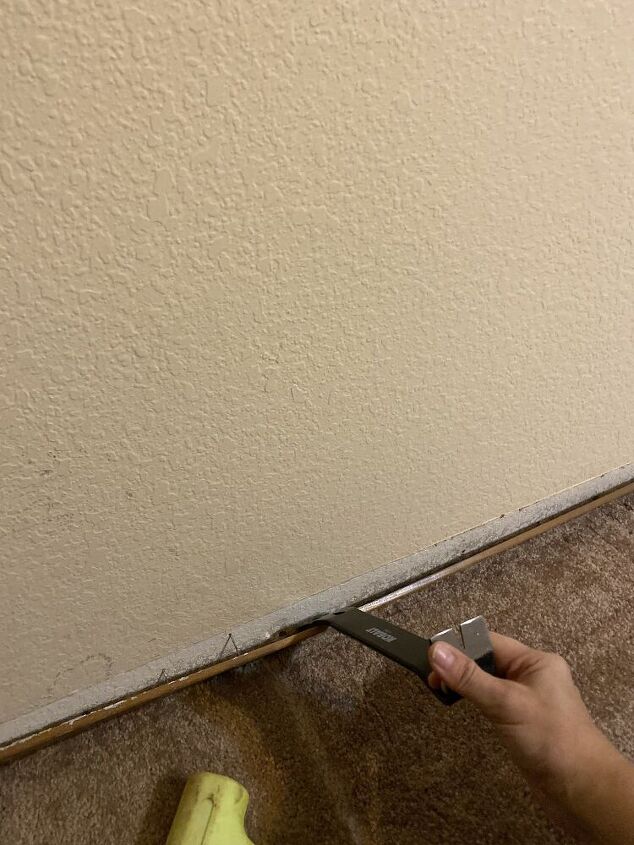
The first step in our home office renovation, was to remove the old wood baseboards and remove any brad nails left in the wall when pulling the baseboards off.
Once the baseboards were removed, we pulled up the carpet and the mat.
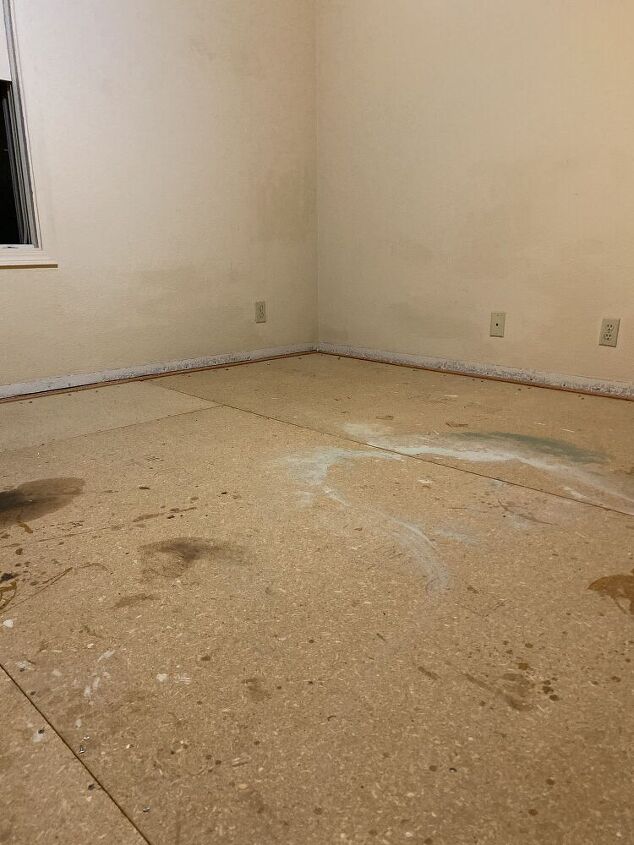
Once the carpet was up, we had to remove the carpet strip that holds the carpet and mat down. We did this using a hammer and pry bar.
The next step involved cutting out a section of our floor to determine why the middle of the office seemed to be lower than the other parts of the floor (our desk drawers had been rolling open themselves over the last few years as the middle section of the floor seemed to get lower or squishier. Hubs crawled under the house and found the issue and was able to fix it, you can read all the details on that fun story over on the original post on my website. But once Hubs fixed the flooring issue, he replaced the layers of flooring that he had cut out, and then it was time to move onto windows!
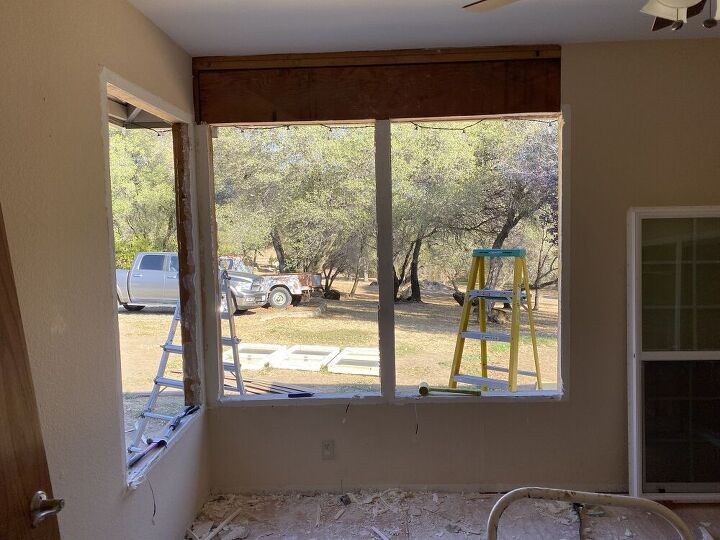
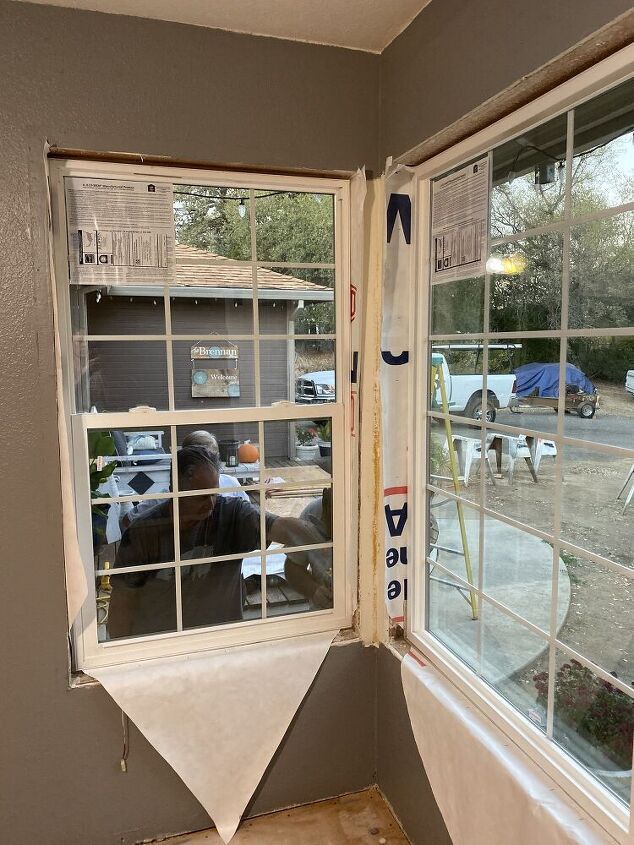
We removed the trim around the windows on both the inside and outside of the office. Once that was done, Hubs unscrewed all the screws that were holding the windows in through the window flange. He also had to remove some nails that had been placed through the window flange. Once those were all removed, Hubs was able to pull the old windows out.
While Hubs was busy with the windows, I painted the inside of the office, using one of my favorite grey paints from Behr.
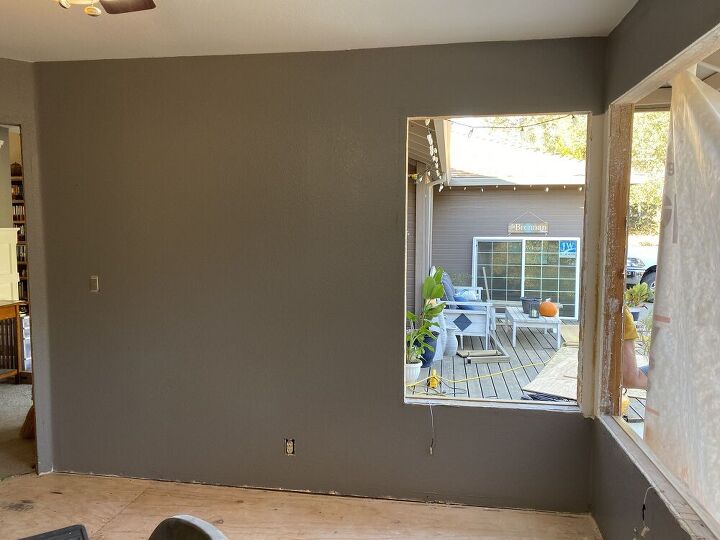
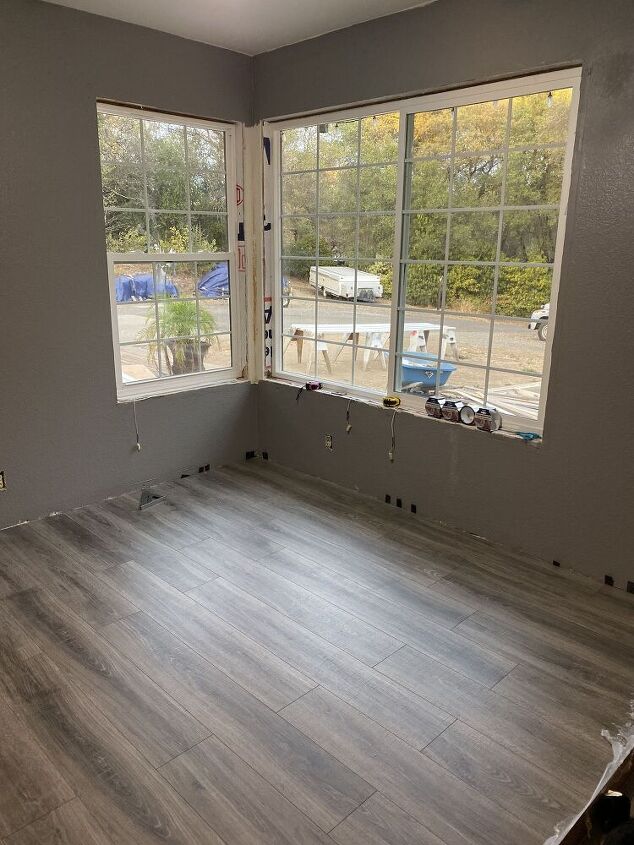
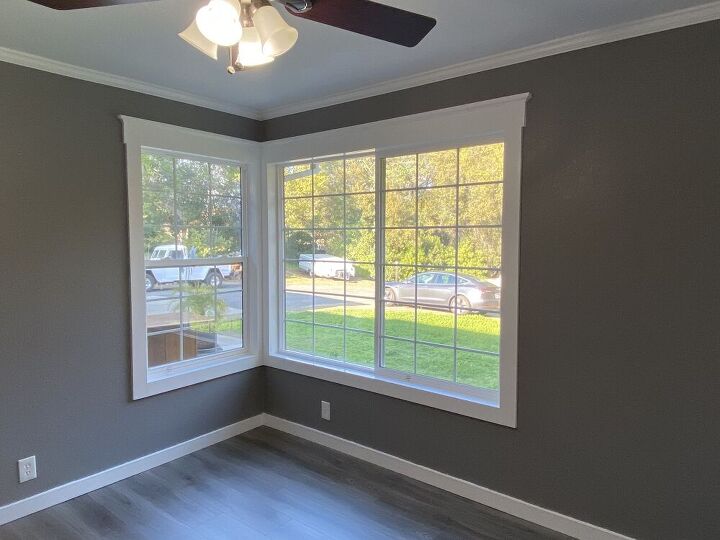
Once the room was painted, in went the new windows! Love the look of the colonial grids.
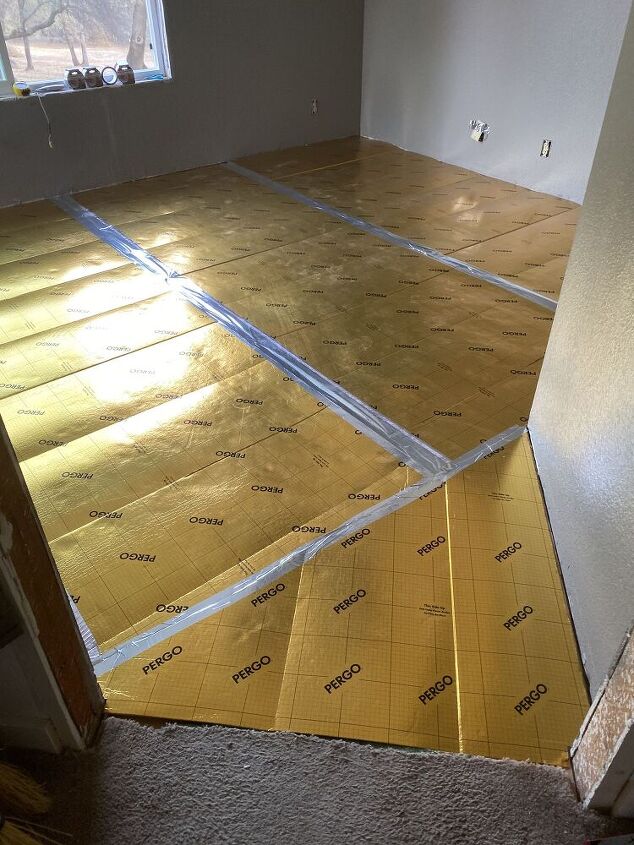
Once the new windows were securely in place, it was time to start the flooring install. We purchased Pergo waterproof laminate flooring for the house and this was the first room getting the new flooring. First, we had to put down the Pergo underlayment. The underlayment we purchased had built in tape to attach all the pieces together.
Next came the laminate flooring.
Next up, I decided to do a shiplap accent wall on one wall in the office. I purchased the tongue and groove shiplap boards from Home Depot. cut them to length, and begin installing them from the bottom up, making sure to mark the locations of the studs in the wall first, and making sure to use a level to attach the first shiplap board to the wall (if the first board isn't level, neither will the rest of the boards be). I attached the shiplap to the wall using 2" brad nails and my nail gun.
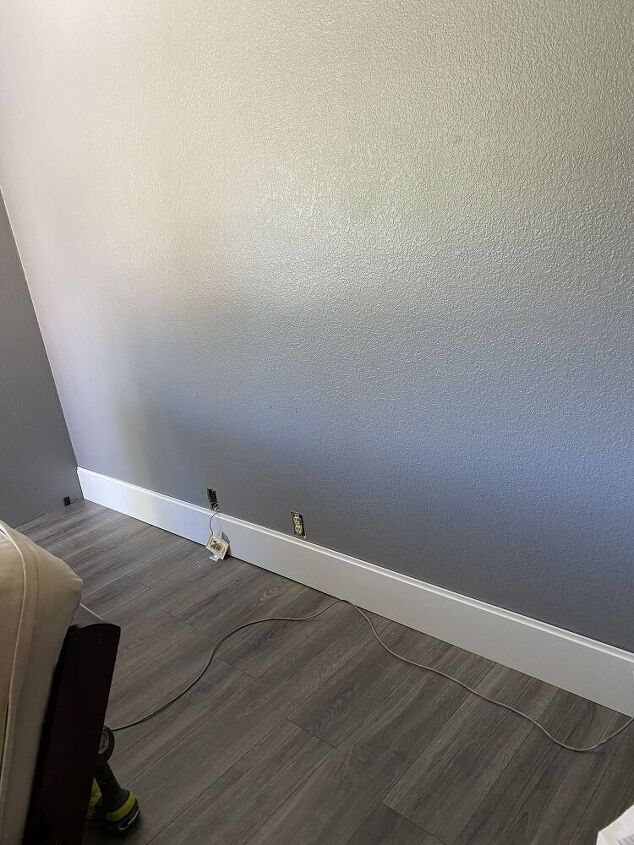
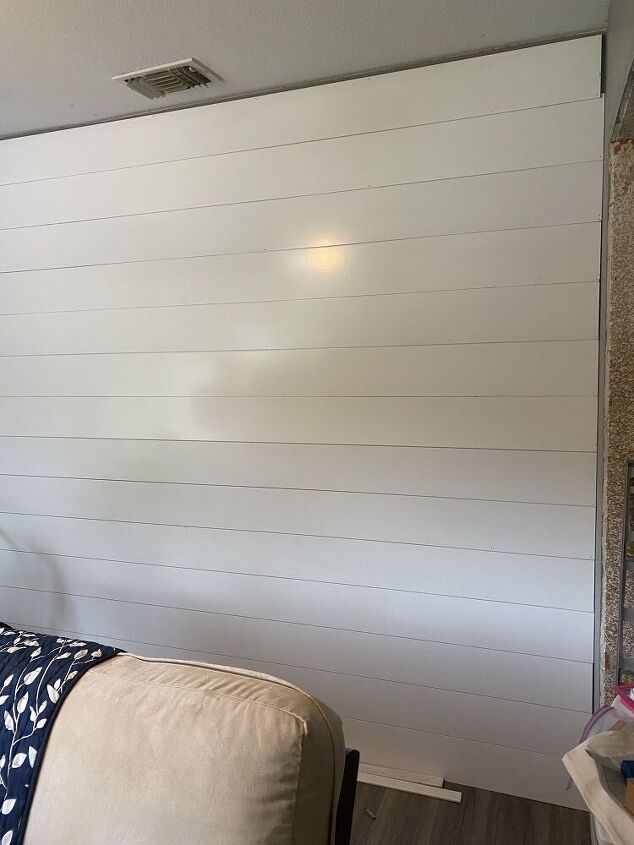
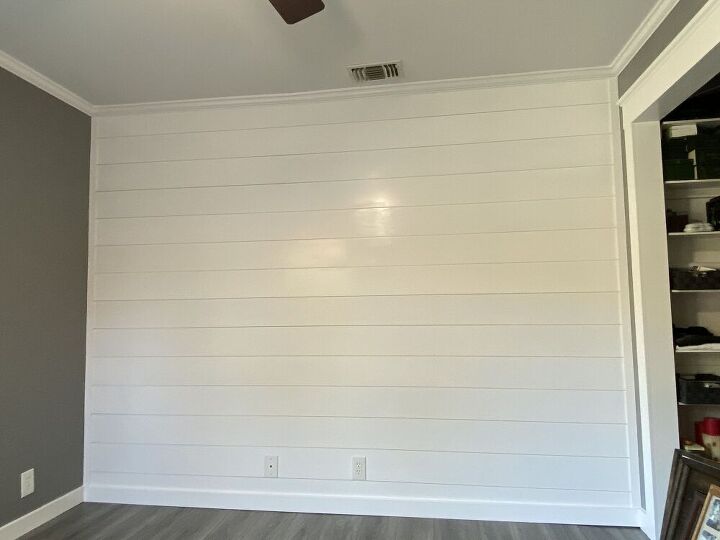
Once that entire wall was covered in shiplap from the bottom up, it was then time to add baseboards and crown molding

I then added two thin strips of molding to each end of the wall with the shiplap to cover any small gaps between the shiplap and the wall.
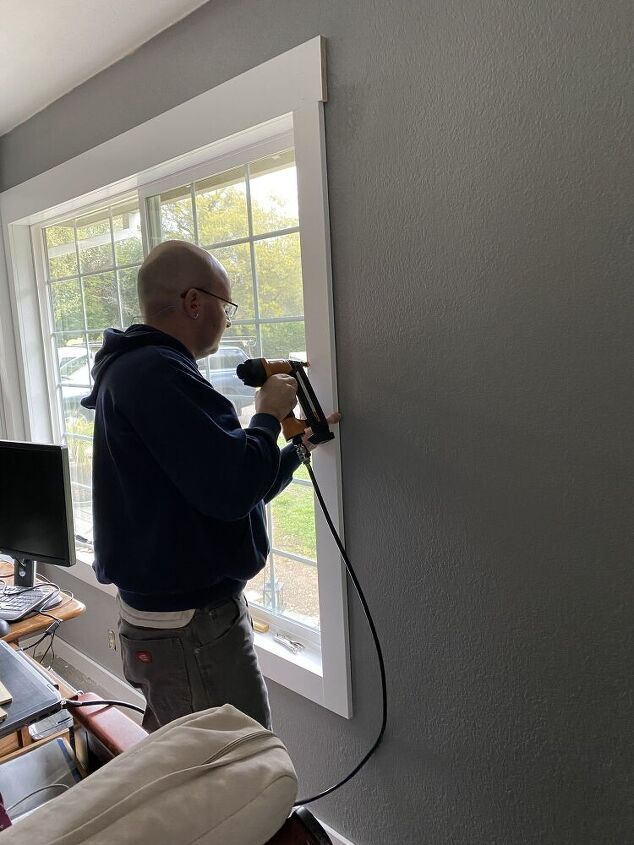
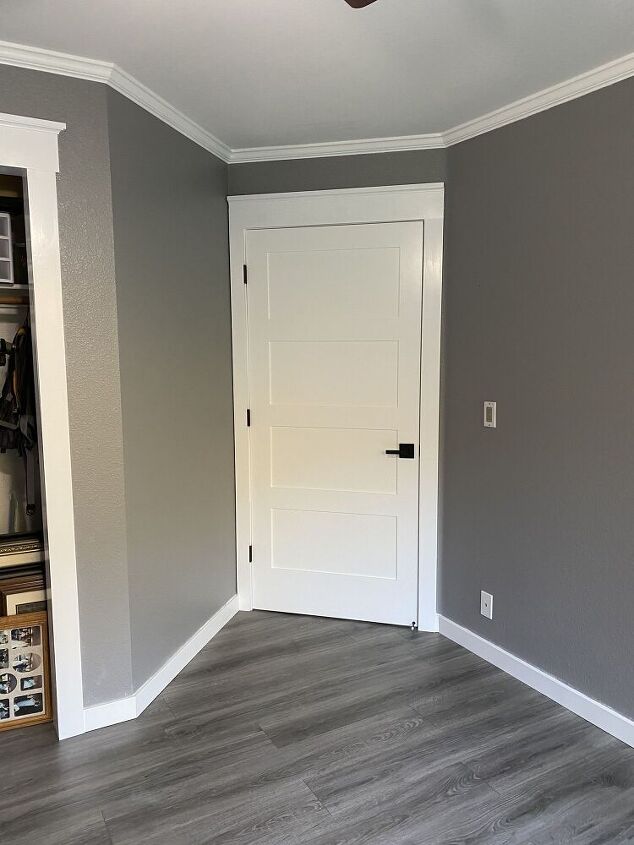
Next, it was time to add the trim around the windows, closet and door, which, other than installing the closet doors, was the final steps to completing our office remodel.

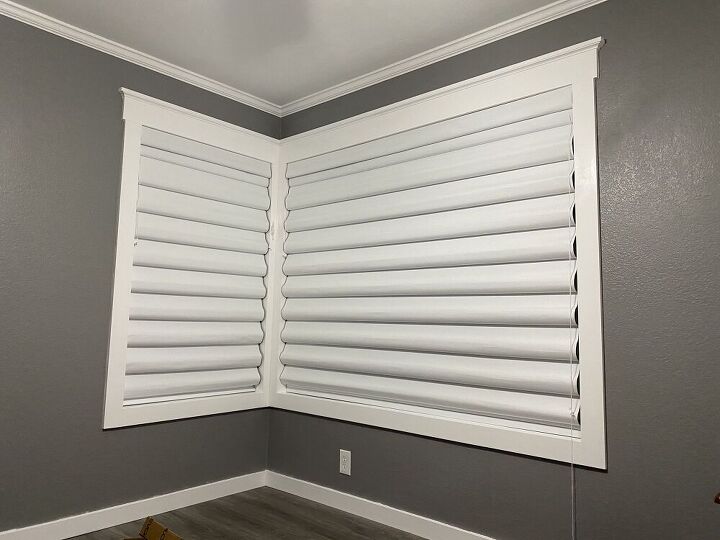
Before moving the furniture in, we hung up some roman shades that I purchased online.
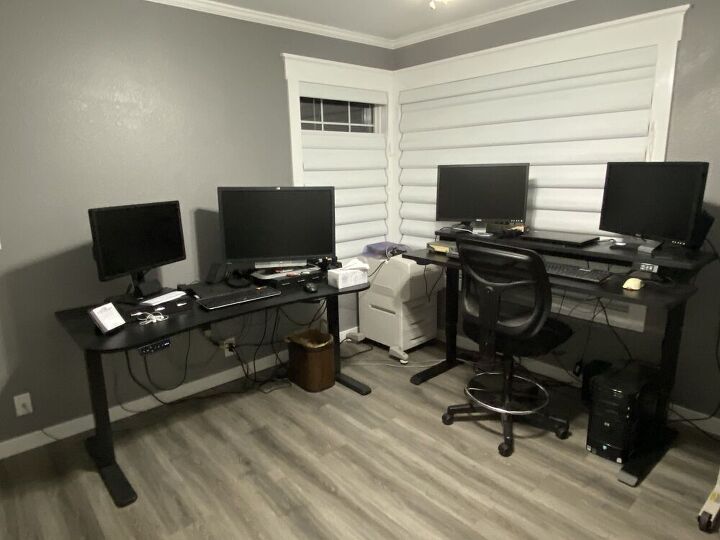
Lastly, it was time to move the furniture in. I had purchased two ergonomic sit/stand desks for Hubs as gifts over the course of the previous year and he was just now getting to set them up!
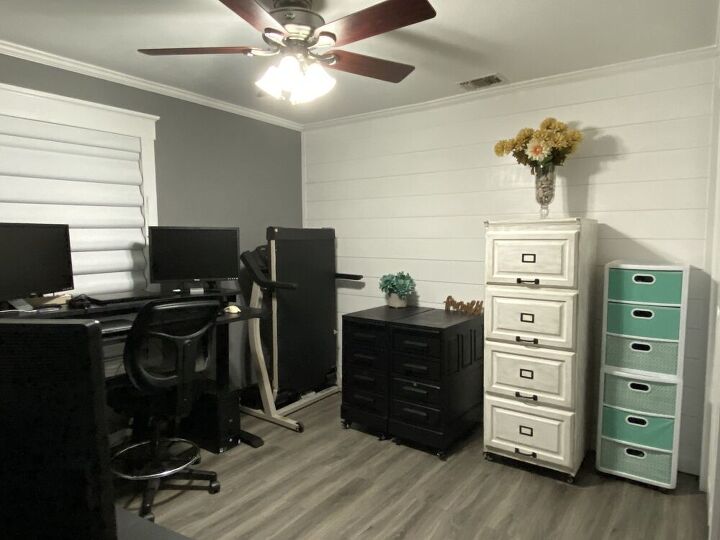
We love how our office looks now, a 100% improvement from our dingy office of before. Head over to my blog to view more pictures of our office renovation and for more details on the steps we took to complete it.


Comments
Join the conversation
-
Amazing job! Kudos to you both! Love what you did, do you have the link for the blinds? They really caught my eye, thanks.


Frequently asked questions
Have a question about this project?