


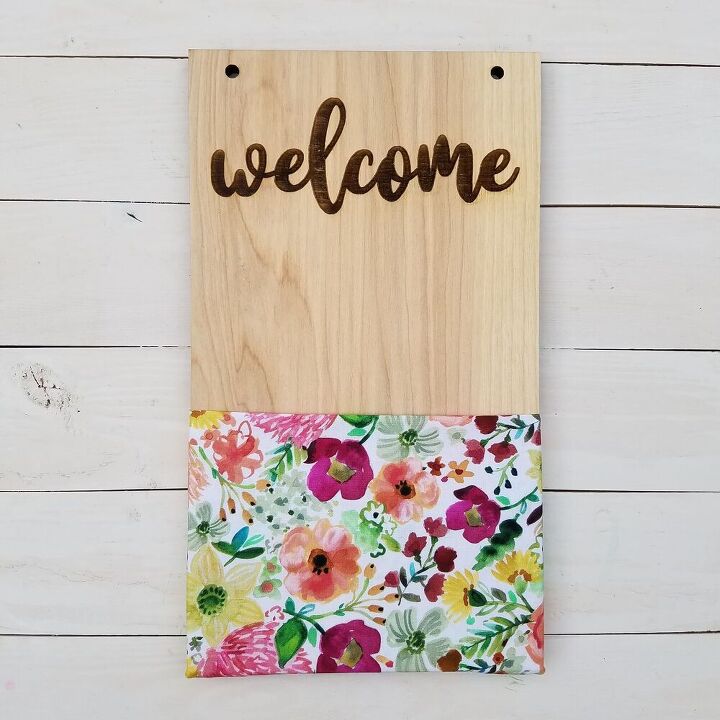
Welcome Fabric Pocket Wall Hanging
I love fabric. The bright colors and fun pattern in this piece are really helping to bring out a summer vibe!
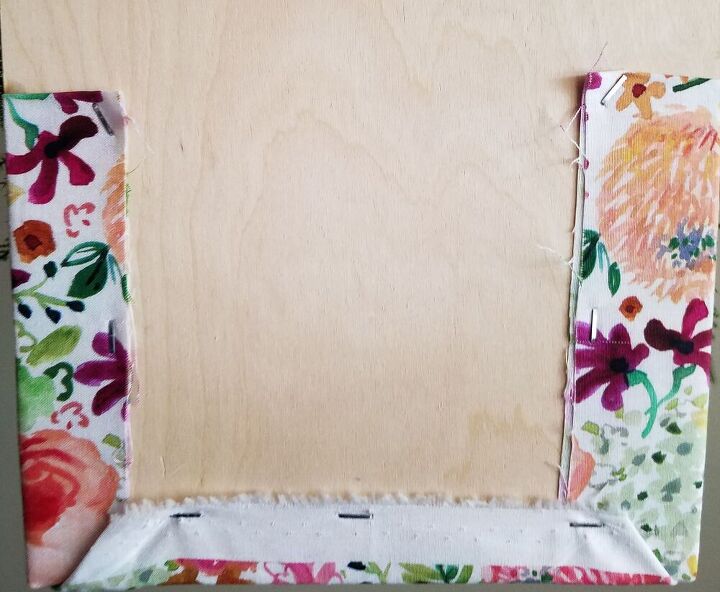
If you want to create your own, grab a piece of wood, a swatch of fabric (size would depend on the size of your wood board) and a staple gun!
Decide how tall of a pocket you would like by laying the fabric on the board. Staple the fabric along one side of the board but to the back side of the board! Pull the fabric taught along the front of the board and staple the other side to the back of the board. Fabric stretches over time so while you want a little space between the fabric and the board to insert flowers or mail or any similar knick knacks, you don't want the pocket to be too loose. Tuck the bottom edge of fabric (kind of like how you would finish off wrapping a present) and staple that to the back of the board as well.
If you are going to use this piece as a wall hanging, I would recommend drilling two holes at the top of the board.
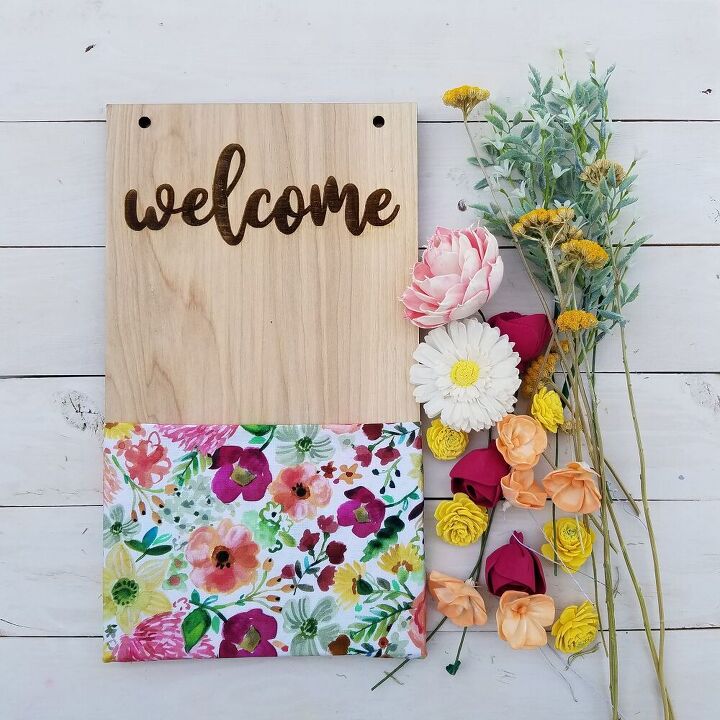
Sometimes, I take a shortcut and buy a pretty piece I know I can add florals to and enhance - like these welcome floral pockets!
I painted my sola wood flowers to mimic the flower types and colors that are found in the fabric pattern on the pouch using craft acrylic paint mixed in water using both the dip dye method and hand painting methods we have discussed in some of our other Hometalk tutorials!
Then I stemmed the flowers using 18 gauge floral wire and hot glue.
For the greenery, I pulled a few springs from a faux greenery bush and cut a few pieces of dried filler to get them prepped.
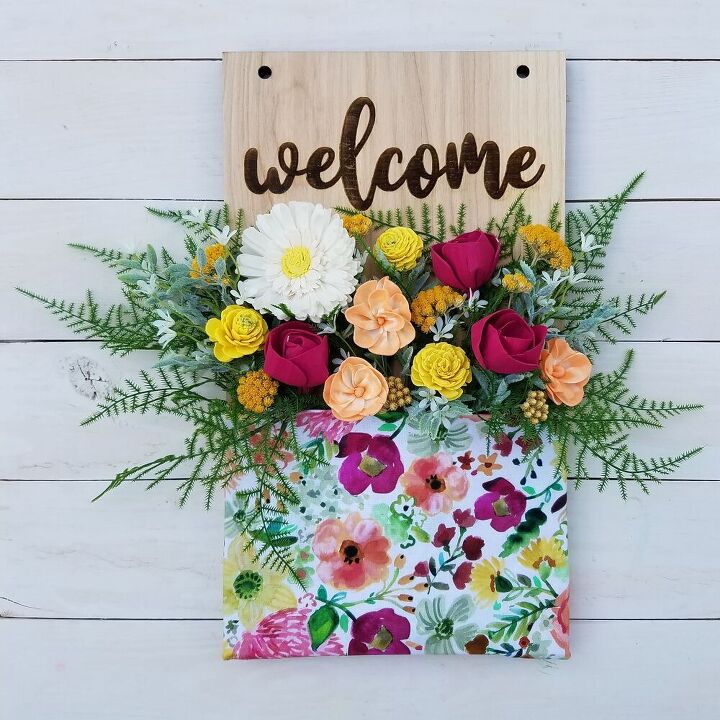
Start with the greenery to get your shape and to determine your height and width. Pop in flowers in a design that appeals to you. Add the dried filler last as that can be fragile and there you have it!
I didn't use any glue to secure the pieces into the pouch so I can change the design around as desired.
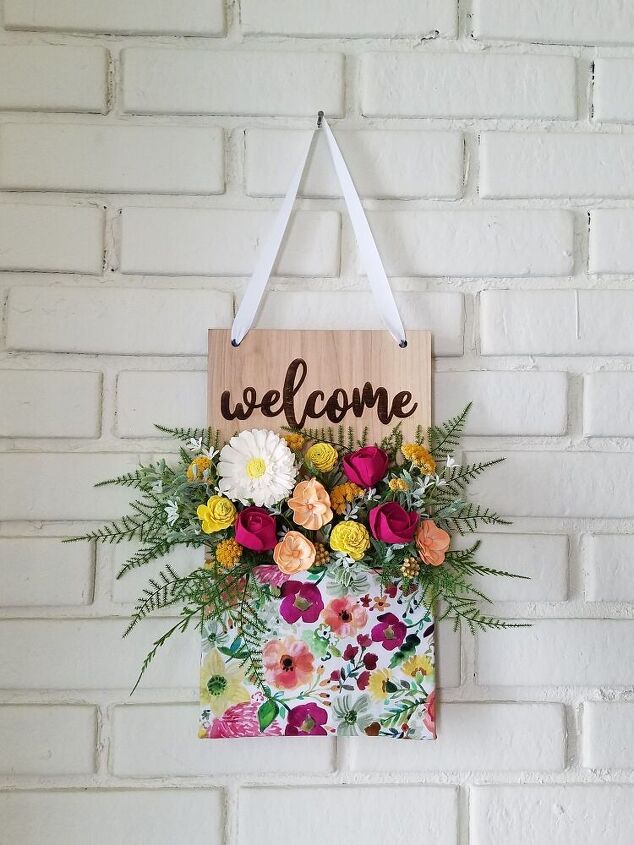
With our pre-drilled holes, you can add ribbon, twine, lace, etc. to create an easy way to hang your arrangement! Just thread the material through the hole, tie a knot in the back and repeat on the opposite side.
I would love to see any floral pockets you create so please feel free to share in the comments 
Resources for this project:
See all materials


Comments
Join the conversation
-
Thanks for sharing! This idea will go inside our camper! I will insert a sandwich size zippered bag to hold a bit of water to keep fresh cut florals hydrated during the camping trip!
-
Yes, inspired! It even looks good with the flowers to the side before put into the slit. This would make a great housewarming or just a gift for someone. The welcome is a nice addition. Thanks for the idea.


Frequently asked questions
Have a question about this project?
This is sooo beautiful !!! I will pay you to make me one !!
So cute, But what about the word “Welcome”? Did I miss something?
What if you used Velcro to attach the fabric? That way you could switch out the fabric throughout the year?