


Industrial Dining Table

During this pandemic we have been prepping our house for sale, which included the organization of my "stash of stuff" in our basement. I have also managed to complete a number of projects that have been in the queue for a long time.
One of them is a large and heavy dining table.
The top is a 30” by 96” hard maple butcher block top. I failed to get a before photo. It is 1.75” inches thick and was once used as a workbench top. It had a backsplash, which I removed- drilling and filling the screw holes with 3/8” maple plugs. The workbench had been used for the repair of scientific instrumentation , hence in quite good shape, except it had separated into two pieces. I was able to dowel and glue it back together and keep it quite flat.
It had some indentations (which I raised with an old steam iron and a wet towel) but very few scratches. This was a good thing because it is very hard and was extremely difficult to sand. I got it as smooth and flat as I could using a belt and an orbital sander, and then sealed it with shellac and added multiple top coats of polyurethane satin varnish.
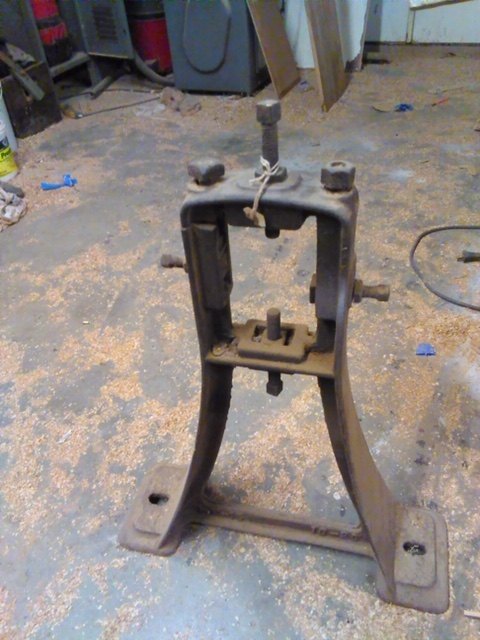
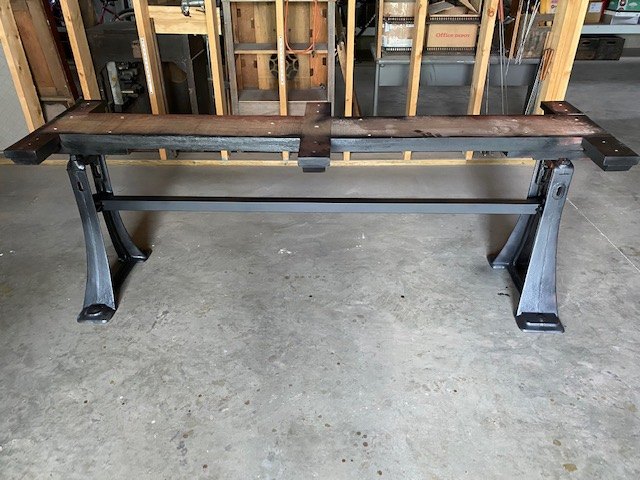
I used penetrating oil to loosen and remove the rusted bolts and nuts. I connected the two trestles together to form the base with stretcher. It is a 6 foot length of 1 and 5/8ths inch (16 gauge) square steel tubing.
Fortunately a local supplier (Alro Steel) had what is called a “drop”. A drop is material leftover from another that is sold by the pound. The cost was about $25, compared to over $175, if purchased/shipped as an internet order
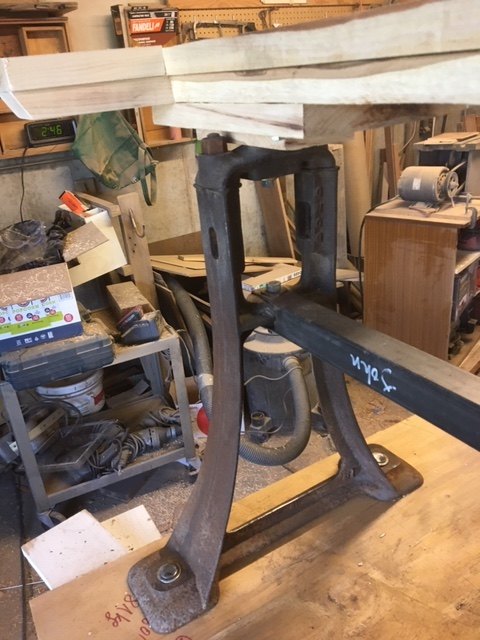
With the footprint of the base defined I was able to make up the height and design the tabletop support. I used some 1” hickory leftover from an earlier project ( It’s hardness was very similar to the hard maple top.
I covered the holes in the feet of the trestles using elevator bolts and washers. Nut and washers secure them from beneath the foot.

I primed the base with Rustoleum Rusty Red Primer and then painted it using the remains of several cans of black spray paint I had on hand. I top coated the base with rustoleums high temperature barbecue paints. It didn’t need to be heat resistant, but experience has taught me that this paint gives good coverage and a uniform sheen, somewhere between matte and satin.
The table is heavy, no doubt about it. The fact it can be disassembled into two pieces helps, but both pieces require two ambled bodied people to move, probably four if you wish to move it assembled.
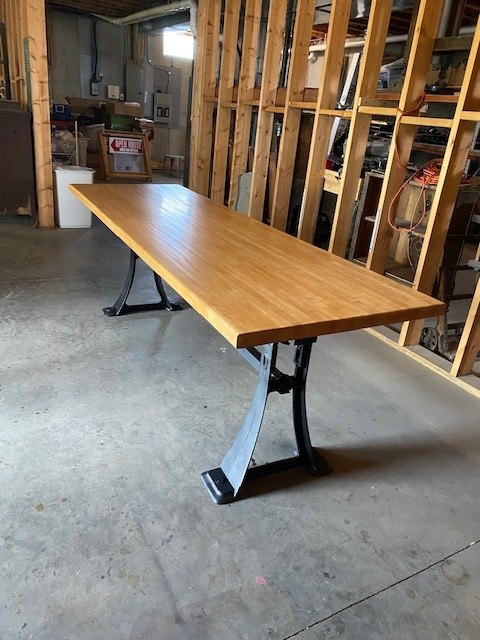
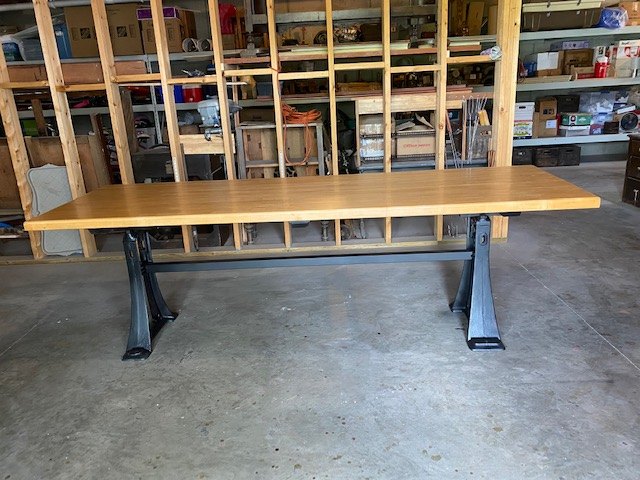
It easily accommodates eight people.
If it doesn’t sell on FB’s Marketplace, we will include it in the estate sale we plan to hold, if/when our house sells.
Resources for this project:
See all materials


Comments
Join the conversation
-
 Looks awesome!!!! I love it!!! 💯 I hope you and your family are well. 😊


Frequently asked questions
Have a question about this project?
I absolutely LOVE IT!!! What is a Trestle, and where do you get them ? This table is exactly what I have been looking for!! Great Job!