


Cheap Fix for Small Cracks in Your Baseboard and Trim

As a home builder I love trim. Trim around doors, baseboards, chair rail, etc, etc. I love all of it. Trim allows you to neatly cap off surfaces and join different surfaces together all while keeping everything clean and intentional looking.
That's why it pains me to see trim done so poorly in many homes, new and old. Gaps, cracks, and unfilled nail holes are some of the most common issues I see. And it's super easy to fix stuff like that, anyone can do it in an afternoon.
So I figured I'd make this little guide showing you how you can touch up your trim and get it looking better than new! It's a great little project for those of us who are still stuck at home during the lockdown. Why not freshen up your place a little bit if you're going to spending so much time at home, right?
For those of you who enjoy videos I also made a YouTube version of this guide if you'd like to check that out you can do it here!
If you'd prefer to keep reading then just keep on scrolling.

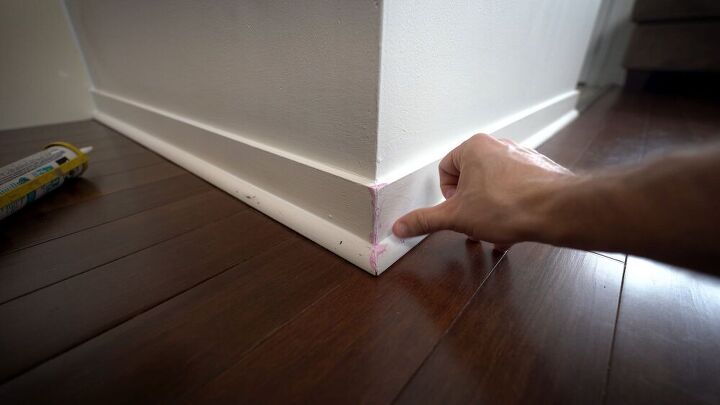
To start this project we're going to go around and make a mental note of all the areas that need attention. In my house I didn't have to look far to find a couple of prime examples of poorly done trim.
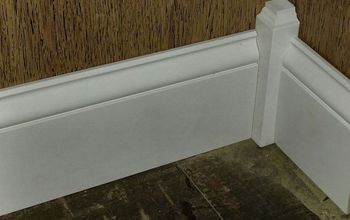
Here you can see that the baseboard is pulling away from the wall ever so slightly revealing a small unsightly crack. None of the nail holes in the quarter round were filled and painted. And finally, to cap it all off, the ends of the quarter round were left unpainted and raw! Oh the horror!
I searched around my house and was able to find several more examples of all of the above as well as a couple of corners that didn't line up perfect (more on those later).
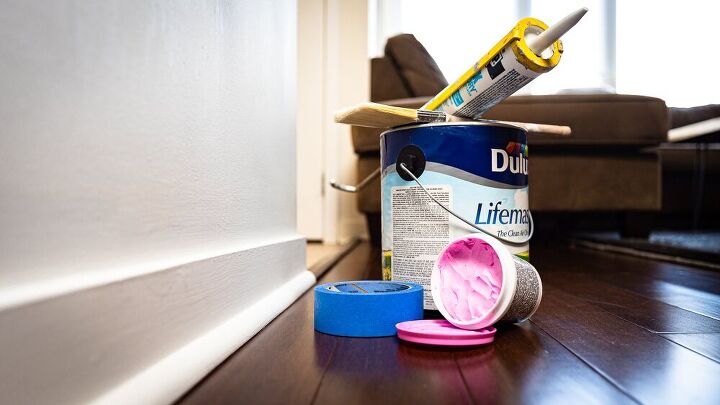
For this project you aren't going to need many tools or supplies, but you'll need a few. At the bottom of this post you can find a complete list of everything I used.
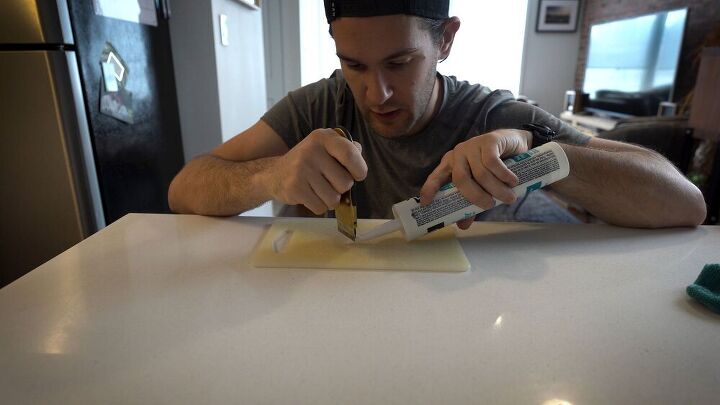
We're going to start with the caulking, so one of the first things you're going to want to do is cut a small hole in the tip of your caulking tube.
Don't go too crazy, just a small 1/8" hole is all you need. The smaller the hole, the neater of a job you will do when it comes to applying the caulking. Personally, I always hand-cut my caulking tubes with a sharp knife because I find that the cutter included on many caulking guns gives a very rough cut.
With the caulking tube prepped and ready to go it's time to start caulking!
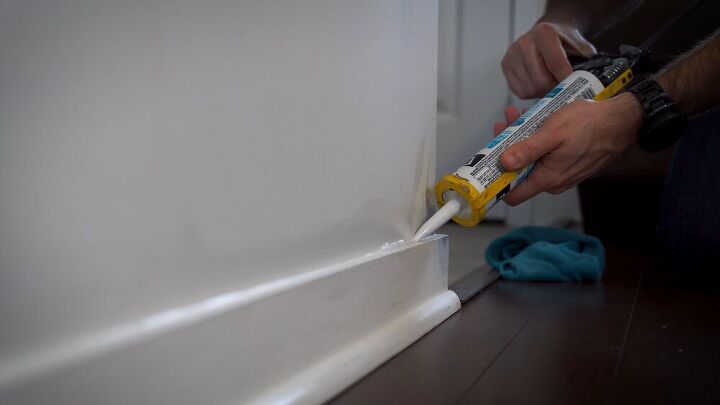
I use caulking to fill those small gaps and cracks that form between trims pieces, and, between the trim and the wall. Position the nozzle near one side of the crack, pull the trigger until the caulking starts to flow out and slowly drag the nozzle along the length of the crack until it's completely covered.

Next, take your finger and use it as a squeegee to wipe off any excess caulking. Keep you damp rag handy to clean off your finger because chances are it's going to take you multiple passes to clean off all the excess caulking. Keep wiping it back until you're happy with the results. You're trying to fill the gap/crack without leaving a big nasty blob on top of your trim, so a lighter touch is best.
Don't be discouraged if you accidentally wipe too much off, you can always apply more, and latex caulking is very cheap. Similarly, don't fret if you accidentally apply too much, latex caulking is water-soluble so it's really easy to clean off of almost any surface with a damp rag.
Speaking of damp rags, make sure you're cleaning your damp rag frequently as you work so you don't accidentally smear excess caulking all over the place. I've been told that can be annoying... not that I know from personal experience or anything....
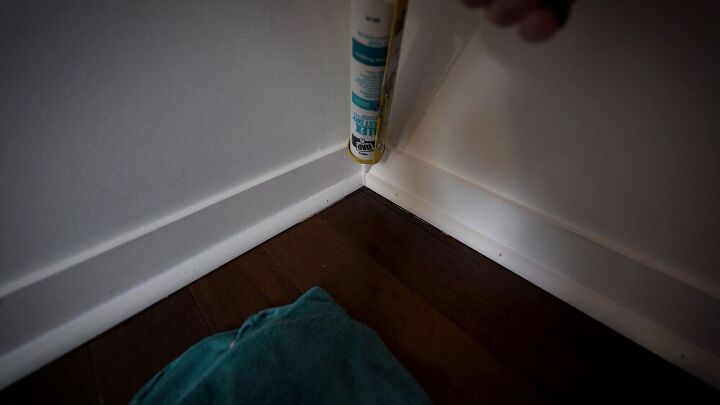
Interior corners are another place that caulking is great for filling small gaps and cracks. It's basically the same procedure as before, carefully lay a bead of caulking, and then wipe back the excess with your finger until it looks nice.
You can fill nail holes with caulking. It's not recommended, and there are better ways to do it, but in a pinch, a little bit of caulking will give you a decent enough result that it looks better than just leaving the nail holes unfilled. The problem is that caulking tends to shrink as it dries. You'll fill a nail hole and it'll look great at first, but then, you'll come back an hour later and see a little indentation where the hole used to be.
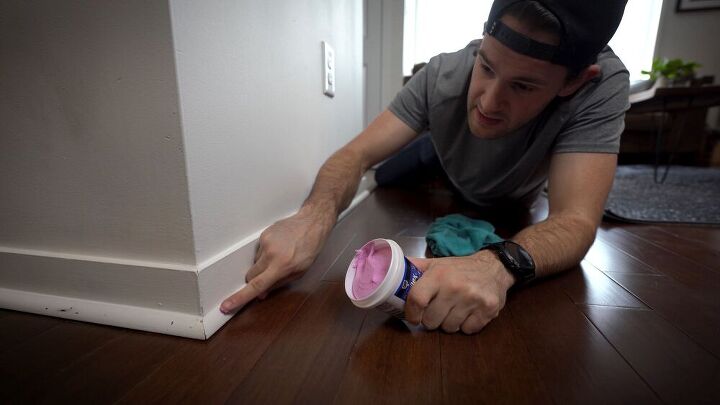
A better way to fill nail holes is to use a spackle or wood filler. A small amount on the tip of your finger can be massaged into the little nail holes. Spackle and wood filler are also subject to a little bit of shrinkage while they dry so I try to leave my filler a little proud of the nail hole.
Some people use a pallet knife to apply the filler, but honestly, I think your fingertip is the best tool 90% of the time. Spackle and wood filler are also usually water soluble, so if you end up getting them somewhere they aren't supposed to be you can just wipe them off with your damp rag.
When it comes to gaps and crack in exterior corners, I don't like to use caulking. Again, as the caulking dries it will shrink back and reveal the gaps you were trying to fill in the first place. Instead use your filler to fill those exterior corners, leave it proud, and then sand it back when it's dried. That way you'll get a perfectly smooth finish.
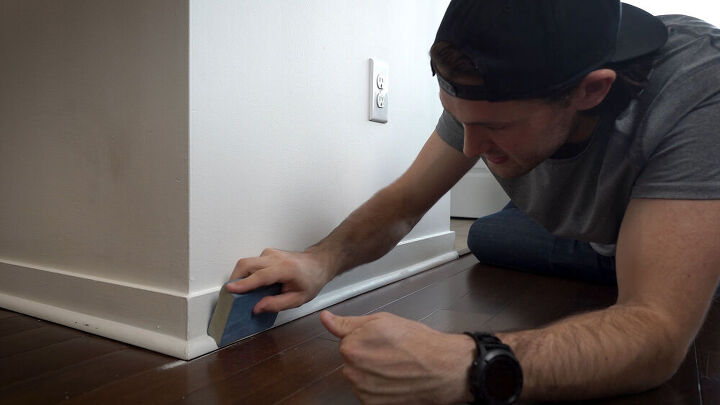
Once the spackle or wood filler dries I sand off the excess using a small sanding sponge. Be careful to avoid accidentally scratching your floor or anything else during this process. If you're worried about accidentally scuffing something you can place a little bit of blue painters tape down to protect it. After that's all done, I vacuum up the dust before proceeding to the next step.
Finally, once all of your holes and cracks are filled (honestly, if you've made it this far without giggling like a schoolgirl, good for you. As I'm writing this I can barely keep a straight face) its time to seal in all of your hard work with a coat of paint.
At this point in the project you might be looking at your work and thinking "Ahhh, it looks pretty good, I don't think I really need to paint it. The white caulking matches my white walls really nicely". And true enough, it might look that way now, but a few months from now it's going to be a different story. The caulking will start to slowly discolor over time and hold onto dirt, discoloring it further. So trust me, you're going to want to paint it.
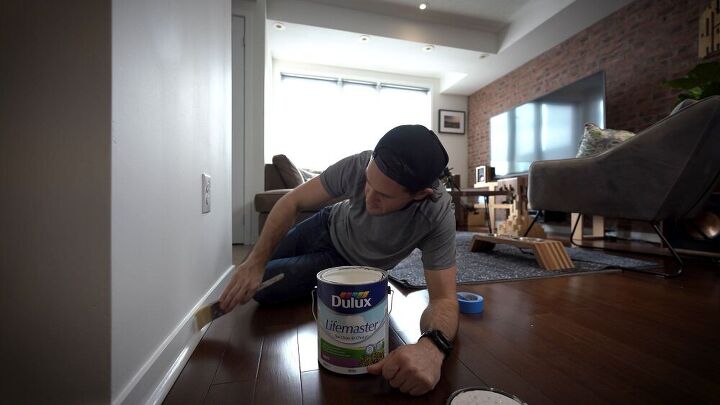
Grab a can of whatever paint your trim was originally painted with and give it a fresh coat. You'll want to give special attention to the areas you caulked and filled, but while you're at it, it might not be a bad idea to repaint the rest of the trim.
Make sure you cover all of your fresh caulking with paint. That means if you caulked a Iine between your trim and wall you'll have to paint both the trim and the wall. If your walls and your trim are painted using different paints (they usually are) you'll need to paint both separately.
Oh and in my case, I took the time to paint ends of the trim that were left raw at this point too. A little bit of blue painters tape helped me avoid getting any on the floor and making a mess.
Once the paint is applied there isn't much left to do other than stand back and look at your newly refreshed trim.
While it might not be the most groundbreaking project you can do in your own home, it certainly helps things look a lot cleaner and a lot neater. It only took me a few hours to do the whole house and it made me feel a lot better about my space.
I hope you enjoyed this post, if you did you might want to check out my YouTube ( www.youtube.com/zacbuilds) and Instagram ( www.instagram.com/zacbuilds/) to see the rest of my projects.
See you guys in the next one!
Resources for this project:
See all materials


Comments
Join the conversation
-
Yes will work on crown molding, have done this. Patience required!
-
LOVE, LOVE, LOVE this and your sense of humour as well. Takes it from 'home done' to professional easily.


Frequently asked questions
Have a question about this project?
what can i do for larger gaps where the wall was not straight when installed? trying to figure out if i used small wedges to fill the gaps first and then use the caulk to close the gap???? any ideas would be helpful thank you
Anyone have hints on oak baseboards?
Is there a spackle or filler for small nail holes that comes in a tube (with a small opening) to fill the holes? Something fast and easy?!!!!