


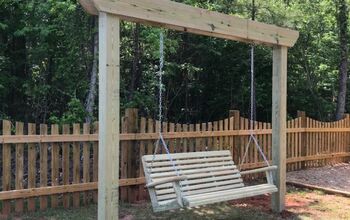
How To Hang A Tree Swing Without A Branch
Tree swings! What is it about a tree swing that draws you in, like there is some magnetic force pulling you closer, even just at the site of an abandoned swing? There’s something even nostalgic about the scene of a home with a swing hanging from a tree. Perhaps taking you back to a simpler and carefree time in your life.
There’s no doubt that creating a dedicated space for children to run around and play outside is beneficial to their physical health and happiness (and their Mother’s sanity! 😜 especially during this pandemic). Children love swings, but sometimes having one in your own yard might be challenging.
What if the trees in your landscape don’t have large enough branches or limbs to hang a swing? Well, with a little bit of creativity, we will show you how to hang your own tree swing without a branch! You’ll soon have the coveted appeal of a tree swing adorning your own yard this summer season!
It might seem obvious, but you wouldn’t hang a swing from just any tree. While working with your own landscape of course, be sure to look for an old tree that is large enough to hold the extra weight.
(Keep in mind that if you’re wanting to hang a swing in the traditional way, you’ll need a tree branch or limb sturdy enough to hold the extra weight.)
While you may not have this option available in your landscape, look for two trees within 10′ of each other, both of which are mature and would withstand the extra weight.
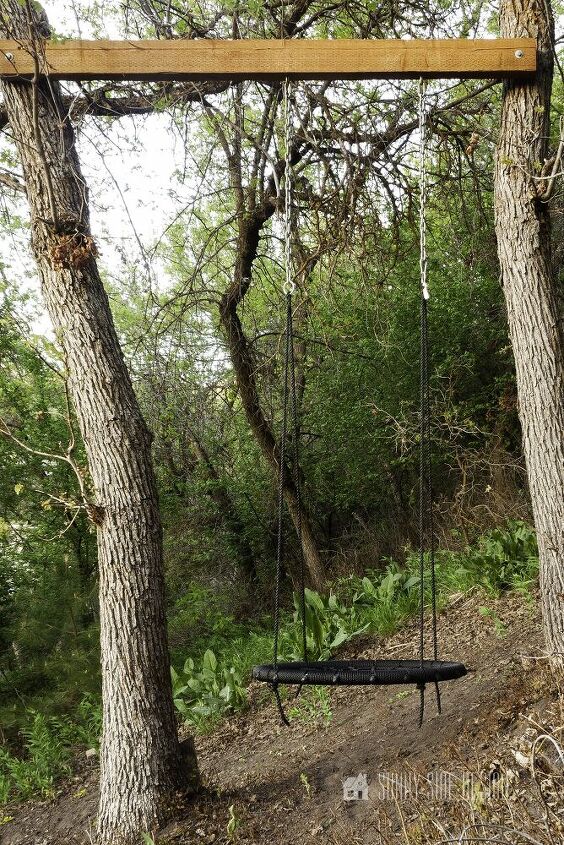
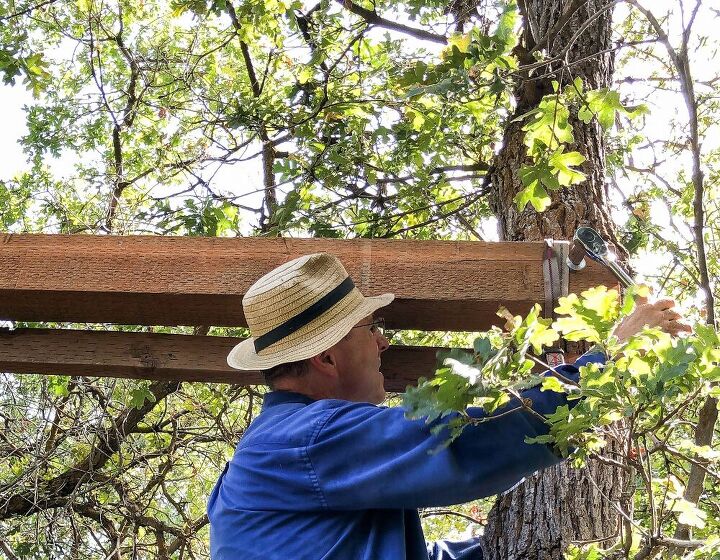
To make this process easier since the header is pretty heavy, we first installed a cleat between the two trees. This will be removed once the header has been properly secured.
The purpose of the cleat is to help hold the weight of the header during installation.
To do this we used a scrap of 2″ x 4″ lumber and secured each side to each tree using a long wood screw. Again this is temporary but you will want it secure. You can see the wood screw in the cleat below.
NOTE: You will want the cleat to be level, be sure to keep one on hand.
Again for an additional method of security while installing the header, we used a rope wrapped around the tree and the header to keep it in place.
Lumber is heavy, you don’t want to try and hold this header in place by yourself while trying to permanently secure it to the tree trunk!
The cleat will help hold up the weight of the header, while the rope holds the header into place during installation.
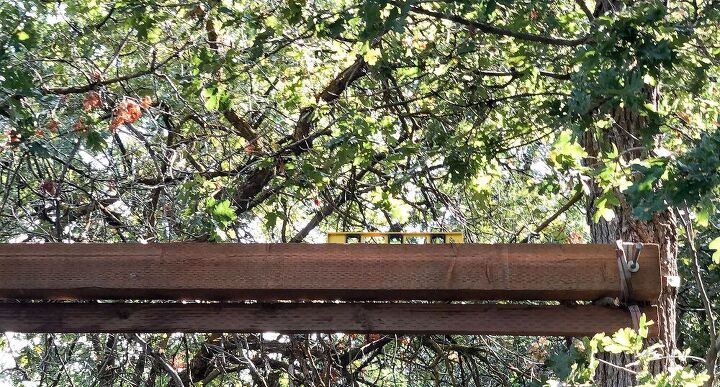
Before securing the header to the tree, again use a level to make sure it’s level. This will allow the tree swing to hang properly.
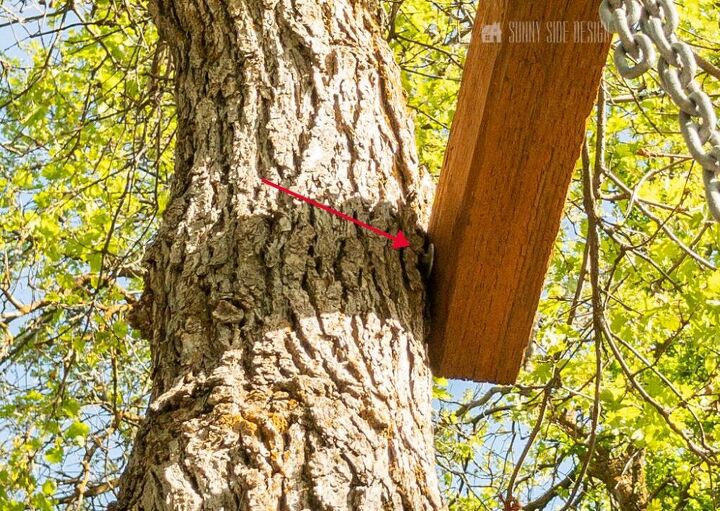
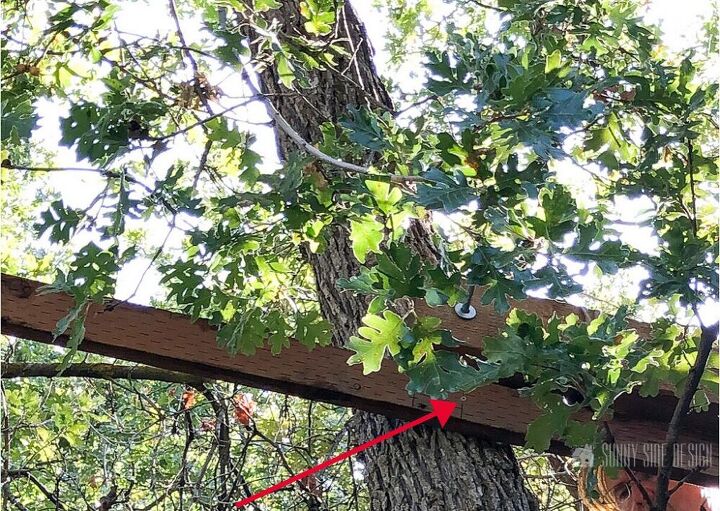
The tree swing header is secured to each of the tree trunks using washers and 10″ lag bolts.
A pilot hole was drilled through the 4″ x 6″ on each end for the lag bolts. No pilot hole was drilled into the tree trunks.
A large washer was placed between the trunk and the header and at the head of the lag bolt for more strength.
To secure the lag bolts, they were first driven about 1/2″ into the trunk with a hammer.
This was repeated on both sides of the header for each trunk.
After the lag bolts were snug and the header was secure, the rope and the cleat were removed.
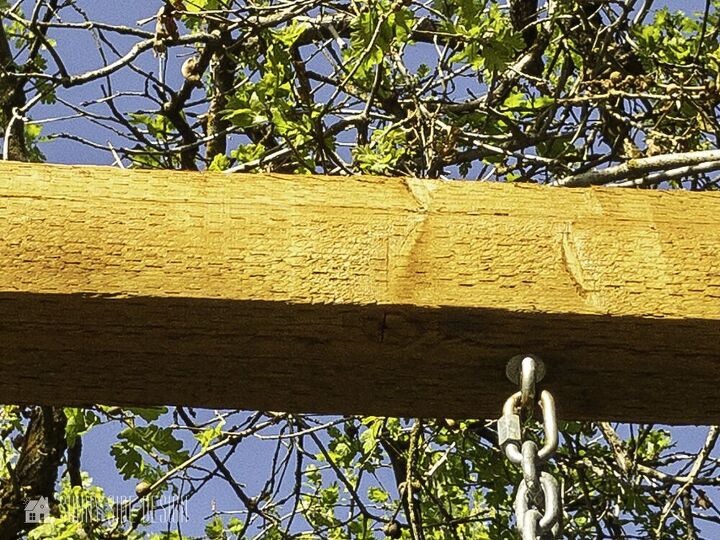
To secure the tree swing to the header, a pilot hole was drilled before inserting an eye bolt for each side of the swing.
We then used a quick link (a chain link that screws open and closed) to attach a heavy duty galvanized metal chain to the eye bolt.
When selecting a chain, be sure to choose one that is galvanized so it will weather well, and one that’s hefty enough to carry the weight of people on the swing.
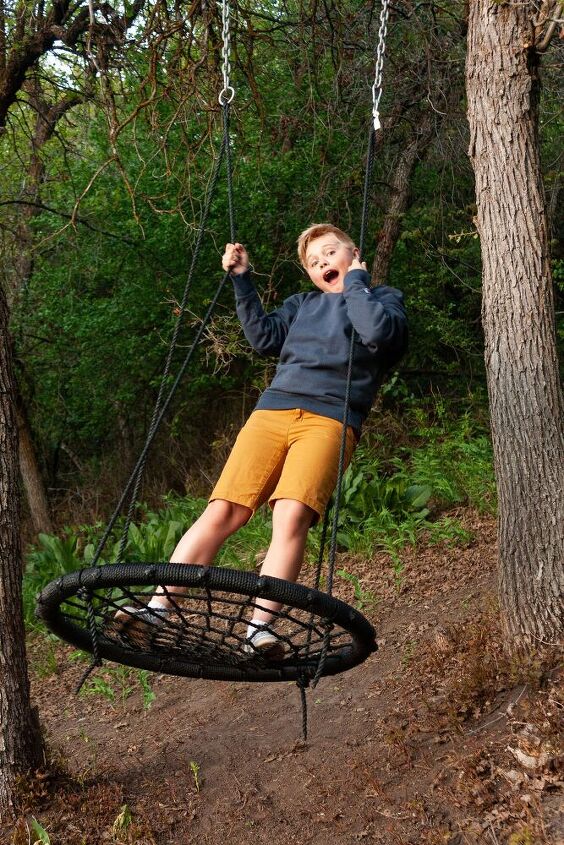
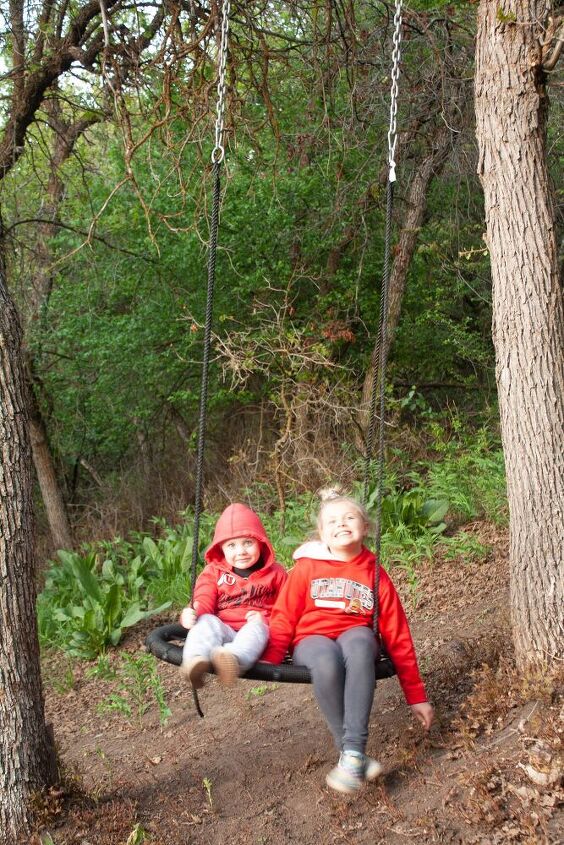
My kids LOVE playing in my parents backyard!
It’s even sturdy enough to hold up adults, so I even get to spend some time relaxing up there!
Do you have a spot in your yard you’d like to add a tree swing? Would you hang yours differently? Comment below, we love hearing from you, and hearing your own creative ideas!
BE SURE TO SEE THE ORIGINAL POST ON OUR BLOG FOR MORE DETAILS AND PICTURES!
See more OUTDOOR projects and ideas here!
And as always here at Sunny Side Design.
WE HOPE TO BRING YOUR HOME TO THE SUNNY SIDE OF THE STREET!
Resources for this project:
See all materials


Comments
Join the conversation
-
Or a nice swinging bench for adults!
-
Just so genius! The hanging rope method didn’t seem to work for long. As a kid I witnessed the branch break while a friend was on and another the rope came off the branch where my sister landed on her back on a stump! I know! She could have been paralyzed. She’s fine.


Frequently asked questions
Have a question about this project?