


How To Install A Paver Patio
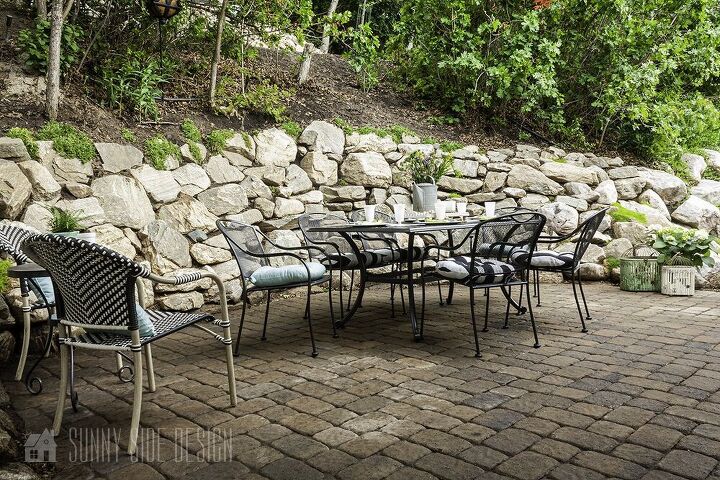
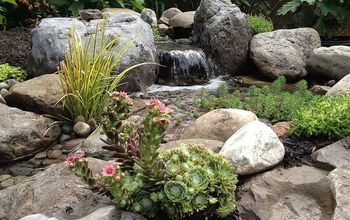
Life is busy. In general, I think we could all agree that we live in a more fast paced society. Our schedules are always full, we’re constantly on the run, and there seams to be minimal time to sit and relax! This paver patio has become a backyard oasis for my parents. Being able to dine outdoors and listen to the birds, and watch other wildlife allows them time to decompress each evening.
To learn more about:
Where do you start when laying a paver patio?
How much does a paver patio cost?
Actual Costs For This Paver Patio
be sure to see the ORIGINAL POST HERE.
When planning how to prepare the ground for pavers it’s best to consider a few key elements such as, slope, thickness of pavers, thickness of base and sand.
For this paver patio we excavated 6″ for the base material, 1″ for the sand and 2″ for the depth of the pavers.
Does A Paver Patio Need To Be Sloped?
When designing a paver patio be sure to account for proper drainage across the entire surface. Building the patio with a 1-2″ slope away from the home will ensure all water drains away from the foundation. You don’t want to have any water pool up under the pavers and soak into the basement!
Making the patio flat is not the same as making it level. To prevent any areas where water may pool, the surface shouldn’t have any dips or bumps.
The area should drop 1/2″ for every 4′. An easy way to check the slope is to lay a 4-foot level on the ground and raise one end up 1/2″. Mark the bubble location of the level and use it as a guide on the patio surface. From there it’s easy to fill in or remove gravel from areas to adjust the slope.
Is Paver Base Necessary?
Installing pavers directly over dirt for stepping stones will hold up fine. But it’s best to assess the condition of the base and make it as solid as possible before laying pavers to create a patio.
This is the 3rd paver patio my parents have installed between each of their homes. They’ve progressively learned what techniques and products work best (each patio has improved and is better than the previous one).
A sand base was laid for a previous paver patio. After time, some settling occurred and created a tripping hazard. After time, it needed repair. The pavers were removed, additional sand added and the the pavers reinstalled.
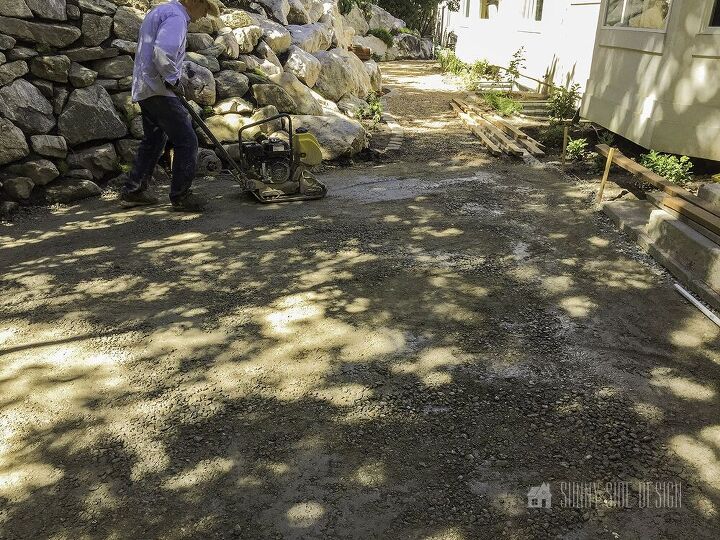
This time they opted to use a road base. Depending on your location and building supplies, it may be called Class 5, crusher rock, road bed gravel or 3/4 minus gravel. Road base compacts better than a general gravel base. This will prevent any settling in the pavers and keep the paver patio free from pooling water.
A base depth of 4 to 6 inches is recommended to provide a sturdy and stable foundation for many types of paver installation.
Now you should have a better understanding of the importance of a base level. Compacting the base level is key to creating a paver patio that will remain level and hold up through the years.
There’s no real rhyme or reason to compacting the base, other than you want to go over the entire surface area. As we began compacting an area, we would sprinkle water over the area. This helps with the compaction. Compacting the base causes smaller particles in the soil to settle in the voids of the material underneath, forming a sturdy base.
You can buy or rent a hand tamper tool to compact the base. For this project we rented a powered compactor to speed up the process.
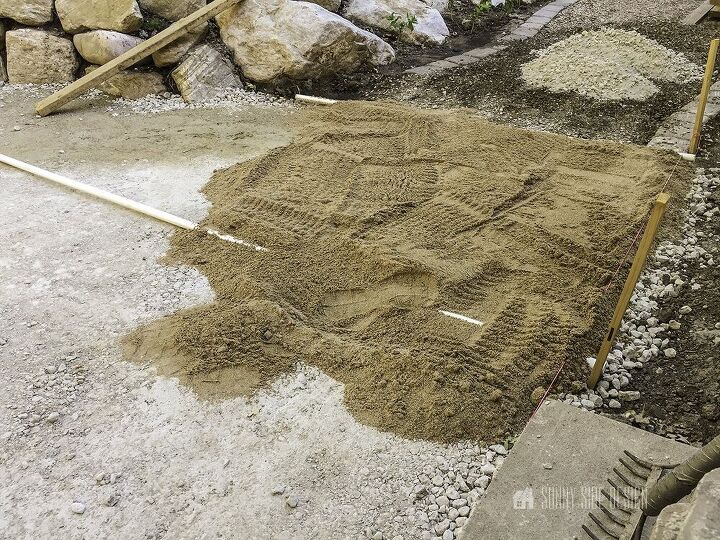
After the paver base has been compacted we added 1″ of sand.
Don’t feel like you have to tackle the whole patio at once. Start with a workable area. You won’t want anyone to walk on the sand after you screed it before placing the pavers into place.
PRO TIP: Use 1″ PVC pipe to screed the sand easily. Place a couple pieces of pvc pipe on each end and one in the middle of your workable are. (Our workable area was the length of a 2×4.) Then fill area in with sand. Pull the 2 x 4 across the 1″ PVC pipe, this creates a perfect 1″ layer of sand.
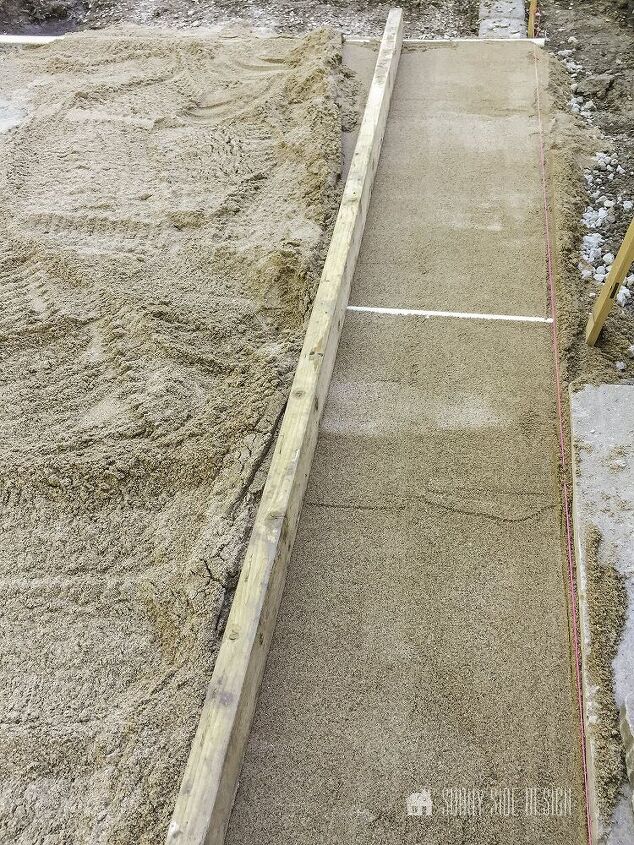
To the right of the sand you can see in the image that we have an orange string at the edge of the cement. This is held into place with stakes on each end of the workable area. The string has been tied 1″ above the road base level. This acts as a guide when screeding so we know that we are maintaining 1″ thickness of sand throughout the entire patio.
Then use the 2×4 to screed the sand. This allows you to get a large workable area level at one time, as it pushes excess sand behind the board.
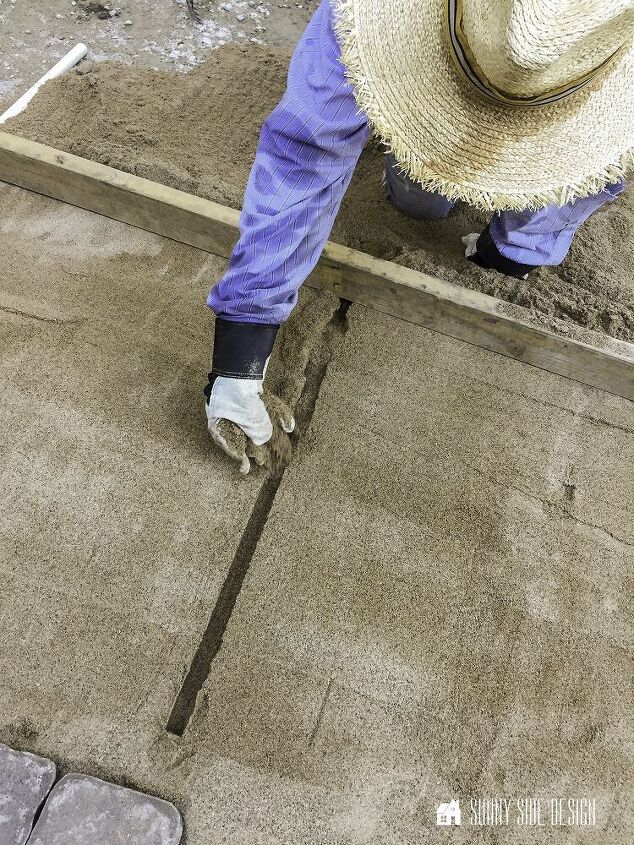
After the sand has been leveled to a workable area, 2 feet or so, gently pull one PVC pipe out at a time.
Take a handful of sand and fill in the void area where the pvc pipe was.
Gently tap the sand into place with a hand trowel.
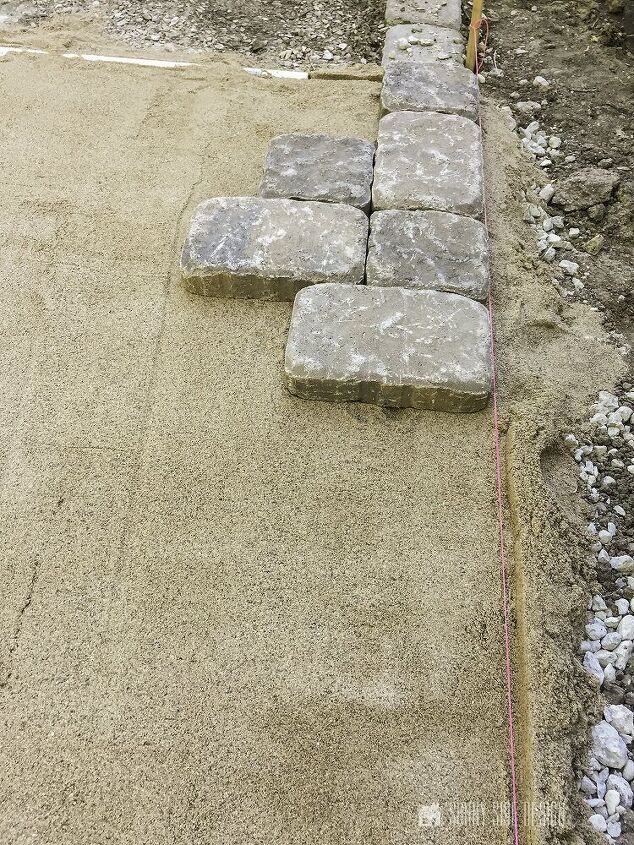
Begin placing your pavers in your desired pattern. We began in the corner and gradually worked our way out. Notice that the orange string is still visible to help us lay the pattern straight.
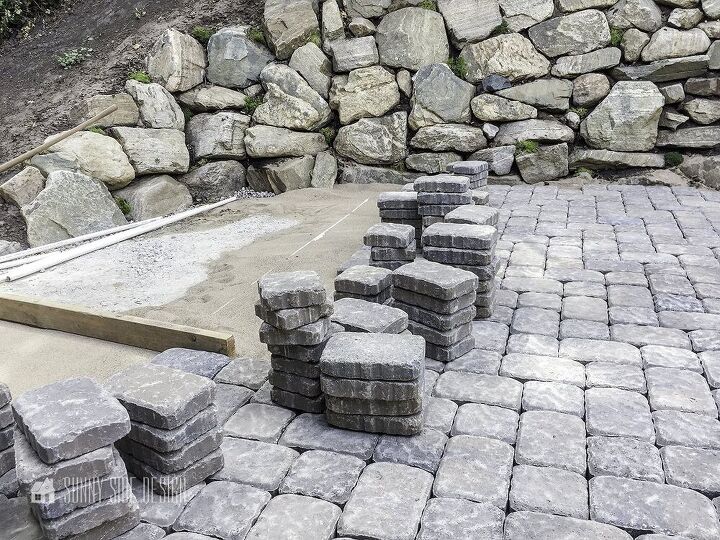
Continue laying the pavers to create your patio design.
PRO TIP: Save all of the cutting work for the end. By placing pavers down over the majority of the surface area, you’ll be able to keep progressing and have the main area installed with ease.
After the main surface area of the paver patio has been installed, the only remaining pavers to install are around the edges. These pavers pieces were measured and cut to size with a wet tile saw.
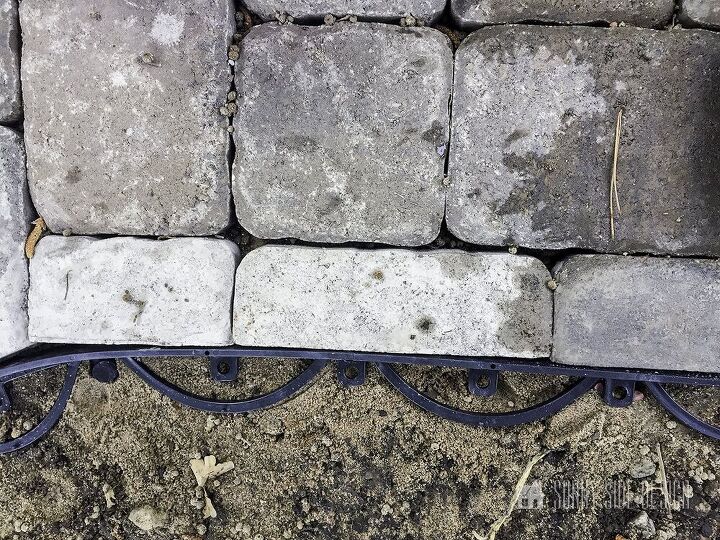
The pavers were then lined with edging secured into place with stakes.
The edging is pliable which makes it easy to work around curves.
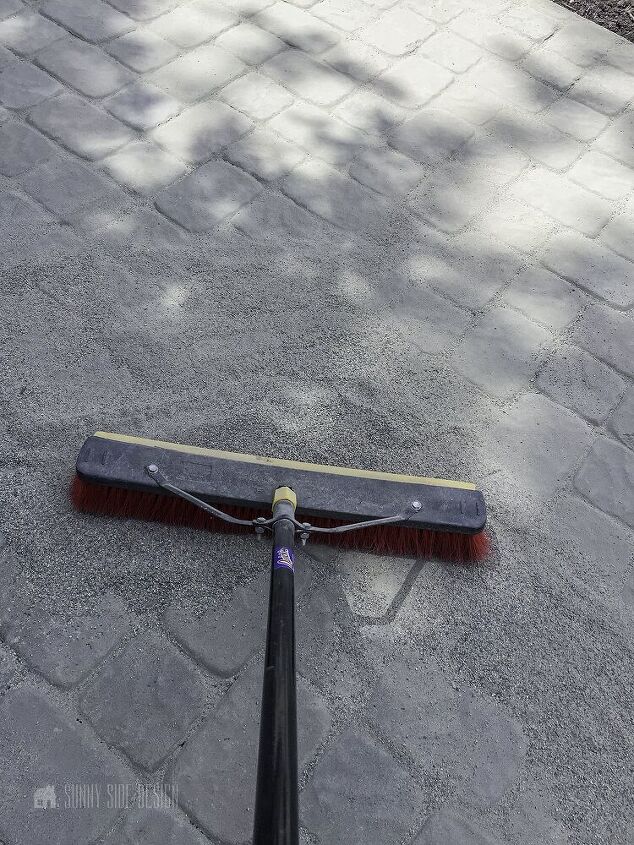
Using polymeric sand vs. a common sand mix is recommended. A common sand attracts ants, whereas a polymeric sand has fillers in it that act as a cement and help lock the pavers into place.
Simply use a push broom to fill all of the crevices of the paver patio with the polymeric sand. After any excess sand is removed use a hose to lightly mist the paver patio. This will set the pavers into place.
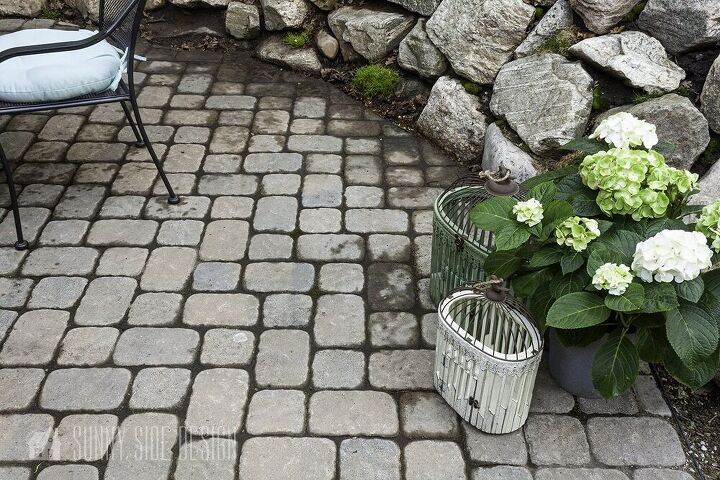
Now, after all that work it’s time to sit back, relax and feel proud of a job well done, not to mention feeling elated by saving thousands of dollars installing it yourself!
This truly is additional living space for your home! Can you imagine your family utilizing this extra space?

Thanks for spending some time with us today. Do you feel more confident installing your own paver patio? Will this project get checked off your list this summer?
BE SURE TO SEE OUR ORIGINAL POST HERE FOR EVEN MORE STEP BY STEP PICTURES, DIRECTIONS AND TIPS!
And as always here at Sunny Side DesignWE HOPE TO BRING YOUR HOME TO THE SUNNY SIDE OF THE STREET!
Resources for this project:
See all materials


Comments
Join the conversation
-
Thank you for the tutorial I have a large patio area that I need to do and the cost of the cement is 5000 but this project doing it myself will will definitely save me a large sum of money very labor intensive but thank you for all the advice looks fantastic
-
A beautiful patio. Congrats


Frequently asked questions
Have a question about this project?
Is this tile heavy? My husband and I have long been planning to do something like this in our homeland. But he cannot be lifted. Probably have to hire workers.
Once you removed the 1" PVC, how do you go about replacing the void with sand without stepping on what you just finished leveling ??
Can pavers be installed over an existing cement?