


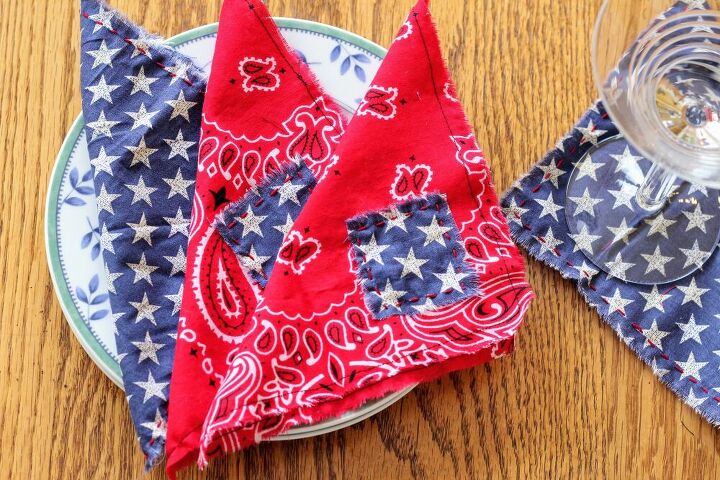
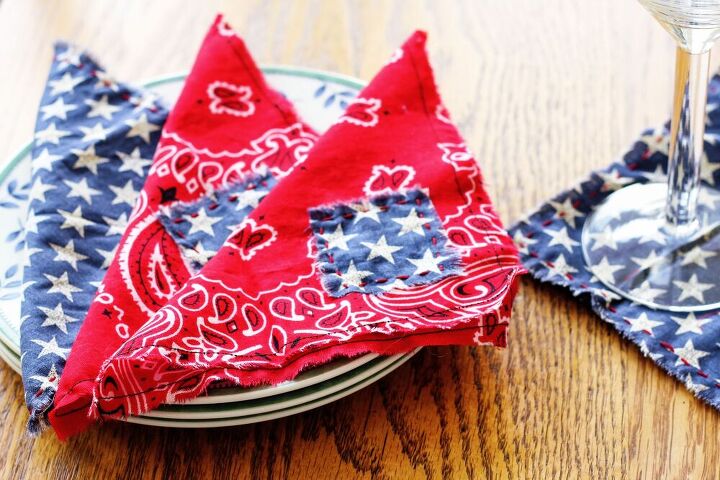
Rustic Torn-Edge Napkins

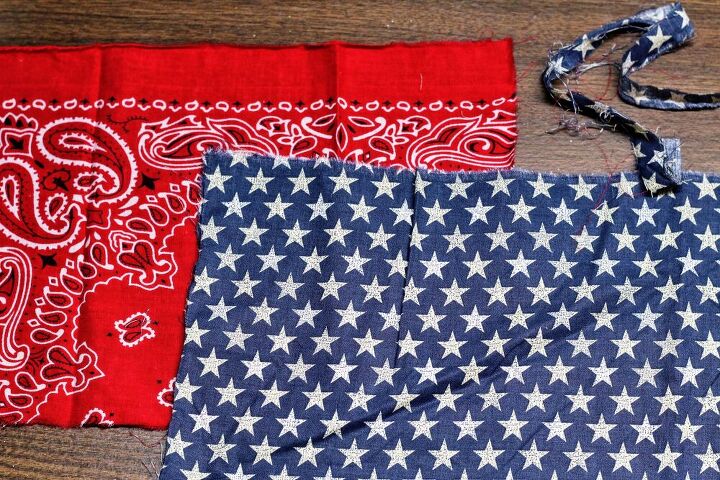
I had a couple of cute fabric scraps left over from other projects (one scrap was actually from a bandana). Recently I noticed that, when these two fabrics were combined, they had a lovely “old Americana” look. With the Fourth of July around the corner, I decided to do something fun with them.
So, with a few tears of the fabric and some basic running stitches (and only about an hour of my time), they became soft and informal cocktail napkins.
Here is how I did it.
Before we get started, I have to mention that these napkins only measure about 7 inches square. If you know your napkin etiquette, you know that this is not a standard size. It’s very small – even for a cocktail napkin. But I was working with what I had. So if you try this project, feel free to make your napkins the proper size.
I wanted a rustic look for these napkins – which meant frayed edges. Of course the easiest way to achieve this is to tear the fabric instead of cutting it.
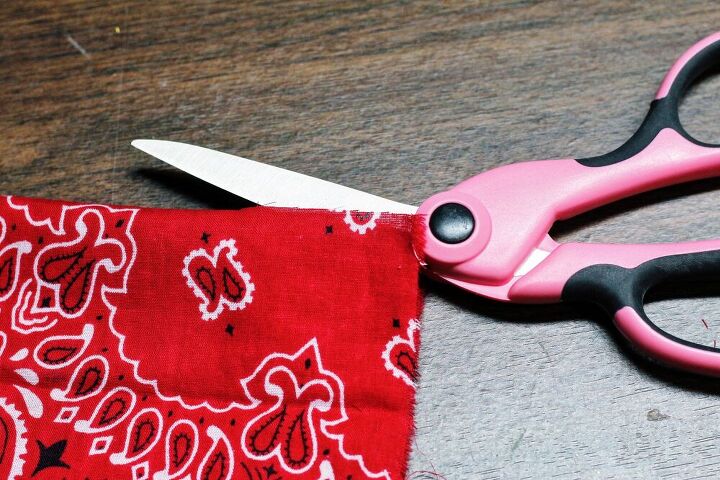
I started by measuring the length I wanted the napkin to be and making a 1-1/2 inch cut into the fabric at that point.
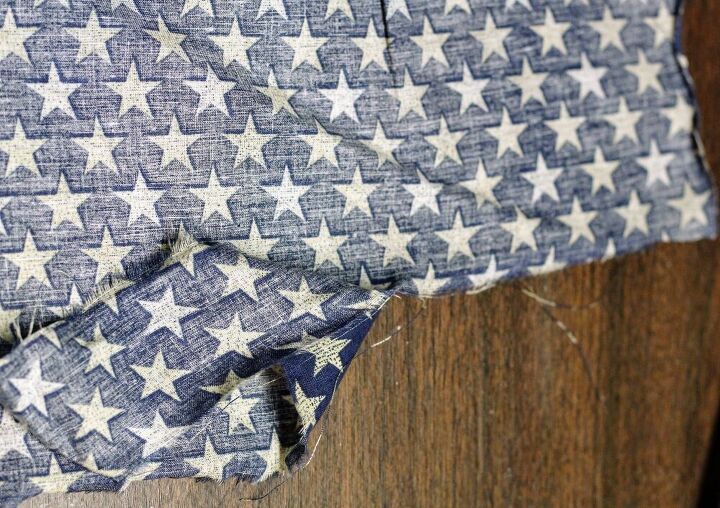
Then I simply tore the fabric where I had cut it. (Sorry the photo below is of the second fabric I used. But I used the same method for both fabrics.) I was halfway through tearing it when I took this photo. After I took the photo, I just kept tearing. I tore quickly and purposefully, end to end.
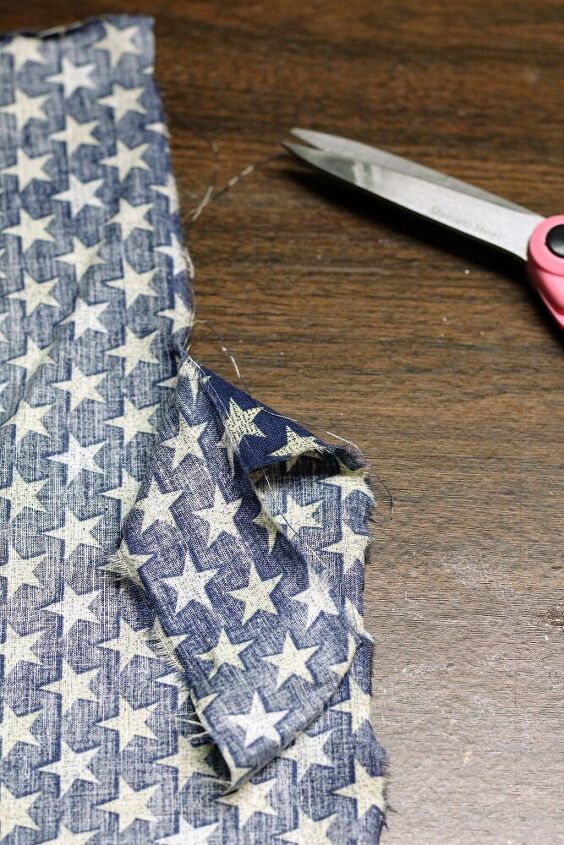
Then I measured the width I wanted the napkins to be and used the same cut-and-tear method. I trimmed away any fabric threads that had unraveled as a result of the tearing.
Not only did I have charming frayed edges now, but tearing the fabric made for nice straight lines – perhaps more so than if I’d cut them with scissors. And, unless something goes wrong, tearing fabric is so much faster than cutting.
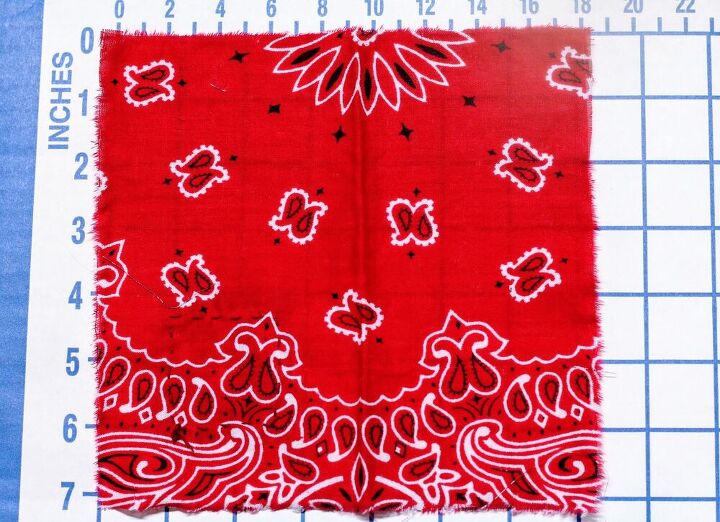
IMPORTANT NOTE: Here I must mention that not every fabric is conducive to tearing like this – especially along the horizontal grain line. This is why it’s important to use fabric that is soft enough to tear both horizontally and vertically. I laundered my fabrics before tearing to make them even softer.
Anyway, at this point I had a lovely little stack of torn-edge fabric squares. It was time for the fun to start.

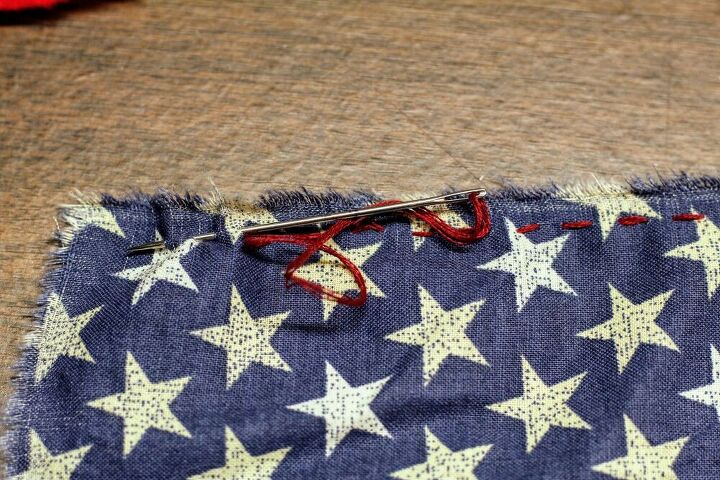
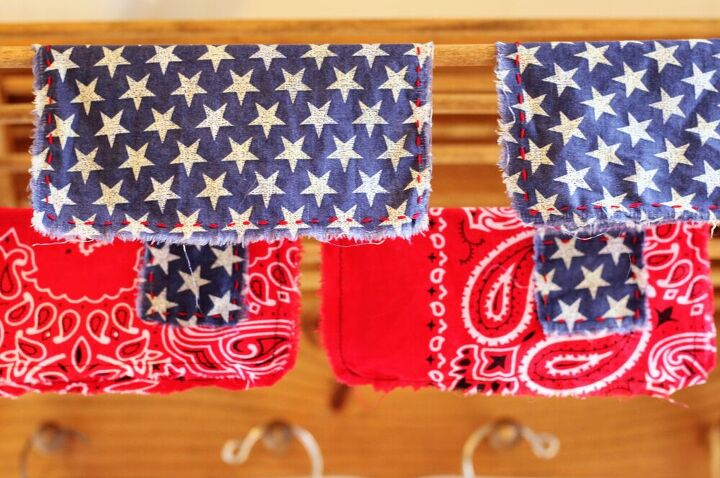
With the leftover bits of star fabric, I tore some two-inch squares. I used the fabric glue stick to temporarily adhere one of the little squares to each red bandana napkin.
Then I hand stitched the little square to the bandana napkin with simple running stitches using the embroidery floss and needle. Soon I had a cute little hand-sewn accent on those napkins.
But what about the frayed edges on my napkins? Cute as they were, would they start to unravel and cause problems? Probably. I would need to stitch or sew around all four edges of each napkin to stabilize them.
So why not make that stitching part of the charm?
For the star fabric napkins, I used the same hand-stitched method – running stitches using the embroidery floss and needle. I stitched along all four sides – about a quarter inch in from the edge.
In theory, this project could have been done entirely by hand. But, when I tried hand stitching on the red bandana napkins, I found that I didn’t have the right color of embroidery floss to make them look good. So, for those napkins, I did a simple machine stitch along each side – again about a quarter inch in.
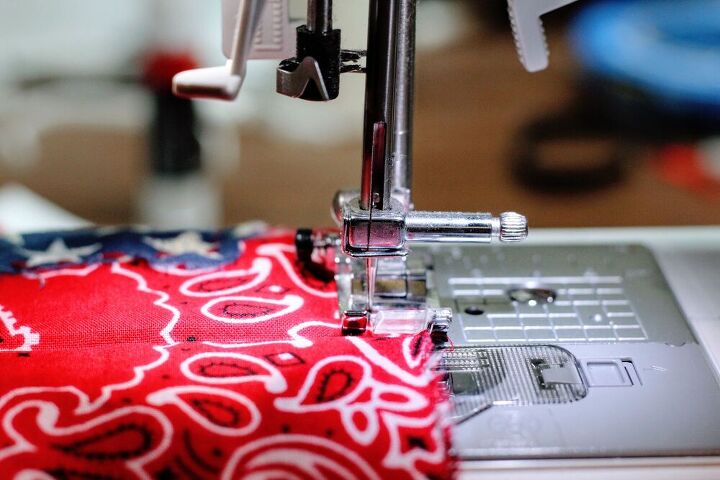
Because the fabric was soft, it was difficult to get the tension right on my machine. I just made sure I pulled the fabric tight while I ran it through.
Anyway, all done!
I doubt Betsy Ross would be very impressed with these, but I like to think of them as my humble nod to the beautiful work she did centuries ago.
How will they hold up? As a test, I ran them through the washing machine. But to be safe, I let them air dry instead of going through the dryer.
A few errant threads came from the torn edges but it wasn’t that bad. I will just trim them away.
I made four of these little napkins in about an hour. Your active time will vary depending on the size and number of your napkins - and how fancy you choose to get with the stitching! I'm estimating the cost at $20, but your actual cost will vary depending on what you already have on hand.
If you enjoyed this project, check out my companion post, Adventures With Visible Mending, for more fun and simple projects using embroidery floss and fabric scraps.
Resources for this project:
See all materials


Comments
Join the conversation
-
The frayed edges make it very cute.
-
Very festive, thanks for the share !


Frequently asked questions
Have a question about this project?