


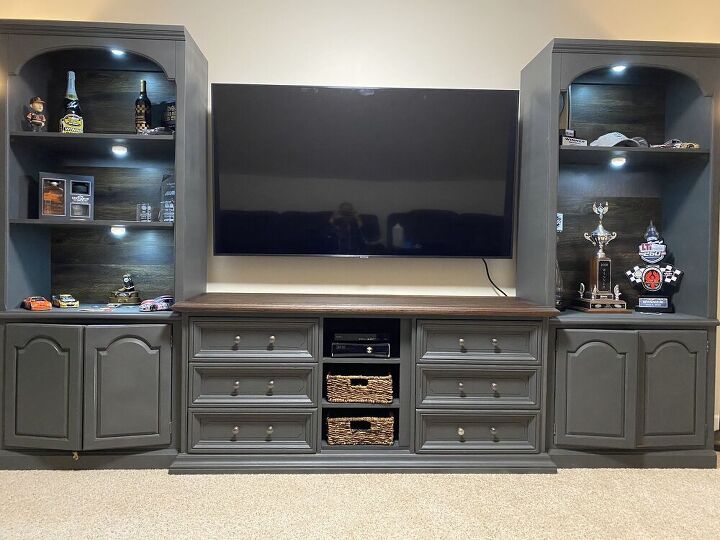
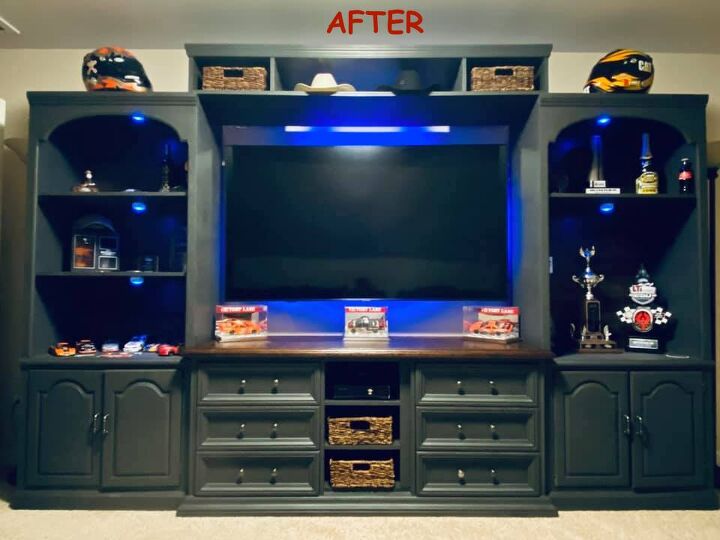
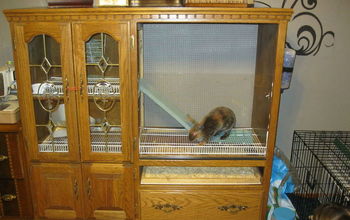
Entertainment Center From Repurposed Furniture

While this wasn't our first repurposing project, it did turn out to be my favorite! We transformed an old bookcase and dresser into a magnificent entertainment center for our movie/sports room!
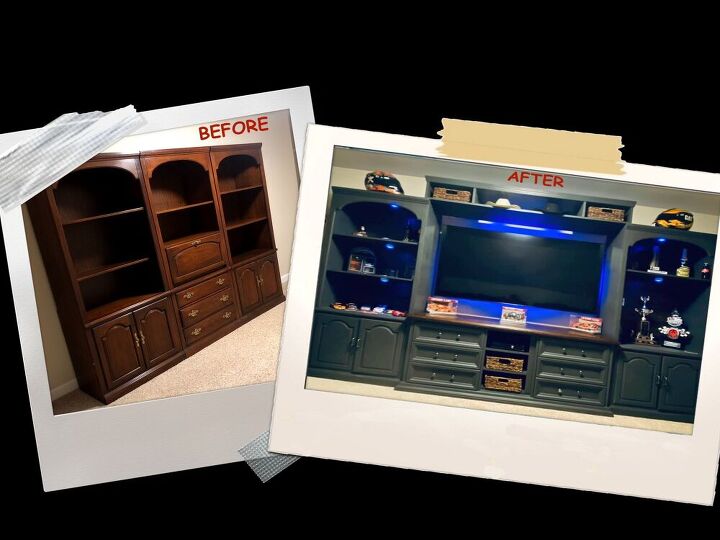
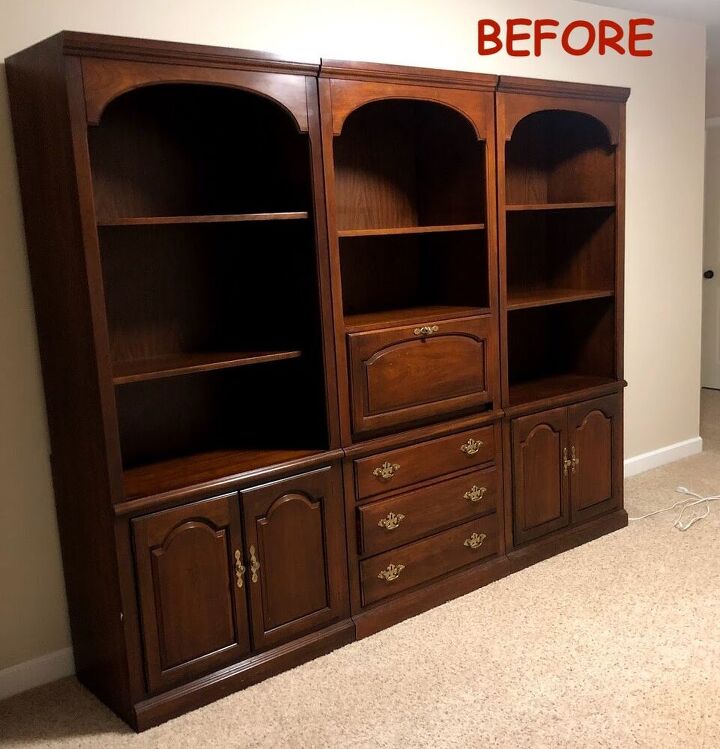
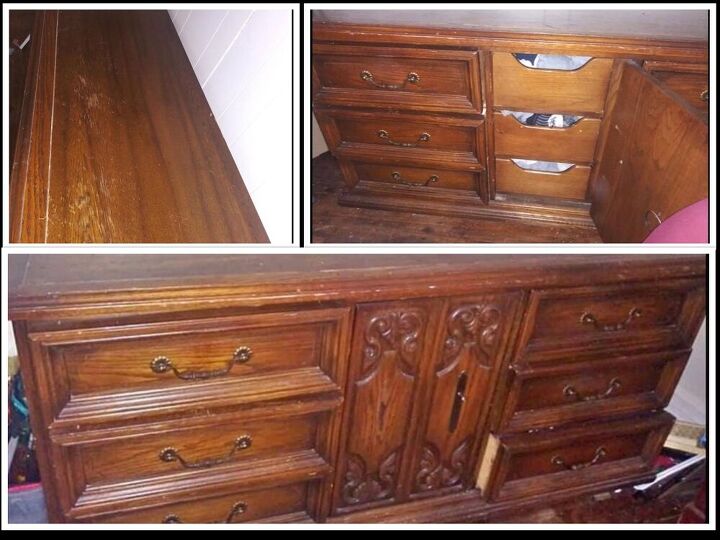
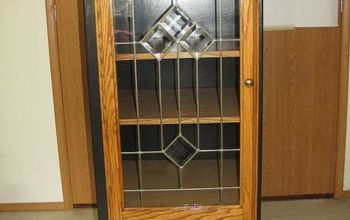
When we bought our home a few months ago, the original homeowners really didn't have a use for this piece...but in all honesty, I think they just didn't want the hassle of moving this tank made of solid wood!
I jumped on buying it when I realized that it was actually 3 pieces that could be separated, as I already had envisioned its transformation.
For around $150 (we bought a kitchen table in the deal too) we were the proud owners of this great Ethan Allen open style bookcase!
I had always admired an entertainment center on Pinterest that was built from two old bookcases and a dresser. It was a gorgeous antique white and would fit in perfectly with my rustic style. But then I realized our "movie" room would also be doubling as my boyfriends sports memorabilia/trophy room. Antique white and dainty hardware probably wasn't going to work.
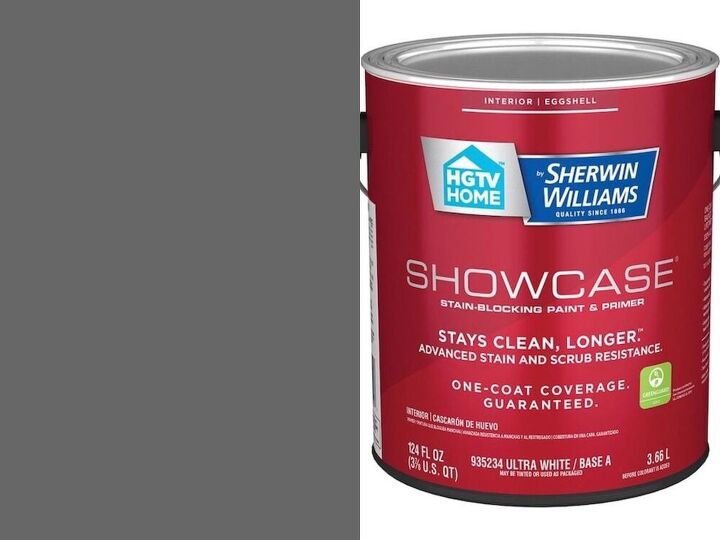
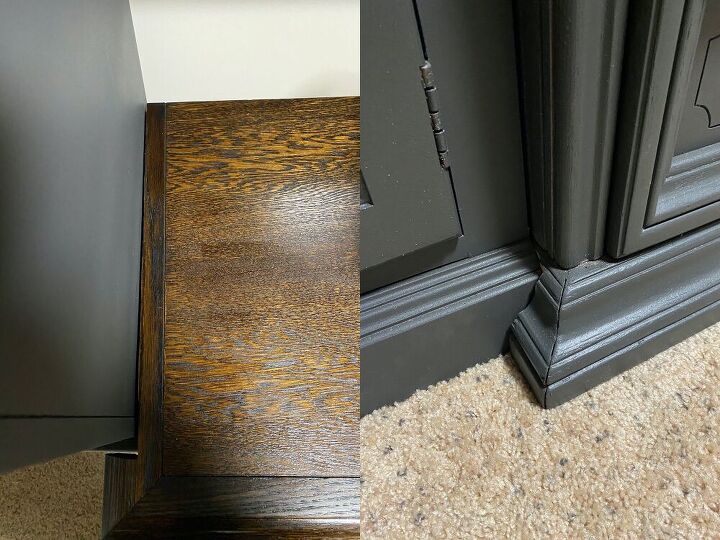
I ended up going with a dark gray called "Carbonized". It was from the HGTV Home line by Sherwin-Williams at Lowe's. Although I just bought it a few months ago, I see it is no longer available. Bummer!! It's an awesome color for a more masculine/classy project.
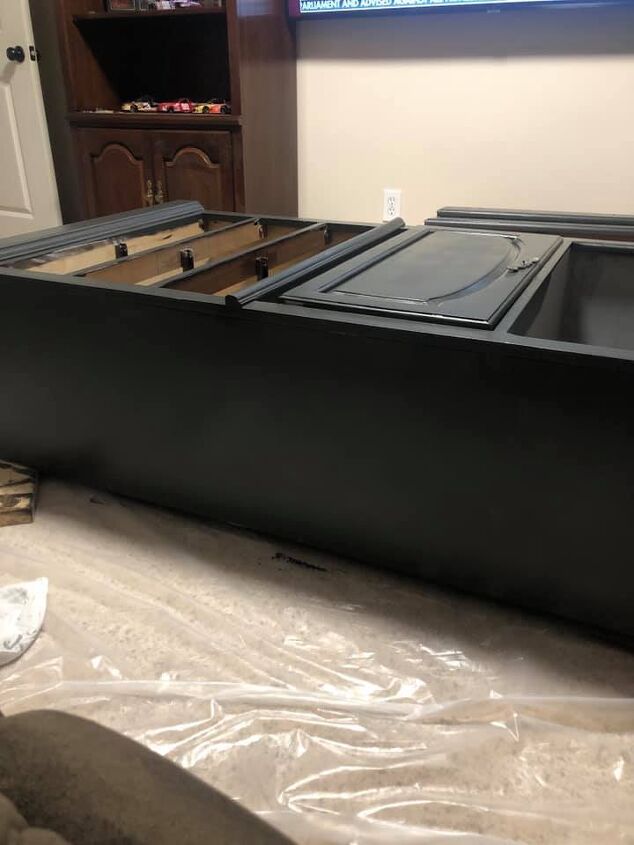
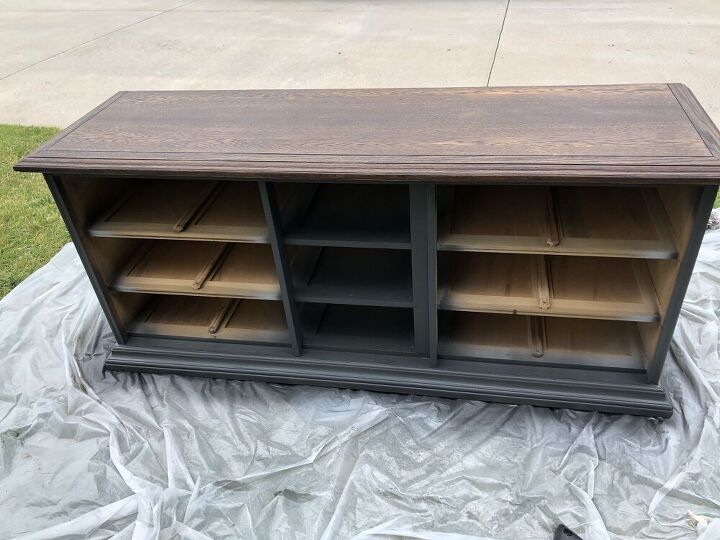
Like I've said, these pieces are tanks! To save our backs and some time, we decided to lay down plastic and sand/paint the pieces right there in the room instead of attempting to move them down a flight of stairs and outside.
I apologize that I did not take any photos of the sanding or priming! Bad me.
The first step was to use my orbital sander to rough up the wood just enough to get the primer to stick to it. We are talking about 10-15 minutes tops here folks! Let the primer do the work.
I used Bulls Eye 2 Multi-Purpose Gray primer from Rust-Oleum. I mainly picked this product as I knew it would work well under the darker topcoat and it was excellent for adhesion to glossy surfaces. The less sanding I need to do the better!
I used a mini-roller and a multi-purpose brush to apply the primer, waited the one-hour dry time and then went to town on the paint. I used the same roller and brush for the topcoat.
I don't know what happened. While most blogs insisted that rolling was the way to go, I thought the piece looked horrible when finished. I certainly would never claim to be a professional painter, or even an average painter for that matter, but this looked terrible. It looked like a child had finger painted it.
I'm not a "neat" painter either. While the plastic we laid down and the movie room carpet held up, it was time to go to plan B and we were going to have to move these suckers for that.
We happen to have an attic room right off the movie room that is unfinished. We dragged the first piece into the now "painting room" for a second go around.
Back to sanding again...this time to remove the primer and paint.
And then I invested in a paint sprayer.
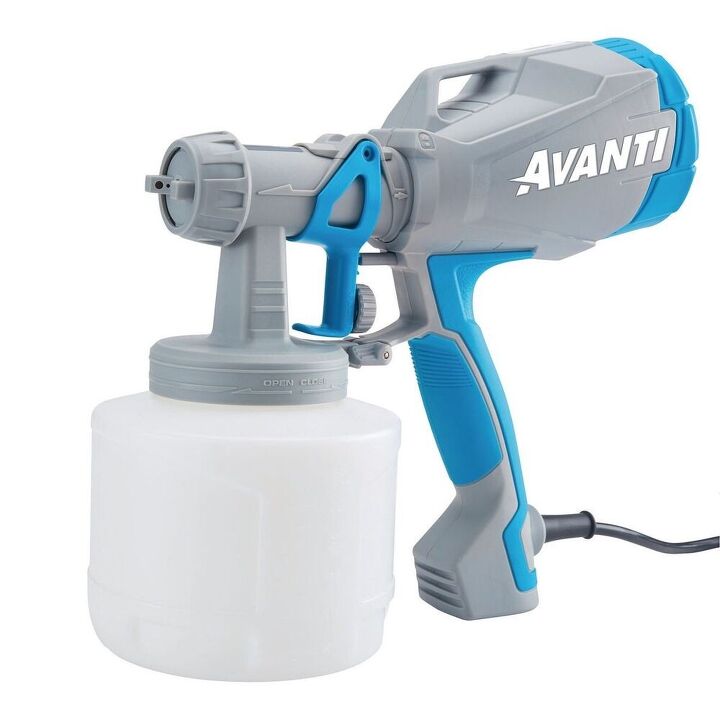
We ended up buying the Avanti Handheld HVLP Paint & Stain sprayer from Harbor Freight. It was on-sale too, bonus! For $70 on-sale, I was more than happy to invest in one. It will come in handy when we need to stain the deck too!
This thing was a LIFESAVER! I cannot stress enough how much time this little baby saved. With a great space to work (where some paint over-spray wouldn't hurt anything), this thing was great! I re-primed the first piece and put on two coats of paint using the sprayer. The piece looked fantastic! It went from looking shiny with brush/roller lines all over it to looking like a nice smooth matte coat.
Onto piece number 2 and 3. While we were only planning on using the end pieces of the original bookcase in our new entertainment center, I had wanted to prepare all three just in case we needed it.
In then meantime, I was scouring FaceBook Marketplace and Craiglist for the perfect dresser. We had already purchased the tv, so I knew what length dresser I would need. And then BINGO, this lovely (all wood) piece showed up for $75.
First step for the dresser was to remove all the hardware, drawers and the doors on the front.
I again used the orbital sander to sand the piece, but this time I sanded it down to bare wood on the top of the dresser. I did this so that I could stain the top instead of painting it. The rest of the dresser was sanded per the usual - just enough to rough it up for the paint to adhere!
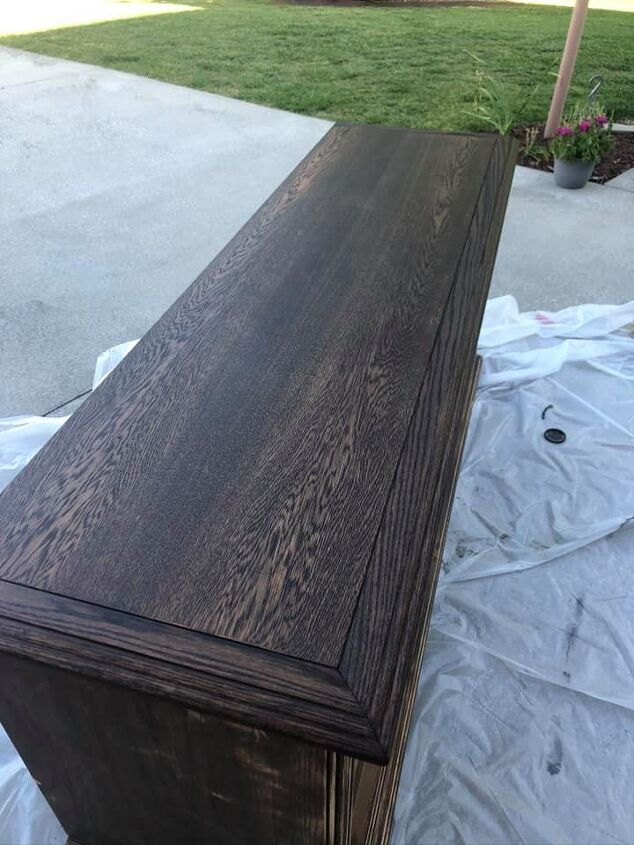
Once all the sanding was complete, I used MinWax Wood Finish Stain in Dark Walnut to stain 2 coats on the top.
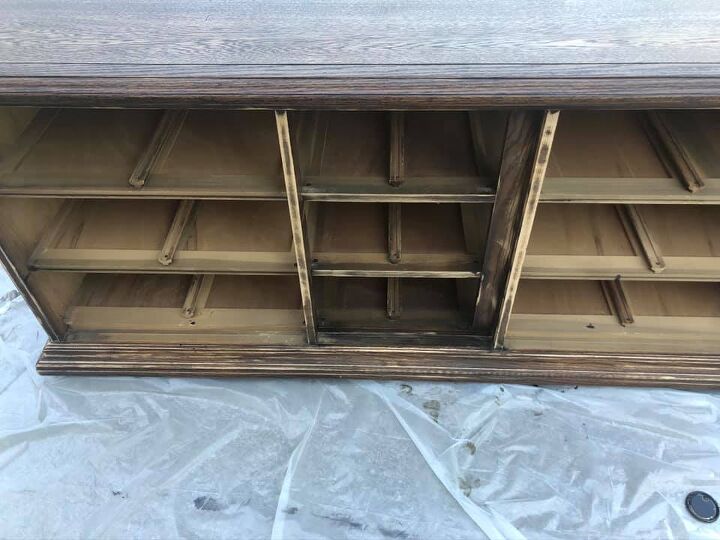
Next, I carefully covered the newly stained top with some plastic and painters tape so that I could spray the rest with primer and the top coat. Again, the Avanti paint sprayer was awesome and did a great job in 1/4 of the time.
I was loving the way this looked with the dark wood on the top and the gray. What a great contrast! I was really starting to get excited about seeing the end result of this project.
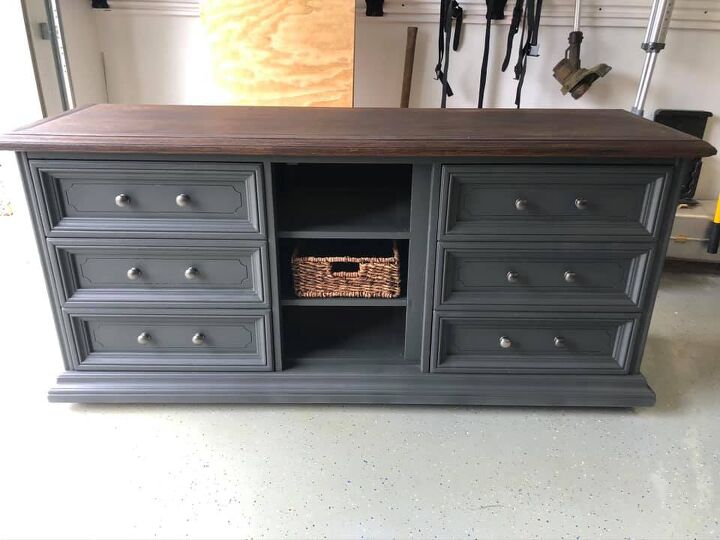
Once all the drawers were primed and painted, it was time for some new hardware. I went with these black nickel knobs that had a great industrial feel to them. They are made by Hickory Hardware - product number P3052-BNV 1 1/4 inch.
Even though it wasn't complete, I threw a basket in it just to see how it looked! The excitement was killing me by this point...
Did I tell you yet that I was LOVING it??
Again, I don't have any pictures of this part of the process. I wish I would have thought more about doing a post on this project before I had started.
For the three pieces to fit together seamlessly and look as though it were all one unit, we needed to cut the top and bottom of the dresser and notch out where the bookcases would fit into it.
This was probably by far the hardest part of this project. I'm sure my boyfriend would rather not talk about it again. Here it is at 11 pm on a Sunday night and he's up in our "painting" now slash "construction" room trying to use a jig saw and circular saw to cut out the notches. After not having the right blades for the job, he ended up using a hand saw to finish it.
Again, hardest part of the job. But to his defense, I wanted this DONE. Had we just waited until morning, he could have went out and bought the right blade for the job.
The anticipation....killing....me...
Here is where I should stop and explain that I really thought this would be a little weekend project. Let's just say this became a multi-weekend project! I was ready to see it all together as one.
After a late night of cutting and maybe some swearing, the dresser was ready for me to coat the top with polyurethane and let it dry for 24 hours.
Ta-Da!!! I couldn't even wait to put his trophies on it to see what it looked like. I'm so weird.
It's almost there...
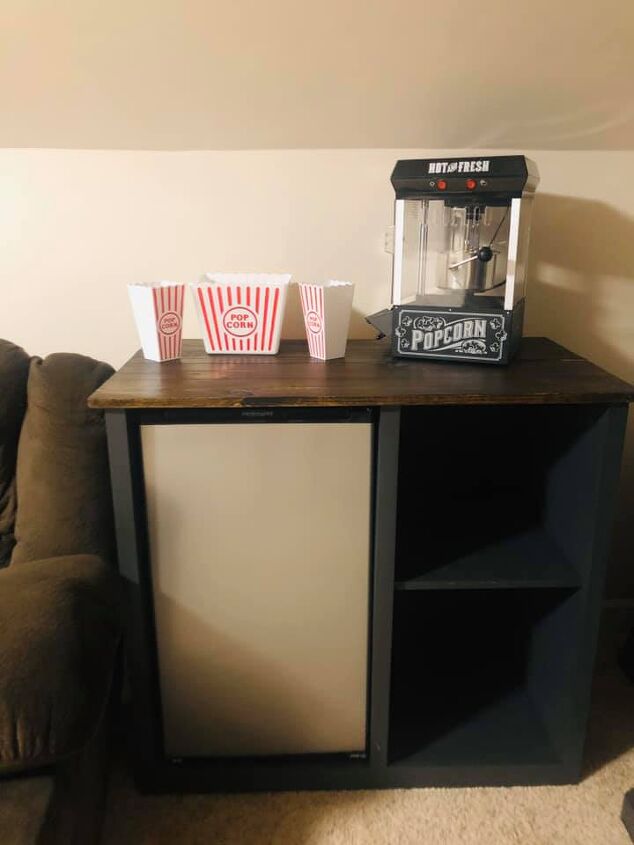
Next step was to finish off the back of the bookcases. The original Pinterest post that I had used as inspiration had used white bead board in the back of the cases. I really wanted something that would go with the wood top on the dresser. While working on this project, we also built a popcorn stand for the room. Since it had the same dark walnut top with planks of wood, it only made sense to have some sort of wood planking for the bookcases.
Since I'm all about cheap and easy solutions, I wasn't about to use real wood. Enter....stick on vinyl flooring to the rescue.

I bought these gorgeous pieces at Lowe's for $.99/piece! The product is Style Selections 4-in x 36 inch Old World Oak Vinyl Plank Flooring. While we were hoping that we could just cut them to fit and then stick them right up on the back of the bookcases, that didn't go as planned. Cutting them was a breeze - just measure your length and cut along a solid edge with a utility knife. The problem was that we assumed (with as sticky as they were) that they would stick to an upright surface as good as they would stick to a floor. Negative.
They looked great when we left the room for the night. By morning, they had all fell. The funny part was that some fell on top of each of and their backs stuck together. You couldn't pull them back apart from each other but heck if they would stick to my painted bookcases!
My boyfriend came to the rescue again and brought home some Gorilla Heavy Duty Construction Adhesive. I was skeptical after seeing them all fall down the first night, but he was right again. "Those things are not going anywhere once I use this".
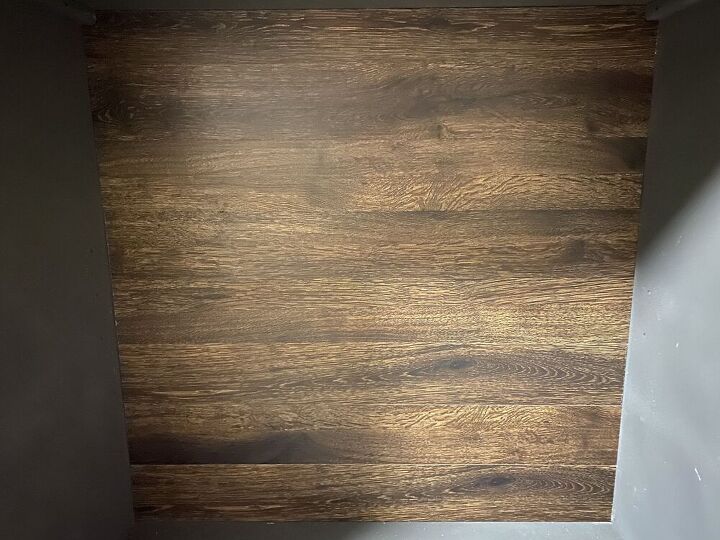
I was again very happy with the final product! It added exactly the little bit of contrast I was looking for.
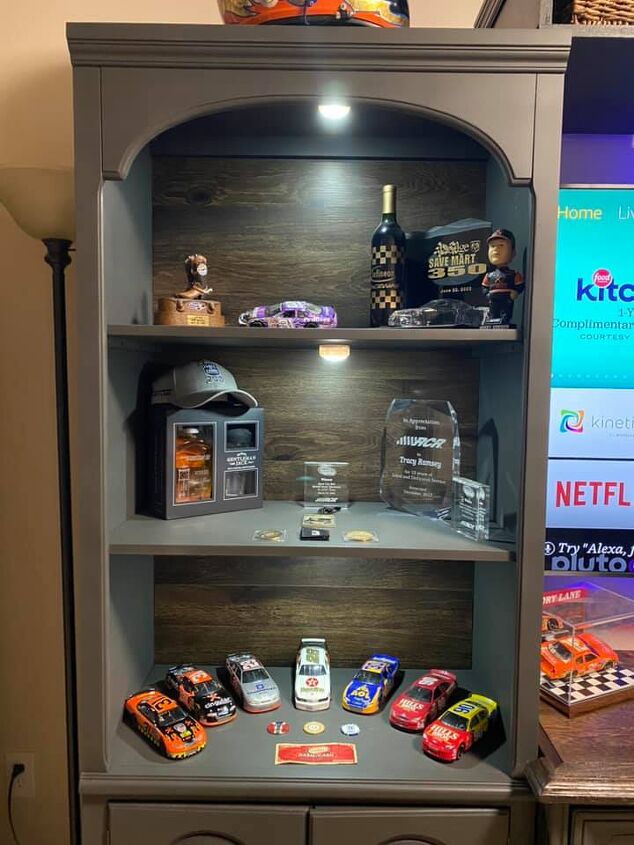
Since we knew trophies were going to be displayed on the shelves, there would need to be light.
Again, I'm cheap.. so I didn't want to spend the time or money on trying to be an electrician and learn how to add lights. Puck battery operated lights it is!
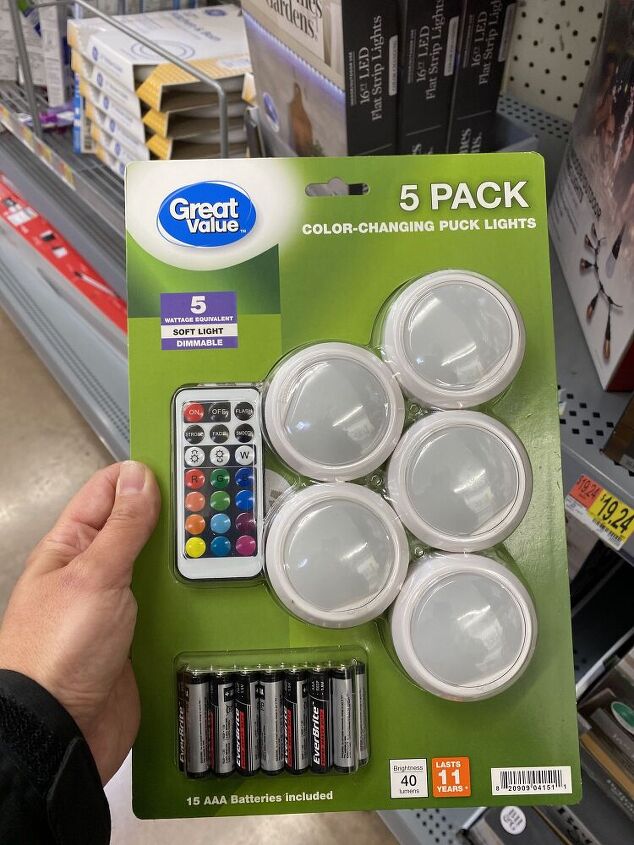
These are color changing, only $15.87 for a 5 pack at Walmart, and they come with a remote! We hung a few underneath the shelving and we had lights!
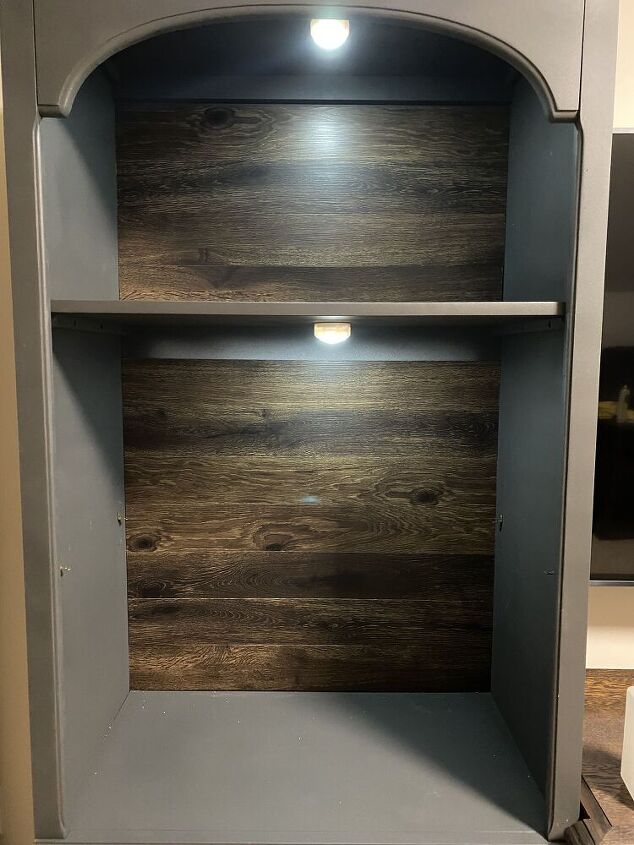
Don't pay attention to the missing flooring in the middle. We had not yet cut the last piece and well, if you didn't know it by now, I'm a little antsy and wanted to see how it would look with the lights!
Speaking of antsy...."let's put it all together with the trophies (even with the missing backing) just to see how it looks!"
It's ALMOST done. Yippy!
You can see I added another basket to the mix along with keeping a shelf open for our gaming system. My boyfriend drilled a hole in the back of the top shelf to easily sting the cables through as well.
Next step, hardware for the doors. We had ordered these from Lowe's in the middle of the COVID-19 pandemic, so they took much longer than anticipated to arrive.
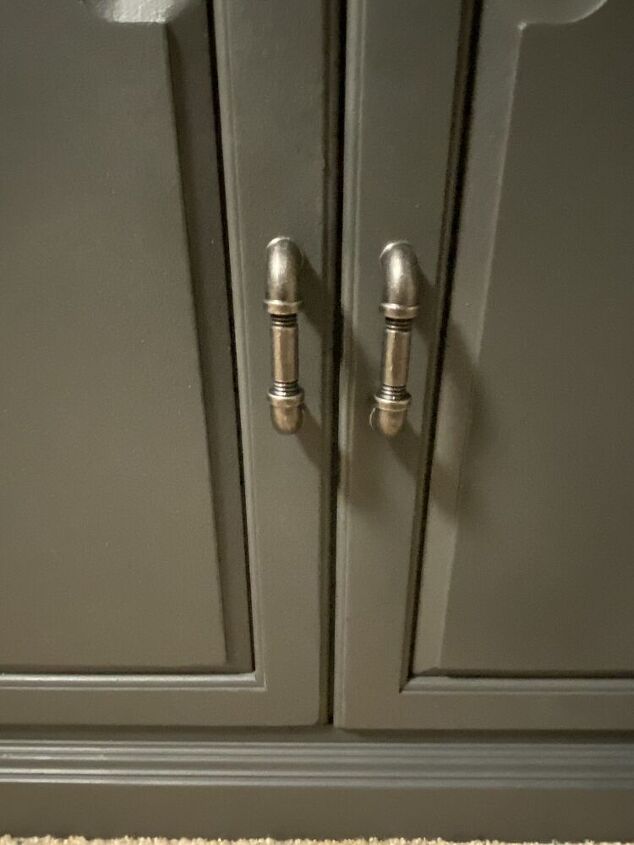
We again went with an industrial type hardware. We had originally discussed building these ourselves out of plumbing piping and fittings but it was actually cheaper to just buy them. They are also black nickel to match the knobs on the dresser. The product from Lowe's is Pipeline 3-in Center to Center Black Nickel Vibed Rectangular Bar Cabinet Door Pulls.
OMG! It's almost done.
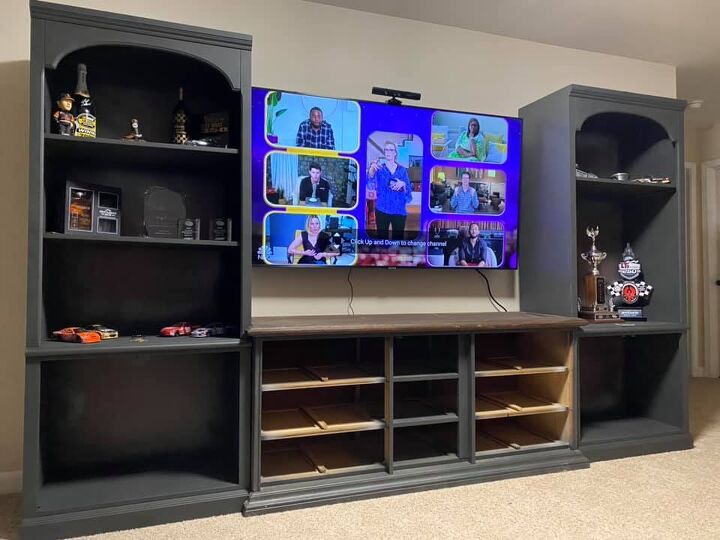
The last piece of the project was to build the "bridge" across the top to connect the pieces together into one unit. We debated about adding this, but once we seen the final piece without it, we knew it was something we had to finish.
Again, sorry no pictures of this process. I am kicking myself.
My boyfriend was in charge of the building - I only allow myself to use the sander!
We started by heading to Lowe's to buy some MDF. I love that Lowe's will also cut all the pieces for you! With one piece of 3/4 x 4 x 8 MDF that cost a mere $38, we were able to have all our measurements cut.
I don't have the exact measurements, and they would vary per a project based on the size of your dresser and bookcases.
We had two long pieces cut for the top and bottom of the "box". We also then had 5 smaller pieces cut for the two sides and the dividers. Again, they would be cut to your length and width of the size bridge you need for your furniture.
Next we found some molding from Lowe's that we could use to finish off the top edge of our box.
My boyfriend drilled all the pieces together and nailed the molding on. I went to work with spraying 2 coats of paint on it and that's it!
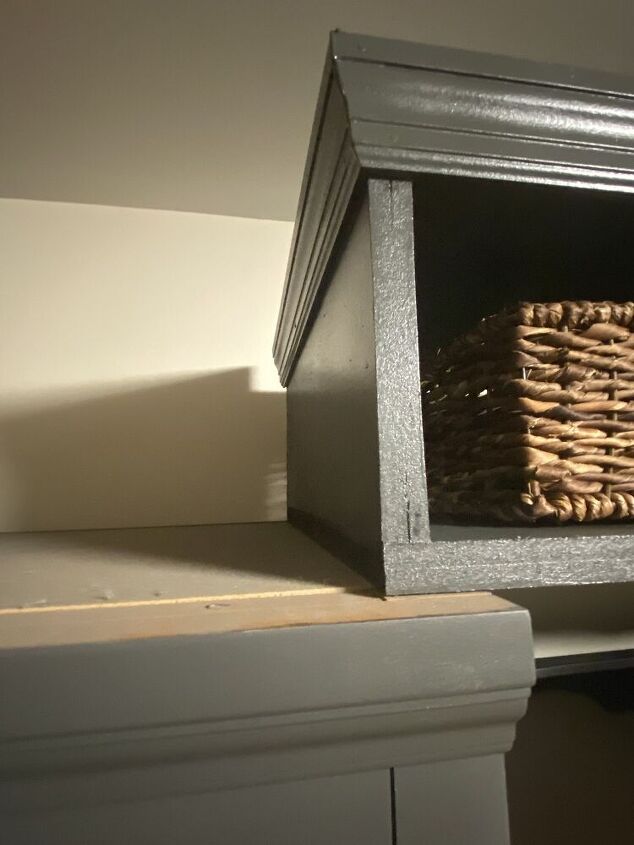
We built the box just long enough so it would overlap the top of our bookcases and sit on it nicely without having to permanently attach all the pieces.
We also decided on only 2 dividers instead of 3. But the good news is they slide in and out so we can always switch it up if we want to!
A few more baskets and the bridge is complete!
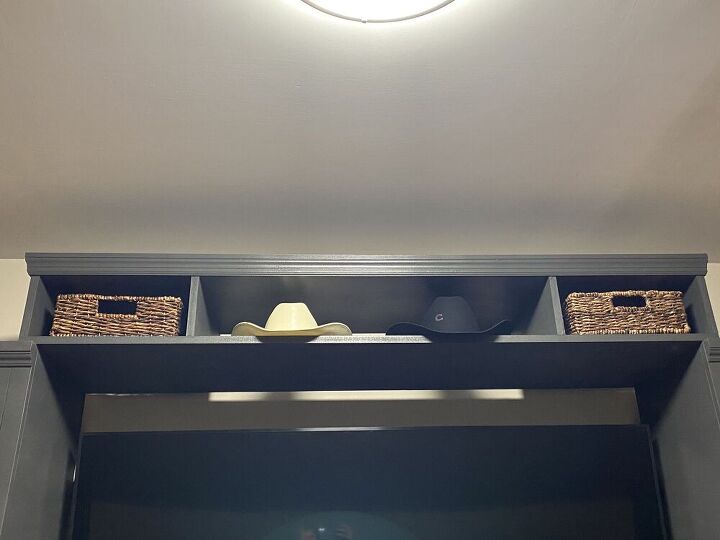
Lights, tv and action??
It is finally fully completed!!!

We couldn't be happier with the final product!
We added some color changing LED tape lighting to the back of the television for that final touch.
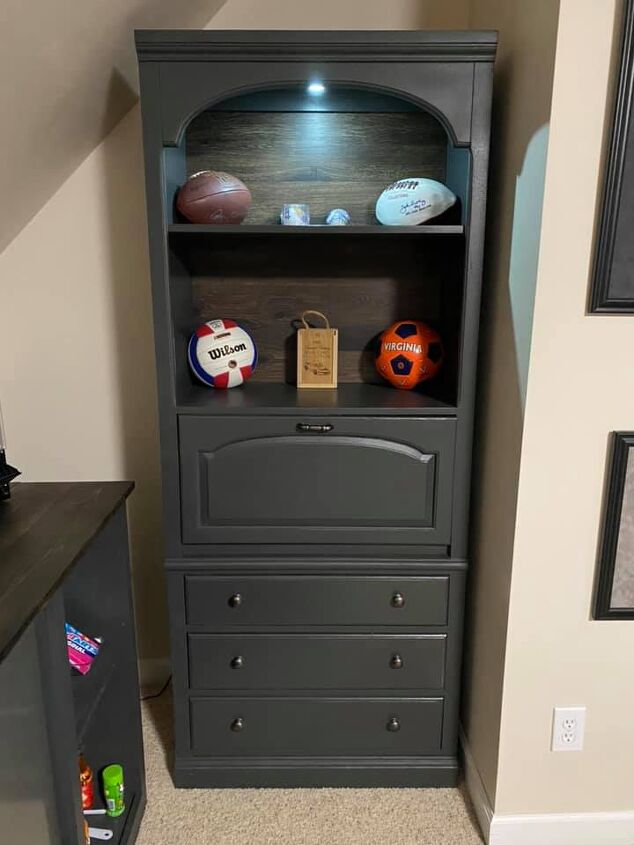
Remember, I also had a third piece of the original bookcase. I ended up having a great spot for it in the corner of the room. And since we are alway hoping for more trophies, we might need the extra space!
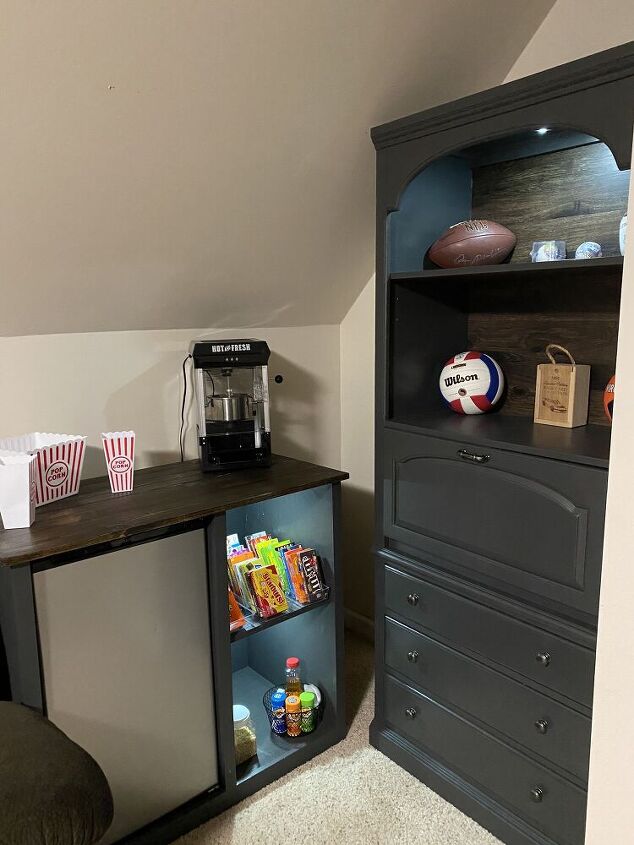
We added the same puck lights to this separate bookcase and the popcorn stand to tie the entire room together. With them all being on a remote it makes it so easy to switch up the color of the room each night!
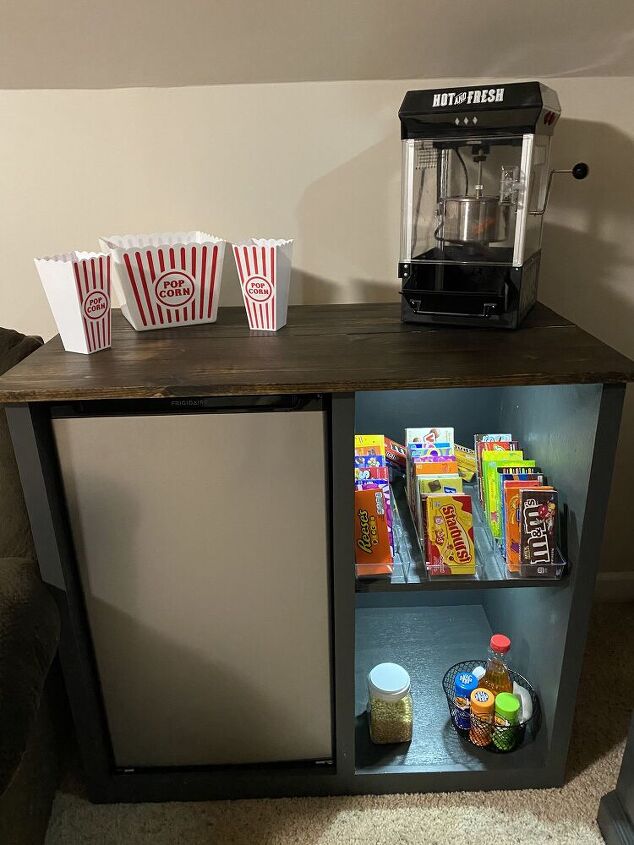
And what's an entertainment center and movie room without some candy!
I hope ya'll enjoyed this project as much as I did! While it wasn't the weekend project I had initially envisioned, it also really wasn't too difficult! The only true "build" that we completed was on the bridge and the completely optional popcorn stand! I would have included the steps for the popcorn stand build but I literally have no pictures of it. As with most everything, the inspiration for that came from Pinterest as well.
Happy re-purposing everyone!


Frequently asked questions
Have a question about this project?