


Vintage Vanity Makeover

This vanity was too good to pass up. It had been heavily used, judging by the scratches, dings and such but I knew it deserved a great new look and I would have a fun time making it over.
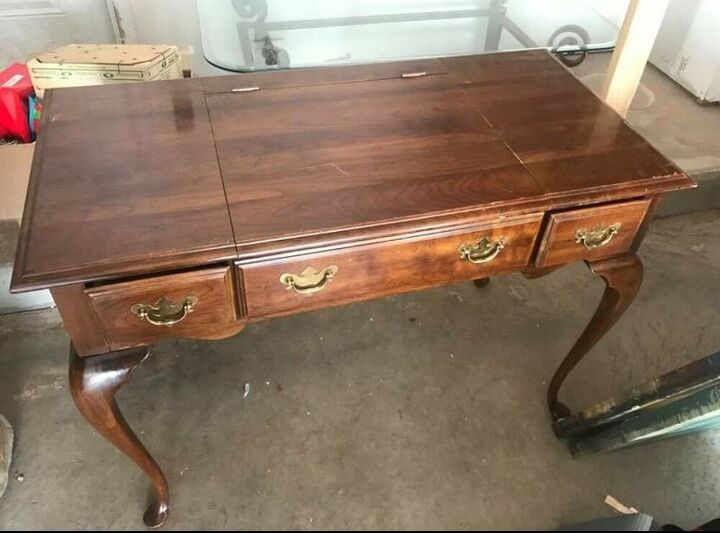
The before is always a bit sad. Scratches, dings and dirt. Oh the dirt. Krud Kutter to the rescue, we rinsed after and what a difference. Next step was sanding to get rid of those scratches. The dings would be next.
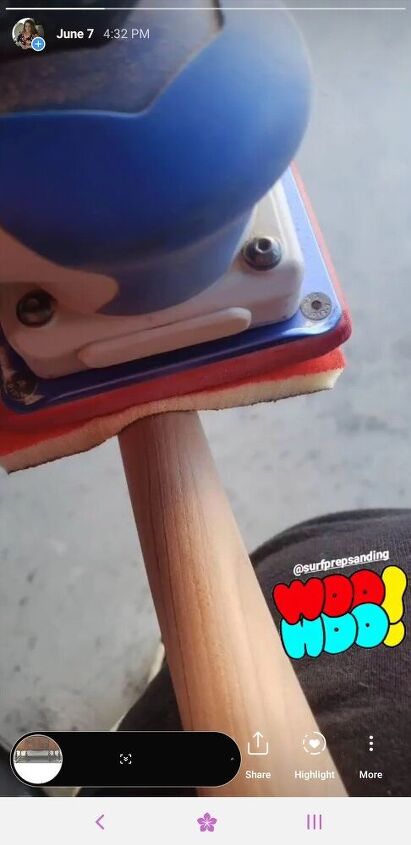
A great tool that has saved me many times is my Surfprep sander. It allows me to sand round and curvy pieces without messing up the profile. This is exactly what we did with these beautiful queen anne legs. The flexible pads made sanding quick and easy. We sanded down to the wood, then we removed the dust with a tack cloth.
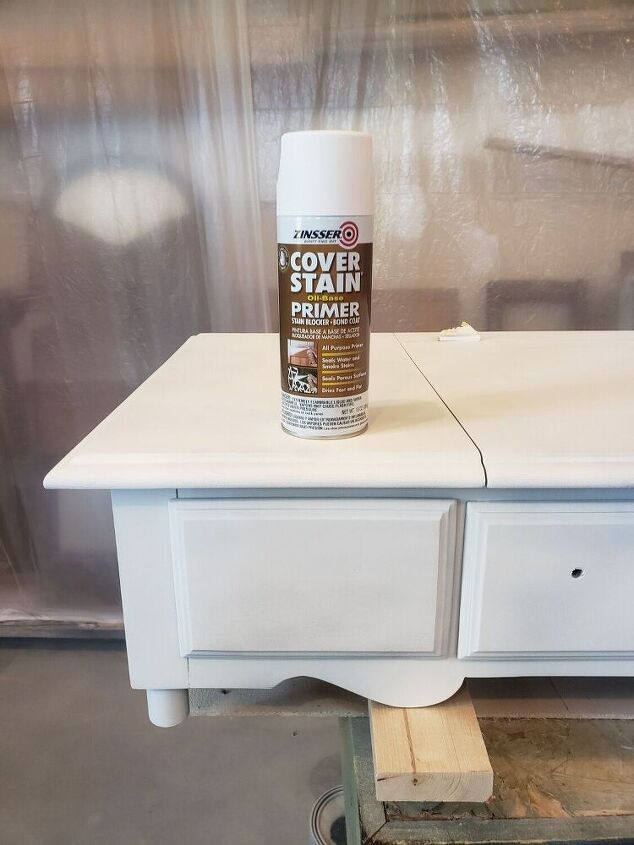
Next we filled the side drawer hardware holes since we were going from two hole pull to a one hole knob. We used Bondo, since it dries so quickly and sands very smoothly. Make sure to use the Bondo outside and wear a respirator. It has a very strong smell! After cleaning, sanding and filling it was time for primer. Since we were going for a light color over and we had just sanded down to wood, we used an oil based primer to lessen the chances of tannen bleed through. Two coats and sanding between and it was time to paint!
I seriously do not know what I would do without my sprayer. It allows me to complete pieces more efficiently and with such a smooth factory like finish that clients love. Doing this as a small business means there could be multiple pieces undergoing transformations at a time and using a sprayer really helps cut that time down. So we sprayed three coats of this gorgeous happy yellow called Luminous by Country Chic Paint. We always like to sand in between each one lightly and then remove the dust. After it was all dry, we sealed the body with their Tough Coat, and used a flat top coat for the legs so they kept their natural look.

Next it was time to dress up the inside. I used decoupage paper from redesign with prima called dark romance, mod podge, and a chip brush. Laying down the mod podge first, then the paper, smoothing it out and going over it again with the mod podge allowed the paper to stick like a second skin. Once it was dry we went back over it again with mod podge just for good measure. Next, we used Kwikwood, an epoxy wood filler and our mould tray to make some roses. We first sprayed pam cooking spray in the mold, then mixed together the quick wood and pressed it in the mold, then quickly flipped it over to remove. We made small roses and larger ones to decorate the rope trim. The rope trim is a really cool product from Woodubend that you heat with a heat gun to make the trim bendable and flexible. Once we were ready, we used wood glue to adhere the trim and roses. When everything was dry, we used copper gilding wax with an artist brush to paint them.
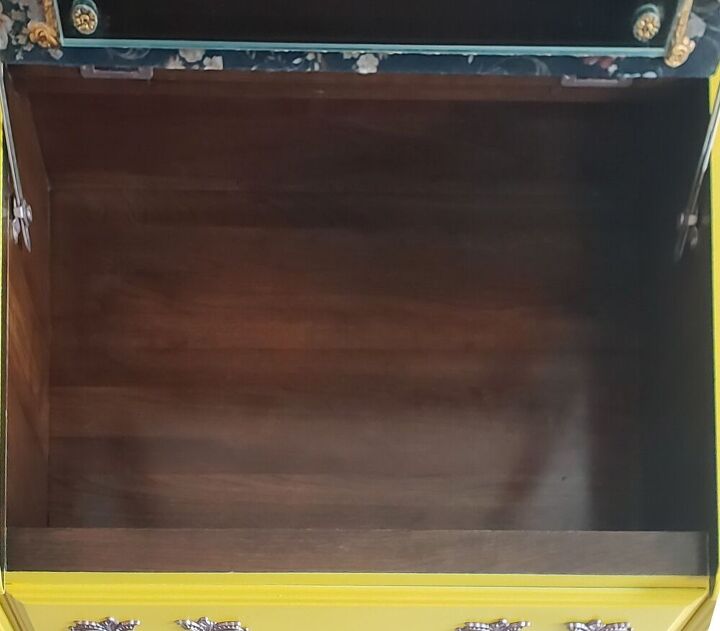
The interior drawer was in great shape, just. few minor scratches so Howards restore a finish in dark walnut was perfect. We applied it with 0000 steel wool, wiping off the excess with a shop towel. since that was dry, we used Feed N Wax to seal.
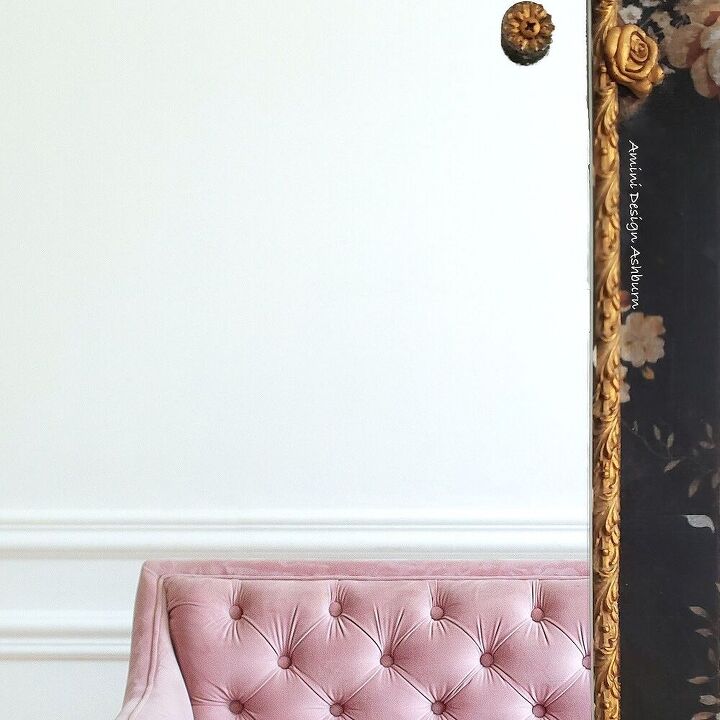
That copper guilding wax from Pebeo with a small artist brush really dressed up the details perfectly.

To get this beautiful color, we first cleaned and primed the hardware, then used Rose gold spray by Rustoleum followed by their clear 2x topcoat spray.
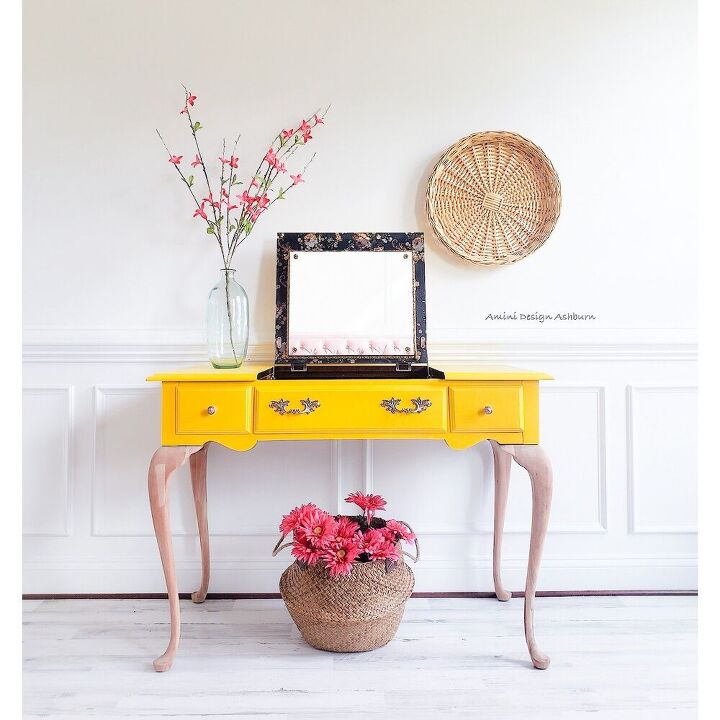
That bold yellow is sure to bring some happiness to the room don't you think?
Resources for this project:
See all materials


Comments
Join the conversation
-
I LOVE what you did to the inside and the yellow color! Personally, I would have liked the legs to be black, to tie in with the fabric around the mirror, but to each his own!
-
To each his own.


Frequently asked questions
Have a question about this project?