


How To Install Floorpops

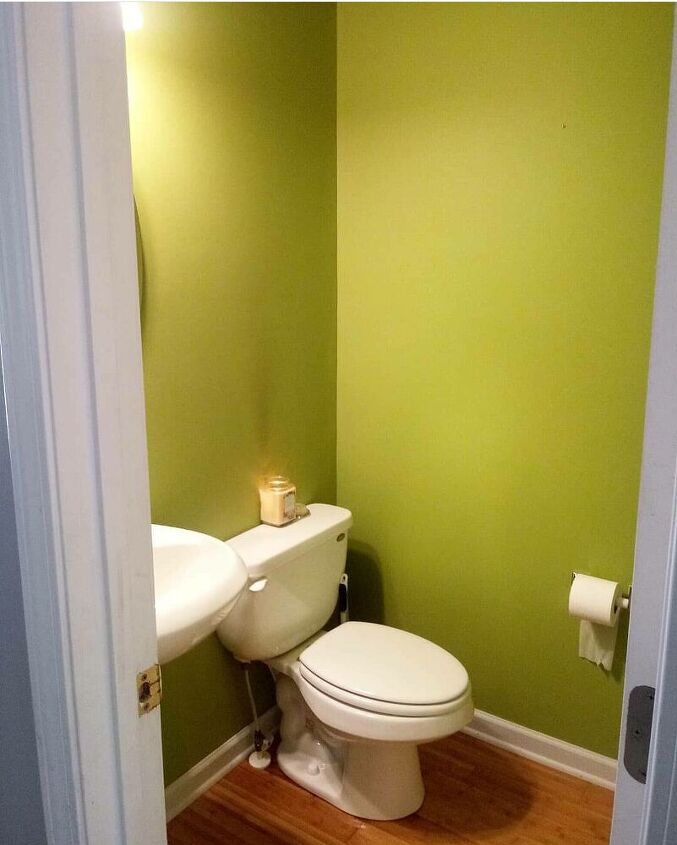
When we purchased our house in 2018 I knew the half bath needed a makeover, but I also knew I didn't want to spend a ton of money on it. The floors were bamboo and did not hold up well to moisture, which is kind of important in a bathroom, especially one in a house full of boys. I was not willing to hire someone to tile such a small space, but I also wasn't ready to try tiling myself. I scoured the internet for options and discovered Floorpops, peel & stick vinyl tile.
The most important thing to do before installing Floorpops is letting them acclimate. This will prevent any deformity after install. I allowed my tiles to acclimate for about 48 hours. In that time I was able to remove the pedestal sink I planned on replacing, paint the walls, and prep the floors for install. It is important there is no debris or moisture on the floor, otherwise the tiles will not adhere properly. I vacuumed thoroughly and used a diluted vinegar solution to clean the floors.
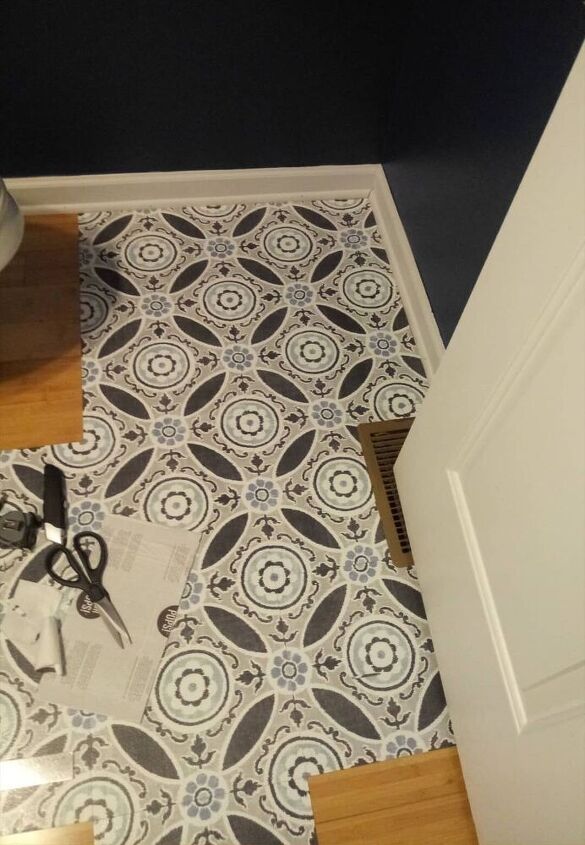
Floorpops recommends starting in the middle and that's exactly what I did. Since the underlying floor was wood lining the tiles up wasn't an issue. To adhere a tile you simply peel of the backing and use a tile roller to press it into place. You'll want to rotate your tile to line up the pattern the best you can. While doing this you may realize some tiles just don't line up properly. This is why it's important to buy more than you need. The first few tiles were the easiest because there were no cuts involved. These tiles are also very forgiving and you're able to move them slightly if you've made a mistake.
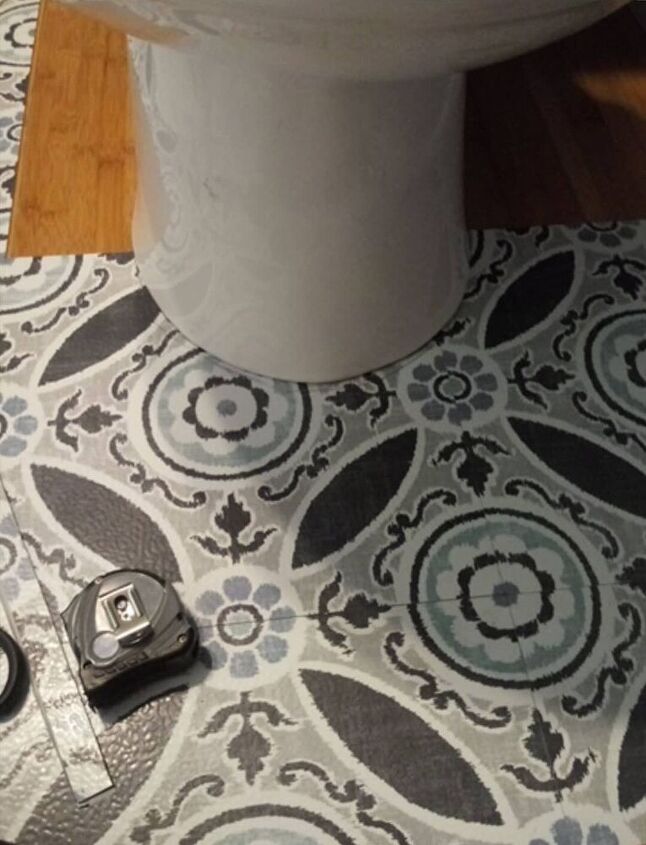
For the more difficult cuts, such as around the toilet, I used a piece of paper and pencil to trace and create a stencil. Scissors work best for curved cuts.
Going around the toilet was definitely the most difficult part of this project. I did eventually realize the tile could slightly tuck under the toilet and that created a more seamless look.
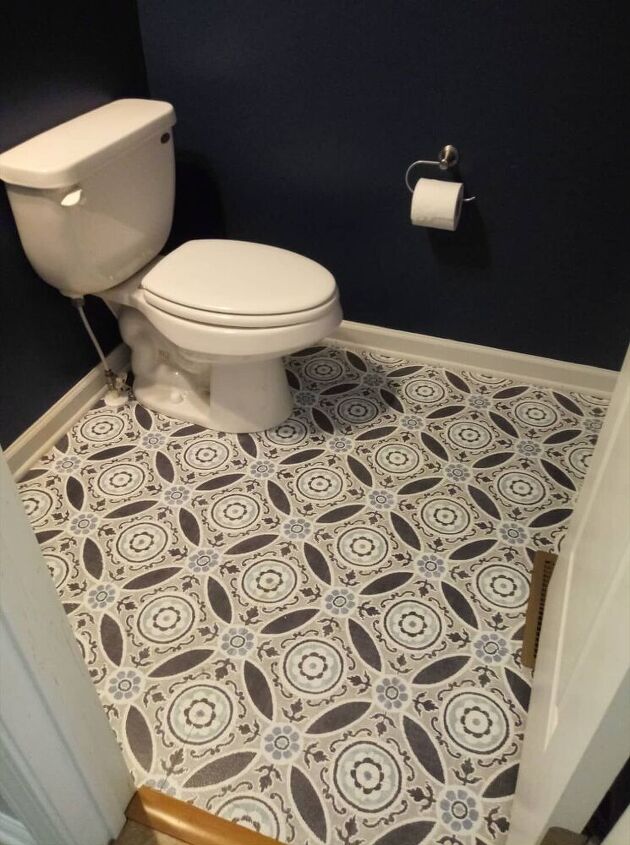
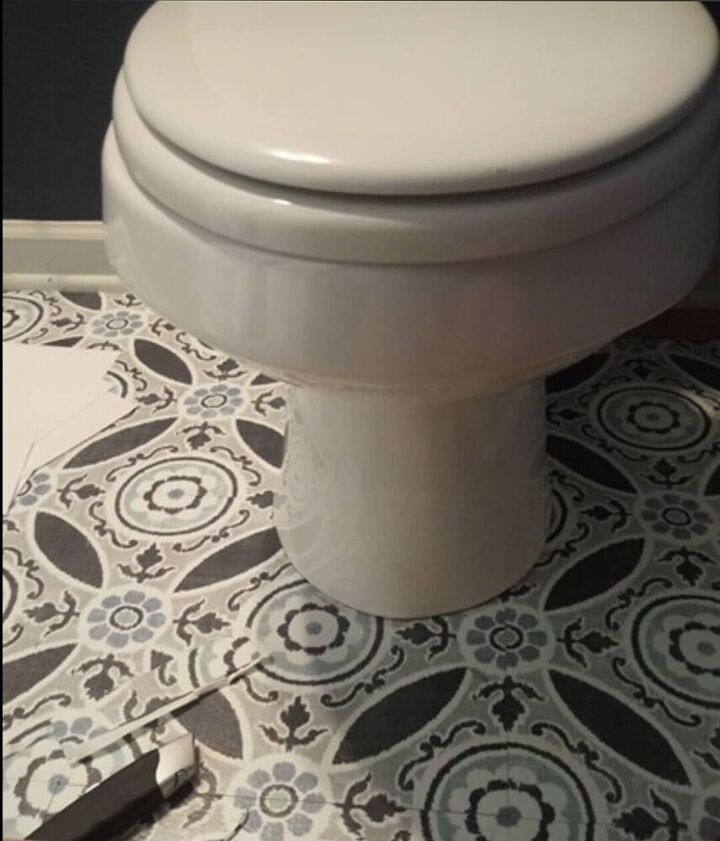
When I was finished installing the tile my husband helped me caulk around the toilet and perimeter of the room. We did this to prevent moisture of any kind from getting under the tiles.
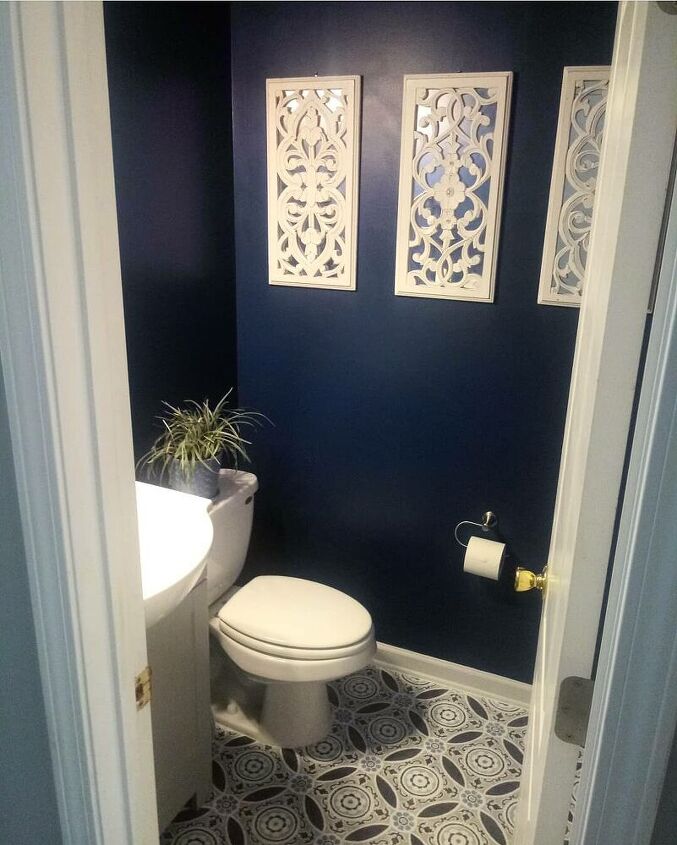
I would definitely use Floorpops again. They've held up very well and are easy to clean. Everyone who comes in my home complements them. I'm already planning which space I'll use them in next!
Resources for this project:
See all materials


Comments
Join the conversation
-
I am putting off doing this job, because of the cutting around the toilet at the bottom. Had the tiles for about 6 months lol. Thanks for your help. x
-
Love it Did you have to have a sealer


Frequently asked questions
Have a question about this project?
I did notice that by the toilet the design did not match up in one pic but did in another, did you replace or paint to connect the big brown oval?
How about over a final tile floor?
Hi, How would you recommend laying floor pops around a vanity unit with legs at front and gap under? I am replacing a pedestal basin with the vanity unit but am worried about installing unit on top of vinyl (existing floor is tiled with ceramic tiles) in case I want to remove it at a later date