


How to Decoupage Laminate Furniture With Brown Paper Bags
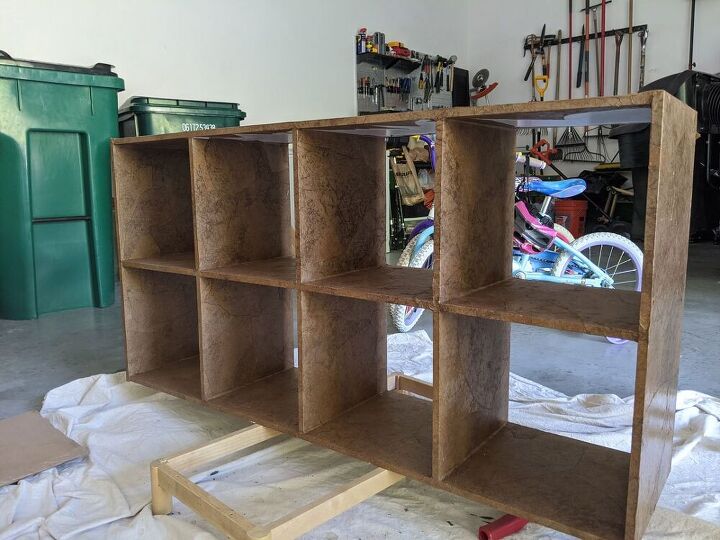
Like a lot of you, I had those inexpensive laminate storage cube organizers to store my kids’ stuff. Cubby organizers are incredibly useful, but they aren’t really built to last. And the finishing is usually pretty cheap looking.
After a year or so mine had also become chipped, scraped, and scuffed. These cube shelves were in desperate need of a revamp, so when I redesigned the girls’ bedroom, I saw the perfect opportunity! I thought about painting them since painting laminate furniture is a big thing these days, but it didn’t really solve for the exposed screws and unfinished edges.
Instead, I decided to decoupage the storage cubes with brown paper bags and HOLY COW, they almost look like leather!
In this post, I’m going to teach you how to update a laminate cube shelf, without painting, basically for free, simply by using some glue, water, and leftover grocery bags.
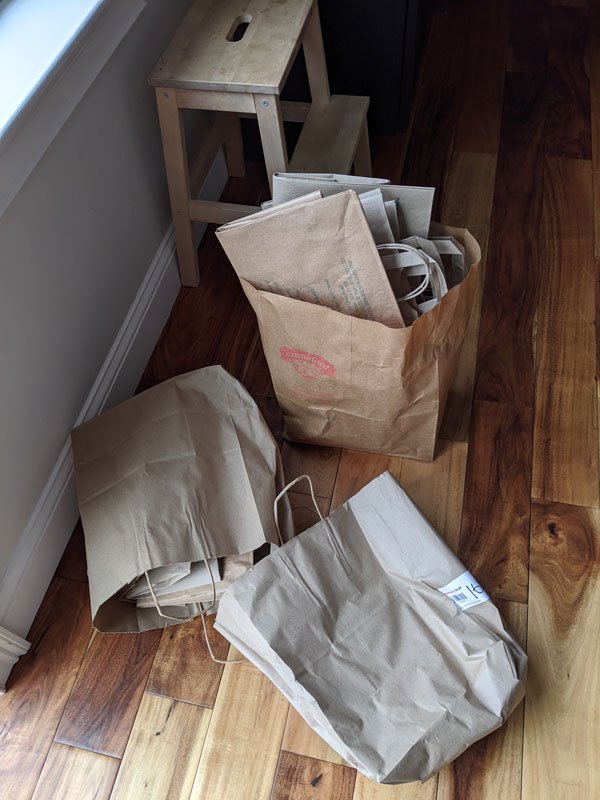
Grab a whole lot of brown paper grocery bags
You’ll need quite a few so don't skimp! If you have bags without printing on them, that's ideal. If you plan to paint over the decoupage at the end, then printed is fine. Otherwise, only use the parts of the bag without print.Kraft paper can also be used if you don't have enough bags. I detail the pros and cons of bags vs. kraft paper on my blog if you need help deciding which to go with.
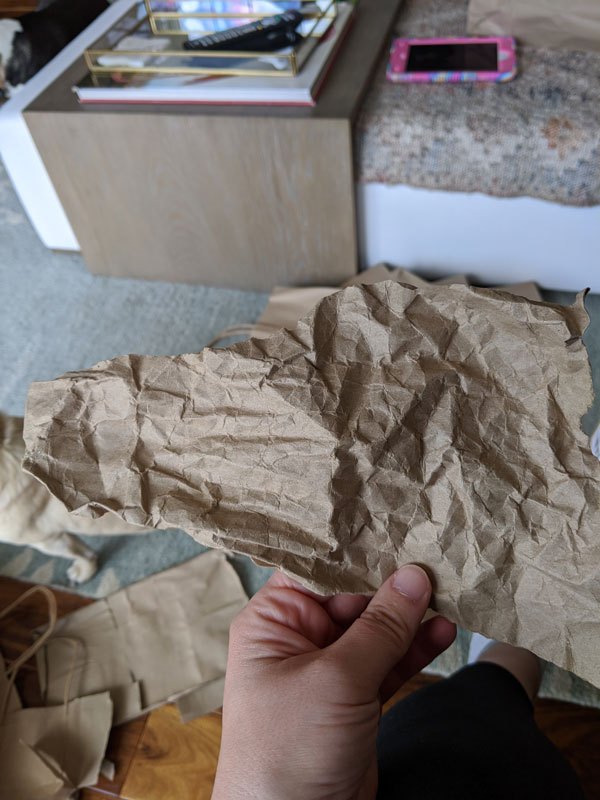
Tear and crumple up the bags
Tear all your bags into irregular pieces. The more variety the better!Then, crumple the pieces up to create a rougher texture. This will soften the paper and allow it to absorb more of the glue.Doing all the tearing and crumpling up front is tedious but will speed up the actual decoupage process. Tearing up paper with glue all over your hands is very sticky

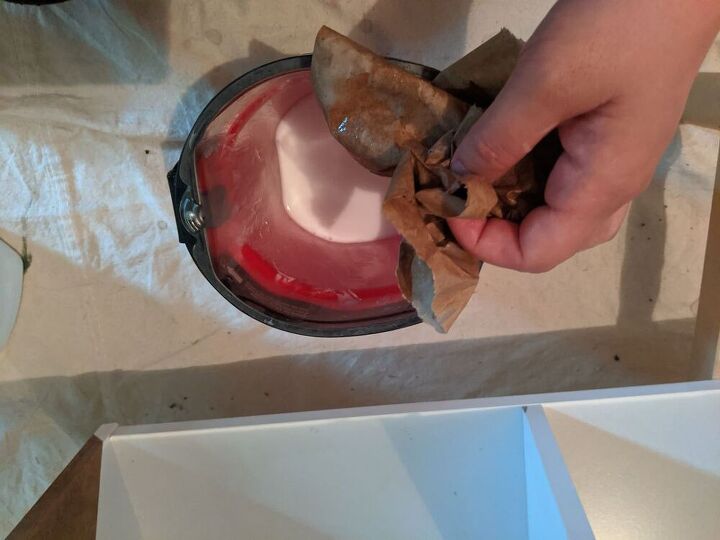
Make your decoupage medium
Mix one part school glue to one part water. I like to mix it up directly in the glue jug if there's room, then pour some out into a lined paint pail as I need it. You can also mix it directly in the container of your choice.
Start decoupaging!
Dip each piece of paper into the glue mixture and coat well. Place each piece onto the your furniture and smooth with your fingers until there are no air bubbles.Be sure to overlap your pieces to create a more natural texture, and also to enhance durability. If you'd like a bit more detail and some helpful tips for this step, check out the full post (link below).Allow the decoupaged paper bags to dry thoroughly (at least 24 hours) before moving on to the next step.
Add a couple coats of varnish
Adding a coat of varnish will protect the finish. I used a spray varnish for the sake of speed, but if you want a more durable finish, do a traditional brush application.
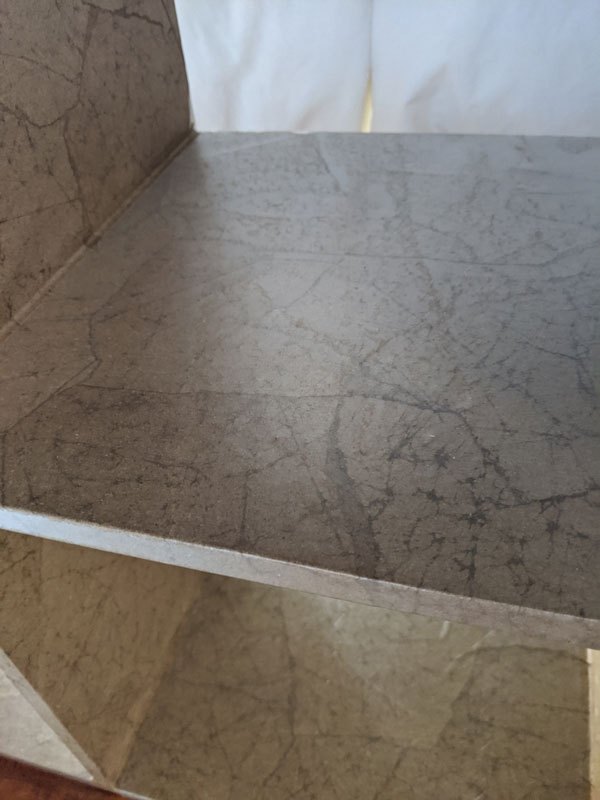
And here's a close-up of the finish!
So what do you think? Would you give this project a try? If you love DIY and are looking to decorate your home on a budget, this is a truly chic look for literally almost free.
Excuse me while I go style those shelves 


Comments
Join the conversation
-
I want to do this! I have a tv stand that is made of pressed wood and cardboard laminated with paper that looks like wood. Y'all know the type, I'm sure! Someone put packing tape around it when I moved instead of the plastic wrap I provided!!! Now the "wood" looks like the pulled up sticker that it is. This bag idea looks easier than contact paper!!! Contact paper requires coordination and attention that I just do not have.
-
I did this same thing years ago, on an old cabinet top. I think I took two or three shades of brown paint over it, to make it look like leather (and it did) and then sealed it with water proof varnish. It has been around for about 20 years and has held up well. My sister in law now has it.


Frequently asked questions
Have a question about this project?
Can you please post a close up picture of the finished project. It was difficult for me to see how it looked on the sides and top of the piece. Thanks!
Definitely will do this on unit in my office. Love the leather look! Sure wish cheap brown grocery bags came in pastels;-).
Did you wrap around edges?
Thanks for a truly easy, slightly messy, fun and Great looking way to update.
If I wanted a different shade or say a tone or two darker than the color of the paper bags, how would I be able to achieve this?