


Swipe Acrylic Pour Painting

Today’s project is another Acrylic Pour Painting but this time a swipe style pour. I have the full video tutorial of this project up on my YouTube channel, click the video below to watch. Please make sure to like and subscribe for future tutorials 
I also have this exact piece for sale in my Etsy store along with lots of other pieces. Please take a look 
Below is a full step by step written guide on how I achieved this swipe pour style painting.

The basic principles of most acrylic pours are the same, how you mix your paints, adding different carrying agents or oils etc, it’s just how you apply the paint to the canvas that varies with each style.
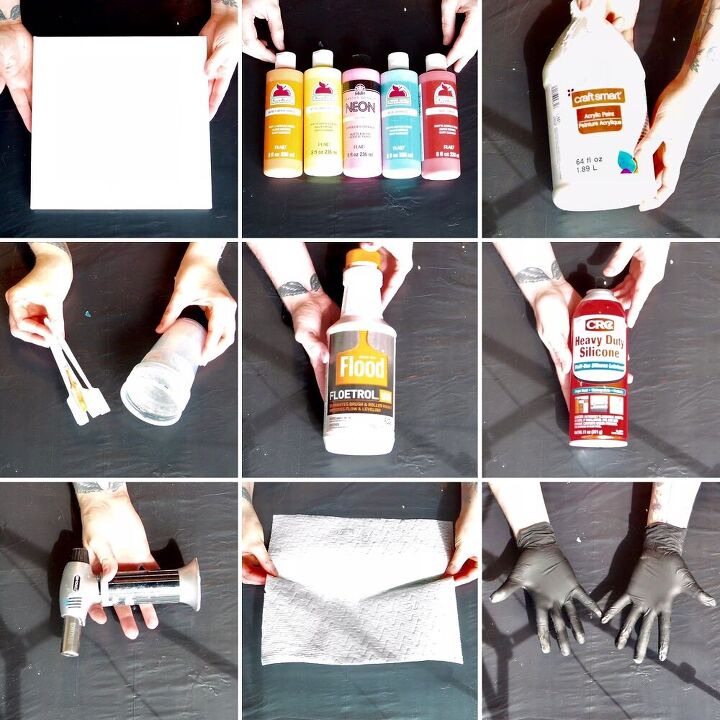
- A canvas (I used a 10” x 10”)
- Coloured paints
- White paint
- Mixing tools and containers
- Floetrol
- Silicone (I always use this in aerosol form)
- Blow torch
- A paper towel
- Gloves
- Water
Click the video to see my YouTube tutorial of this project.
Please also visit my channel and subscribe for future tutorials! 
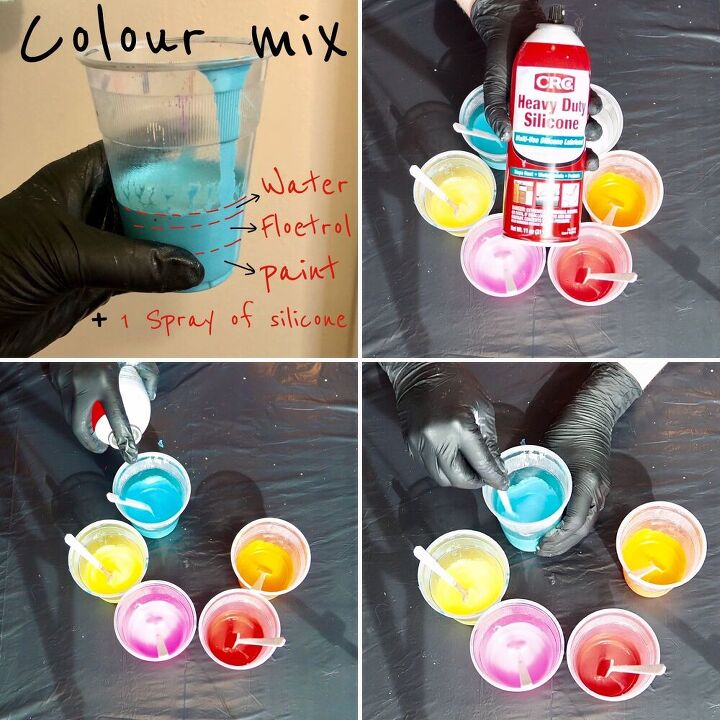
Above you will see a visual of the particular formula I use for acrylic pouring paints. I apply this to every colour except the white. The only difference with the white is that I don’t add the silicone, everything else is the same.
So:
Add 1 part paint to an empty container followed by a splash of water. (Start by adding a very small amount of water as you want to be able to add more water if necessary, not more paint or you could end up wasting paint). Mix the paint and water together thoroughly until the mixture runs off your stick like it’s the consistency of warm honey. If it’s too thick and blobby, continue to add small amounts of water to the mix until the right consistency is achieved.
Once you’ve got your ‘warm, smooth honey’, add 1 part floetrol. Mix well and you should end up with the same consistency. Basically, because the floetrol you’re adding at this point is in fact the perfect consistency, by adding 1 part of this to your existing mixture, you’re just increasing the amount of perfect consistency!
Do this with all your colours including your white, then set your white container aside as you’re now finished mixing your white. The rest of the colours now need silicone.
Spray just 1 short quick spray of silicone into each container and mix in gently (one, or even half a turn of your mixing stick, that’s all, don’t mix and mix the silicone in). And that’s it, all your paints are ready and prepped for pouring.
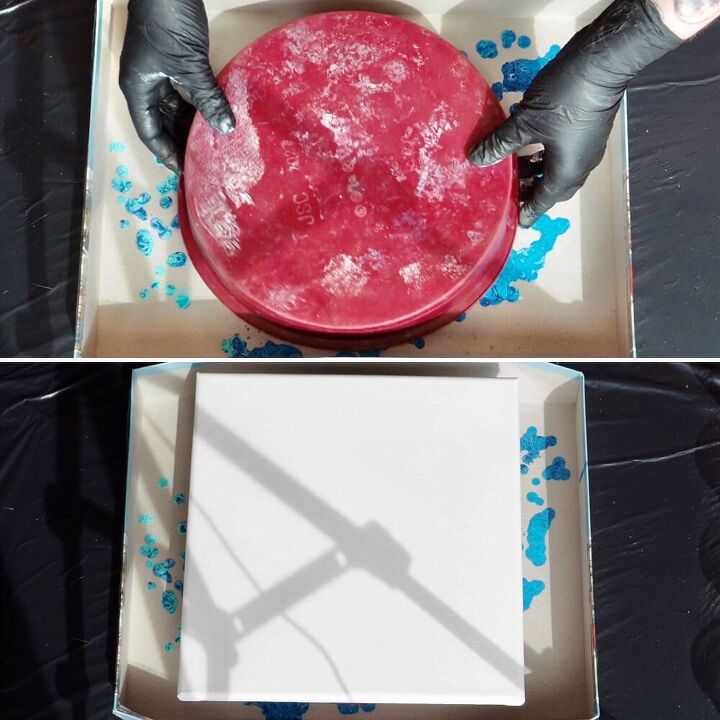
I stand my canvas on a silicone dish mold and place that inside an old jigsaw puzzle box lid so that my canvas is raised off the table and so that there is a way to collect all the paint that will run off later, minimizing mess and maximizing accessibility to the canvas.
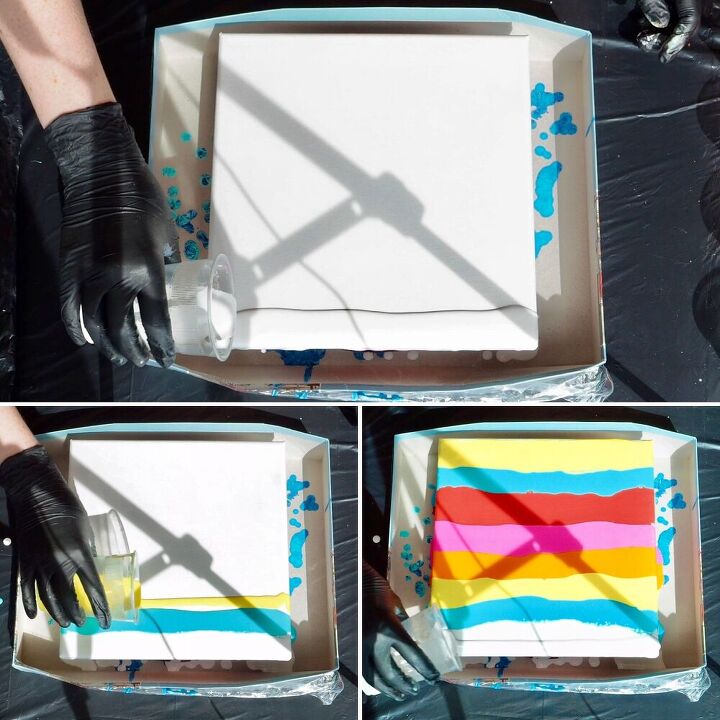
Start by adding a strip of white paint to the top of your canvas. Don’t use all your white up in one go as you’ll want to top up this layer in a sec. This is the most important strip as you will be dragging the white paint over all your other colours later so it needs to be thick and wet (avoid having it sit on the canvas for too long).
Then add strips of all your other colours to your canvas in which ever order you like. I used quite thick strips for my piece but if I could do this again, I would maybe use thinner strips to get more of my pink and red on there. Just a thought.
Then lastly, top up that white layer so that it’s good and thick.
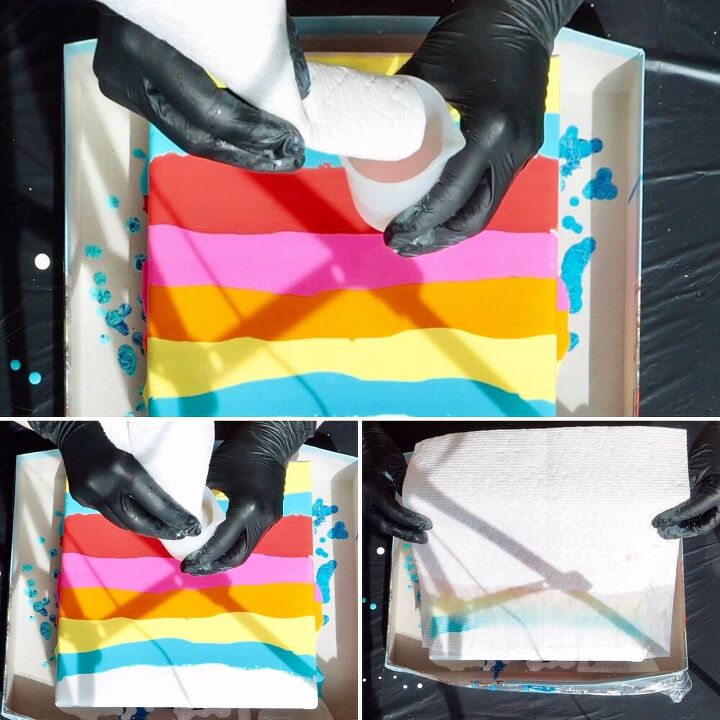
Roll up your paper towel and dip the end into your water. I did this over my painting just to show the camera but don’t do this in case you drip water onto your painting (because I nearly did!).
Squeeze out some of the excess water from your wet paper towel so that it’s not dripping but so that it’s still nice and moist and then open it out.
Hold the wet end over the top of your painting and let it fall over your white paint section. Now carefully and slowly, drag the towel through the white paint and pull the white paint over the other colours.
Be careful not to essentially wipe all the colours off, it’s a bit of a sweet-spot situation and takes practice to get the pressure just right (I didn’t get it quite right on this swipe even), but it’s not a problem because that’s part of the beauty that comes with acrylic pouring. It’s not an exact science, and anyone who says it is, they’re fibbing! Besides, there’s lots to do still that can change the look of your piece.
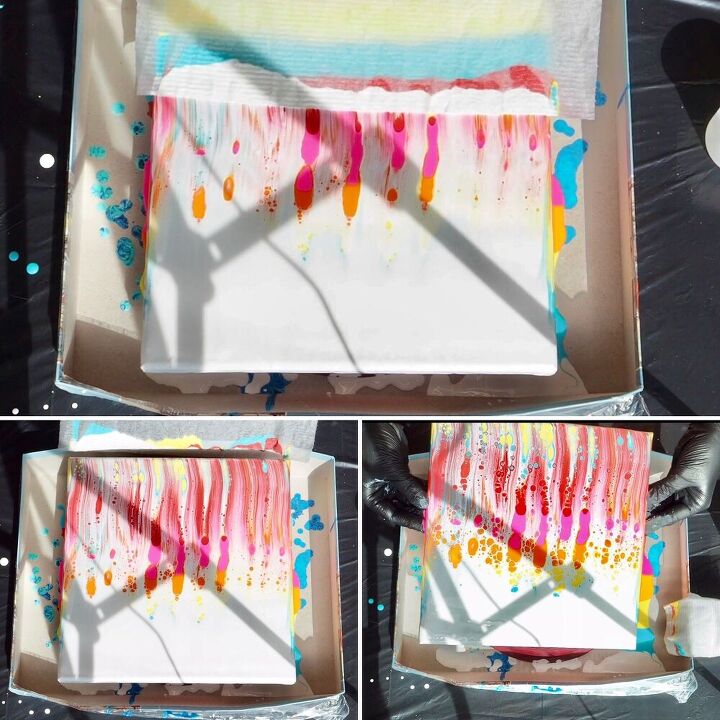
So once you’ve completed your beautiful swipe, life up your canvas and tilt your piece to move the paint around to distribute your colours how you want them.
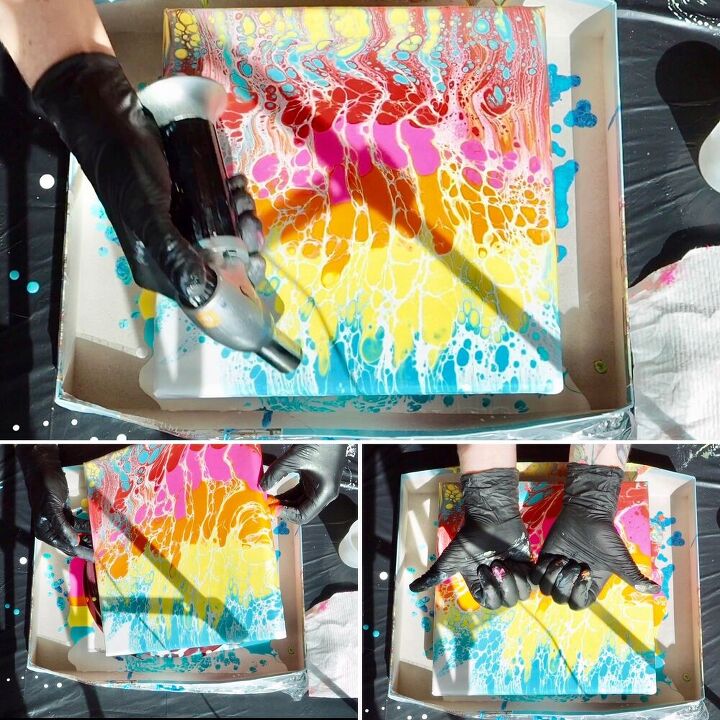
You should have some amazing cells coming alive on your canvas right now but to make them pop even more, use your blow torch. This will split up the larger blocks of paint due to the silicone you added eariler. Just be careful not to hold the flame too close to the canvas or for too long in one place 
Again, pick up your canvas and move the paint around to create the look and pattern you want and once you’re happy, set it down to dry out fully for a couple of days.
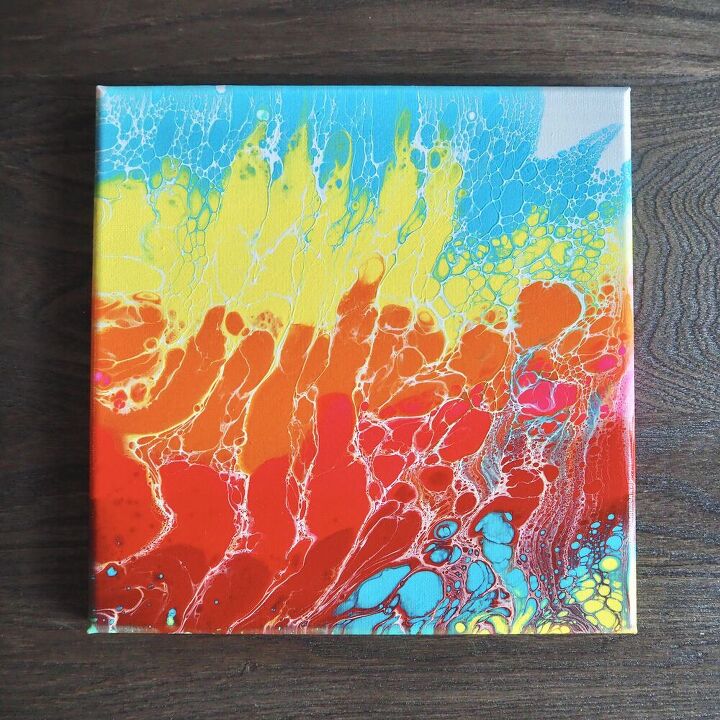
Once dried, you’re painting is ready to hang, however, I like to set my paintings either with resin or with a glossy clear acrylic setting spray which I did in this case. I just used Kylon’s Crystal Clear Spray. It gives the piece a lightly glossed look and takes away that tacky paint feeling which I know some people hate 
As I mentioned earlier, this piece is currently available in my Etsy store so if you’re interested in purchasing it then you can do 
Thanks so so much as always for taking the time to view my project and if you have any questions then please drop them below and I’ll be happy to get back to you.
Take care 
Resources for this project:
See all materials


Comments
Join the conversation
-
Great instructions! Beautiful!
-
Ooooo! I can’t wait to try this! Love this idea for canvas!


Frequently asked questions
Have a question about this project?